Review: Nikon AF-S 16-35mm ED 1:4G lens

Review of the Nikon AF-S 16-35mm ED 1:4G lens

Price

The Nikon 16-35mm lens

I bought my copy of the Nikon AF-S 16-35mm ED 1:4G lens in February 2021 for around 730 UER, but here in October 2021 you can get a used copy over at mpb around 450 EUR subject to wear and tear. I recommend you get a used copy as the lens comes with a gold ring (Nikons pro level lenses) and is hence built to last. If not forever, then for a long time.
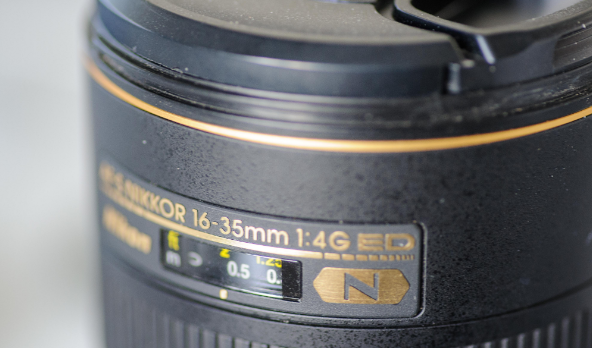
Specs and build

The Nikon 16-35mm lens

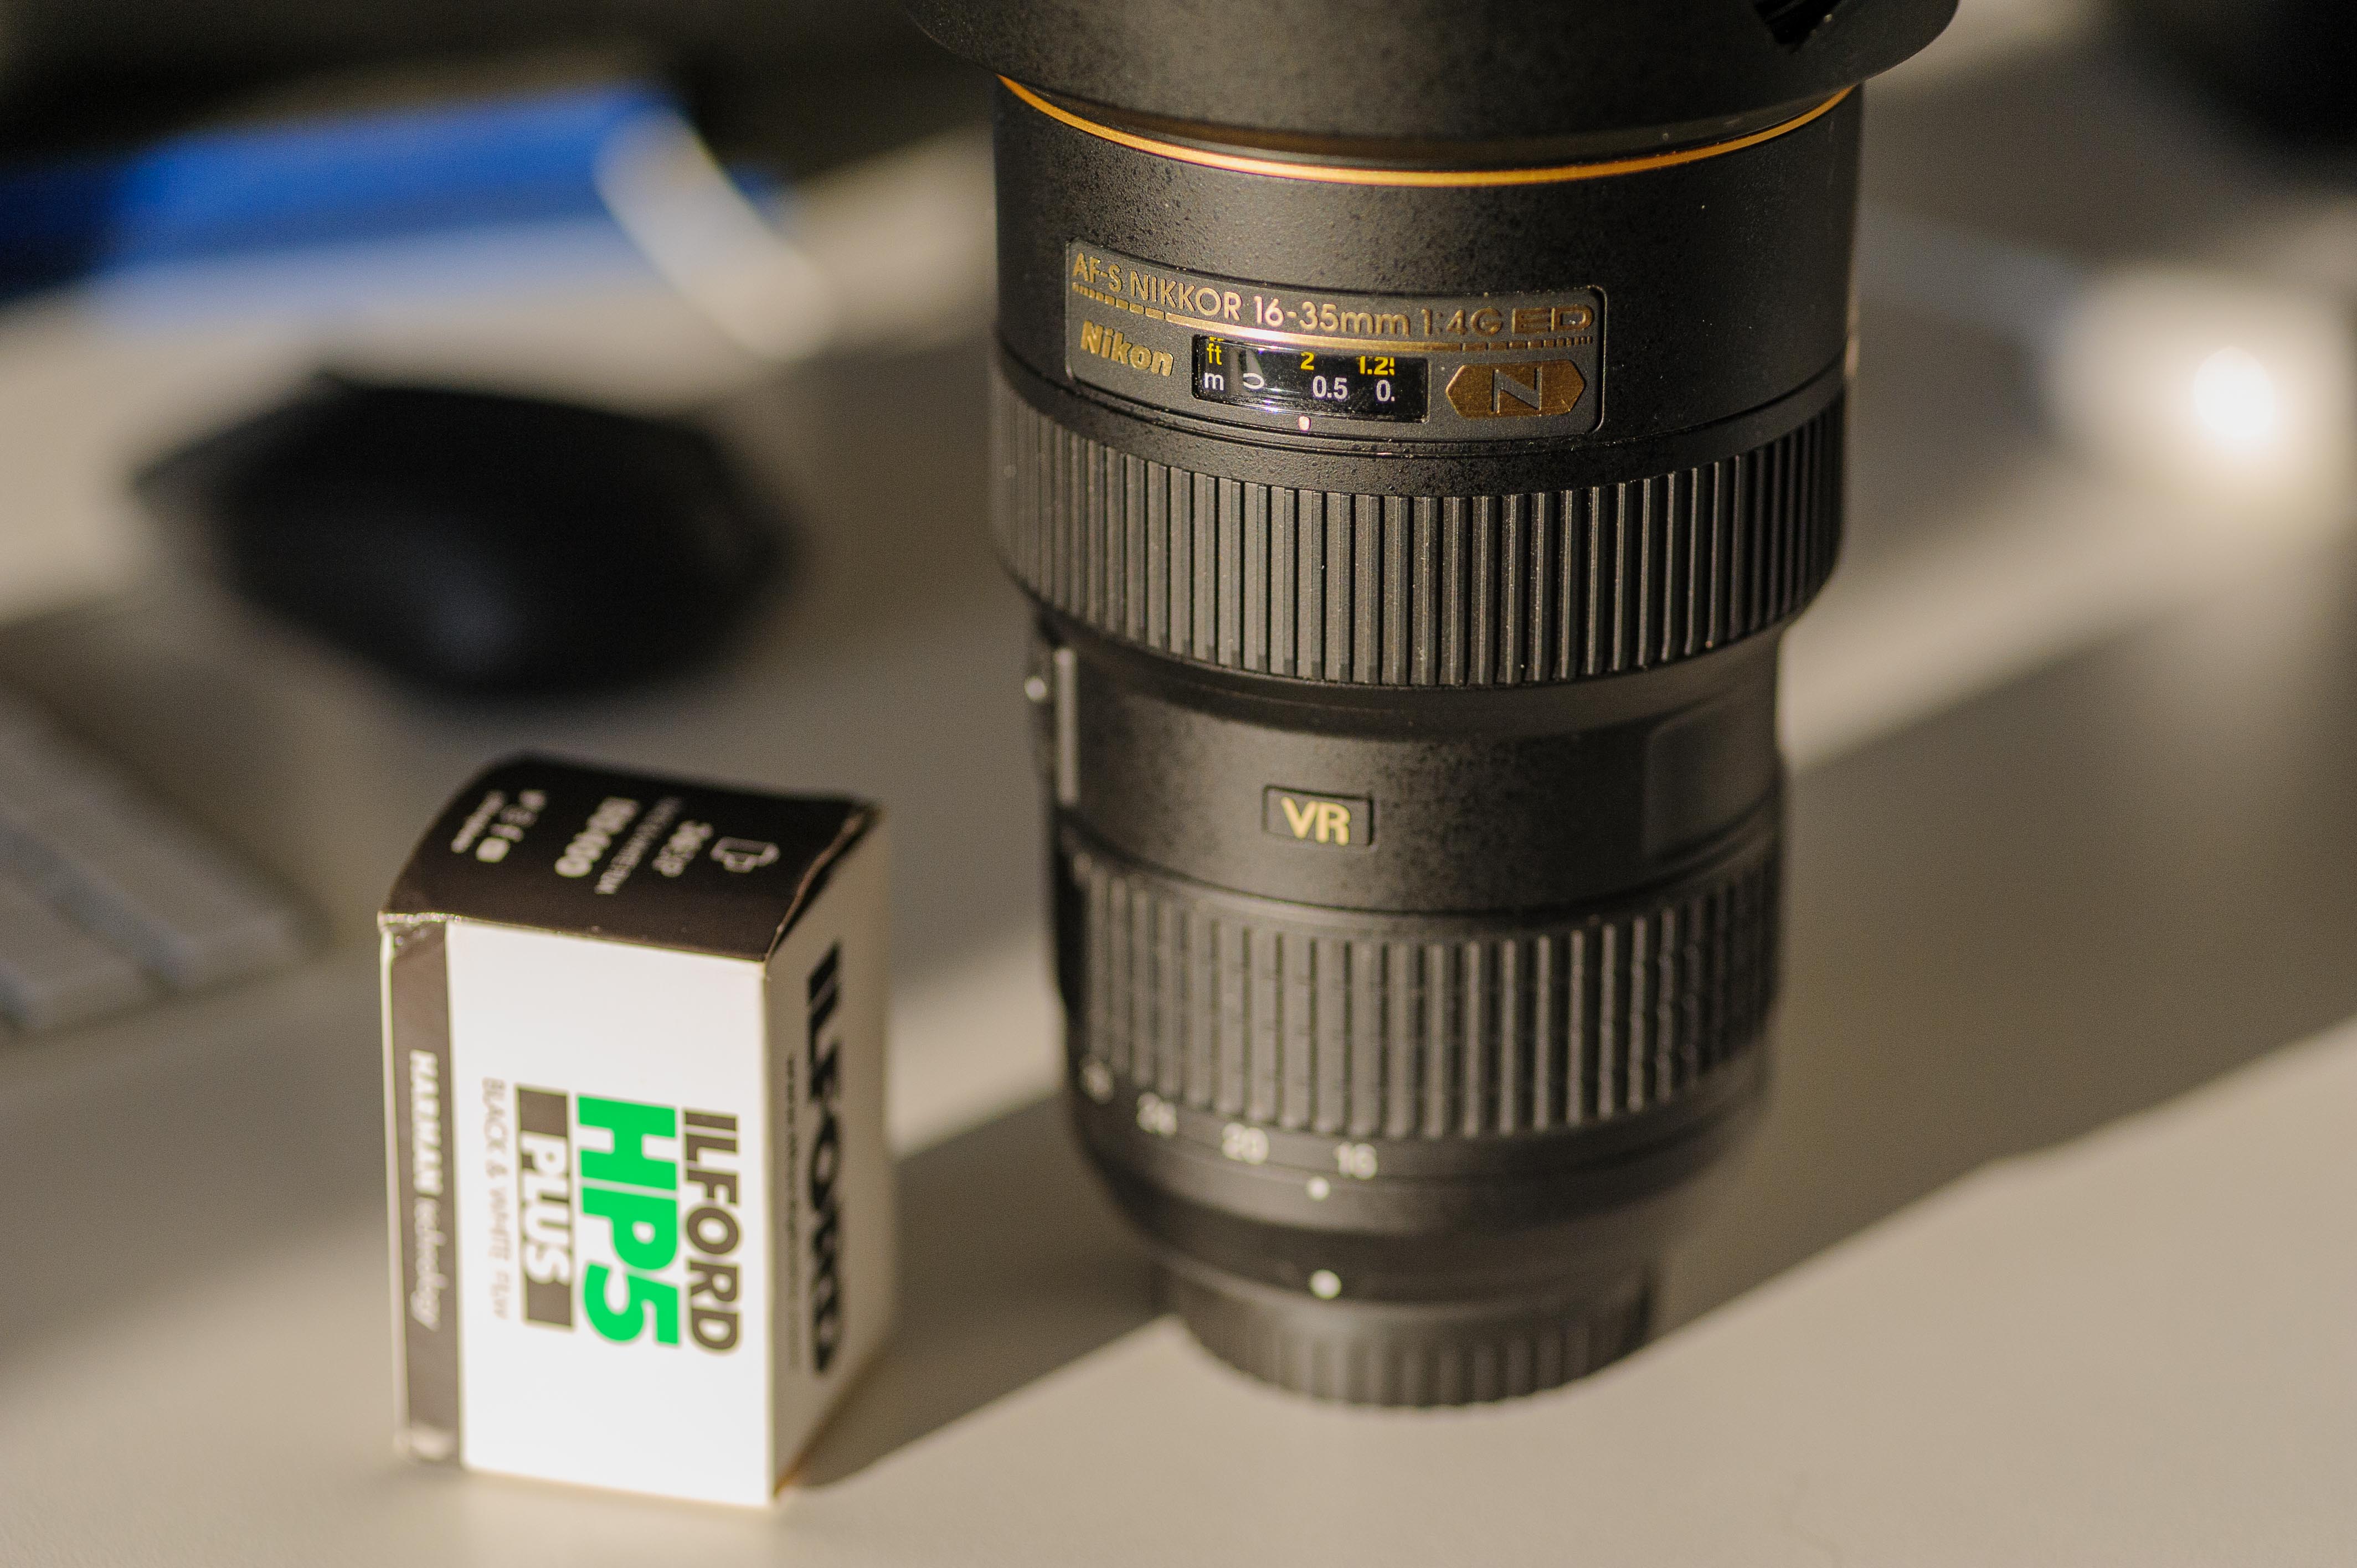
The lens ranges from 16-35mm and has a constant aperture of F4. That may not be the fastest of lenses, but a bit controversial, Nikon has supplied this lens with vibration reduction (2.5 stops claimed) which allows longer shutter openings without camera shake. Some report that they have shot razor sharp images down to 1/10th of a second.

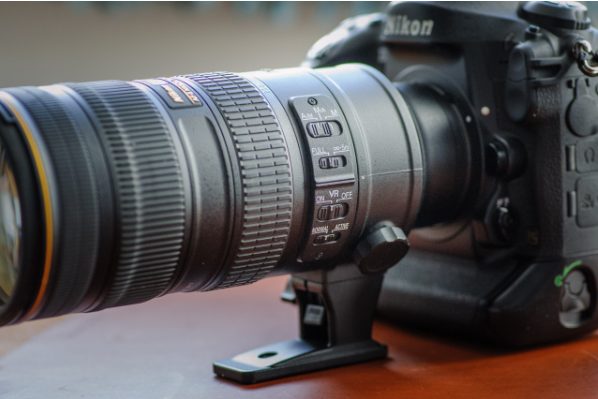
The lens takes Ø77mm filter threads – no issue with rounded glass in the front or the front turning. At 15cm the lens is somewhat longer that what you would expect from a wide lens, but it balances well on a Nikon D4 with its 680 grams. Lighter cameras like a Nikon D750 makes the combo a bit “nose heavy”.

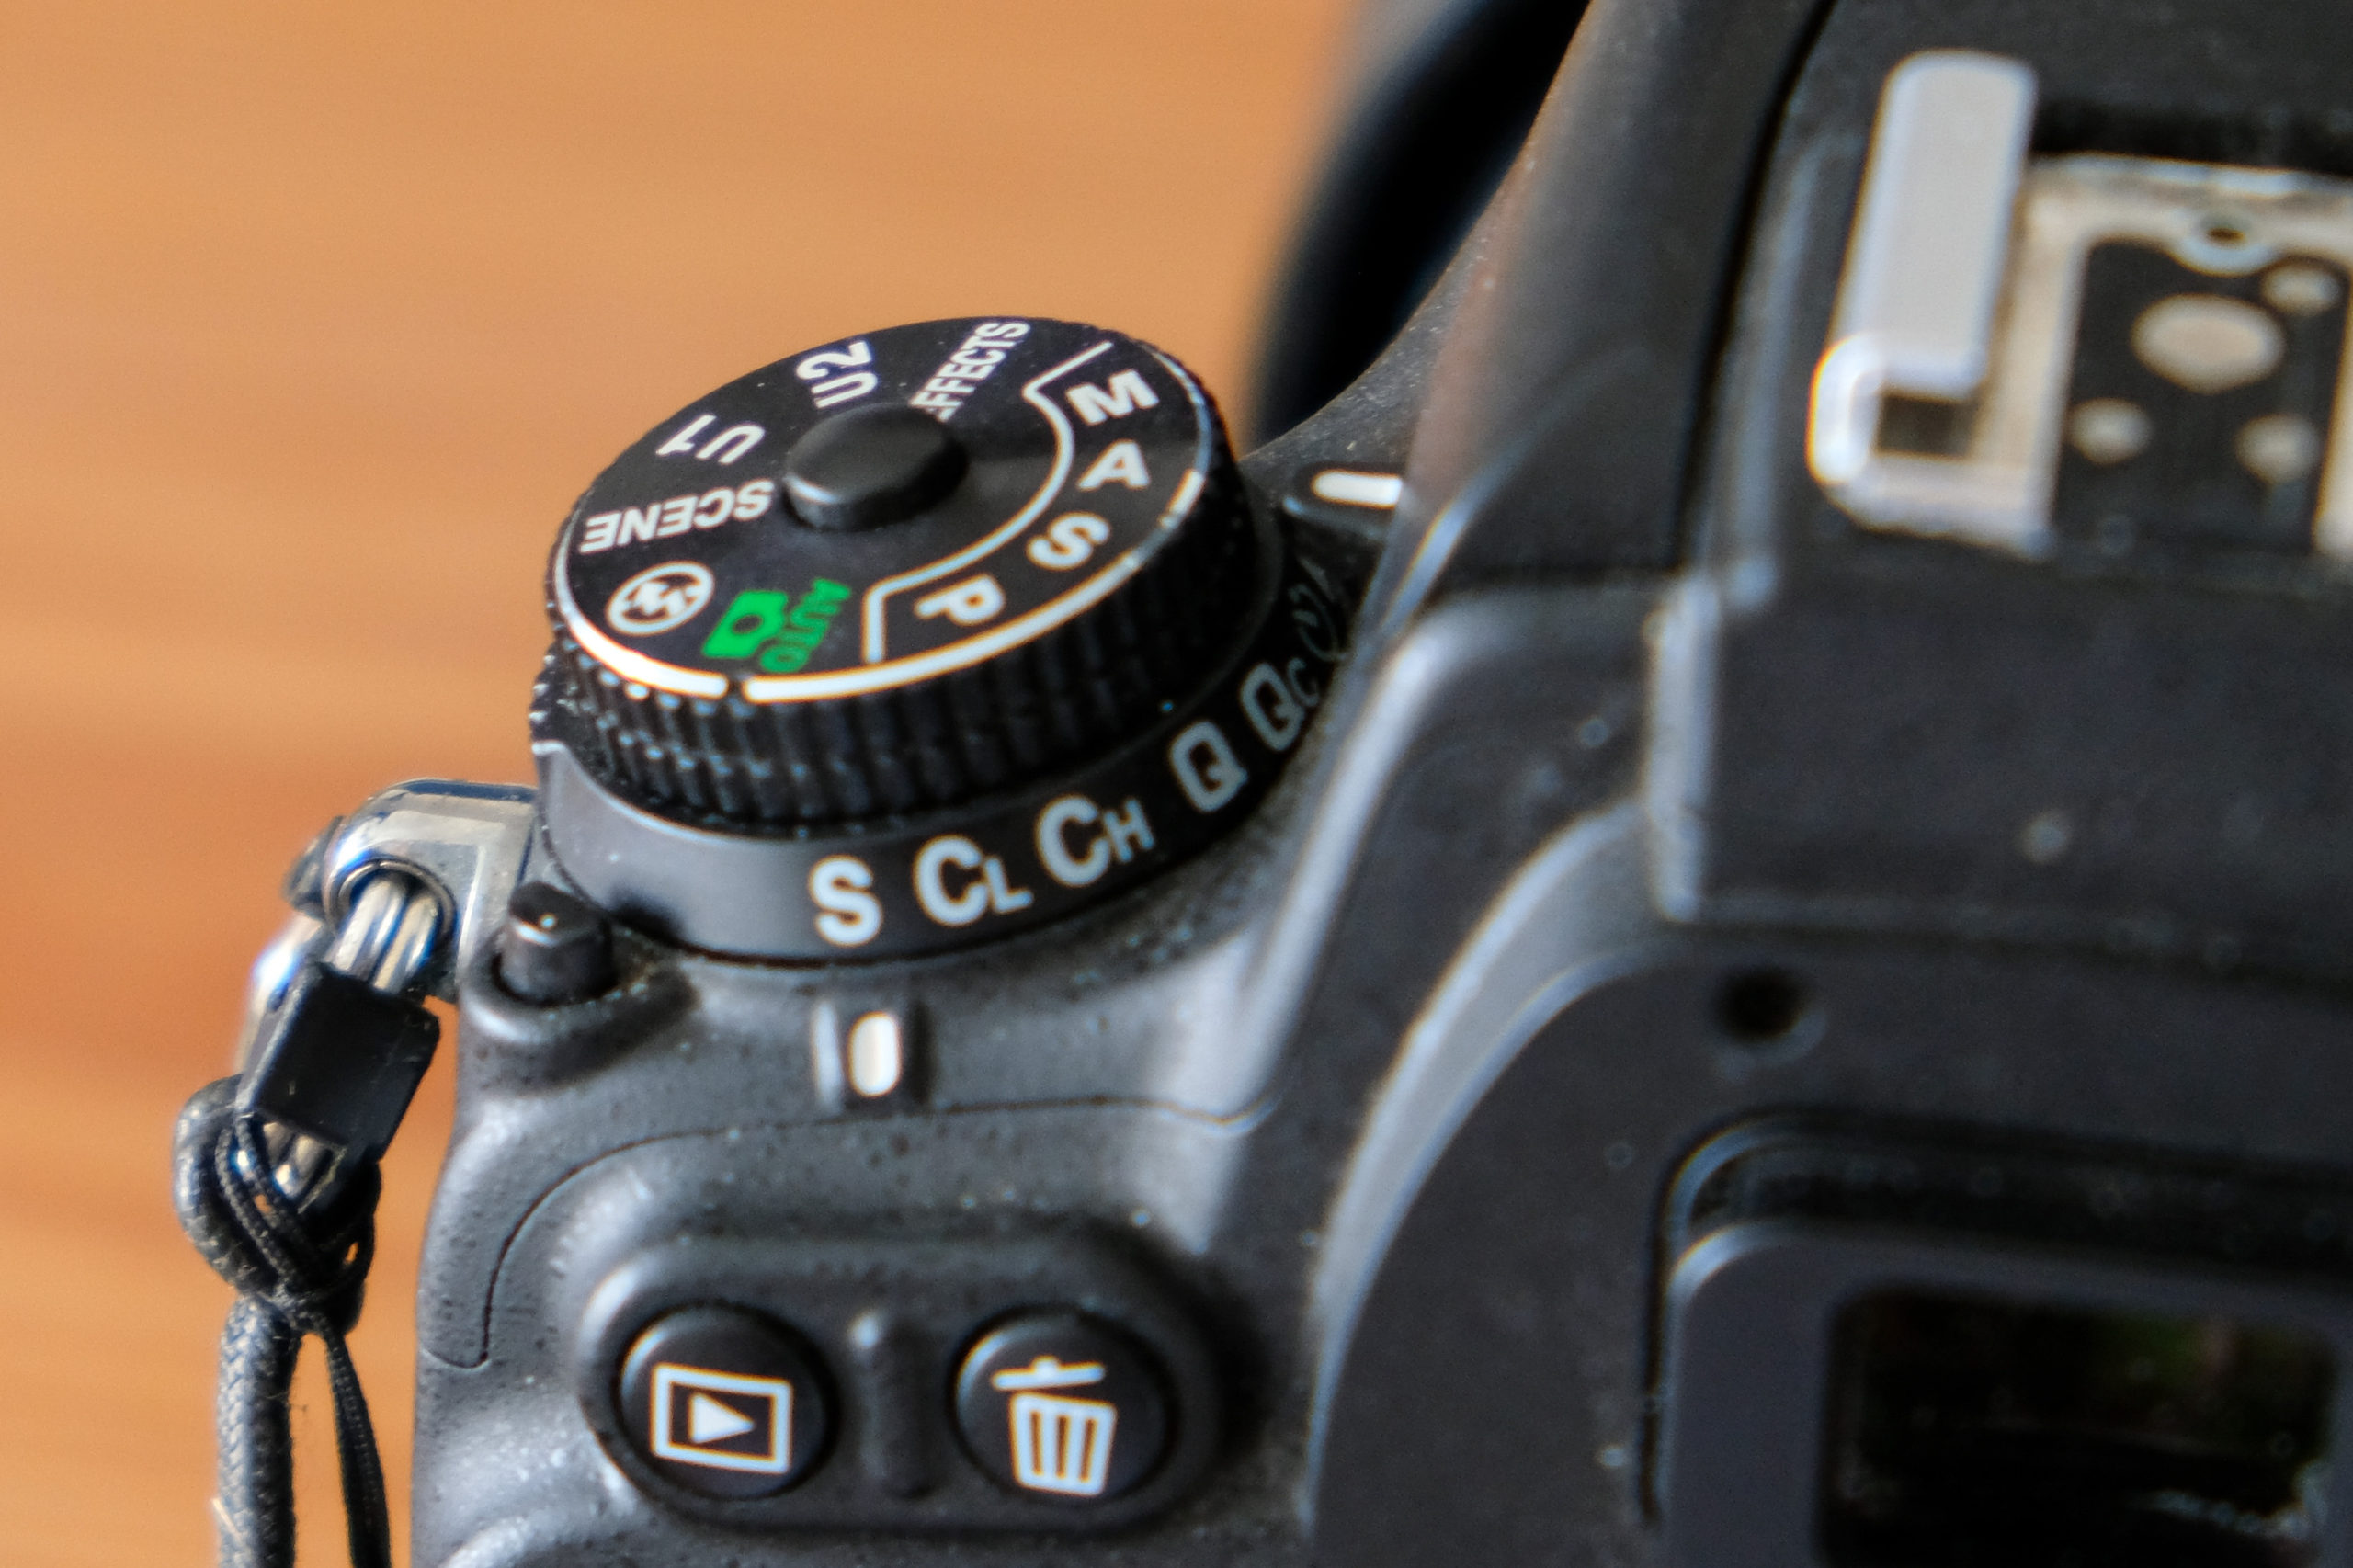
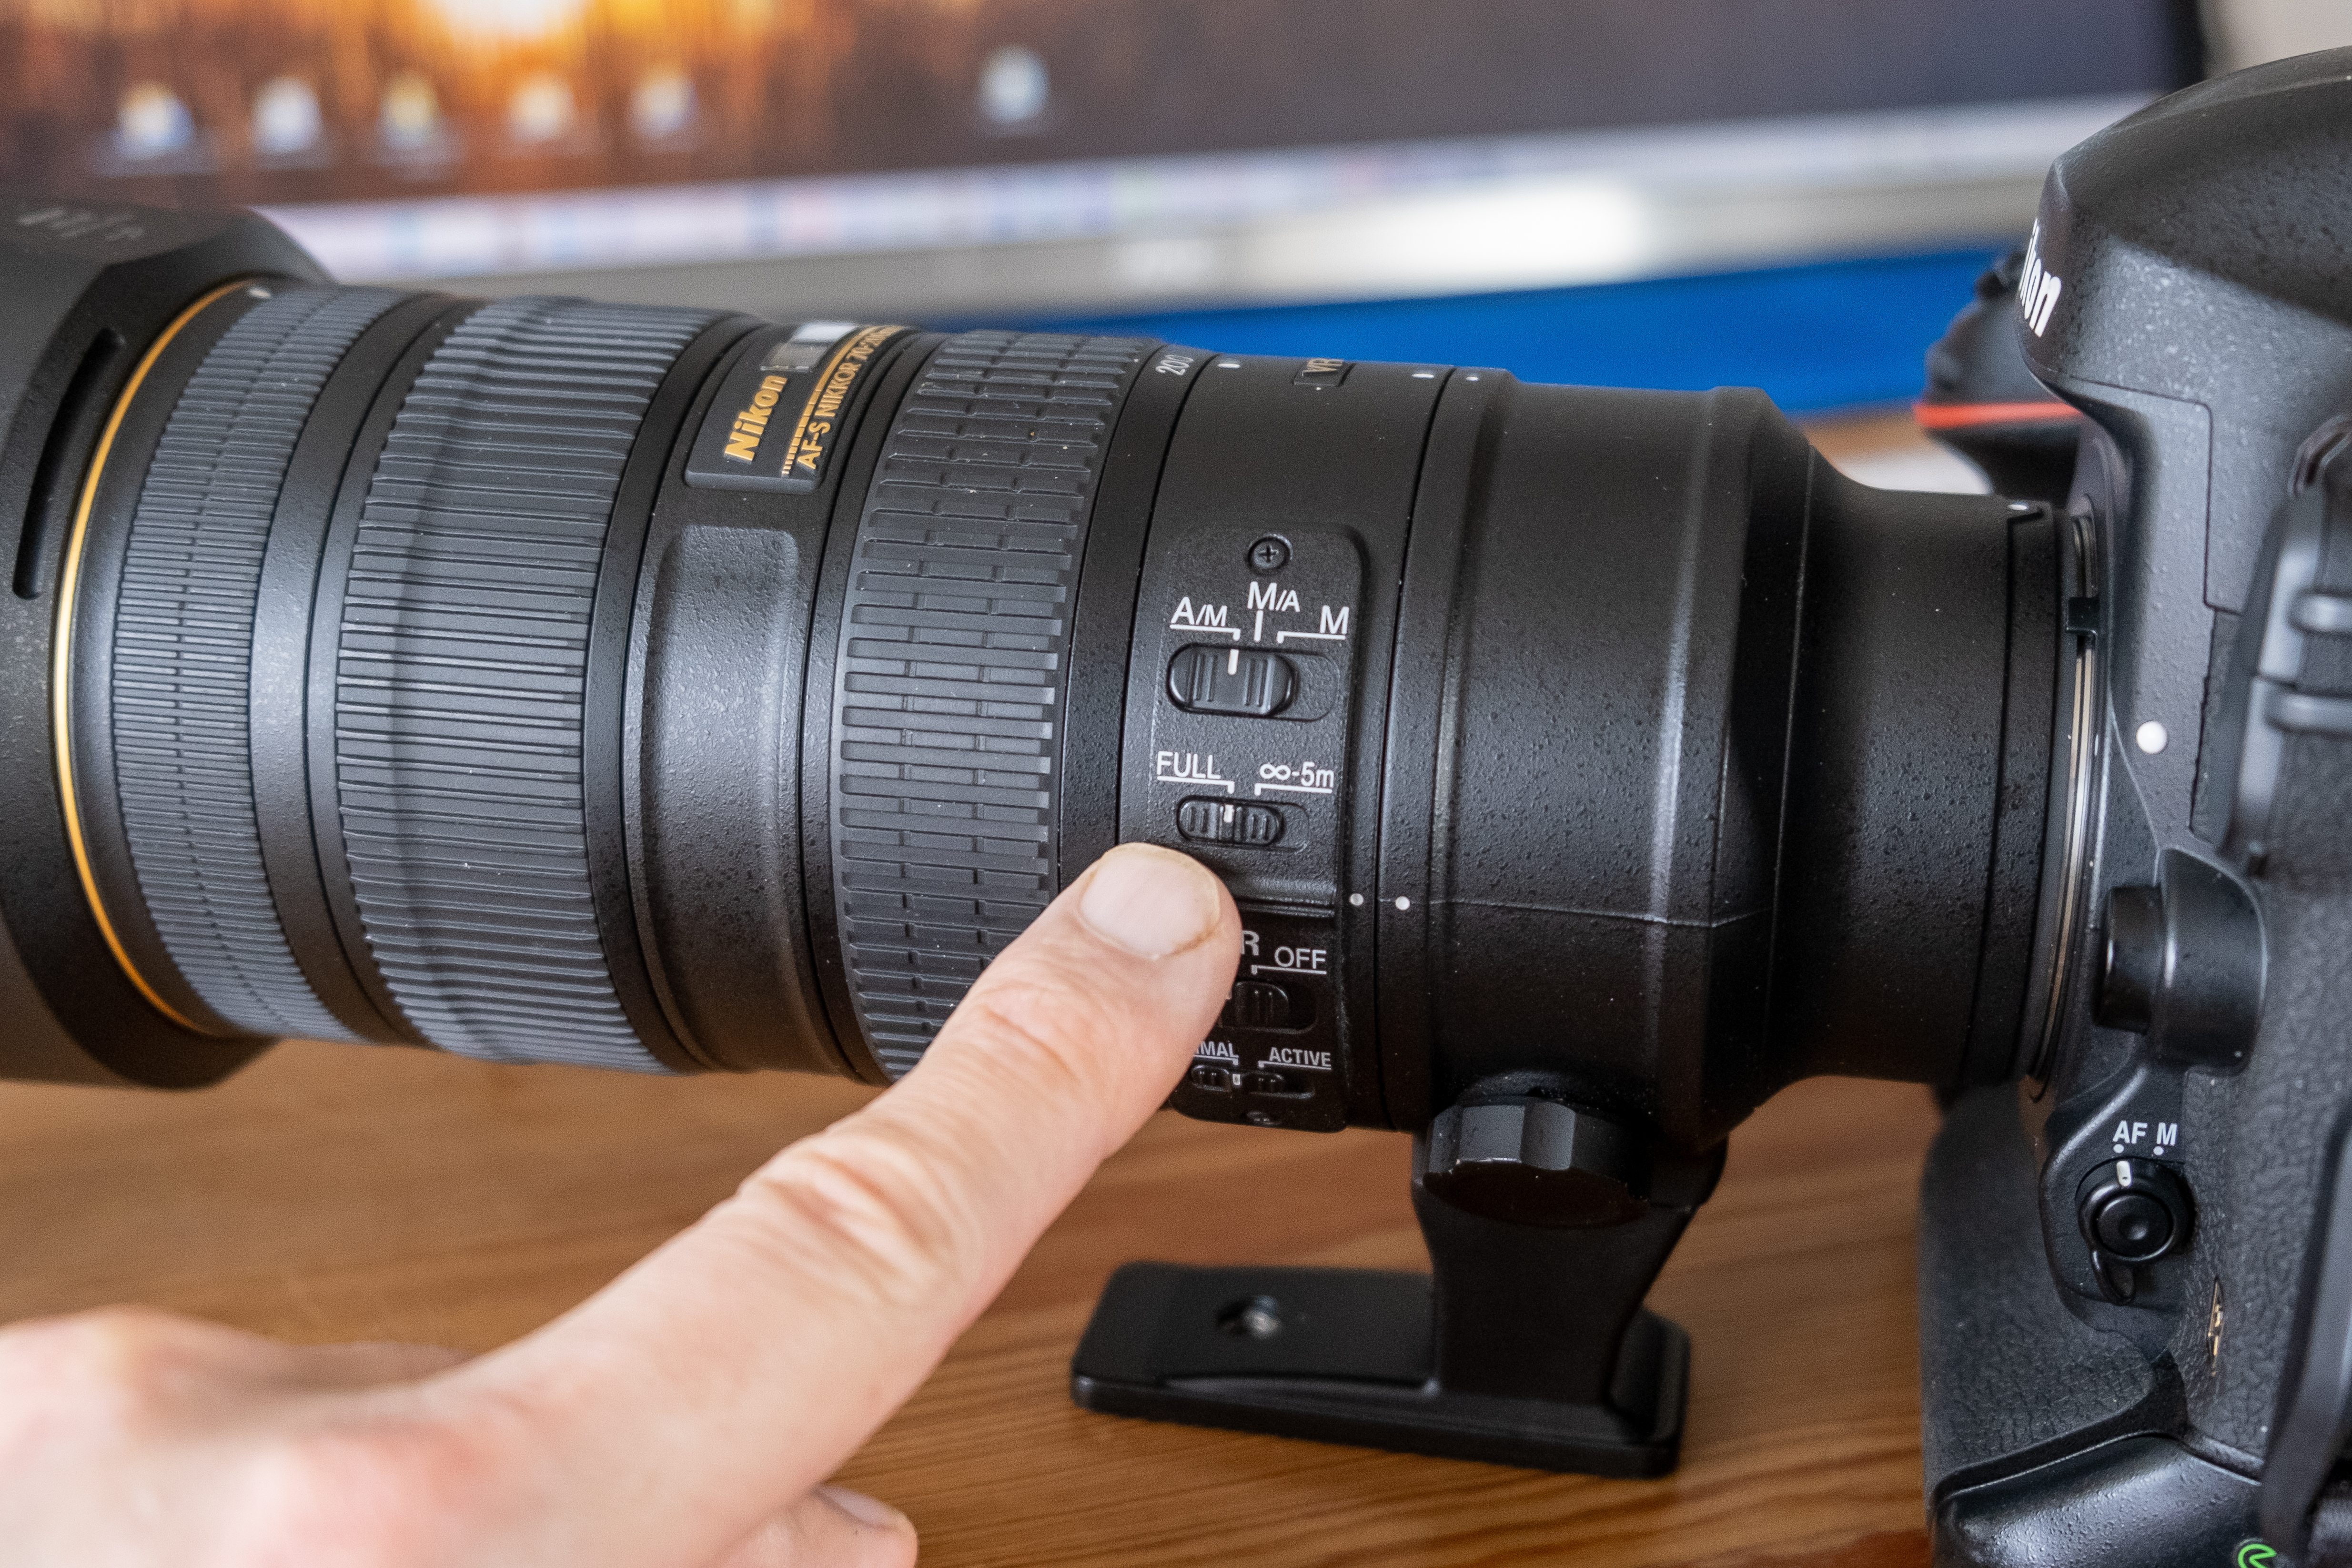
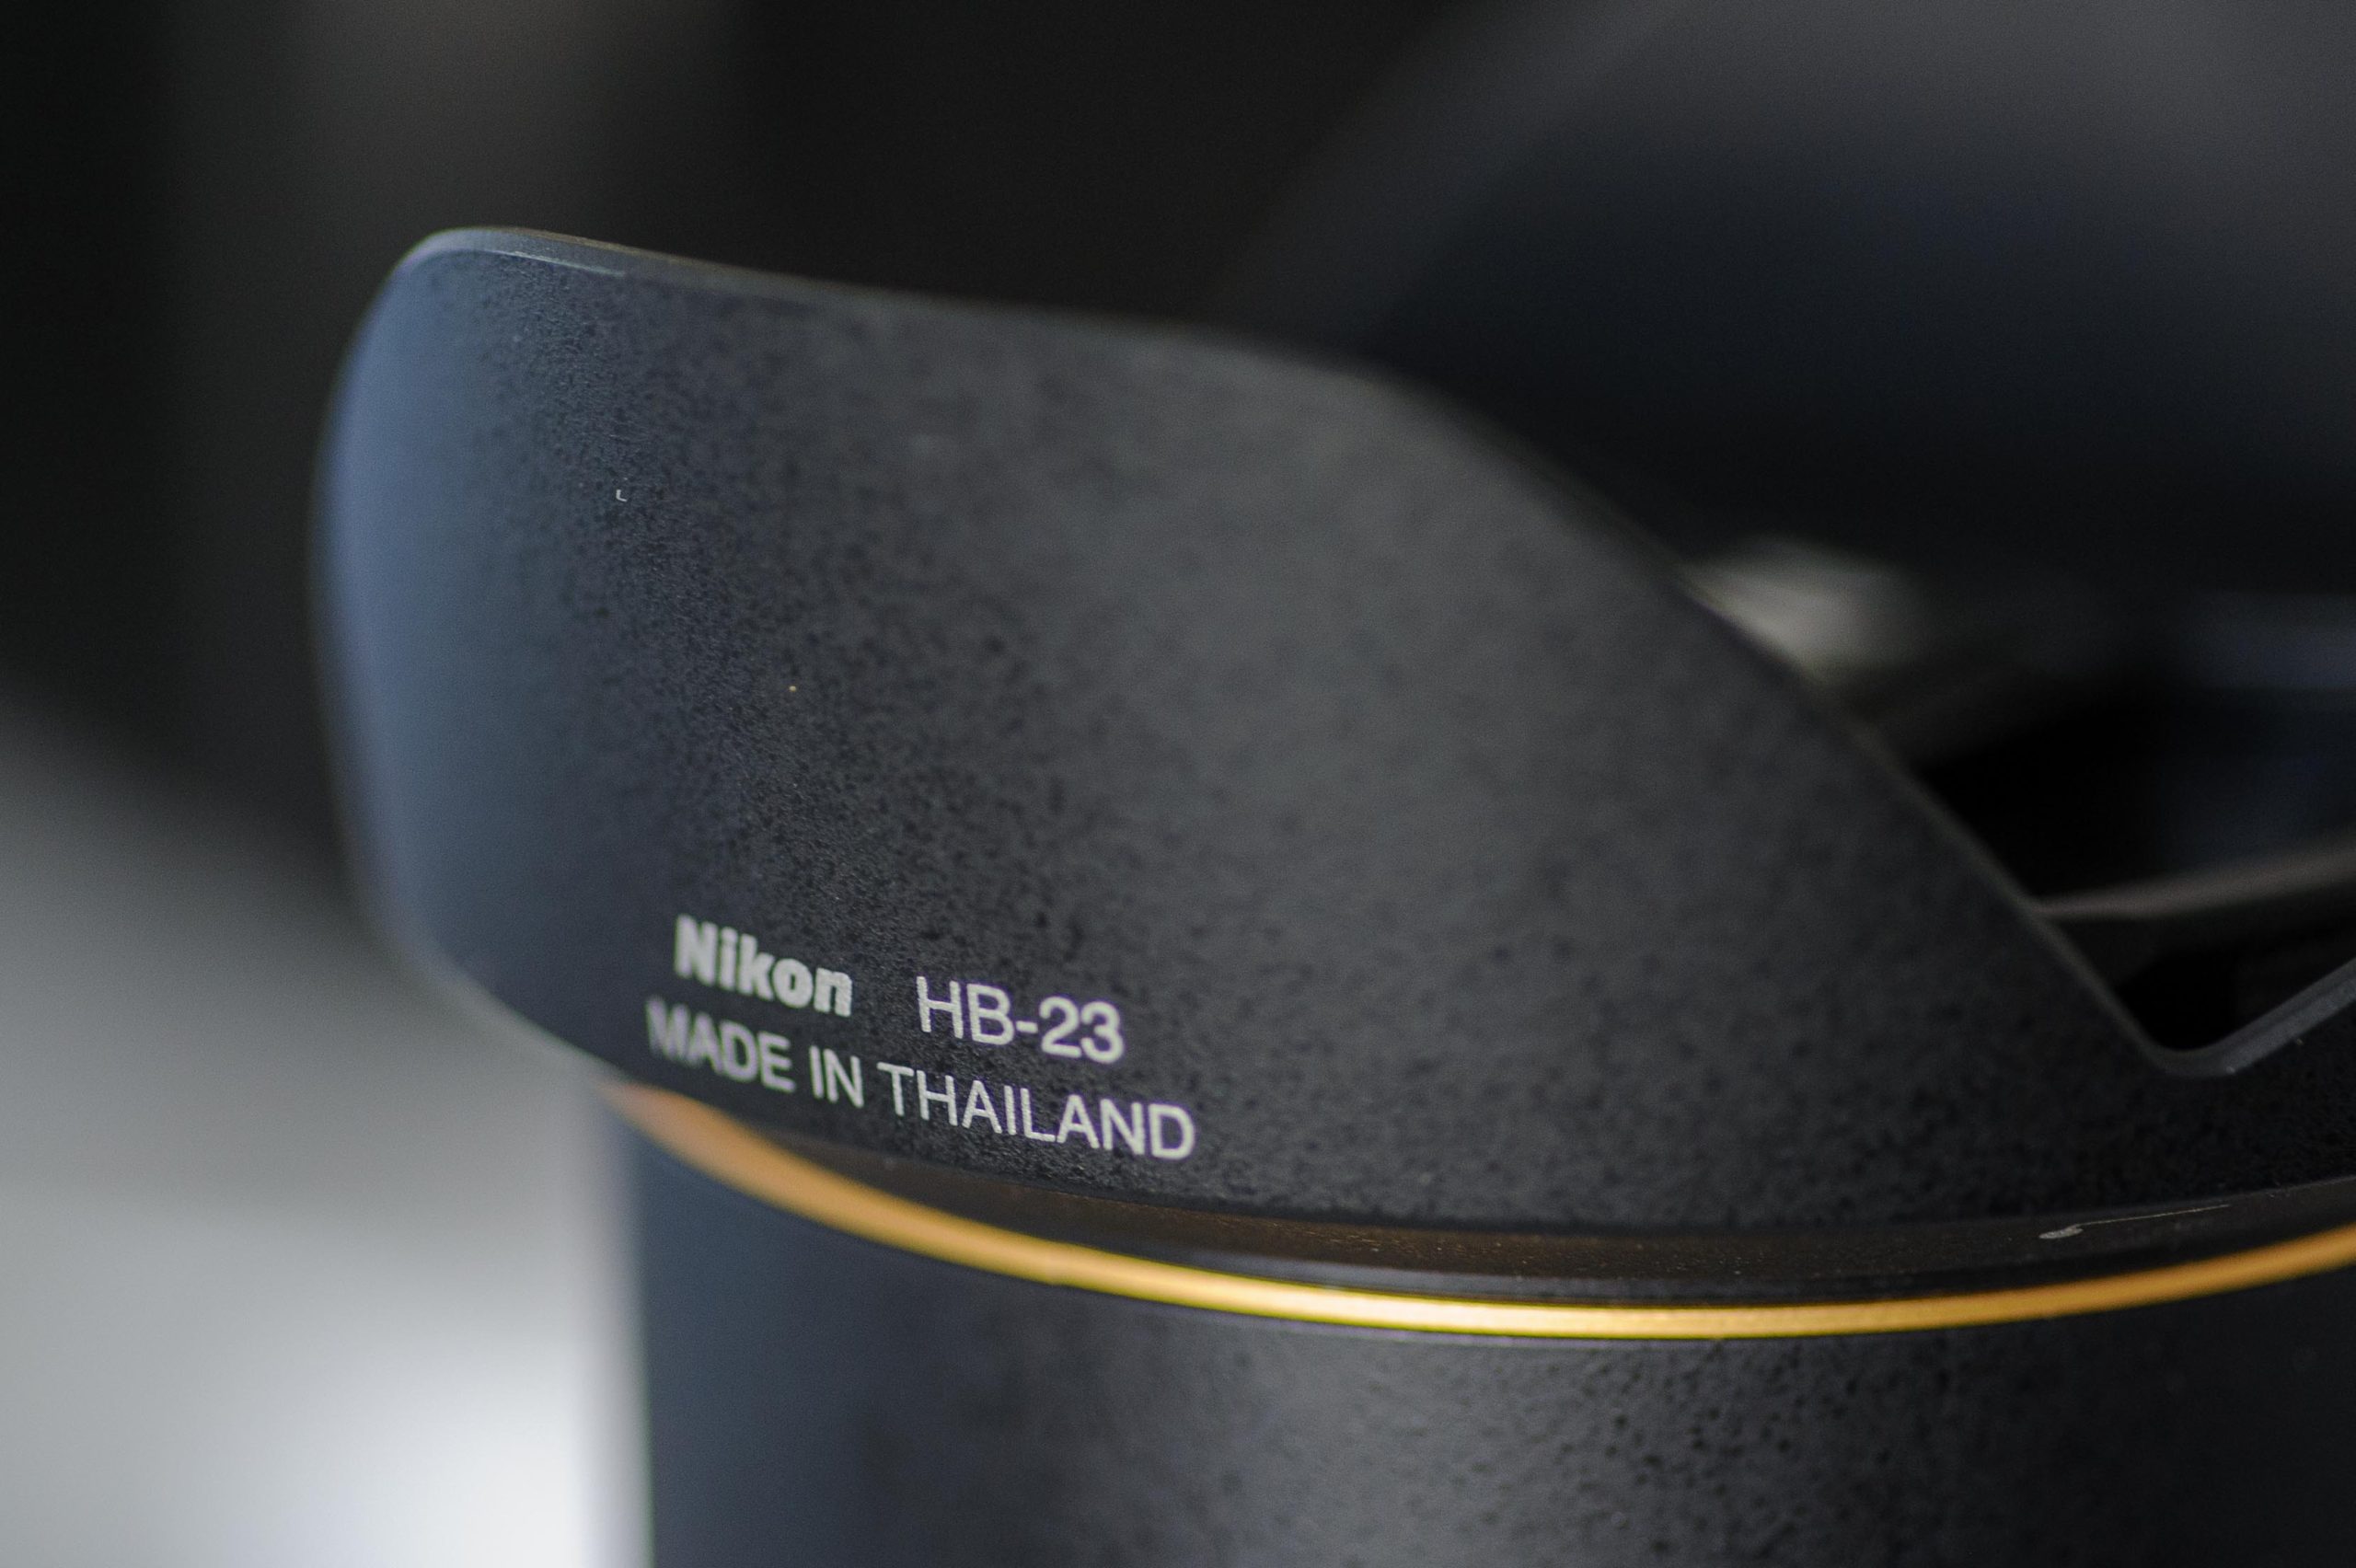
The lens comes with a very short lens hood, which is what you would expect when the widest angle of view is 107 degrees. There are buttons to turn VR and autofocus on and off.

The Nikon 16-35mm lens
Lens hood.

There are 9 rounded aperture blades inside the lens, along with ED glass and aspherical lens elements. Nikon has made the lens since 2010, so the design is relatively new (coming from a vintage lens enthusiast!). The focus motor is built into the glass (SWM – silent wave motor) and works silent and fast; albeit it is not far the glass has to be move to go from 16 to 35mm.

The lens is all made in plastic except for the lens mount, but feels solid and in good quality. My only issue with the lens build quality as such is the manual focus as there is a bit of play when you turn the focus ring before it engages and actually gets the glass moving. Plus the throw is rather short at around 90 degrees. Other than that, it seems like they have made a good job in Thailand assembling this lens.

Daily use

At first I was skeptical to the idea of both VR and a zoom lens – why not just give me a fast prime? But I must admit this lens has grown on me. The ability to zoom in and crop a bit where relevant is great when you are shooting with not-too-high-resolution cameras like the D700 or the D4. Here the zoom allows me to get the framing right in camera so I don’t have to crop in post.

The VR in combination with the not-so-fast aperture actually works really well. I think Nikon knows that a lot of issues occur for fast lenses wide open, so by stopping down to f/4 by design and adding VR instead, you get a really useful combo. Not great if you want to shoot fast moving subjects, but I think this lens is made for landscape photographers primarily.

I find the AF less useful. Don’t get me wrong – I am as lazy as anyone else, but I often take my time to focus when I shoot landscapes and AF is really not that important. I would much rather pay a little less for the lens and skip AF. What I instead could use was some depth-of-field markings on the distance scape. That is useful for finding the hyper focal distance. And then I would like to get a better manual focus ring that has a long throw and engages immediately.

I have a few times, especially when shooting at the ocean, missed the ability to go wider than 16 mm. I can see the difference to my 14mm Samyang prime, and believe it or not, the last 2mm makes a HUGE difference. So it would be nice if the next version of the lens could go a tad wider.

Image quality

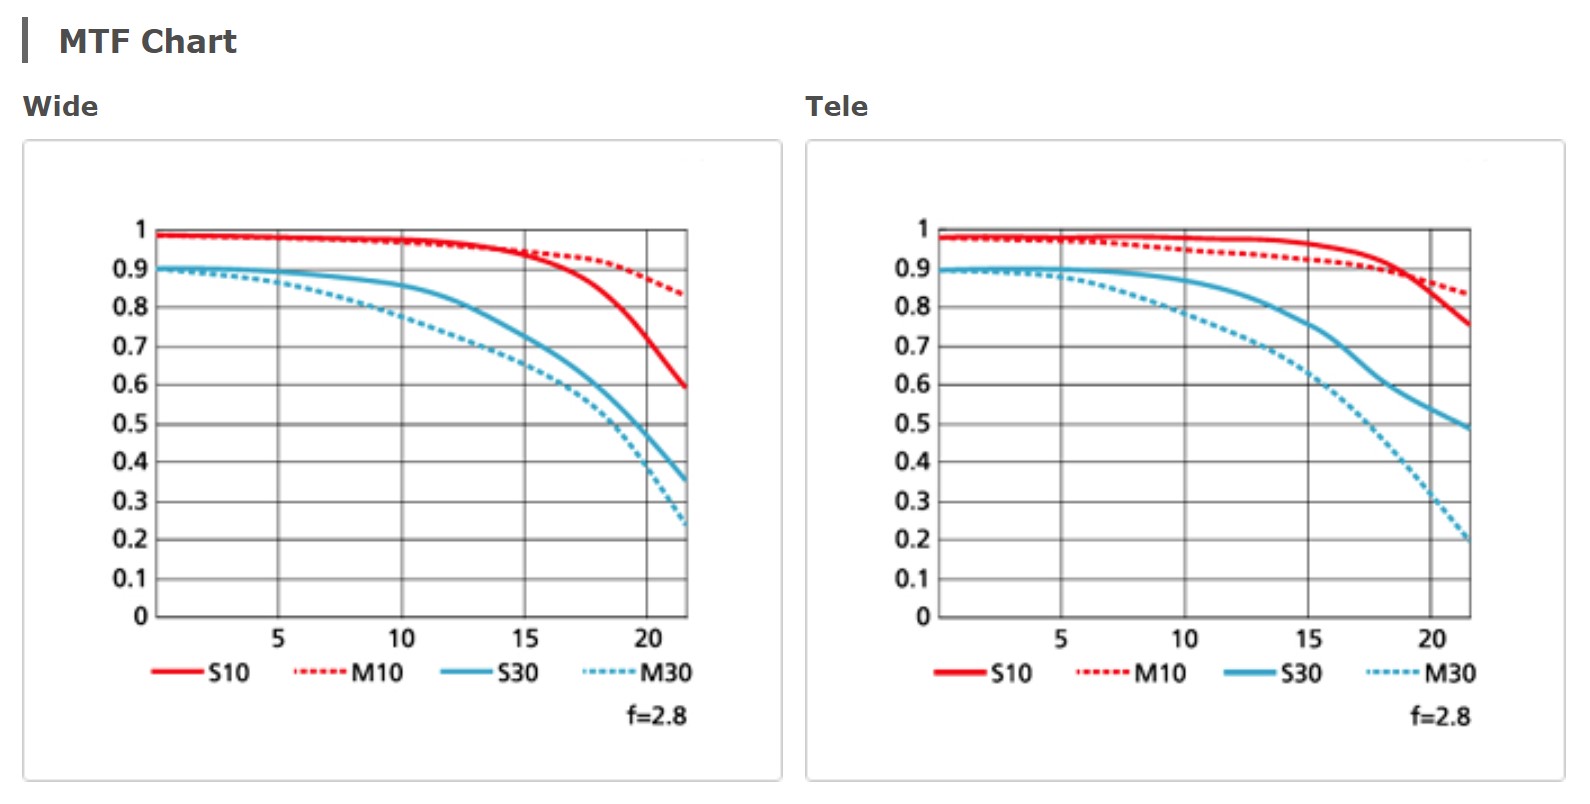
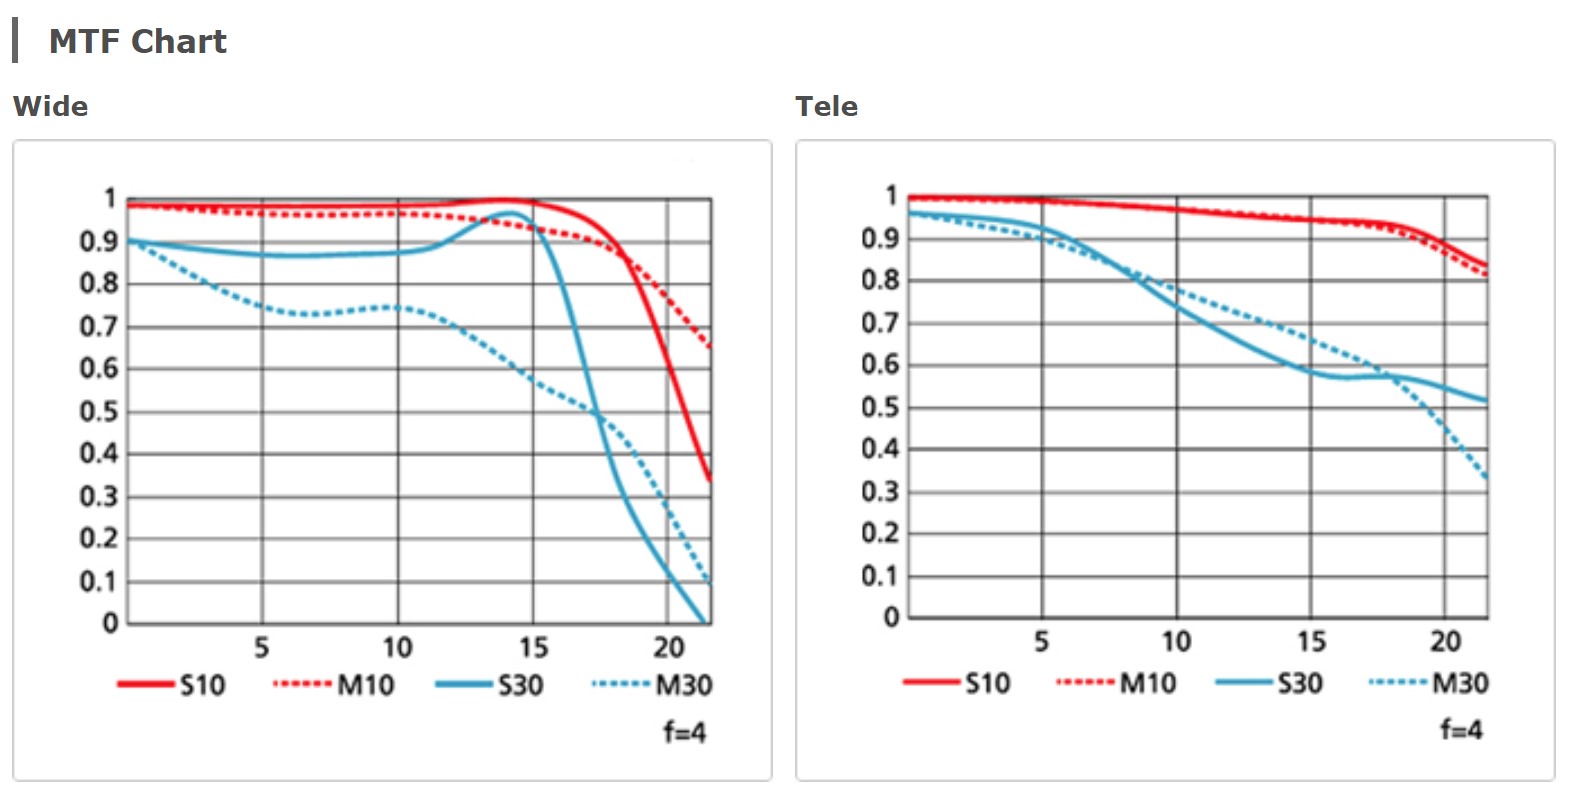
The performance of a lens is always a co-operation between lens and camera, and there will be sample variations from any production line. For these reasons a MTF chart is more an indication than the absolute truth.  Having said that, the image quality from this lens is from the top shelf. The red lines below in the MTF shows impressive performance in terms of contrast also close to the edges, whereas sharpness starts lower and declines more, but both in tele and wide we are at 0.9 or above, which in my opinion is very high. Now wonder Nikon gave this lens a gold ring.

I have shot more than 4000 images with this lens in the 8 months I have owned it, and I can confirm that the image quality is stellar. There are of course some that will be able to see the slightly softer corners, but I really doubt anyone will notice.
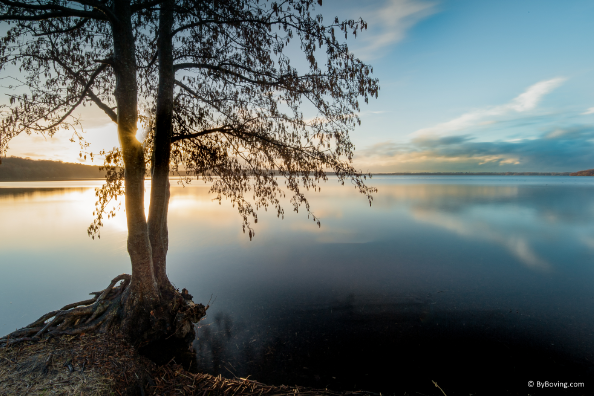
The Nikon 16-35mm lens
A beautiful sunset.

Sun stars and bokeh

I doubt anyone buys this lens for it’s rendering of out of focus elements – that is probably more relevant for a 85mm portrait lens. But of course there may be an architecture or real estate photographer that appreciates good bokeh. Being a landscape photographer, I am not a bokeh fanatic.

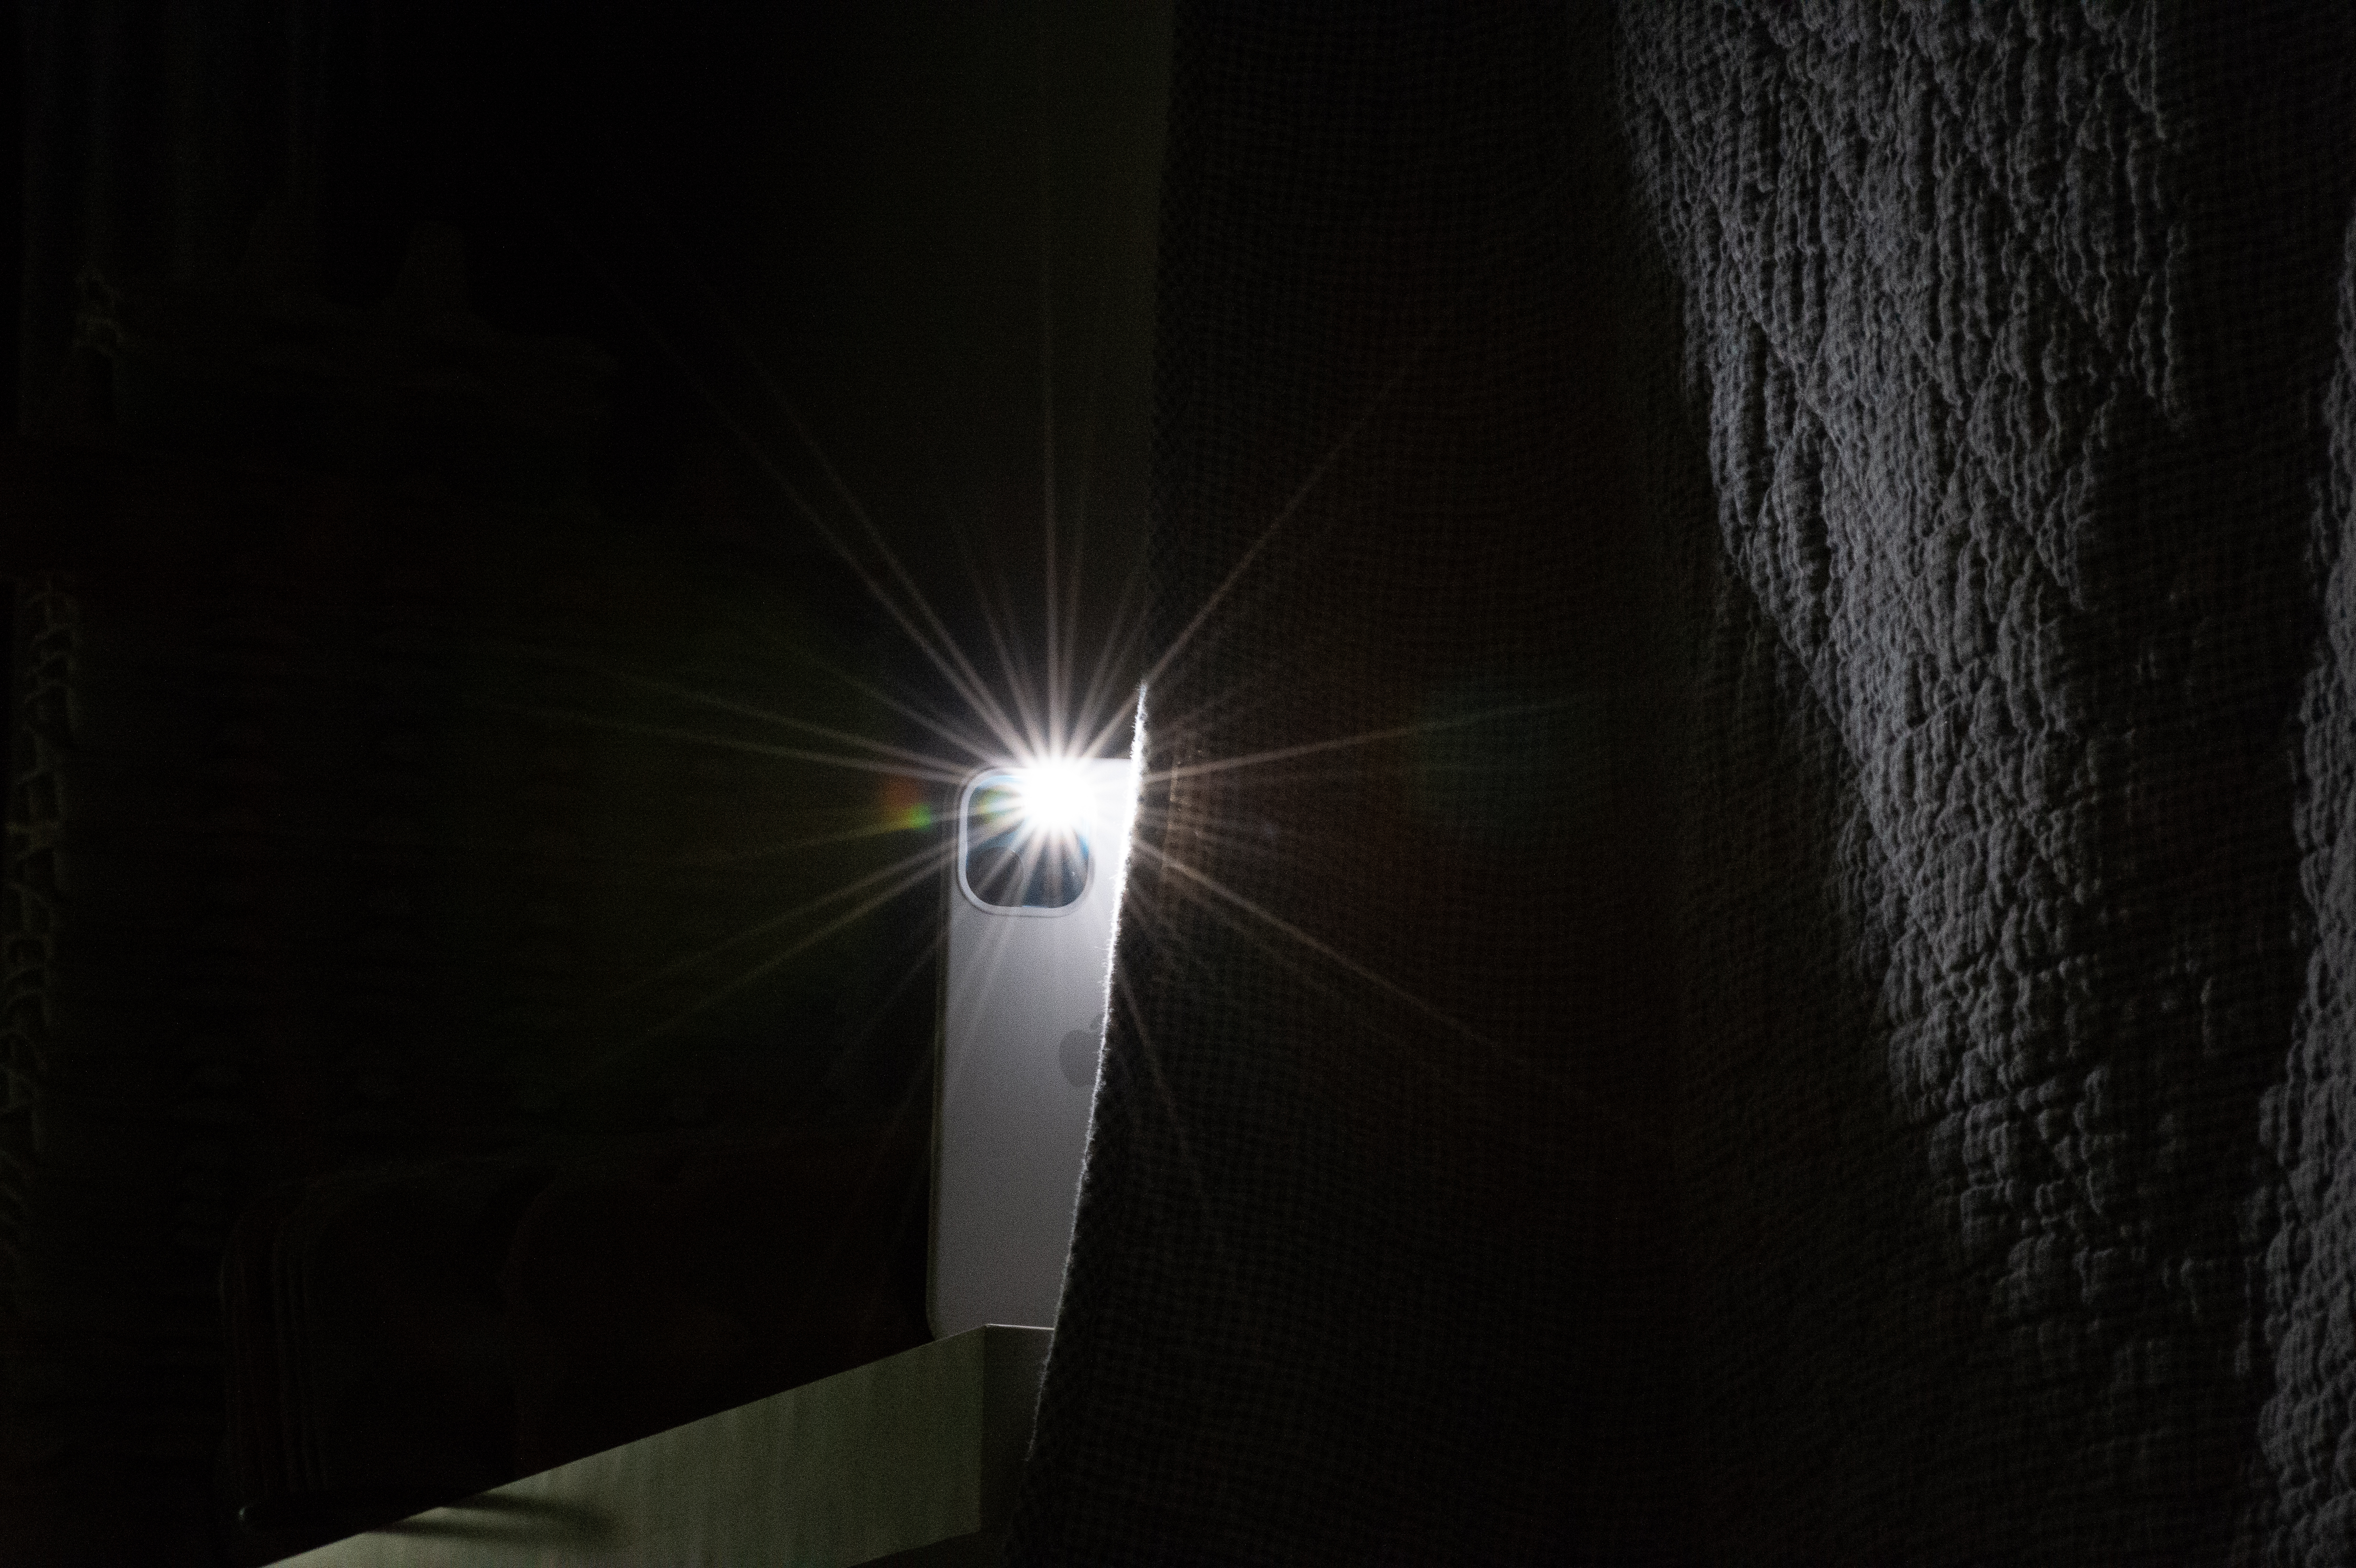
But what I am very interested in is sun stars. And these do not look great when the blades are rounded – see the example above? I prefer sun stars from straight blades any time.

Vignetting and distortion

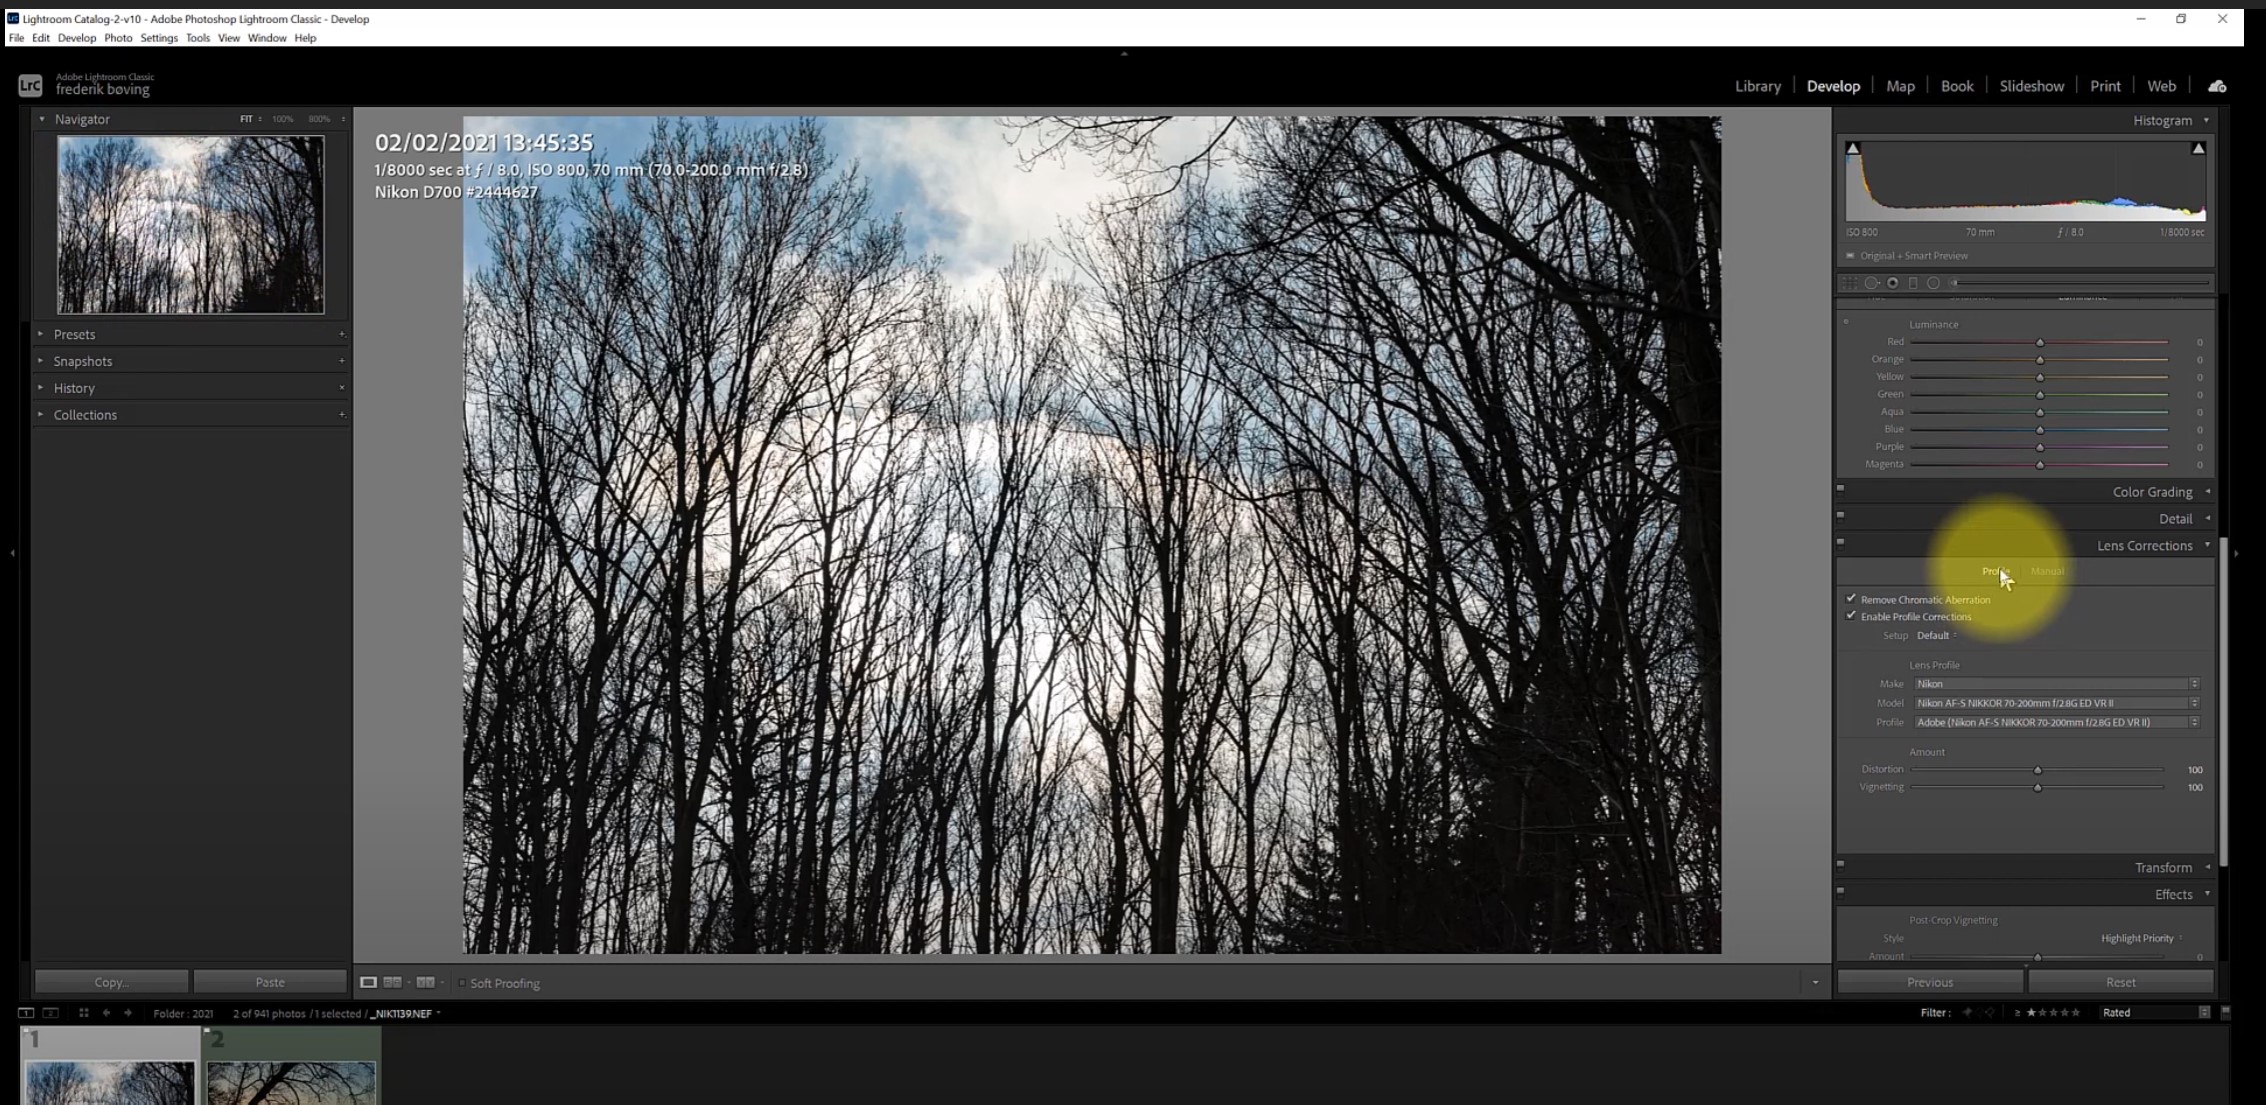
Vignetting and distortion is bad, especially distortion. Good news is that it is only a click away in Lightroom. You can literally fix both issues by two clicks in Lightroom. However, if you are a real estate or a architecture photographer, then this could be an issue for you, so know that this lens comes with these issues.

Aberrations

Contrary to what the MTF charts show with the solid and dotted lines moving apart towards the corners of the lens, I have found aberrations very well controlled in this lens. Only if I shot at 16mm and in Lightroom zoomed in at 400% in the corners, was I able to find purple and yellow fringing, but for most users of this lens I think the bottom line is that aberrations are controlled so well that it is no issue at all. The fringing I did see was removed immediately when I hit the “remove CA” checkmark in Lightroom.

Flare and ghosting

This lens has Nikons latest and greatest ED coating, and flare and ghosting is very well controlled, actually to a level where I think this could be a showstopper for a videographer (they love flare!). Not that I think a videographer would be interested in this lens, but just to illustrate how well it is dampened.

Conclusion

On the plus side:

  • Price (450 EUR used)
  • Useful zoom range (16-35mm)
  • Vibration reduction (tripod less needed)
  • Super center sharpness
  • Super contrast
  • Not too heavy (680 gram)
  • Takes 77mm filters
  • Weather sealed
  • Constant aperture
  • Aberrations and flare well controlled
  • Can focus close (29 cm)
  • Color rendition as we know Nikon (which is good if you ask me!)

And the less positive:

  • Some softness in the corners
  • Would be nice to go even wider than 16mm
  • Heavy vignetting and barrel distortion (easy fix in post)
  • Rounded aperture blades (sun stars not super pretty)
  • Manual focus ring quality (play)
  • F/4 not the fastest wide lens (but VR compensates)
  • No aperture markings on the distance scale

And things where I cannot mobilize a strong opinion:

  • Built in AF (I could easily do without – if the price came down)
  • Bokeh is fine (but I don’t really need it for landscapes)
  • Focus breathing is an issue, but I doubt videographers or macro photographers would choose this lens, and for the rest of us it is not important
  • Longer than you would maybe expect at 15 cm

So can I recommend this lens? Yes, absolutely, provided of course you need a wide lens. But get a used copy. There are plenty out there, and it comes with Nikons gold ring (pro level lens) so it is built to last.

Alternatives

If you want the very best wide angle in the Nikon lineup for the f-mount, you should take a look a the the 14-24mm f/2.8. It is a super lens! It is in almost al dimensions superior to the lens under review here, but be aware that the lens is 1 kg (!), does not take filters due to the rounded front glass and the price is close to double up! But if you want the best from Nikon – this is it.

If on the other hand you want something smaller, lighter and much cheaper, the little 24mm prime from Nikon that I have reviewed here could also be an alternative. It is going in the opposite direction in terms of price and size and zoom range, but it all comes down to what your requirements are and how much you want to invest.

Video link

Related reading

AF-S Nikkor 70-200mm F2.8 G VR II lens review

Nikon 50mm 1.8 AF-S lens review (G series lens)

What is PASM on your camera body? What are exposure modes?

Introduction to the PASM modes on your camera.

PASM

PASM is abbreviations for program, aperture priority, shutter priority and manual exposure modes. You typically find these modes on a dial top left of your camera. If you are shooting Fuji, you will not have a PASM dial – the camera figures out the mode based on your selections.

The PASM dial on a Nikon D750. Most manufacturers name the modes the same way you may find that S is called Tv and A is called Av.

The point with the PASM dial is to control how much control you have of how correct exposure is achieved. You may recall that the exposure triangle gives 3 variables to control the exposure: Aperture, Shutter speed and ISO. Lets get back to ISO a bit later, as ISO is not controlled  by the PASM dial.

The PASM dial gives you varying degree of control for shutter speed and aperture:

(P)rogram mode: Camera controls aperture and shutter

(A)perture priority: You control aperture, camera controls shutter

(S)hutter priority: Camera controls aperture, you control shutter

(M)anual mode: You control aperture and shutter

So what is the point with different degrees of control? It all comes down to what it is your are shooting and what you want to achieve. Not a very helpful answer, but some examples might help:

Lets say you want so shoot something that moves very fast and you want to freeze the action. In that case you want to secure that the wings for the bird for example are not a big blur but is captured razor sharp. So here shutter priority is a good choice, as you set the shutter speed to say 1/1000th of a second and ask the camera to adjust the aperture to get a correct exposed image.

In another situation you are shooting a landscape with very little moving parts. But you want to have as much of the landscape sharp as possible, so you set the aperture very narrow to maximize the depth of field. You leave it up to the camera to determine the shutter speed.

The thing to realize is that your camera, no matter how clever it is, cannot tell what it is you are shooting. Only you know that. So if you go for the automated (P)rogram mode, you get some “middle of the road” camera settings that may not work for what it is you want to achieve. So by taking the camera out of the automated exposure mode (P) and move to the semi automated modes (A) and (S), you get more control. And the top of the pop is manual mode (M) where you can control both shutter speed and aperture at the same time. This can be used for example to deliberately under or over exposing your image to achieve a high key effect. It all comes down to what you want to achieve.

What is then the difference between Auto mode and Program mode? You probably have auto mode as a green option on the mode dial on your camera. In auto mode, the camera controls EVERYTHING – you are really going with an auto pilot here. In program mode, the camera only automates the exposure settings – you control many other options, for example if a flash is to be used or not. In auto mode, the built in flash (provided your camera has one) pops up as soon as the camera finds there is too little ambient light.

What about ISO then? ISO is typically controlled irrespective of the exposure mode. You can control ISO via the menu system and sometimes via buttons on the camera body. ISO comes in 2 option: Auto or a specific value. If you set the camera in Auto ISO mode, it is one more dimension the camera can use to get a usable image. But be aware that you pay a price for using high ISO values: grain. There is no free lunch in photography.

Related reading

What are exposure metering modes?

What is exposure compensation?


What is RAW format in photography?

Unprocessed

RAW format is a way of storing information about an image so that it gets as close as practically possible to what the camera sensor recorded.

It is not about resolution. The resolution of the image is (unless cropping) determined by the resolution of the sensor. You can have two images in different formats (say JPG and RAW) and they hold the same resolution, but what is different is how much information is stored about each point or dot (pixel) in the image.

RAW format stores much more information about each pixel than other formats do. This maximizes the options for you to work with the image in post processing – you can recover shades in the dark, clipping in the highlights and work with the colors to a degree that no other format allows you to.

But there is no free lunch in photography. The price you pay for all this flexibility and headroom is the file size. RAW format takes up much more space than JPG or HEIC formats, even when the resolution of the image is the same. That is why many edit their images in RAW format and finish their work by exporting the file to a format that takes up less space – this makes sharing on social media much easier.

Related reading

What is a camera image sensor?

What is PASM on your camera body? What are exposure modes?

What is lens vignetting?

Vignetting is simply that the corners or edges of your image are darker than the center. It is caused by the lens, but can also be created artificially in post processing software. The term light falloff is also used for the same.

Some use vignetting to draw attention to the center of the image and hence find it useful.

Most lenses exhibit some level of vignetting and it is most common for lenses that can open up and let in a lot of light (say f/1.4 or f/1.2). Some cameras are able to correct the vignetting as part of the cameras processing of the image, so it is never visible to the photographer.

Review: Nikon AF-S 70-200mm F2.8 G VR II lens

I think a few quotes from other reviewers to start with will set the scene just beautifully:

  • DXO Mark 2013: “[it] has no significant weaknesses and is the best zoom lens you can mount on a Nikon Full Frame body. If your photography demands a medium telephoto zoom with a fast maximum aperture that will deliver across the board, but particularly at 200mm, and your budget holds no bounds, go get yourself a Nikon 70-200mm f2.8G ED VR II. It’s one hell of a lens.”
  • Ken Rockwell: “I hate this lens because it is so good than now I want to buy one. I borrowed one to test, and it turned out so subtly excellent that it surprised me.”
  • DP review 2009, gold award: “Overall, though, it’s impossible to conclude anything other than that the AF-S Nikkor 70-200mm F2.8 G VR II is one of the most accomplished lenses of its type, and a perfect companion to Nikon’s top-end bodies such as the D3S and D3X. It’s an equally accomplished performer on both DX and FX that will satisfy the most demanding of photographers.”

Despite this lens certainly not getting any younger (production started back in 2009) it still today is a great lens, and as far as I know, still in production.

Price

I bought my lens for 900 EUR used (2020), and it came in good condition. Even though prices fluctuate over time, it is a rather expensive lens also used, but certainly much more within reach than the original list price of 2400 USD in 2009.

Build and layout

The lens comes with 4 buttons, two to control the AF, and two to control the VR. In addition good wide rubber grips are there for manual focus and zoom (just left of the buttons).

The full frame 70-200mm lens is packed with features:

  • ED: glass to control Chromatic Aberrations
  • AF-S: Built in auto focus motor, that also works on ML with FTZ adaptors plus on entry level Nikon cameras (!)
  • VR: Vibration Reduction so you can get more keepers with slower shutter speeds
  • 1:2.8G: Constant fast aperture at f/2.8 throughout the focal range
  • IF: Internal focus, makes focus faster and allows filters to be mounted on the lens

You will have to accept a pretty high weight at 1.5 kilos, it takes Ø77 mm filters and you won’t be able to go closer to your subject than 1.4 meters.

The focal range from 70-200 makes lenses like this one a workhorse for portrait photographers, sports, some wildlife, photo journalists and wedding photographers. It is simply a super important range for many pros, and hence a lens that major lens manufacturers work very hard to get it absolutely right.

The lens features the golden ring that we know from pro grade glass from Nikon, but the jury is still out as to what exactly the gold ring signifies. Some think it is the ED glass, others that it is the weather sealing and yet others that it is pro grade glass. No matter what the right answer is, the lens is built very solid in most metal and some rubber (focus ring and zoom). And a bit seldom in this day and age, it is made in Japan (at least my copy is!).

All in all, you get the impression from handling this lens that it is built for professional use and designed to withstand a lot of beating from daily use in all kinds of weather.

Sharpness / contrast

There are many reservations to make before studying an MTF chart, and one of them is that your lens and your camera team up to produce the images, and hence studying a camera agnostic MTF chart may not reveal how your specific camera performs with this lens. And then Nikon does not provide data other than wide open and at the far extremes of this lens (wide and tele respectively), so we cannot see from the MTF chart how it performs in between.

Nikon AF-S 70-200mm F2.8 G VR II lens
The MTF chart as provided by Nikon.

However, as you can see, the red contrast line sits very high in the diagram and the blue sharpness is also impressive for center sharpness at least. Then it drops towards the edges, as is the case for so many other great lenses, but it remains over 0.7 close to 15mm from the center, and I find that impressive.

Just for the fun of it, and because people often tell me that primes are sharper than zooms, I made a little test where I looked at the center and corner sharpness and contrast, to see which one came out on top:Although the 180mm AF may not be the sharpest lens Nikon has ever produced, it certainly is a good lens and the 70-200mm won the center sharpness stopped down, whereas the prime won when going wide open. Maybe not a surprise, but to me this clearly shows that the lens in review here has very good contrast and sharpness.

Chromatic aberrations

Nikon AF-S 70-200mm F2.8 G VR II lens
Some chromatic aberrations can be seen in the treetops where the contrasts are the strongest.

This lens does suffer from chromatic aberrations, but I seldom come across them. In the image above with a high contrast image, the trees top left have a purple line where dark meets white. It is easily removed with the “remove chromatic aberrations” option in Lightroom. You may in stubborn cases  need to also work with the manual sliders in Lightroom, but that is even more seldom. So I would not consider CA an issue for this lens.

Flare and ghosts

I shoot a lot into the sun and hence both flare and ghosts often materialize. I find that both flare and ghosts are well controlled with this lens, and often to such extend that even when it is visible in the picture, either I don’t notice it or it is not a disturbing element. Much is still dependent on the lens hood and the photographer’s skills, but this lens gives you all that modern technology has to offer in terms of minimizing flare. I would even argue that if you are a videographer (they love flare!) you may find that flare is too well controlled for your liking!

Focus breathing

This lens suffers from serious focus breathing! The former version of this lens and the successor has much less breathing, as does the f/4 version, so if you are into focus stacking or a videographer, then this could be an issue for you.

Vignetting & distortion

This version of the lens is known to have both vignetting and distortion under very good control and apparently the engineers at Nikon did a really good job here. However, I do see some big shift when I push the profile compensation button in Lightroom, but it is not an issue as such, just interesting to see how big the change is at several apertures. I doubt you will be shooting architecture or other things with this lens where straight lines are important.

Vibration reduction

I don’t have much to say about the vibration reduction other than it works! I have been shooting at 200mm down to 1/80th of a second with no camera shake and it works in a way so I don’t notice it is on. When shooting ICM it is of course turned off!

Sun stars

Nikon AF-S 70-200mm F2.8 G VR II lens
Sunstar example: the iPhone in the dark!

I am not a big fan of the sun stars this lens produces and it comes down to the 9 rounded blades. The peaks in the sun star as you can see above are split and look messy to me. I much more prefer the sun stars that straight blades gives, but I also understand why Nikon has made the rounded blades, as most users in their target group prefer bokeh over sunstars.

Bokeh

The lens comes with 9 rounded blades that start to get to work as soon as you stop down the lens. I find the bokeh absolutely beautiful and have no complaints whatsoever.

Nikon AF-S 70-200mm F2.8 G VR II lens
Bokeh example from a fall day with a bit of sun coming through the trees in the background.

Color rendition

Nikon AF-S 70-200mm F2.8 G VR II lens
Beautiful sunlight providing backlight to the straws.

I often get questions why I don’t comment on color rendition or color science when I review lenses and cameras and the answer is that I have seen the eye opening video by Tony Northrup where he documents that most of us are unable to consistently pick our favorite camera in a blind test and that we are influenced by brand loyalty when assessing color rendition and your WB settings are much more important.

Nikon AF-S 70-200mm F2.8 G VR II lens
Silhouettes of trees.

So that is why I am hesitant to cover this subject. For this lens I will say that when I put in front of my D4, the pictures and colors it produces are absolutely stunning. If you want to have a closer look, I have a flicker album with these pictures. Link here. There you’ll also find the EXIF information, but please look at the pictures first and foremost.

Auto focus

Nikon AF-S 70-200mm F2.8 G VR II lens
You can limit the autofocus so that is does not search in the interval from minimum focus distance to 5 meters out.

It is fast and silent. Period. And it is so fast that I do not use the option to limit the AF range from 5 meters and out. Only if you are an extremely nerdy guy like me that likes to shoot lampposts at night will you sometimes experience the AF gives up in low light and you have to switch to manual, but for most normal uses the AF simply just works fast, silent and reliable. As you would expect from a pro grade lens.

Conclusion

My overall conclusion is that this lens probably is as good as it gets when we are talking lenses where the price point is within reach for normal human beings. Is it a perfect lens? No, you can find things that are not perfect for example the focus breathing. But it is a lens where I find that Nikon has made some very good compromises that add up to a very attractive package.
I can fully understand why working Nikon professionals 10 years ago had this lens sitting on their cameras. It is a pleasure to work with. It gets the job done. The vibration reduction just works silently in the background. The auto focus is fast and reliable. It produces great images.

My advice to you is consider if alternatives with more reach or maybe some lighter primes. There are also alternatives in the same range from Sigma and Tamron – or the not so fast f/4 version from Nikon.

This is exactly where I cannot help you, as only you know your personal preferences. This shoe fits my foot well, but that does not mean it will fit your foot well.

Video link

Related reading

Nikon 50mm 1.8 AF-S lens review (G series lens)

Nikon 28-105 f/3.5-4.5 AF-D lens review

Shopping link

Affiliate link to the the 70-200mm at Amazon.

Review: Landscape photographer of the year, collection 10

Book review

Landscape photographer of the year, collection 10

I believe they produce a book similar to this one every year, or at least regularly. This is the edition 10, with 1-9 preceding obviously. So it is not the latest and greatest I am reviewing here, but the images are timeless and hence the edition number is of less interest.

It is VisitBritain as sponsor amongst others, so there is an agenda here other than just distributing some absolutely lovely award winning British images.

And I am happy to see that one of my favorite ocean photographers Rachel Talibart is one of the winners that made it into this book (the Sunday Times magazine award), but there are simply so many other talented British photographers that you have to see it to understand it. This is only the top of the iceberg – there must be so many hard working photographers out there that are not on display in this book.

One of the things I really enjoy about this book – other than the beautiful images – is that the photographers tell a little story about each image and in the back of the book they document what camera, settings and lens they used, and in addition briefly describe their post processing work. This is valuable insights, and shows that cameras of different make and price range are all able to produce beautiful images. It is the photographer that makes the big difference. A decent quality and camera is merely the means to an end.

Related reading

Review: And then there was silence, by Jan Grarup

Review: Photo basics by Joel Sartore


Review: WILD! What you love you will protect, by Helle and Uri Løvevild Golman

Book review

The two Danish photographers Helle and Uri have captured images of wildlife that are nothing short of astonishing. This 200+ page coffee table book is filled with one wonderful image after another. Their passion for wildlife and nature shines from every single image, carefully selected from numerous journeys into the wild: South America, Greenland, New Guinea, Antarctica -the list goes on and on.

It is seldom that I am blown away by even a single image, but in this case I was blown away by almost every single image in this giant of a book. Their work is truly impressive. It is the combination of their love for nature that shines from each page and the technically impeccable images that lifts this book to a level that I have seldom seen. There are a few introduction pages and forewords, but other than that the book is filled with one wonderful image after another.

I can only recommend this book wholeheartedly, even if you are not a nature lover, you will be impressed by the sheer quality of the images presented.

Related reading

Wild and Fearless by Uri Løvevild Golman

Link to their homepage: weareprojectwild.com

Review: Photo work: Forty photographers on process and practice, edited by Sasha Wolf

Book review

Forty photographers on process and practice
Photo work: Forty photographers on process and practice, edited by Sasha Wolf

This book is as academic as they come! That is my review in short! If you are curious to look over the shoulders of 40 acclaimed photographers (like Andrew Moore or Paul Graham) and understand their process and workflow, then this is the book to read!

All 40 have been given the same questionnaire of 12 questions like “Do you create with presentation in mind, be that a gallery show or a book?”. The book is simply the documentation of 40 answers to these 12 questions.

This is not your beginners book about photography, nor the advanced book about photography, rather it is an look into the minds and workflows of some highly creative people. I could as well have been a book about painters – the questions and their answers are that agnostic to photography.

So only if you have a keen interest in this highly specialized area can I recommend this book – otherwise I would stay clear of the 255 pages of process and insights.


What is diffraction?

When light travels though the lens, the aperture blades can reduce the diameter of the hole the light travels through. Most lenses can close down the aperture to a very, very small area – the size of a pinhead or even smaller.

When light has to travel through such a small hole it simply changes slightly. This can get very technical, but the effect is that your images appear soft, i.e. as if out of focus – even when you have focused perfectly.

Photographers debate exactly when the effect sets in and how large the effect is. Macro photographers often shoot at crazy high f-stop numbers (closed down apertures) and seem to be doing fine, and in many find that the effect of diffraction is exaggerated.

The best you can do is to notice if your lens/camera combination gives diffraction – I think you should start to worry about this from around F/16 and onwards.


What is focus shift?

When your DSLR focuses, it typically does so by opening the aperture up as much as possible to allow all the available light to flow to the auto focus system. So if for example you are shooting with a f/1.8 lens at f/8, the camera will open up to f/1.8 to focus and then shift down to f/8 to take the picture.

Some lenses, especially lenses that can go very wide, i.e. a low f-stop number, suffer from focus shift, which means that the lens moves the focal plane as a consequence of changing the aperture.

This is nothing short of a catastrophe for an auto focus system, as the camera gets the focus sharp at f/1.8, but then when the image is taken at f/8 the subject is no longer in tac sharp focus.

There are a few ways to mitigate focus shift, as you can of course shoot at the maximum aperture – then the focus aperture and the shoot aperture is one and the same. You can also shoot in live view on your DSLR, as it the uses a different focus system than when not shooting in live view mode. The best option of course is to get a lens that does not suffer from focus shift!