A few specific posts about photography accessories, as I often find that it is small things like these that can make a big differences in your photography life. There are so many practicalities to get on top of as a photographer!
I have for some time been able to manage with only one flash (!) – the Godox V860III. My copy is made for sitting on a Nikon, but because I trigger it off camera with a Godox XPro, I am able to use the same flashlight across my Nikon, Canon and Fuji cameras. I have to invest in a trigger per camera, but the flash can be the same. This is the first reason why I wanted to stay with Godox – their eco system works really well and the protocol is shared across a lot of their newer products.
My Godox V860III has been my only flash – supported by reflectors and mirrors.
I wanted to get a second flash to give me more options especially when doing product shoots. I did consider getting an additional Godox V860III, but I really do miss a good modelling light, so I am able to see where the light falls before hitting the shutter. The V860III does have a modelling light, but it sits on the base of the flashlight and hence does not follow the turning of the head. And when the flashlight sits in say a softbox, the modelling light is no good at all.
The modelling light on the Godox V860III sits on the base of the flashlight and does not follow the direction of the head of the flash light.
The Godox AD100Pro solves this problem by having the modelling light sitting at the edge of the flash light itself, and hence solves the issue I have with the V860III. It is not a very strong light at only 1.8W, and when sitting in a softbox this is not very useful. But when the flash is used “naked” it is really a helpful feature and for my flower photography I really enjoy the modelling light.
The Godox AD100PRO has a small 1.8W modelling light sitting at the edge of the flash light itself.
Further, the AD100Pro is not a very big flash. It is marginally larger than a can of coca-cola and as I have only a small studio, having a compact flash is important to me. The flash is not that powerful (only marginally stronger than the V860III) and if you need more power, I suggest you take a closer look at the AD200Pro or AD400Pro to mention a few.
The Godox AD100PRO is a relatively small flash – here compared to the size of a pen.
I was able to get the AK-R1 accessory kit that gives a range of modifiers, including barn doors, snoot and gels. The light modifiers snap onto the flash via magnets, and it is so easy and very fast to mount and swap light modifiers. I really enjoy this addition to my flash, although the size of the light source for my usage (typically product shoots) is small and hence gives hard light. But for a focused beam of light to enhance the brand name or a logo on a product, it is really useful.
Godox AD100PRO and the AK-R1 accessory kit
Finally, the Lithium battery that comes with the AD100Pro is – even when I shoot at full power – able to recycle in a matter of seconds. And the battery easily supports one of my shooting sessions (1-2 hours typically) without a need for charging.
Summary
The Godox AD100Pro works really well for me, but your preferences and use case may vary from mine. If you need lots of power, I recommend that you look to some of the larger models (AD200 and AD400), especially if you want some modelling light that is useful also in daylight when sitting in a softbox.
I just ordered my copy of the Atomos Ninja V. It is a great tool if you want to get serious about video recording, but prepare to pay! The Atomos has a few surprises up its sleeve that you might want to know about before buying!
You can find lots of reviews praising the Atomos Ninja V and rightly so – it will unleash a lot of potential from your camera doing internal recording. But buying the Atomos is like buying a german car: the price for the base model looks reasonable, but when you add needed extras, the price suddenly changes in upward direction.
The backside of the Ninja with the SSD drive sitting to the right (light grey).
The Atomos Ninja V comes with no memory. You have to install a SSD drive for it to store information, and if you don’t want the SSD drive to stick out from the side of the Atomos Ninja, you have to buy a dedicated drive. I went for the Angelbird AtomX SSDmini with 500 GB.
To the right the mount for the ninja on the camera hot shoe. The red button is for releasing the Ninja from the mount.
Further, there is not mount to make the Atomos sit comfortably on the camera – you can make a DYI version, but I decided to go for the Atomos monitor mount. The total of the mount and the SSD drive was around 66% of the price for the Atomos Ninja itself!
Then I learned that I did not have a cable to go between the Ninja and my camera -I needed a HDMI-A to HDMI-D cable for my Lumix camera (your camera may need a different cable). Maybe you are so lucky that you have one on stock, but I did not, so I had to invest once more. Notice that it is useful with a relative short cable if you intend to have the Ninja mounted right on top of your cable.
HDMI cable to go between camera and Ninja.
Add to this that the Atomos Ninja V comes with not batteries at all! You can get a Atomos Accessory Kit with batteries and a sun visor and a battery charger, but that kit will set you back another 40% of what the Atomos itself costs, so if you want both batteries, sun visor, memory and a monitor mount, you have to pay a bit more than double the price of what the Atomos Ninja V itself will cost you.
Then there is the question of getting data out of your Ninja! Here there is no USB-C or USB-A connector to “talk” to your Ninja, so I had to get a docking station for the SSD drive.
SSD drive docking station.
The final stab that Ninja Atomos V made at me was when I created a profile on the Atamos homepage and downloaded the latest software. There I learned that a one-time fee of 99 USD for the giving me access to the H.265 codex was required.
H.265 codex access paid!
So, as I said in the beginning of this blog, the Atomos Ninja V is a great tool, but just like cars from Germany: be prepared to cough up some extra of you hard earned cash to make the package complete.
The SmallRig RM75 video light is actually quite small. At 9.9 x 6.7 x 0.18 centimetres, it will not take up much space in your camera bag. Despite the small form factor, it delivers a CRI at 96 and a colour temperature in the range of 2500K to 8500K.
It is powered with a 4Ah battery, which I find to be a large battery especially considering the small size of the light. The spec sheet promises 3 hours of operation at full throttle, and if you ask me, that is a mind blowing performance! When I think back just a few years what a small LED light could deliver, then giant steps of progress have been made here!
The SmallRig RM75 as it presents itself on the tin.
The box with the light contains very little other than the light: a manual, a user guide, a USB cable and a light diffuser.
In the box you will find the instruction manual (left), the light itself (right) and a diffuser along with a USB cable (middle). The diffuser also protects the SmallRig light.
I must admit that I thought the light diffuser was a case to protect the light mainly, but when I tried to fit the silicone rubber case, I could see that the case is somewhat thicker than the light itself. This design to create a space between the light and the case, so the heat can dissipate. That said, the diffuser will also protect the light, the same way you probably have a cover for your smartphone.
Yes! USB-C charging! And you can also see the small screen top right that shows you the menus and status of the light.
I enjoy USB-C charging very much! It saves me from unboxing yet another charger, and it also means that I can charge the SmallRig when on the go, say via my power bank or the USB plug in my car. So USB-C charging is very welcome! And I am also glad to see that the SmallRig charges with a powerful 65W charger – not all devices can stomach so much power (for the tech savvy: it supports USB-C PD).
In use
There are not many buttons on the SmallRig and that is good news if you ask me! Other than the on-off switch and the USB-C connector, there is only a command wheel to control the light (it is named “SET”). It works simple and smart: push it once to enter/jump a menu, and long push it to exit the menu. Turn the wheel to change the value, say the strength of the light or the color temperature. The menus and options are displayed in a small OLED screen on the middle of the rear of the SmallRig light.
The interface to the SmallRig is simple: a small command wheel (left), an on/off button (middle) and a USB-C connector (right). At the other end there is a 1/4″ thread for mounting the SmallRig on a tripod or the like.
There are 3 main menus in the menu system and you can control all aspects of the light (light intensity, color temperature, saturation, hue, etc). There are also a number of predefined effects that you can choose between like fireworks and a police car. For my liking, it gets a little bit fiddly to choose between all those options with just a command wheel, and luckily there are 2 QR codes in the manual – one for OIS and one for Google. In other words: the SmartRig has an app! Everything seems to have an app this day and age!
Of course the SmallRig has an app! And you can control all aspects of the light including special effects! Just remember to have bluetooth turned on on your smartphone.
The app is maybe not the most elegant software I have come across, but it certainly gets the job done, and it also secured that the software in the SmallRig was updated to the latest version, before I started to use the app in more detail. For my usage the most important is to be able to control the intensity of the light and the color temperature – and sometimes also to turn the light on and off remotely. So I have not deep dived into the more advanced functions, but it sure looks overwhelming with all the effects that are available and the way you can tweak the hue of the light.
Mount
There is a small 1/4″ thread in the bottom of the SmallRig so you can mount it on a tripod or a boom arm or whatever is to your liking.
The SmallRig on a Manfrotto tripod.
As a new feature (at least for me), the SmallRig also has some magnets that makes it possible for you mount the light on a metal surface.
The SmallRig has magnets that allows you to mount the light on metal surfaces. Here a small lamp on my desktop. The magnets are relatively weak compared to the weight of the SmallRig, so it will not work for all types and sizes of metal.
I found the magnets to be relatively weak when holding the 185 grams light, but if you find some metal that is sufficiently “beefy” and flat, then it definitely works.
Conclusion
The SmallRig RM75 here in late 2022 retails for around 80 USD which I think is a very fair price for a powerful light with lots of features and controls and a battery that will keep you with light for several hours on one charge.
The question is if the 5W of light the SmallRig yields (500 lux at 0.5m) is sufficient for you and if the surface of the light is big enough for your needs. That comes down to exactly what your needs are for lightning. But if you find that the size and the illuminance of the SmallRig will cover your needs, then I have no hesitation to recommend the SmallRig RM75.
When I was in the market for a speedlite flash the first time around, I looked at the prices for flashes from the big brands such as Canon or Nikon. And my conclusion was that they were out of my reach budget wise. I know from many blog posts and users sharing experiences with these brand flashes that they are very good and will (almost) last you a lifetime. Your mileage may vary, but the price simply kept me from the big and well known brands.
The other side of the road is is to go for a very cheap flash, but studying the market and what experience photographers had had with budget flashes, that did not seem to be my path either. As they say, buy nice or buy twice. I was not planning to buy twice.
So my solution was Godox, that I find to deliver solid quality products without breaking the bank. That for me was the sweet spot I had been searching for. And I got a TT685 and later a V860 mk II and now a V860 mk III. And I wish I had started with the latter!
Now, if you are simply after if I can recommend this flash, then it is a big yes. I find the price around 220-230 EUR to be reasonable, and the functionality and light provided by Godox is exactly what I need. If you have a big studio and need to cover a lot of distance or area, then this flash may not suffice (the guide number is 60 (meters)), but for my work mainly being shooting objects (products, stills, etc) at relatively close range, this flash is spot on for that I need.
Notice that this flash is also branded under the name: Flashpoint Zoom Li-on III R2 TTL over at Adorama.
Battery
So this reviewer starts out with the battery on the V860 III – does he not get the point with a speedlite? Well, I do, but when you start working with a speedlite, one of the first things you will notice is battery life and recycling times.
Mk II left, mk III right. Newer is better: Smaller size battery and more power.
I have had speedlites with AAA batteries and external power banks, and I can say from bitter experience: do not travel that road! It is clumsy and cumbersome! The powerful Li-on battery in the V860 III delivers plenty of power. In fact, it has 1.5 times more power than the mk II, despite the battery is smaller in size.
The hole in the flash is by design! The battery fits very precisely. You release the battery by pushing a button while tilting the flash – then it slides out sideways.
The recycle time after firing full throttle is around 1-2 seconds, and that is more than acceptable in my book. The cycle speed obviously increases as you lower the power, so worst case is 1-2 seconds, but often faster.
The spec sheet promises 480 flashes at full power (76W) before the battery is flat. I must admit that I have never run a battery down – I have a spare battery in the charger, and as soon as there is 1 bar left, I switch, and I have never bothered to count. For me the flash can fire so many times on a single battery that I get tired before the flash does! But of course, if you shoot HHS a lot, then 480 flashes may wear down quickly!
Notice that relative to the mk II, the mk III has 50% more amps available, despite the battery’s physical size being smaller. So if your budget allows, go for the mk III for that reason alone – you will not regret it.
Presentation
So the Godox V860 III is a pretty standard speedlite and from the looks of it, it does not stand out from so many other speedlites.
As with more expensive flashes, you can tilt the head both in and up-down direction, but also turn it sideways. This is great for bouncing the light exactly in the direction you want it to. Cheaper flashes often only allow you to tilt up and down.
Modelling light.
An added feature with the mk III relative to the mk III is so called modelling light. It allows you to see the direction of the light before you hit the shutter – provided the head is pointing the same direction as modelling light does! And when shooting into a shoot through umbrella, I find it less useful as the light is rather weak. The idea is good and probably stems from some of the pro gear where the modelling light can power up entire softboxes and really be useful. Here I find it is more a gimmick than anything else.
On camera
The foot of the flash is designed for a specific brand of camera, and you can get a flash for all the major brands. I have flashes for both Fuji, Nikon and Sony, but I know the list is longer and that Godox probably extend is as this blog post ages. So check if there is one your camera.
One cool detail that I think many have forgotten is the ability to have the flash fire in optical slave mode. This is a budget friendly way of getting your flash off the camera and use the flash built into your camera to trigger the Godox flash. In the image above, just below the modelling flash, you can see a red zone beneath the Godox name, and it is where the flash looks for trigger light if you have activated optical slave mode. Of course the slave flash is not very smart and cannot contribute to TTL shooting or other ways of controlling the light automatically, but as a manual way of getting the flash off camera, I think it is a valid option. And it can be an option while you save for a radio transmitter! Which brings me to…
Off camera
Maybe one of the best things about the Godox flashes is that they share protocol and can talk to each other irrespective of the camera they are intended for. When we are talking on camera, you need to buy a Godox flash made for Fuji if you want it to be mounted on a Fuji camera. The foot is made specifically for that brand only. But when moving off camera, only the trigger needs to fit the brand of the hotshoe. The protocol between sender and receiver is brand agnostic.
Transmitters to be mounted on Nikon (N), Fuji (F) and Sony (S) going left to right.
Sounds complicated? I have 3 so called X-pro tiggers. One for Nikon, one for Sony and one for Fuji. Each pro trigger can only sit on a Nikon, Sony and Fuji hotshoes respectively. But they can trigger any V860, irrespective of what camera it is made for.
The x-pro transmitter.
So I use the same flash for 3 different cameras. That is smart. And it works. But of course the trigger is not for free, but compared to other brands where the protocol between trigger and receiver is brand specific, this is simply brilliant!
Living with a V860 III
Admitted, I will never be a big fan of the user interface on the Godox flashes, and the mk III is no exception. I have come to learn to live with the menus and buttons that I find a bit quirky, so it is not a showstopper in any way, but a better designed user interface is for sure on my wish list for the mk IV!
The weight is around 500 grams with battery, and that is some when mounted on top of the camera, but you quickly get used to it. Be careful with handling the flash when mounted on camera – the foot is made of metal, so if force is applied (you drop the camera with flash on a tile floor!) then you may find your flash survives but the hot shoe on your expensive camera is shredded. So take care or shoot off camera!
The user interface could be better. It is not bad, but not super intuitive either.
I don’t think you will miss any technical features with the V860 mkII. It supports HSS, front/rear curtain sync, optical slave, TTL, exposure compensation +/- 3 stops, zooms between 20 and 200mm, has built in reflector and has a focus assist light. There are so many groups and channels that even 10 wedding photographers working in the same space could find a seperate channel combination to work with! Your demands may be more advanced than mine, but for me this flash has all I need and then some!
The light is as it should be – 5600K +/- 200 K. I have not noticed any changes or inconsistency over time with the temperature of the light, no matter if the flash is just started or has been at it for a long time.
My wish list for the Mk IV, other than a better menu system, is the ability to charge the battery via the USB-C connector in the flash, i.e. that I can charge the battery without removing it from the flash. That would be cool. But it is nice to have.
Conclusion
As you have probably guessed, I like this flash! It gets the job done, and without the quirks that some other flashes have. In short:
Excellent value for money
Powerful and compact battery
Tons of technical features
Great wireless system
And the improvement points are:
More power to the modelling light
Re-designed menu system (by a photographer, not a software engineer!)
Some say that photography is writing with light, and as such the right light is more important than anything else! Here the Ninja 10B LED light from Viltrox comes in handy. It was kindly sent to me by Viltrox for review, but the review here is by me and not Viltrox.
Some prefer flash light in a studio, but for video that is not of much use and also steady light has the advantage that you can see how the light hits your subject(s) before you start shooting or recording; you don’t have that convenience when shooting with flash. In that sense there are many advantages to using steady light over flash light.
The Viltrox Ninja 10B. Here with the lamp cover mounted (yellow triangle in the centre). On the side you see the green handle bar for angle adjustment. At the bottom the handle for hand holding the lamp.
The Viltrox Ninja 10B comes in several variants, and if you want to go mobile say because you shoot outdoors, you should definitely take a closer look at the options with battery supplied over at the Viltrox homepage.
In the box
In the box the main items is the light itself, a reflector (Bowens interface) and a power supply – and it is all delivered in a nice little bag for easy storage and travel. There is also a lamp cover that protects the LED lights during transport – it is important that you remember to always put to cover back on the light during transport so the LED panel is not exposed to dust or hit by anything.
My copy came with a handle to use the light handheld. Weighing less than 500 grams, handheld is a good option, although I often mount my light on a stand.
The adapter retaining clip keeps the power supply at bay.
A really useful item is the so called adapter retaining clip, that allows you to secure the power supply to the stand, so it is not hanging in the power cable on the rear of the light. It may sound like a small thing, but when you first get used to this adapter, you wonder how you could do without it!
A bag is in the box. Nice for both carrying the light and storing at home.
The light is delivered in a nice bag that you can use for both transportation and storage.
The light
The light is a 120 watts (!) LED light with a color rendition index above 95, which is bound to give you precise colors at any color temperature. The kelvin values ranges from 2800K to 6800K.
120 Watts at your disposal!
My current studio light is around 100 Watts and I have never felt that 100 Watts was too little, so 120 Watts is more than sufficient if you like me work in a small studio.
Viltrox Ninja 10B LED light rear controls.
Controls
Other than the on-off switch, the control that you will use the most is the big dial on the rear of the Ninja 10B: Turn it to control the brightness of the light (0-100%) and push it once to switch to control the color temperature (2800K to 6800K). Push it again to switch back to brightness control. A nice clear LCD on the rear will show you your selections.
You have 19 channels and 6 groups (A-F) to choose from, so I don’t think you will run out of options for finding an available combination.
Remote control
You can buy a remote control as an additional item – it is not supplied with the light by default. But I doubt you will miss the remote because Viltrox has an app to control the light entirely. Download the app, and you have a remote control at your disposal!
The number of options and details you can control with the app is much better than what the controls on the rear of the light offers, so I quickly got in the habit of using the app for controlling the light. If you like to have many pre-defined options to choose from, then you will love the app: you can choose between pre-defined scenes such as a campfire, an ambulance, candlelight, etc
The app right is a fine alternative to the physical remote as described on the manual to the left. The physical remote you have to buy seperately.
A cool detail is that the app for this light is exactly the same as for the Weelight light sticks, and it works via bluetooth communications. I don’t know how they do it, but when you download the app, the app and the light is connected automatically. Not setup or connection procedure required! A cool detail is that you can turn the light off using the app!
Price and conclusion
The price of the Viltrox Ninja 10B here in October 2022 is around 330 USD (there is an introduction offer – you can take a closer look at Viltrox homepage to get the details). I think that is a fair price and you get a really good solid light with good build quality.
The handles carved out in aluminium is a nice touch.
The only issue I can find with this light is that the fan is quite loud. Even though it is possible to adjust the fan speed into 3 levels (50%, 80% and 100%), it did not really change the fan speed, and the fan kept on going when the light was dimmed down to 0% or I had turned off the light via the app. For video recording, this is an issue, as the fan noise is picked up by the microphones mercilessly and it is difficult to edit out with noise cancellation in post. So you may find that this light is primarily for photography and video where the sound is added later.
The Viltrox adapter for Nikon Z-mount enables you to use your Nikon F-mount glass with Nikons mirrorless cameras, such as the Nikon Z6 or the Nikon Z50. It is intended to work exactly like the FTZ adapter from Nikon, making it possible for you to use your F-mount glass on a Nikon Z mirrorless camera body.
You need to study the list of compatible lenses carefully, as Viltrox do not promise to support all lenses. Selected lenses from both Nikon, Tamron and Sigma are supported according to Viltrox, but here I have only tested with Nikon lenses on my Nikon Nikon Z6ii with camera body software version 1.3.
It is my impression that Viltrox has put in an effort to make the adapter work with lenses with built in AF motors (AF-S and G), including image stabilization and obviously EXIF information. I have been shooting with the 70-200mm f/2.8 G lens extensively, and it works like a charm. I have also used it with my wide 16-35mm f/4 G ED and although I felt the AF was a tad slower than with the Nikon adapter, it also worked really well (speed of AF with a wide lens is not critical to me).
The Viltrox NF-Z mount adapter. Notice both the USB-C plug bottom left on the adapter and also the button next to it, reserved for future appliances.
However, my older lenses seem to work less well:
My good old 135mm AF f/2 Defocus Control lens, I could get the on-camera aperture selection to work. It was simply stuck at f/1 and did not move no matter how much I turned the front command dial. The Nikon adaptor worked fine with this lens.
I got the “FE” message when I used my trusty 28-105mm AF zoom lens despite it being locked at the minimum aperture, but a software update from Viltrox set that straight.
So my conclusion is that the adapter from Viltrox does not have the same wide coverage as the Nikon original in terms of lenses it will work with, and that you should consult the list of compatible lenses carefully before investing.
For the AF lenses that are dependent on a AF motor in the camera body, the autofocus will not work with this adapter, as there is no motor built in. This is the same for both both the Nikon and Viltrox adapter, so no difference between original and copy here.
Build quality
Can you tell the difference? Viltrox left, Nikon original right.
The original FTZ adapter from Nikon and the NF-Z adapter from Viltrox are very similar in built quality. The Viltrox is 146 grams and the Nikon is 131 grams. Both of them appear very solid and both of them lack a gasket towards the camera side to keep out moist and dust.
Nikon left, Viltrox right.
One of the big differences in terms of appearance is that the Viltrox adapter has a USB-C connector, which enables you to install new software updates in case Nikon releases new software for their camera bodies or lenses, that the Viltrox software needs to adapt to. Also, the Viltrox adapter has a button prepared for future use – right now I don’t think it has a function. So the Viltrox adapter is pretty well equipped to deal with future changes, provided of course that they will continue to develop the software for the adapter.
Price
As far as I can tell, the Viltrox adapter does not do anything more than the Nikon original adapter. In fact it does a little less, as the range of supported lenses is less. However, where the difference kicks in is the price. I will not quote prices as inflation is crazy this day and age, but he Viltrox is easily 30% cheaper than the Nikon original. And for the lenses supported by the spec sheet most likely does exactly the same as the Nikon original. And to me the build quality seem to be on par with the original Nikon. Add to this the fact that the FTZ mark 1 adapter has been difficult to get from new since the release of the FTZ mark 2, then you start so see why the adapter from Viltrox starts to be interesting.
Conclusion
The Viltrox adapter to me seems to be very close to the original from Nikon. The build quality is very much the same and the adapter seems to work well to provide auto focus, image stabilization and all the modern features that say a G-series lens support. And then the price is significantly lower – 30% or more.
So what not to like? Well, I would recommend that you study the spec sheet to see if the lenses that you plan to use with this adapter is covered. It may not be the case. After all, Viltrox are reverse engineering the software to behave like the Nikon equivalent without Nikon providing an open source or insight to the inner workings of the adapter. So it will probably be so that the lenses and camera bodies supported are less than the original. But then again, if all your lenses are supported, then this may not be important to you and the price differences is worth a serious consideration.
The Weeelite K21 RGB Light Stick is as the name says simply a stick of light. Not much to report here I thought – it is just a stick of light, but it has a few tricks up its sleeve that won me over after working with it for a few hours.
The Weeylite is here hiding behind the dark vase to the right and used to enhance toe shape of the red vase to the left.
The Weeylite K21 gives around 8W of light, and back in the day when we had incandescent lamps, this is equivalent of around 75W of light. So it does give a significant amount of light, but of course it is not enough to light up a large studio or the like. But it will be more than enough if you make Youtube videos and want some light close to your face or want it to light up the background to make it more interesting. I have also used the Weeylite for product shoots, where it is brilliant to backlight a product, as the stick is easy to hide.
Not much, or?
Admitted – it doesn’t look like much! It is just a stick of light approximately 25 centimeters long. But there is more than meets the eye!
When you see the product, it does not look like much – it is just a stick of light, where the light (ends excluded) is approximately 25 centimeters long.
A brilliant little detail: The Weeylite K21 has threads in both ends, so you can mount it on a tripod or the like.
But the first thing I notices when unpacking it was the threads in both ends, making it possible to mount the light on a tripod or the like. And even better, the Weeylite K21 is also magnetic(!) so you can mount it on many surfaces with or made of metal.
The Weelite is magnetic! Here I have put in on my computer screen for demonstration.
That is a brilliant little detail, that I only found out by studying the manual. And the manual is short and sweet, just like I like them. And easy to understand. In fact, it is not a manual, more a large piece of paper.
The manual is short and sweet. You will quickly get familiar with the Weeylite K21.
Interface
The Weeylite K21 chargers via USB-C! Brilliant!
The Weeylite holds a battery, so you don’t need to worry about cables or the like when you shoot. And I was glad to see that it charges via USB-C, the new EU standard – brilliant!
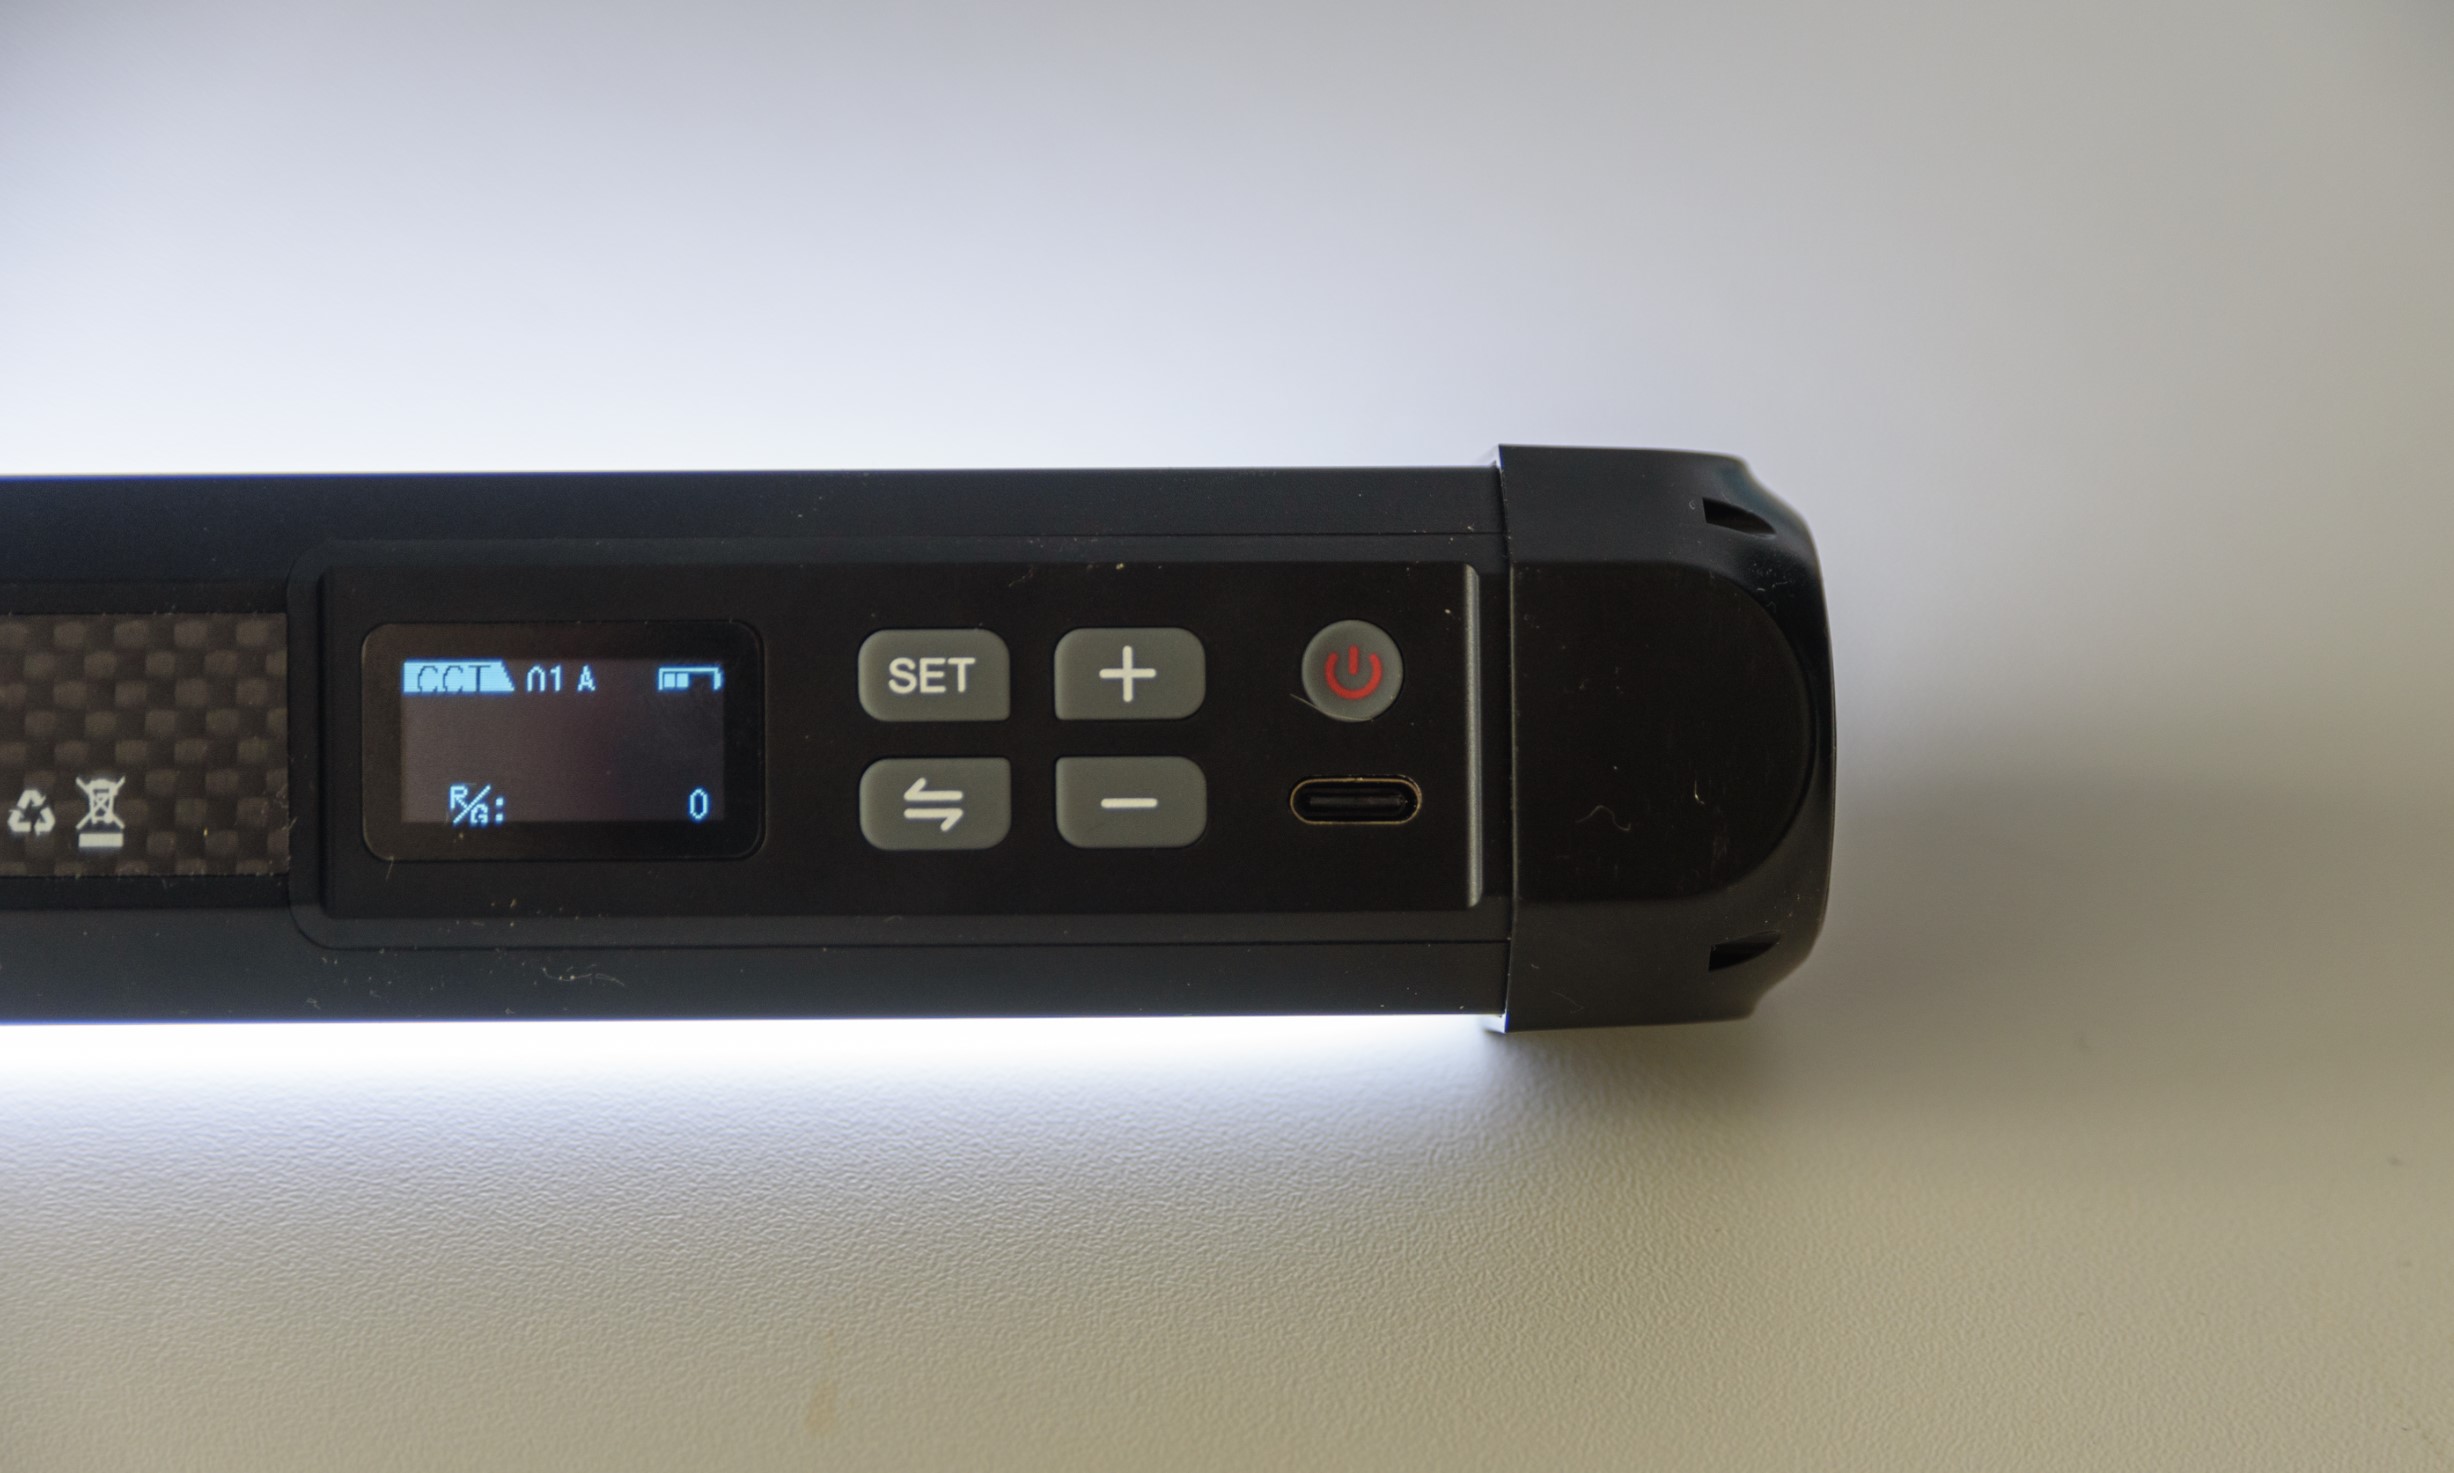
If you don’t want to use the app, there is a small LCD screen with a few buttons to control the light settings. Also notice the USB-C charging port.
The interface is very simple: A small LCD screen and 4 buttons. You can of course control the strength of the light between 100% down to 1%, and the color temperature. The four buttons work well and my only complaint is that it would have been nice had the buttons been backlit, as I often work in the dark when applying the light from the Weeylite.
But here is the thing that really won me over with this little product: the app. It is simply brilliant – and you can of course see all the settings on your smartphone via the app, also in the dark. The app is so good that I hardly ever use the buttons on the Weeylite K21 itself.
The app impressed me! It links to the Weeylite K21by itself during installation, and you can control all aspects of the light via the app!
First, the app connected to the Weeylite K21 without me doing anything but downloading the app! Not sure how that works, but it did. And then you can control several lights is channels and groups, just like you know it if you have worked with wireless flashes – brilliant!
And the app gives you so many options for controlling the light that it is a bit crazy. It has pre-set effects like weld, candlelight, flame, TV, weld etc, and you can also configure the lights Kelvin value, saturation, brightness and individual color channels, just to mention a few. It is very impressive. And of course you can turn on and off the light via the flash.
Conclusion
If you are in the market for a small light that you can use for videos or product shoots, then I think you should really consider the Weeylite K21.
It is compact, gives a lot of light, easy to mount via either threads or magnetism and the app to control it is simply brilliant and gives so many options that I think even the most demanding will find their requirements are met.
China based Synco kindly sent me a copy of their product P1L, a wireless microphone to be used with the Apple iPhone. It comes in other variants than this one, but as I have an iPhone 12, this is the version that I asked to have sent for review.
The price on B&H is 89 USD (April 2022), but be aware that taxes and transport costs may apply if you buy online, so make sure to check this before you buy.
If you don’t know why you should be interested in a product like this when you are producing videos, the answer is simple: sound is super important if you want people to watch your videos. It may sound counter intuitive, but the sound is more important than the visuals. If you don’t believe me, try watching an interview on CNN or the like where they are interviewing someone far away with poor sound – I bet that you will have trouble maintaining focus on what is being said. Good sound is vital.
And another point – good sound is often equal to almost no distance between microphone and sound source. The more distance – the more difficult it is to produce great sound. And this is why it makes a lot of sense to have a wireless transmission from your microphone to the receiver, so you can get the microphone as close to your mouth (or the sound source) as possible.
Light and simple
The microphone comes in a small box wrapped in thin plastic, so you know you are the first one to touch the product since it left the factory.
In the box you will find a USB to USB-C cable, a small cable to hook up a headphone to the receiving side and a power bank that both holds and charges the sender and the receiver.
When you open the power bank, you will find the sender (tx) and the receiver (rx) sitting in the drawer.
When you take the transmitter (tx) out of the cradle, it will automatically start up. The receiver (rx, to the left above) switches on as soon as it is inserted into your iPhone. The two combined, i.e. as shown in the picture above, is only 17 grams in total! This must be the lightest sound option out there available!
Above the receiver is inserted to the bottom of the iPhone. It is very important that the connectors on the iPhone a free from dust and dirt, as the receiver obviously needs good connection to the iPhone to work properly. The sender and receiver are paired from the factory side, and will connect super fast and show that they are connected by switching on the LEDs on both tx and rx in a “rolling” manner. If there is no connection, the LEDs will switch on and off at the same time, so you get a blinking bar instead of a rolling one.
All this worked out of the box and I had not problems making this work. There is no need for installing an app on the iPhone or the like.
If it does not work and you need the tx and rx to re-connect, simply put both of them in the cradle, close it and hold the button at the end of the power bank in for 3 seconds and more, and the re-connection is made in a matter of seconds. You can see the button to push for 3 seconds above, along with the USB-C connection to charge the power bank.
Charging the tx and rx? Happens automatically when you put them in position in the power bank.
The microphone comes with a little spring laden clip that allow you to attach it easily to your clothing. In the image above I have attached it to my iPhone just to illustrate how it works. The microphone sits on top of the sender, i.e. to the rightmost above.
Above you see the transmitter with the hole into the microphone closest to the camera. The clip to attach it to clothing is now at the bottom of the image.
Once you have put the receiver into the iPhone and attached the sender to your clothing – you now have an operational wireless microphone! There is no option for adjusting the sound level, so you will have to do so in post processing if you desire, but I found that it does a good job selecting a good sound level, as long as there is around 15-20 centimeters between the microphone and your mouth.
The sound is really good and pleasing. You can hear very clearly what is being said and I like the result. I did however find that when on the beach or other windy places, I missed the option to mount a “dead cat” to reduce wind noise. Also, it would have been good if there had been a connector to allow me to use an alternative microphone, so I just used the sender/receiver setup, but maybe this is not a fair request for a product at this price point.
Synco promises up to 5 hours of operating time with the microphone on – I must admit that I have not tested this part, as it is much more than what I need. This also applies to the reach – Synco promises that the setup will work with 150 meters (!) between microphone and receiver if line of sight, and 50 meters otherwise. I have tested it and found that it delivers to promise. Just like with the battery, this is MUCH more than I will ever need.
There is an option to listen in to your own recording while recording and that is what the small adapter is for. However, it gives a cabled connection to the receiving side, and hence the whole point with the wireless setup is lost. I think this option is only relevant for studio usage.
Finally I have not tested the voice effect. I think it is a bit of a gimmick for a serious product, so I have simply ignored this feature. I prefer to do my post processing of sound in Premiere Pro and the like, and hence have no need for this feature.
Conclusion
Below my list of pros and cons. I really like this product for its ease of use, being super light, producing great sound and not breaking the bank. If you use your iPhone for video recording, this product could lift the quality of your sound to a new level. And for such use case, I can recommend this product.
Pros:
Price / value
Good sound
Light solution (17 grams)
Long reach (150 meters LOS, 50 meters NLOS)
Easy to use – starts and connects easily
Charging case included
USB-C for charging
Monitoring option (although only for studio use)
Cons:
No option for mounting noise reduction / dead cat
No option for using own microphone
Connection to iPhone seems fragile if dropped accidentally
The XTAR GP2 is designed to give you extra power for your GoPro 5/6/7/8/9/10 while you are out and about. It works very much like the cradle for my iPods – it is a storage case and a power bank at the same time.
My iPods next to the XTAR GP2. They solve much the same need: A carry case and a power bank at the same time.
At home
You simply charge the GP2 while at home, and then the extra battery in the GP2 will enable you to charge 2 GoPro batteries when on the move. Notice that when the GP2 is unplugged, i.e. out and about, it only charges one battery at a time, but it automatically starts charging the second battery as soon as it is done charging the first one. When powered via the USB-C connector, it charges both itself and docked batteries at the same time.
The XTAR GP2 itself is charging here. There is a small USB-C connector on the rear to feed the power to the GP2. Notice the little rubberized door that can seal off the connector from dust and moist.My copy came with a wall charger (rightmost) and a cable to fit into the USB-C socket on the rear of the GP2 dock, but if you already have a USB-C charger, you may not need this.
The indicators are easy to learn: The GoPro batteries show red for charging and green when fully charged. The XTAR GP2 itself has a 4 bar indicator all with white LED’s – 25% for each step. In the example below the GP2 is fully charged, as is the battery to the right, whereas the battery to the left is charging.
Battery to the left is charging (red). The GP2 is fully charged (4 bars). The battery to the right is fully charged.
Older batteries
To work with the older and smaller batteries for the GoPro 5/6/7/8, you have to buy an additional battery holder that makes the smaller batteries fit snugly into the same space as the batteries for the 9 and 10.
Battery for the GoPro 5/6/7/8 mounted in the holder, so the battery gets the same size as the battery for the GoPro 9 and 10.
There is a little hole in the holder, so you can keep the smaller battery and the holder together as one unit, this is especially useful when you pull the battery out of the charger.
The GoPro 7 battery to the right and the battery holder to the left. Notice the hole in the battery holder that fits the handle on the battery, so that you can pull holder and battery out of the charger as one unit.
Memory
Another nice feature is the ability to store 2 memory cards inside the XTAR GP2, so you have a carry case for both power and memory.
As a nice touch, the XTAR GP2 also takes 2 memory cards for the GoPro and enable you to store them together with the battery. In this way you have backup for power and memory in the same place.The XTAR GP2 charger right, my battery for the GoPro 8/9/10 to the left.
Use
The lid on the case closes using magnetism, and it works really well. In order to fit into my messy camera bag, I close the lid with a rubber band so I am sure the lid stays closed during transport. I would hate to start searching for micro SD-cards in my not-too-orderly camera bag!
Price and place
Here early March 2022 the product has not yet been launched, but it will happen very soon. The retail price is expected to be around US$40, but if you are one of the first to buy, you may find that it comes with a nice discount. XTAR plan to sell the product via Kickstarter first, then on XTARdirect (XTARS homepage where you can make purchases), then Amazon store and finally Aliexpress store is planned.
Conclusion
This product quickly made its way to my camera bag. I can now have one battery in my GoPro 10, and 2 ready in the GP2, and then I can do a round robin to continue to have power in the GoPro. The manual says that the GP2 gives 12 hours running time for the GoPro camera – I have not tested it, but it is also far beyond my needs.
I find the XTART GP2 to be a relatively small and light product that fits into my camera bag with no problem. It solves my worry to run out of both power and memory, and as such I can really recommend this product if you find yourself in the same situation. I also like that the design enables you to use this product with the smaller batteries for the GoPro 5/6/7.
The only improvement I can think of is that it would be nice to be able to lock the lid, but for now a rubber band takes care of that.
All in all I can recommend this product.
Find more information about this product via this link.
This is not a product designated to photographers. I know. But backups of your photography data is so important working as a photographer, that I take the liberty to review this product in that context.
I have several of these drives. I do backups at least every month and as part of my year end procedure. And do I then store it in a drawer? No, not immediately. I drive the backup far away from where I live and store it in my summer house (swapping backups with a friend also works). That way I am safe in case of fire or theft.
You may think that no one breaks into your house or that a fire is unlikely, but recently we have had a client where half of their house burned to the ground, and this was the part of the house where the pictures they had bought from us were located. The first thing they asked us was if we could reproduce the images – and I was happy to say yes, knowing that I had several digital copies of the images in several locations.
The tin
WD My Passport external HDD 4TB
This little 4TB drive weighs around 200 grams (a little less if you go for the 2TB or 1TB versions). I find the price around 130 EUR here in Denmark very fair, but in the US and UK they can be bought for less than that. 4TB is a massive amount of data, and I manage to put several years of data on a single drive.
Content
In the box: The drive itself (blue), a short guide that is more security details than anything else and the USB cable.
There is not much to say about the content of the box: A drive, a little guide and a USB cable. That’s it. What you cannot see is that the drive is pre-formatted – you can get versions for both Windows and IOS. I got the Windows version.
There is also pre-installed software on the drive that allows you to encrypt the data and facilitate the backup process. I have not used this part – I simply use the Lightroom facility “export this folder as a catalogue”; then I know I can import it again and get all the edits etc maintained. Probably also possible with the backup software provided by Western Digital, but I prefer a process that is simple and low-tech.
Operation
The drive in use. The mouse top left and the keyboard illustrates how small the drive is. The little light on the side flashes when the hard drive is working.
The drive is quiet. If you lift it while it is working, you can feel the gyro effect of the hard disk drive spinning fast, but you can hardly hear it. The little light on the side of the drive flashes when the drive is working and is steady when not. If the drive is working, then it is vulnerable to say being dropped or bumping into something. The head of the drive will potentially touch the drive with severe consequences. So only move the drive when it is not at work.
There is no on/off switch. In the beginning I found that a bit odd. But the drive can sense the power disappearing and manages to park the head before the power runs out. It took me a little while to get used to.
I backup using Lightroom as I previously stated, and the combination of Lightroom and this drive is no speedy Gonzales. It takes time. But as it says very little, you can have the backup running while you are working in Lightroom; it seems to me the backup process takes very little energy from Lightroom, and as such the time required to do the backup is not issue for me.
Verdict
You may have guessed that I really like this product, as I have several of them. It provides an astonishing amount of room for data (4TB) at a reasonable price of 130 EUR, the operation is silent and the drive is only 18mm thick, and 7,5 x 10,5 cm in size. The USB connector is not USB-C, but it still manages to get the data safely across and power the drive at the same time. HDD may not be the latest and most fancy technology, but for backups I prefer proven technology, and that it certainly is. I can recommend this product.