Review: Bosch VitaBoost blender MMBH4P3B

Time to replace

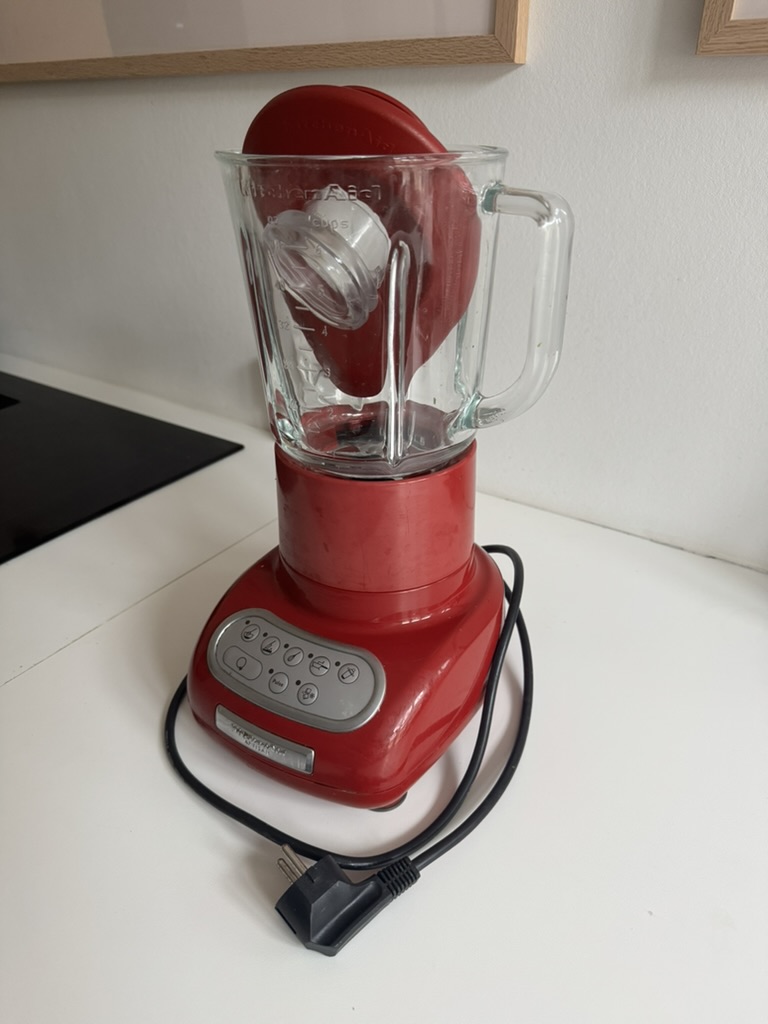
My old Kitchen Aid blender started to send smoke signals when used it at high speeds, and although I am not happy about replacing a trusty friend in the kitchen, the last few times I used the blender, the smoke signals became more and more intense at it was time to part ways.

Bosch VitaBoost blender
My 14+ year old Kitchen Aid blender started to send smoke signals, and I figured it was time for a replacement.

After a lot of googling and review reading, I actually gave up for a short while, thinking that the number of options available was simply too overwhelming for me to manage. Only because we came across a hardware store in our local neighbourhood and because they had the Bosch VitaBoost blender (MMBH4P3B) on heavy discount, did we decide to go with this one. At approx 220 EUR it seemed like a budget friendly alternative to many of the more professional / enthusiast blenders out there.

Bosch VitaBoost blender
This is the model under review here. Notice that there are other models from Bosch that looks like this one, but has more buttons and programmes and hence also a higher price.

Notice that this blender is the MMBH4P3B one. There are other models from Bosch that look like it and have more programmes (and hence buttons on the front), but they also come with a more steep price. I find that the one reviewed here is a good compromise between features and price. But be aware that my experience with feature – be it dish washers or washing machines or ovens – is that if I decide to pay for features and advanced programmes, I enjoy it for a little while, and then after a few months I am back to using the same few features that I always use. So I have learned my lesson and now try to stick to the basics when I choose my hardware. Your milage may vary, of course!

Unboxing

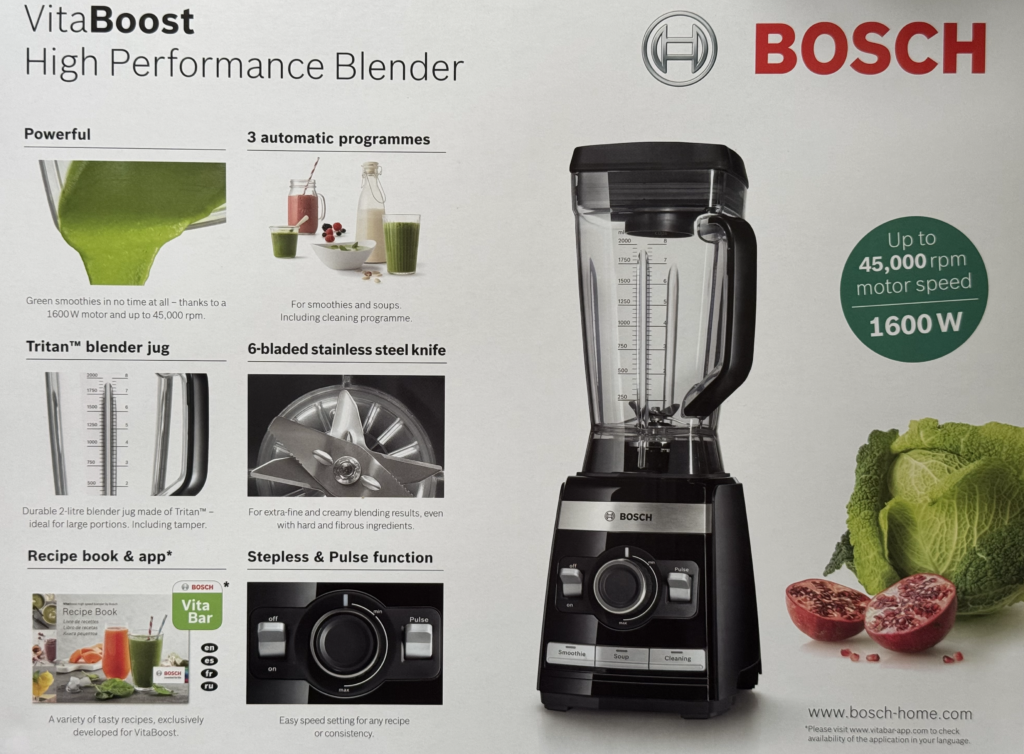
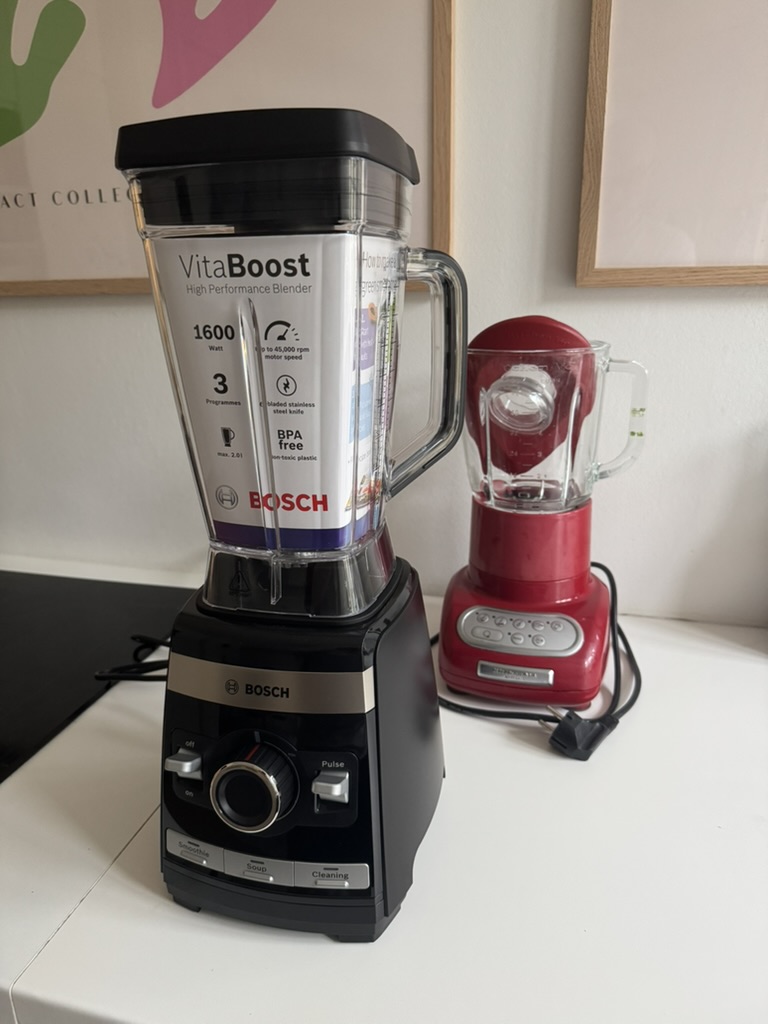
The tin explains pretty well what you can expect to find in the box and the features the blender offers. Below a picture of the tin that you can study to find all the marketing peoples points. To me, the most important is a powerful motor and sharp blades.

When we bought the blender, our only question to the sales person was if the blender would be able to crunch ice cubes, and this was confirmed, as long as the ice cubes are not alone in the blender jug – there always has to be some sort of fluid to go along.

The promise on the tin: Powerful motor, 3 programmes, 6-bladed knife and a recipe book. I find the Bosch VitaBoost blender delivers on all promises made here.

Out of the box you will find the blender jug and the base unit with the motor, and that is basically it. There is also a lid (black) and a little stick to push ingredients into the blender – useful in the beginning of the blending process.

Bosch VitaBoost blender
Fresh out of the box. The features of the blender is shown in the paper filling the blender jug. 1600w motor is a lot of power!

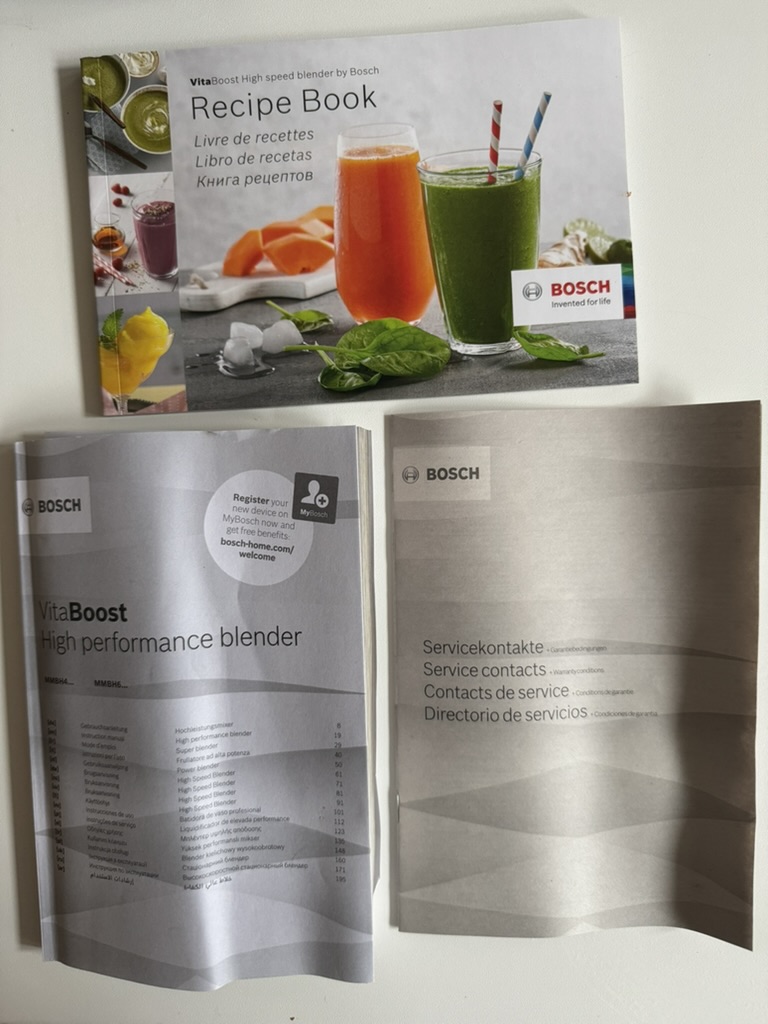
In terms of literature, you’ll get 3 books. A recipe book, a service contract (have you ever read it?) and a user guide. The user guide looks intimidating at first, but it is actually quite short and sweet. Only because they cover many languages the guide became a booklet. Effectively, I think it it is only 4-5 pages per language and a few shared illustrations.

Bosch VitaBoost blender
You get 3 books in total: a user guide, a service contract and a recipe book.

Please take notice of the safety instructions from Bosch as printed in the user guide. Just to mention a few: Make sure the cover and lid is always attached to the blender and make sure the content is never hotter that 80 degrees celsius, otherwise  the blender jug can be damaged.

Bosch VitaBoost blender
A nice little booklet with colorful illustrations and recipes is part of the package. Ingredients in the right hand side and the result illustrated to the left. Simple, healthy and tasty.

First use

After cleaning the blender, I decided to make a simple lunchtime smoothie consisting of spinach, carrots, avocado and juice. And just using the manual dial to control the speed.

Bosch VitaBoost blender
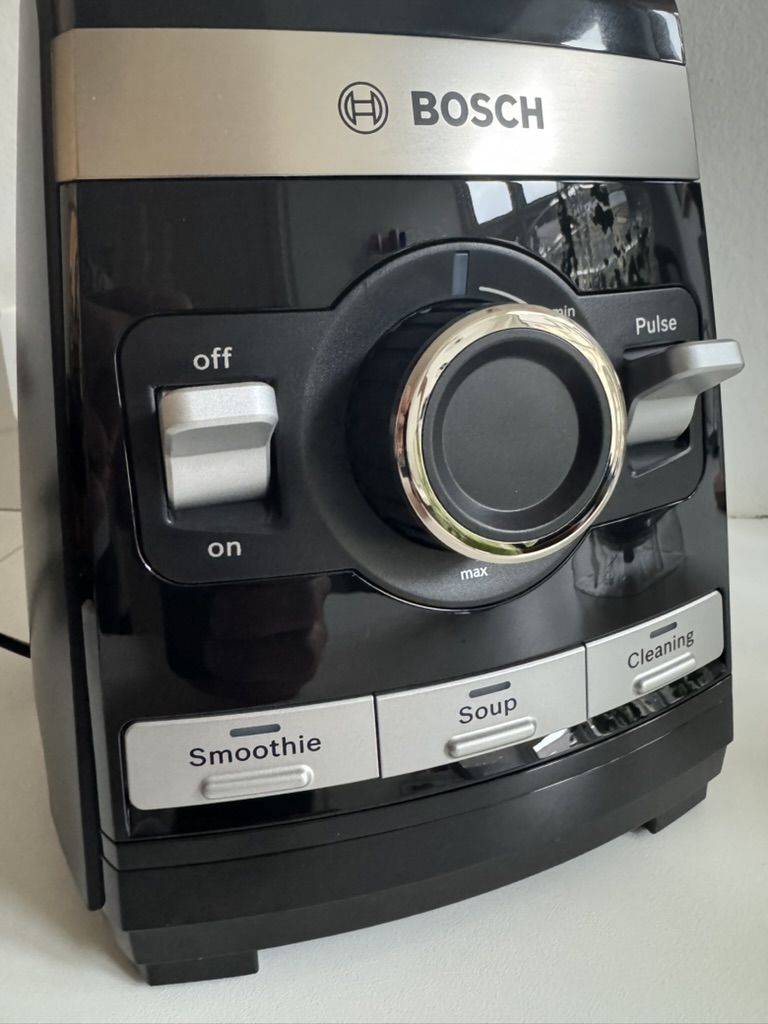
The big dial in the middle is for managing the speed manually. The two switches left and right is to turn the blender on/off and turn the pulse function on/off. Below the 3 programmes that manages speed and pulse on their own.

I was happily surprised by a few observations:

  • the blender stands very still even in the initial phases of crunching the ingredients,
  • it is more quiet than my previous blender and
  • I only used a fraction of the full power to crunch the ingredients into a smoothie.

I don’t know about you, but when I use a tool for the first time, I find that first impressions last. And this was a VERY good first impression, so I was relieved. It looks like a good investment! The only negative side I found for the first time use is that the black lid is a bit difficult to remove. I am sure it will improve as I get to know the blender a bit better.

Bosch VitaBoost blender
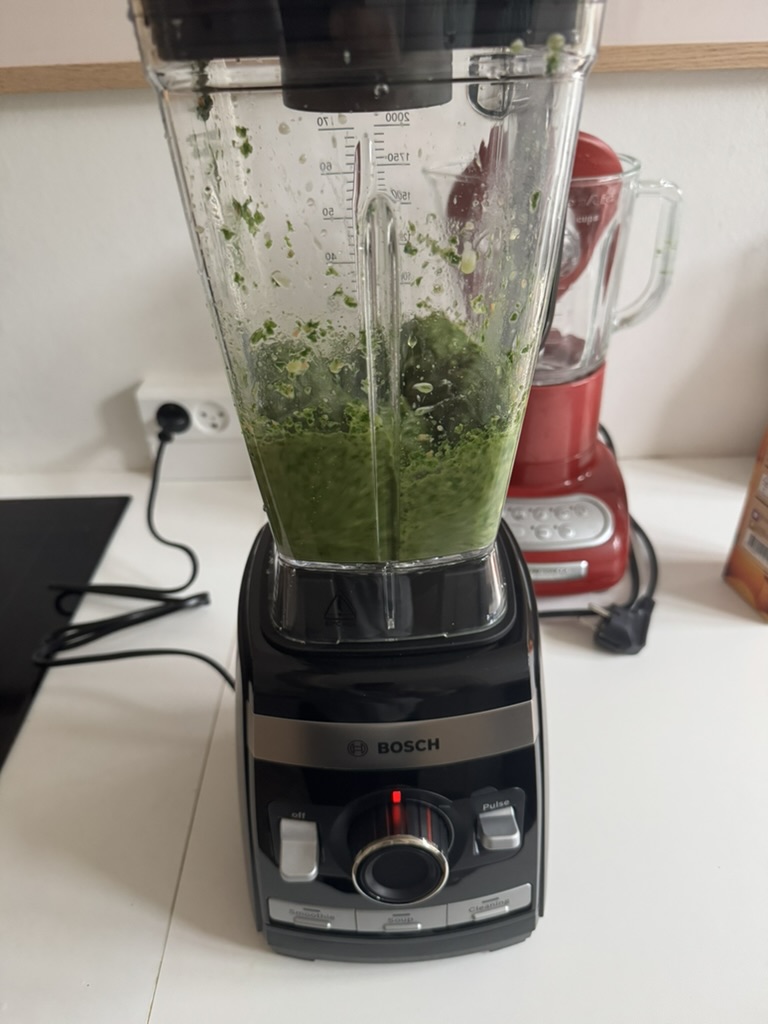
The blender in action. Notice that the central dial shows how little of the speed I am using to make this smoothie.
Bosch VitaBoost blender
The result of my first use of the blender: a smoothies with lots of spinach and a little carrot. Super healthy! Remember to clean the blender before you use it the first time!

Cleaning

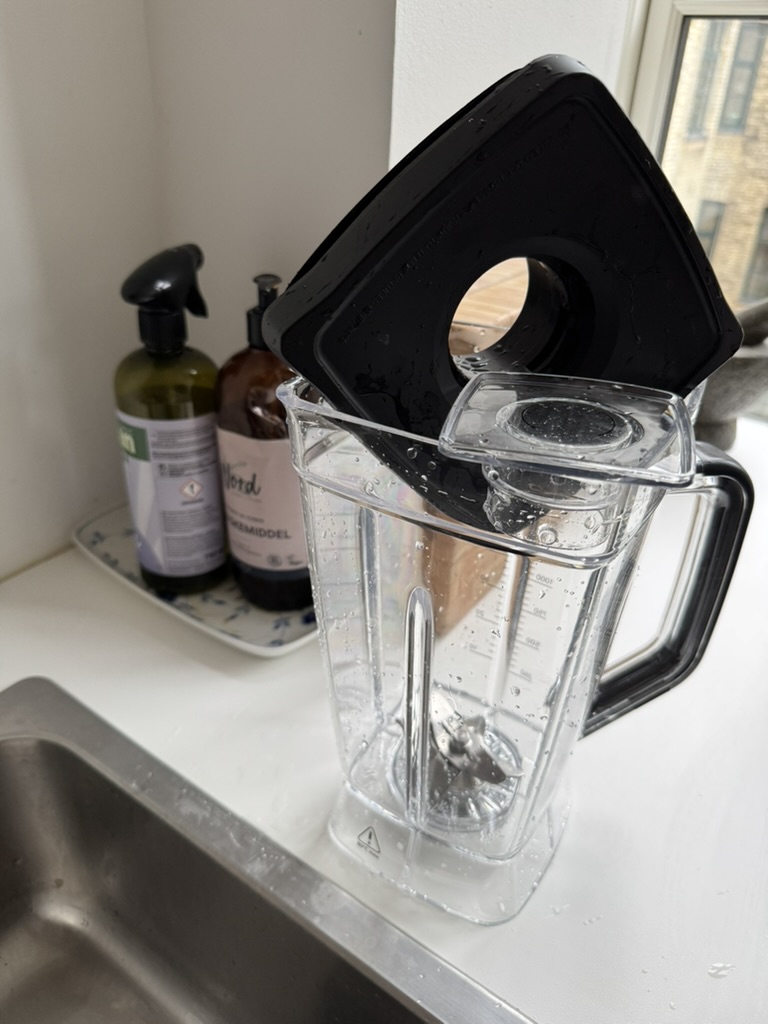
Cleaning is never the fun part, right? But there is a programme that the blender offers (one of 3) where you simply fill the blender with 1.25 liter of water and a drop of soap, and then the cleaning programme takes care of it. Of course you have to rinse the blender jug and lid in water afterwards, but the base cleaning is done after running the programme. I really welcome this feature, as ease of cleaning is also an important part of me continuing to use the blender in real life.

Don’t add too much soap. Just a drop. Otherwise you’ll have foam all over your kitchen even with the lid tightly in place! How do I know this? Hard earned experience…

Bosch VitaBoost blender
The blender jug has a nice scale to help you fill in the right amounts of liquids.
Bosch VitaBoost blender
The cleaning programme in action.
Bosch VitaBoost blender
After running the cleaning programme and rinsing the blender jug and lid in fresh water, the gear to me appears perfectly clean and ready for the next job. Just fill in 1.25 liters of water and a drop of sulfo before running the cleaning programme.

If you are more careful than me in terms of cleaning the blender, you may want to run it via the dishwasher after running the cleaning programme, but I often find that I use the blender more often than I run the dishwasher, so I try to keep it simple and rely on the cleaning programme.

Hot soup straight out of the blender?

This was news to me: Apparently the friction between the blades in the blender and the food in the blender generates so much heat that you can use this for heating up the content to around 5-70 degrees celcius! The “only” precondition is that the speed in which the blades moves through the soup is very, very high.

This is where the 1600w motor and the sharp blades show their impressive capability: simply throw the ingredients into the blender, put on the lid and turn on the soup programme (bottom right button), and after approx 5 minutes the blender will present a hot soup, straight out of the blender jug!

Bosch VitaBoost blender
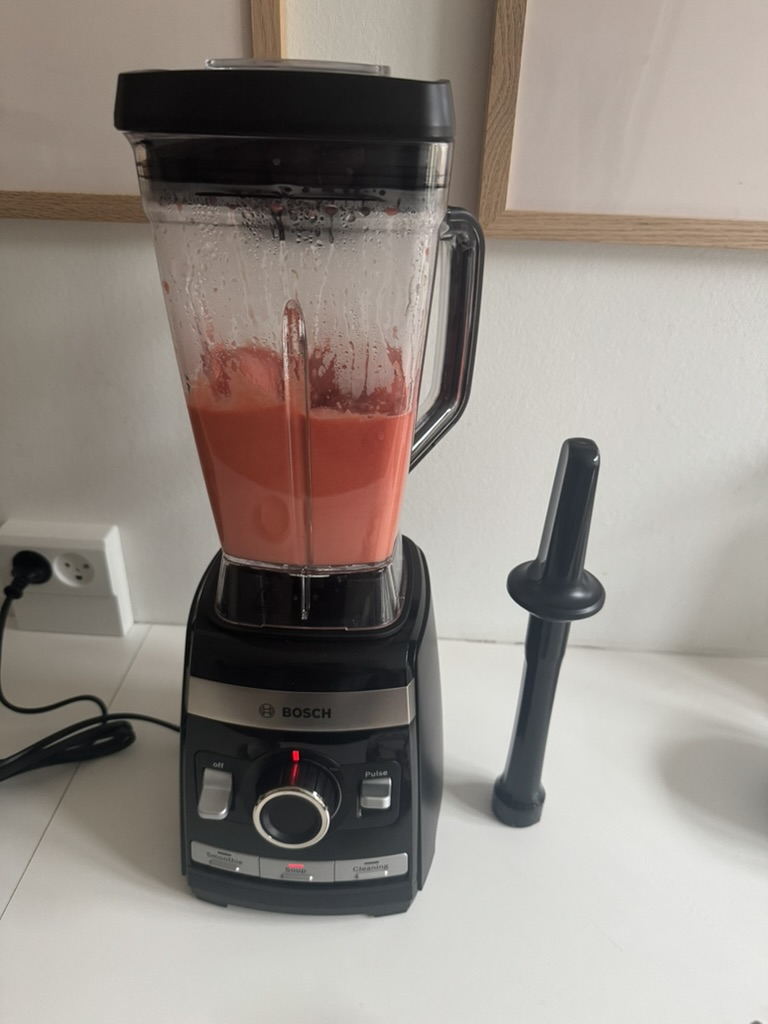
The blender at work with the soup programme activated (middle button). Notice the stick to push down ingredients – useful in the beginning of the blending process.

Trying the programme for the first time, I simply emptied the fridge and kitchen for whatever I found useful in a soup: potatoes, onions, carrots, etc. And then the blender did the rest! The blender is working hard when the soup programme is on and it is noisy – not sure my neighbours appreciate the noise level when running the soup programme! Also, be aware that a lot of air is pushed out on the back side of the blender – I think a lot of cooling is required to cool down the engine when working this hard.

Bosch VitaBoost blender
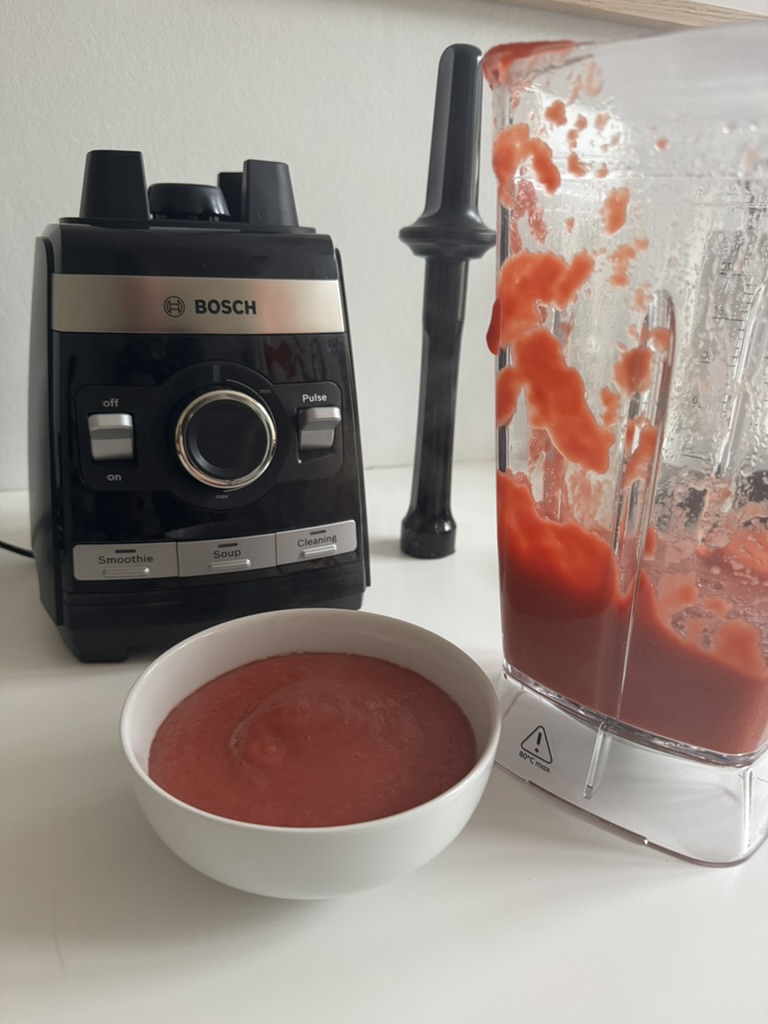
Soup after 5 minutes of hard work for the blender. Delicious!

But, the result is wonderful! Season the soup with salt and pepper and add a slice of good bread and you are in for a healthy (and hot) treat!

Conclusion

I’m happy! This is an excellent tool that delivers exactly what I need without breaking the bank. Yes, there are more advanced versions out there, but they also come in a different price bracket. The blender is steady under operation, not too noisy, performs really well for my simple use and helps me cleaning it after use via a cleaning programme.

The true test is in the long term performance! Will the blades be dull over time? Will the motor start sending smoke signals in 2 years time? Who knows. But we’ve had a good start, Bosch and I, and that is all I have to report right now. Thanks for reading this far.

Further reading

Review: Roborock S7 robot vacuum cleaner

Review: Worx Landroid M700

Review: TP-Link Tapo C100 WiFi Camera

With a price around 30 EUR (Europe), my first thought was that this little WiFi enabled camera could not be of much quality. But I was wrong! Read on to find out why!

I find the market for WiFi cameras very difficult to “read” – there seems to be so many vendors and so many options from each vendor, that it is overwhelming. Also, I know that once you get “stuck” in the eco system of a particular vendor, it can be an investment – both in terms of time and money – to switch to a new vendor. So after a few weeks of trying to find some way to navigate in this universe, I simply gave up and went for this relatively cheap camera just to see what it would do. And I was positively surprised.

My use case is simply to be able to follow what is going on in my summer house when I am not around. My plan is to start in-door – I may add outdoor cameras later. But I decided to start small and take it from there.

TP-Link Tapo C100 camera
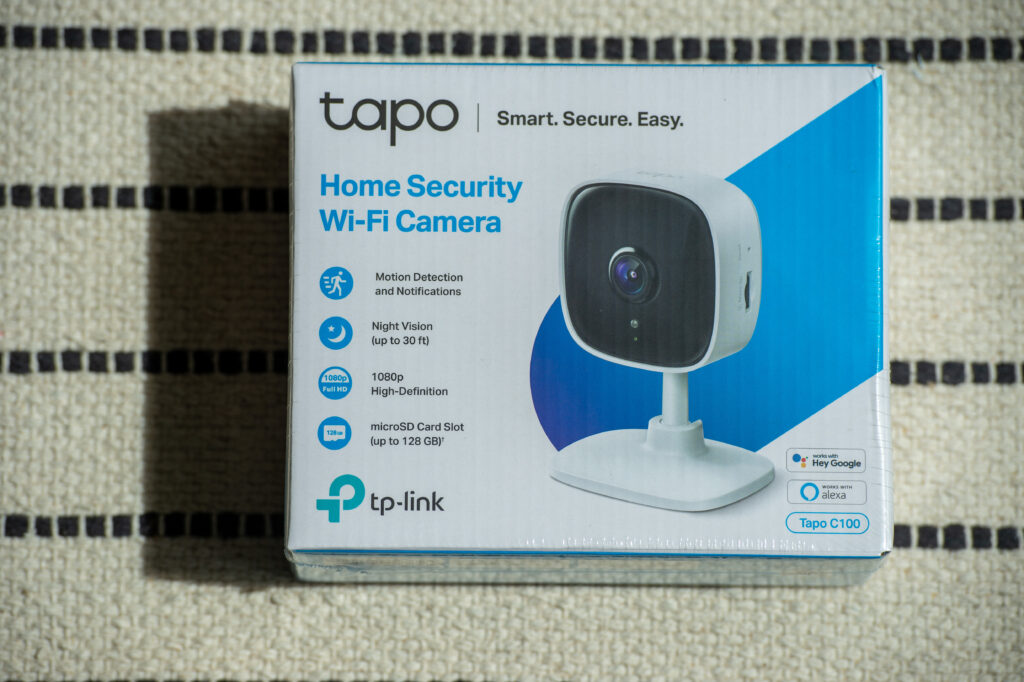
The TP-Link Tapo C100 camera as delivered before unboxing.

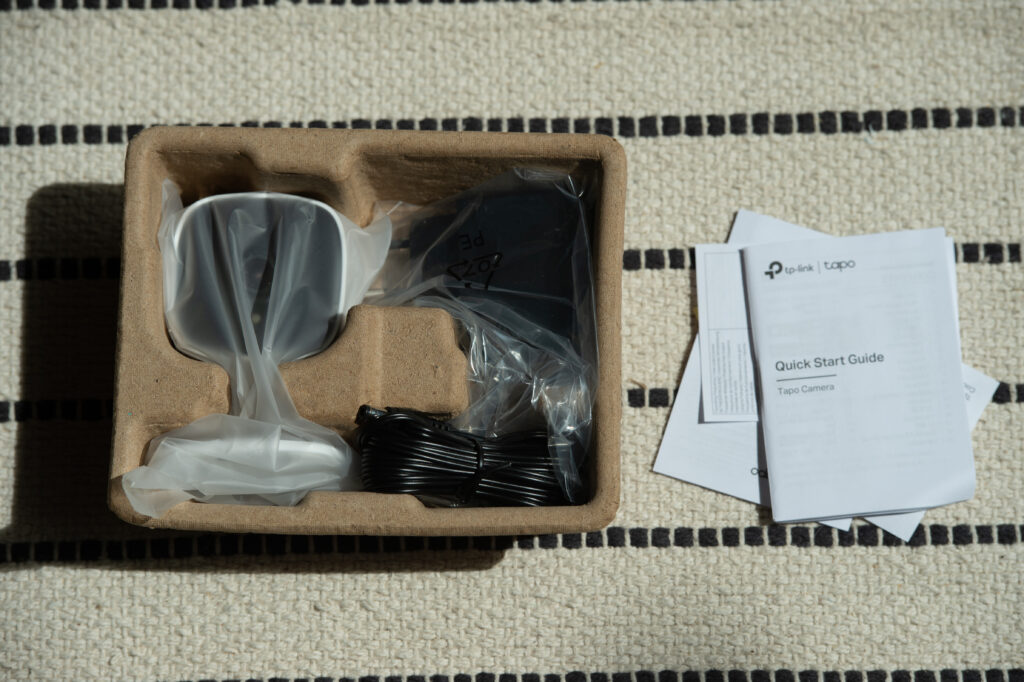
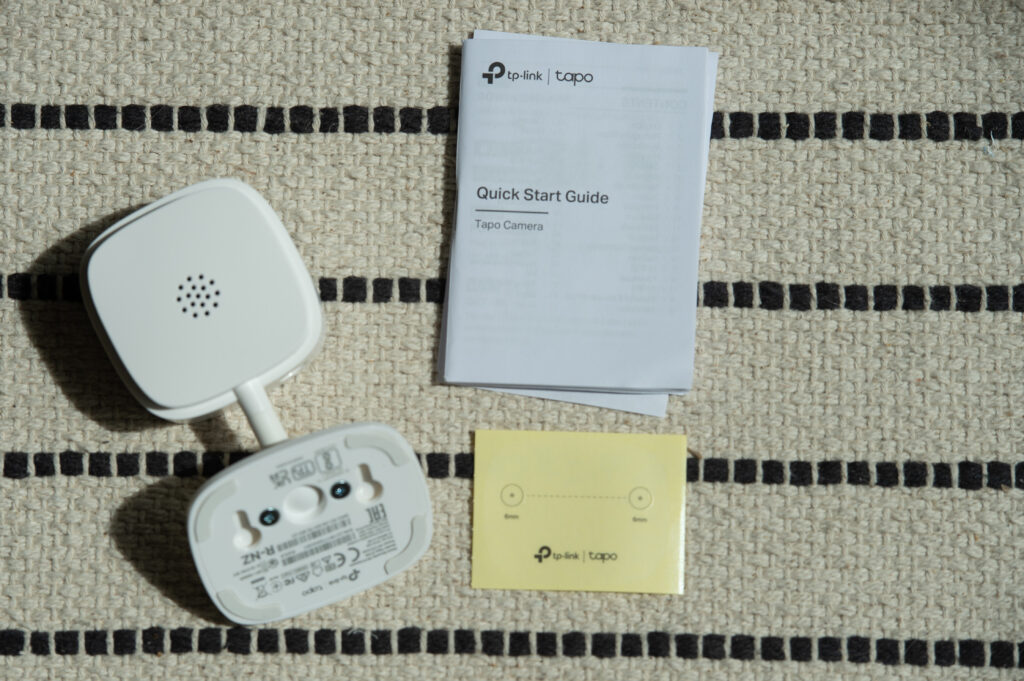
The TP-Link Tapo C100 camera is delivered in a small box with the camera itself, a small template to mount the 2 screws to hold the camera, a power supply and a super short user guide. The latter is more or less just a QR code to get you started downloadning the associated app.  Once you have drilled the two supplied screws into the wall using the template, the wholes in the mount plate hook the camera to the wall and the major part of the HW installation is done. The TP-Link Tapo C100 camera comes with a small power supply that needs to be connected to the camera, so you need a location for the camera where a power plug is not too far away.

TP-Link Tapo C100 camera
TP-Link Tapo C100 camera is to the left in the box, to the right is the black power supply and associated cable and to the very right the quick start guide, which is basically a QR code link explained in 37 different languages.

I was pleased to find that the TP-Link Tapo C100 camera is small – I have seen other cameras designed for outdoor usage that are much larger and dominating. I feared that the video and lens quality would be sub standard because of the low price and the small camera, but it is not – the camera delivers a both wide and sharp image. Of course it is only 1080p, but on my iPhone (15) it looks really sharp and clear. You can zoom in by double tapping or pinching. As it is a budget camera, there is not mechanical tilt or panning available – the lens sits and gives you the view as you left it at the installation.
Hooking the TP-Link Tapo C100 camera up to my WiFi was easy – after you have installed the app, it will guide you through the installation process. It follows the same process as many other gadgets where you are asked to join the WiFi network the camera provides, and from here the camera does the rest.

TP-Link Tapo C100 camera
TP-Link Tapo C100 camera nose down to the left, quick start guide and bottom right the yellow template for mounting the screws to hold the camera. The distance between the screws needs to be rather precise to fit the pre-made holes in the camera mount.

The camera has surprisingly much functionality – you can listen to what is going on in the room, and you can talk to someone in the room via the camera. The sound quality is not impressive, but if you want to say hello to your cat sleeping in your sofa, the sound is useful but far from beautiful.

TP-Link Tapo C100 camera
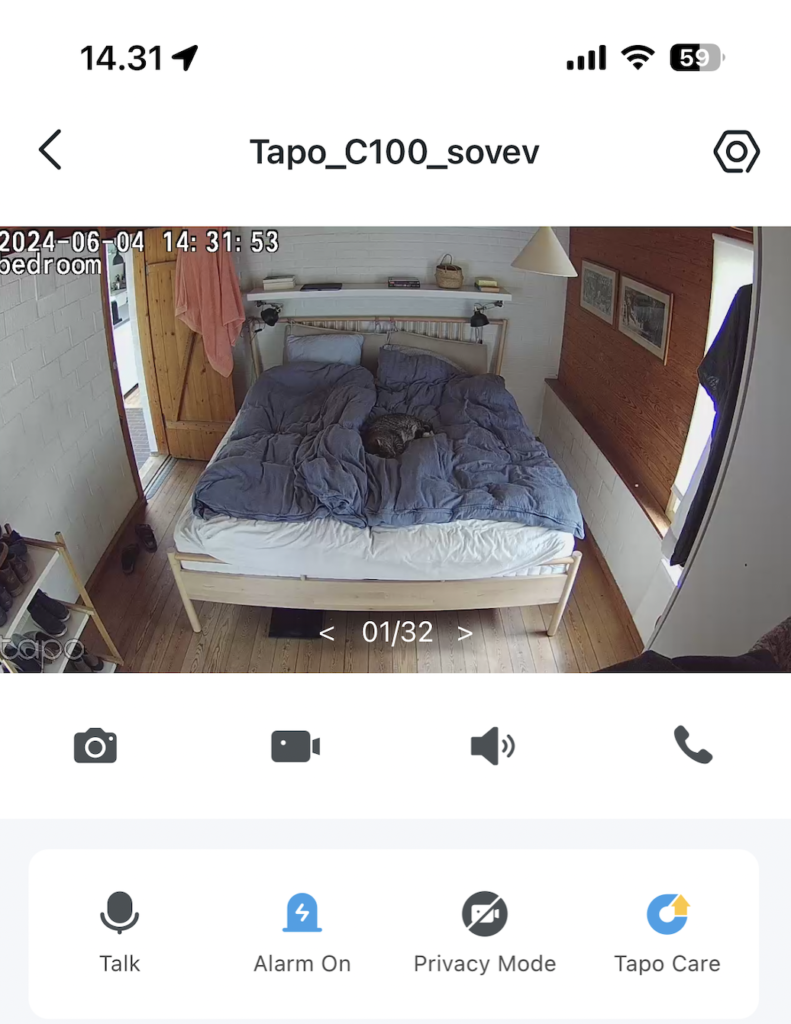
TP-Link Tapo C100 camera view of my bedroom. You can see my cat sleeping in the middle. Notice the time and day is displayed top left and the buttons below the image gives the access to the different features. I find the app easy to use.

It also allows you to be alerted every time someone steps into the view of the camera. This is of course very useful to keep burglars out (you can shout at them via the speaker), but after 20 notifications triggered by my cat, I decided to turn it off. But it works really well, although it can be fooled by a ray of sun dancing on a wall, if the size of the sun-ray is sufficiently large.

Some of the more expensive cameras has a privacy mode where the camera mechanically blocks the lens. The TP-Link Tapo C100 camera cannot offer this mechanical privacy mode, but does offer a more digital one where it electronically turns off the camera and also the red LED in the camera, to show it is not recording. I would feel more comfortable with the mechanical privacy mode of course, but find that the option the C100 offers is ok taking the price point into consideration.

TP-Link Tapo C100 camera
TP-Link Tapo C100 camera night view. It claims to be able to see 30feet during nighttime – it appears to be plenty to cover my bedroom!

The camera delivers colour images during daytime and black and whites during nighttime. In the example above you can see a screen copy from the app during nighttime. I find the night view useful – the camera can actually see more than I can during nighttime!

If you want to, you can buy a micro SD card and install it in the camera. This enables you to capture up to 16 days of live capture (claimed). I have not tested this part as I have no use for this feature, nor did I sign up for the cloud solution Tp-link offers to capture data. I would imagine these solutions to be helpful if you want to be absolutely sure to capture footage of potential burglars. You can initiate a video capture from the app and store it on your phone, but I would imagine this is more relevant for short videos for fun rather than surveillance videos to be used as evidence.

Summary

I have found the TP-Link Tapo C100 camera to be exactly what I needed – a simple camera that can help me keep taps on what is going on in my summer house when I am not around. The camera has more features than what I need so I did not really miss anything. If you are in the market for a more advanced camera or maybe an outdoor camera, TP-Link has plenty of additional models in their lineup for you to explore.

Plus
– Price point
– Image quality (considering it is 1080p)
– Nighttime view
– Ease of installation (both hardware and WiFi)
– Ease of app user interface

Minus
– Camera is fixed – no option to pan or tilt remotely
– Requires a power plug close nearby (and no battery backup)
– Motion detection can be fooled by sunlight or shadows moving
– No mechanical privacy mode, only digital

Not tested
– Alexa and google interface
– Micro SD card storage
– Cloud storage

Shopping link

If the TP-Link Tapo C100 camera has caught your interest, this affiliate link will take you to Amazon. Notice that transportation and import taxes may apply.


Review: HORL 2 knife sharpener

What is it?

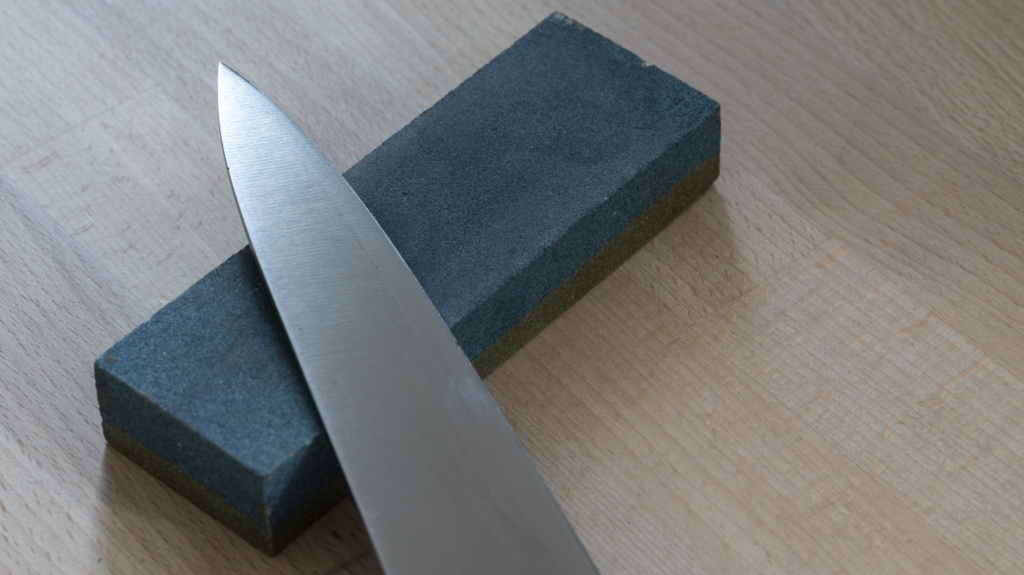
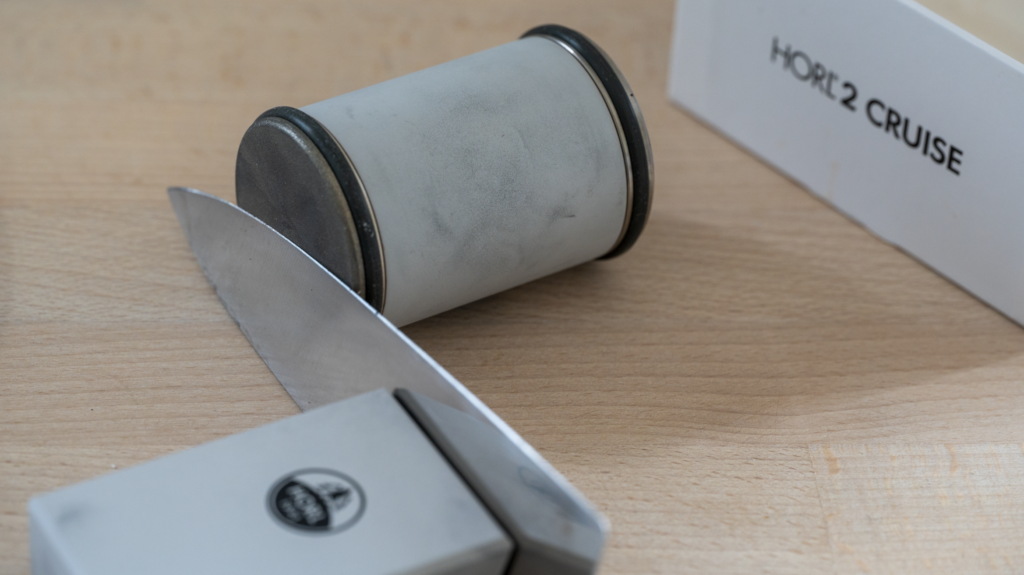
The HORL 2 knife sharpener is a manual grinding solution that applies a new principle: where the traditional principle is to have a fixed stone you drag the knife across, the HORL flips these two.  Here the knife is held in check with a magnet and instead the stone is rolled back and forth along the knife blade to sharpen the knife.

HORL 2 review
The traditional way: The stone is fixed and the knife is moved. The HORL 2 flips this logic and fixes the knife with a magnet and moves the stone by rolling it.

The advantage is that the angle between the stone and the knife can be held constant. An amateur knife sharpener like me struggle to keep the angle constant and that is the safe route to failure. So here the HORL 2 comes to my rescue with a solution to keep the angle absolutely constant during the grinding.

Horl 2 cruise
The HORL 2 cruise comes with a grinding disk, a magnetic angle support and two guides: a quick guide and a more detailed instruction manual.

The solution itself is therefore simply a little magnet to fix the knife and a grinding stone on a rolling device. Thats basically it, along with a quick guide and a more detailed instruction. The image above shows what I found in the box from HORL.

HORL 2 Cruise
Close up of the grinding process. Magnet support to the left, knife with blade pointing upwards in the middle and the diamond grinder to the right.

Price

HORL 2 Cruise
The HORL 2 Cruise is the budget version.

I find the HORL 2 to be quite expensive, so I went for the budget version named HORL 2 Cruise, which here in March 2023 set me back 120 EUR. I think it is a lot of money for a knife sharpener, but my logic is that I have around 10 knives which makes up a significant investment, and as I do not have the skillset to maintain the sharpness of the knife with a traditional sharpener, the value of my knife portfolio is steadily declining. My hope is that the HORL will bring my knives back to tip top shape, and in that light, I can justify the investment.

HORL 2 Cruise
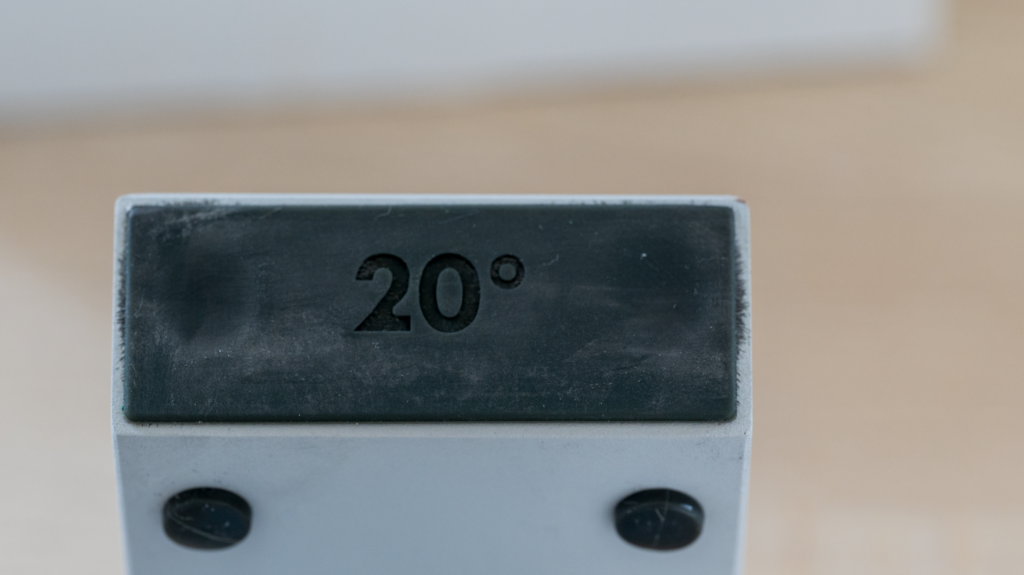
The budget version of the HORL (Cruise) only comes with a 20 degree angle option. The more expensive versions comes with both 15 and 20 degree options.

I thought the main downside of the budget version was the replacement of  delicious oak wood with plastic, but it turned out that the budget version  only comes with a 20 degree angle (and not both 15 and 20) and that the grinding disc cannot be exchanged! Take note of this, as many especially Japanese knives are born with a 15 degree angle, and hence you may want it to stay that way. The ability to change grinding disc is mainly an issue if you want to shift between different “strengths” of grinding – the disc should not need replacement due to wear according to the instruction manual.

Use

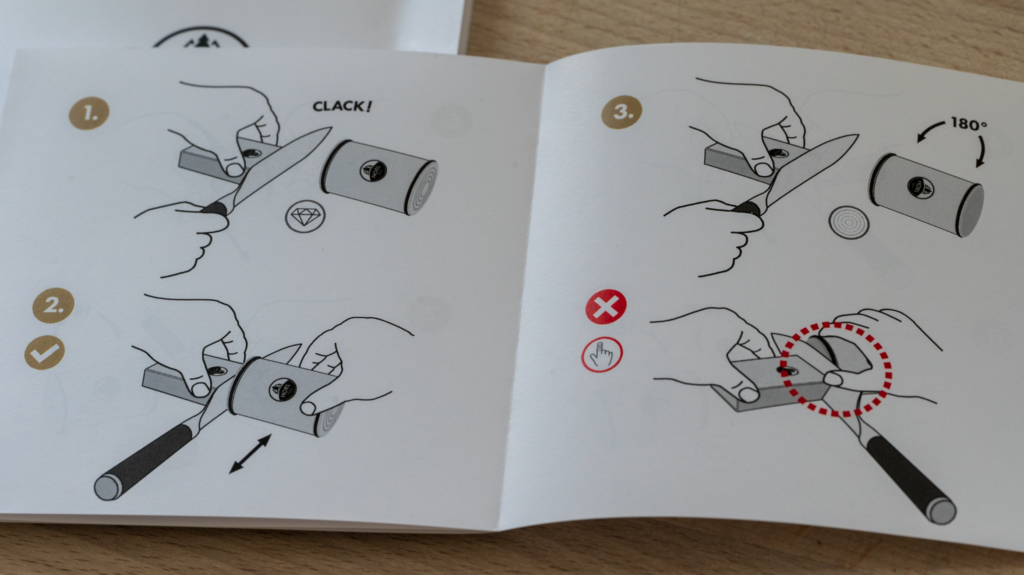
I find the use of the HORL 2 to be easy. It comes with a good instruction manual and also the quick guide quickly gets you going. Also, if you google a bit, there are a lot of YouTube videos that shows how to use the HORL.

HORL 2 Cruise Review
There us both an instruction manual and a quick guide. The use of the HORL 2 is not complicated at all.

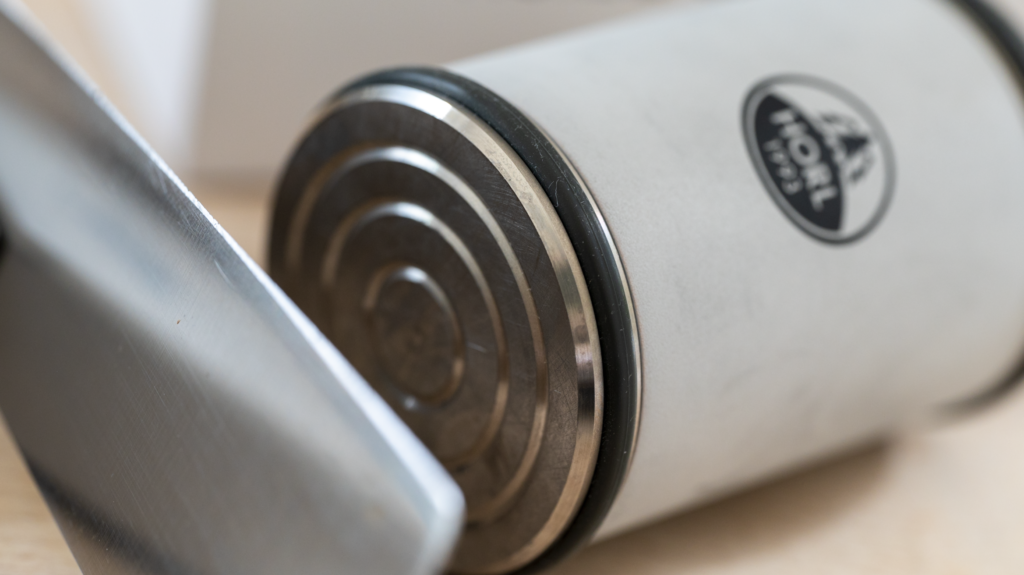
As I am not an expert when I comes to sharpening knives, I did not really pay much attention to the fact that the HORL 2 has both a diamond grinding disc AND a stainless steel honing disc. In other words, you need to use both sides of the HORL 2. This is important to get a good result! I figured that the honing side did really not have that much influence on the sharpness of the knife, but judging from what experts say, the honing side is just as important as the grinding side to get a good and sharp result! I wish the instruction manual had underlined this point.

HORL 2 cruise
Opposite the diamond grinding disk is the stainless steel honing disk. NOTICE: using this side is as important as using the diamond side! The instructions shows this, but I think they fail to underline the importance.

In terms of how long time to sharpen the knife, there is very little guidance, other than “between 2-5 minutes” or something vague like that. So what I do is that I count the number of times I move the HORL 2 back and forth, and then I make sure to apply the same number to both sides of the blade. And if the result is not as satisfying, I simply repeat the process. They say that once you have sharpened the knife, a re-sharpening only requires a few movements. I have not tested this claim, but it would be nice if it is the case.

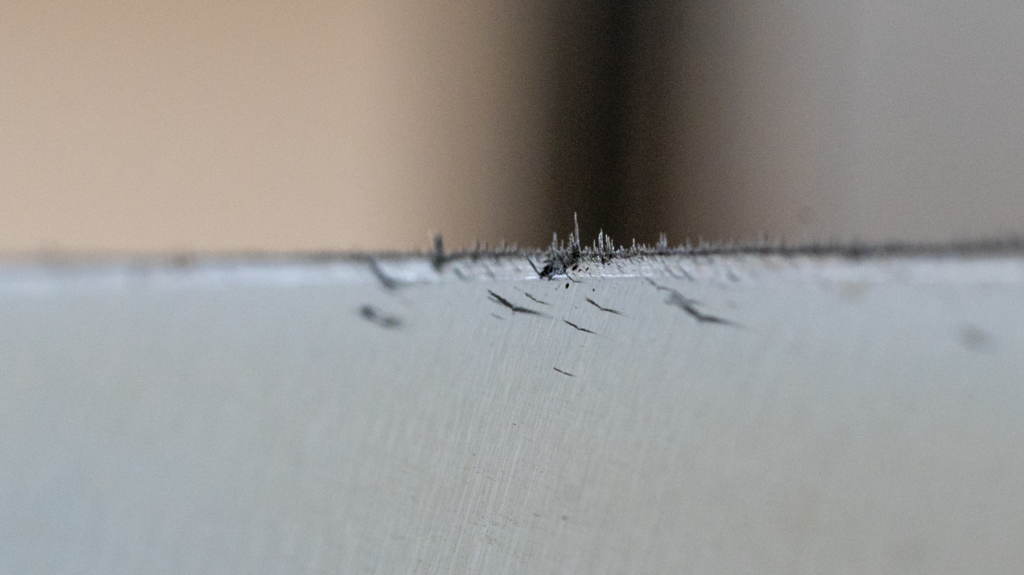
Be prepared to be dirty! The grinding will result in small metal particles and metal dust that will be all over the place in no time!

HORL 2 review
The grinding will result in small pieces of metal and metal dust being generated.

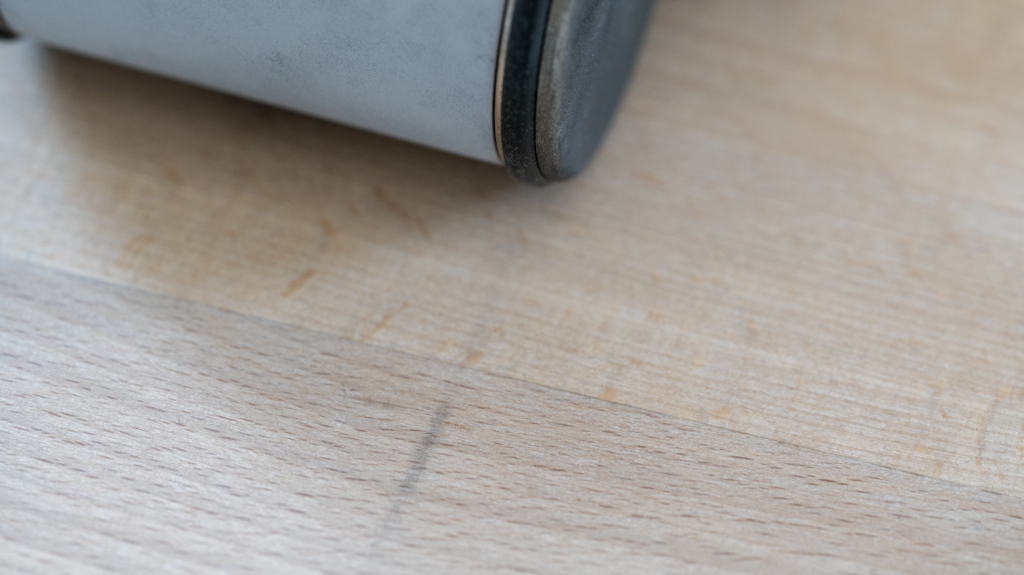
The rubber that the HORL 2 rolls on when you move it back and forth can leave small marks on the surface you use. My kitchen table is a bit sensitive so I generated several “tire tracks” from rolling the HORL 2 back and forth. So you may want to be more smart about it than I was.

Horl 2 cruise
Rolling the HORL back and forth on my kitchen table left a mark as you can see here. Soap and water removed it, but maybe smart to do the grinding on a piece of paper or the like.

Result

The result is … okay. I am not excited. I really thought I would get super sharp knives, and they do get better, but to my surprise it seems to be a little random still. Some knives becomes very good, others less so.

One of the reasons is that I find it hard to sharpen the part of the knife that is close to the tip. I think it is because the angle changes slightly. Also the magnet cannot cover the entire range of the knife and obviously gives the best support where it is mounted. So I find that I have to move the magnet a bit back and forth to get the support I need.

Despite all my attempts to vary the position of the magnet etc, I cannot seem to get the far end of the knife sharp. The part close to the handle: excellent! Not so much the other end. The difference is so noticeable that my wife commented on the difference in sharpness unsolicited!

HORL 2 review
This is where I cannot get the knife sharp: when the blade curves in the far end. It is as if the sharpening is really easy to get right close to the handle, but not so much towards the pointy end.

The instruction manual gives guidance to both narrow blades and so called “extremely broad blades”. Apparently my knifes are not in any of these extremes, as I have been able to use the HORL 2 Cruise on all my knifes with not problems. Except for my ceramic knife, that obviously does not work with the magnet.

Conclusion

I’m a bit divided here. Intuitively and looking at the design, this solution should work! It does take the biggest uncertainty out of the equation for manual sharpening of knives: the angle between steel and stone. It should turn an amateur like me into a pro. The problem is, as they say, that reality does not always follow armchair logic. And this is one of those cases.

I do think that this solution is as good as it gets when you cannot hold 15 degrees manually and need help from the HORL. And maybe my problem is that I was hoping for more than I got. But I still have this idea that my knives can be sharper than they are right now, and I am not sure the HORL 2 is the solution that will fulfil that ambition.

Afterthought

HORL 2 review
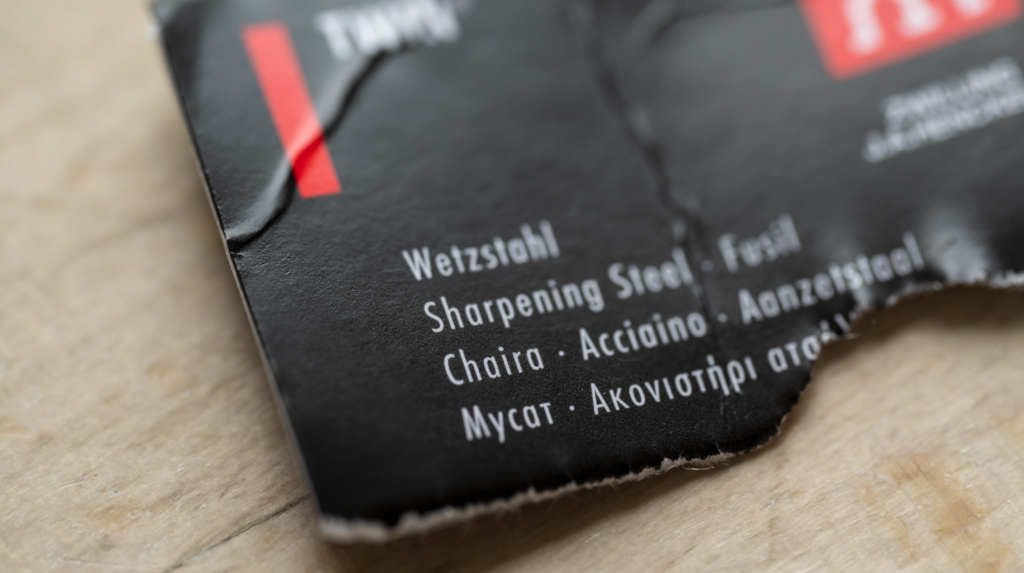
I ended up buying a traditional sharpening steel to be used after using the HORL 2.

After using the HORL 2 for some time, I ended up buying a more traditional sharpening steel. The sharpening steel is actually built into the HORL 2 solution, so it may seem like a superfluous step. But I did find that I got better results if I used the sharpening steel from a more traditional solution. I still use the HORL 2 stone for the initial sharpening but finish off the job now with a traditional sharpening steel. I now get results that even my wife praise. And you know what they say: Happy wife = happy life.

Related reading

Review: Roborock S7 robot vacuum cleaner

Review: Hövding 3.0 – airbag protection for cyclists!

Review: Roborock S7 robot vacuum cleaner

Skeptical!

When it comes to robots that help out in the garden or in the house, I am a bit skeptical. Some years back I had one of the first robot vacuum cleaners that was mass produced, and to make a long story short, it was not a good experience. Also, I have two different robot lawn movers, and that is also a mixed bag of experiences.

Roborock S7
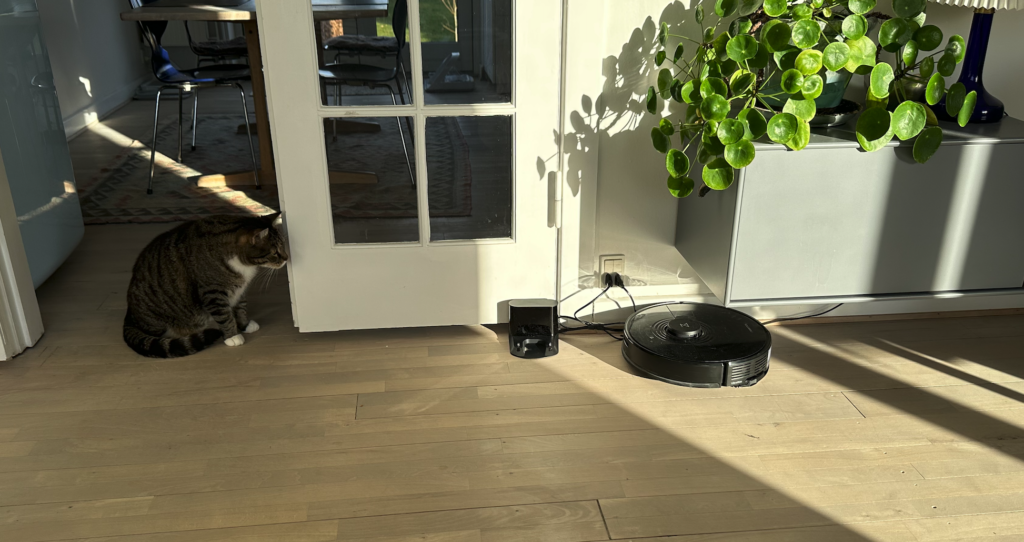
Not all members of your household will be equally happy to bid the Roborock S7 welcome to your household…

So maybe my excitement when it comes to the Roborock S7 is rooted in bad experience with other products. That is hard for me to say. But with that said, the rest of this blog will be one long praise of the Roborock S7, simply because I find that it is a brilliant product at a price point where it delivers value far beyond the retail price of 450 EUR (Denmark, Europe).

What is it?

Roborock S7 robot vacuum cleaner
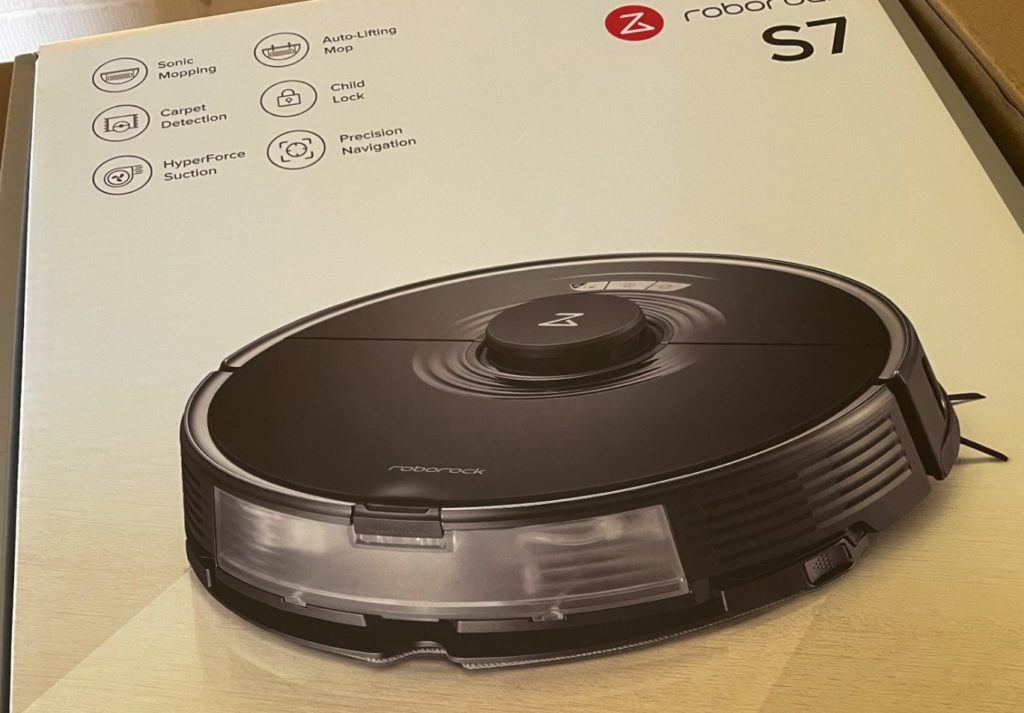
The promise on the tin is spot on.

The Roborock S7 is a vacuum cleaner robot, that also facilitates light cleaning with a wet cloth for hard surfaces. It is smart in the sense that it can see the surface it is cleaning, and for example when it cleans a carpet, the vacuum motor powers up to give max suction.

Roborock S7 robot vacuum cleaner
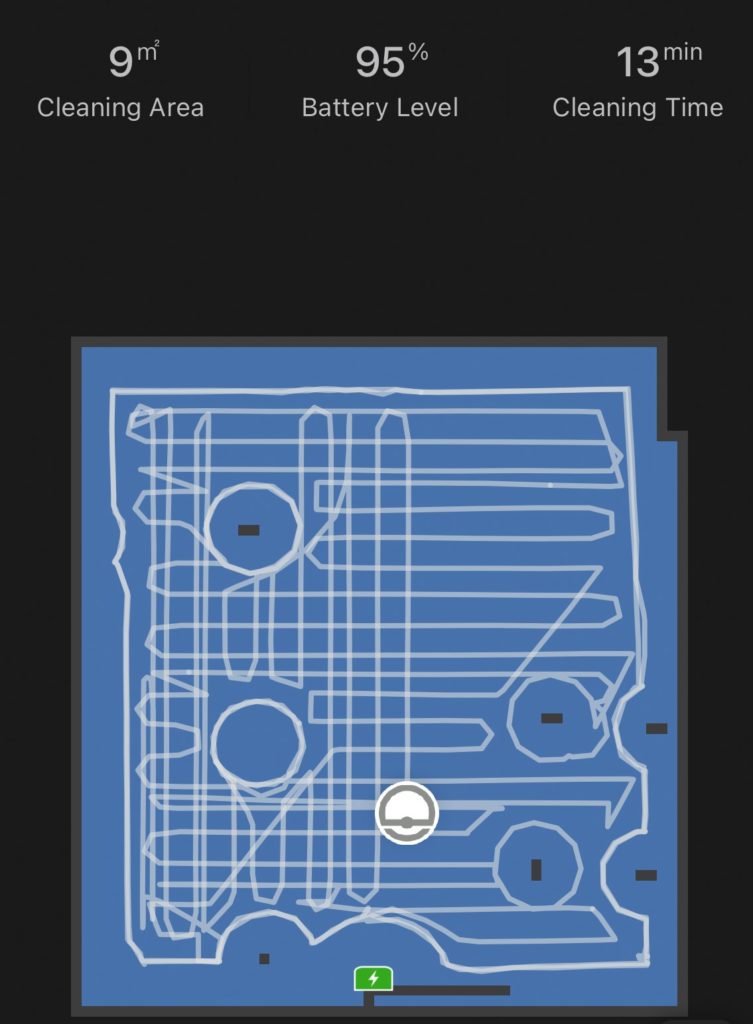
Super systematic approach to vacuuming the room.

It is also very systematic. It first walks the perimeter of the room to find the size and direction, and after that starts cleaning both horizontally and vertically.  It is not like a lawn mower robot that takes pride in doing a random pattern – the Roborock S7 cleans in vertical and horizontal lines as depicted in the image above, taken from the app. You can also see where it has identified legs on the furniture and how it has walked around these obstacles in a circle, making sure to clean very close to these.

Is installation cumbersome?

Installation is easy. You download an app, and connect your smartphone to the WiFi network the Roborock provides. Then the Roborock uses the information provided by the app to log on to your Wifi (it needs the SSID and password) and after that the Roborock logs on to your WiFi network and you can now control the functions via the app. And you can follow the Roborock working via the app as the image above illustrates.

Roborock S7 robot vacuum cleaner
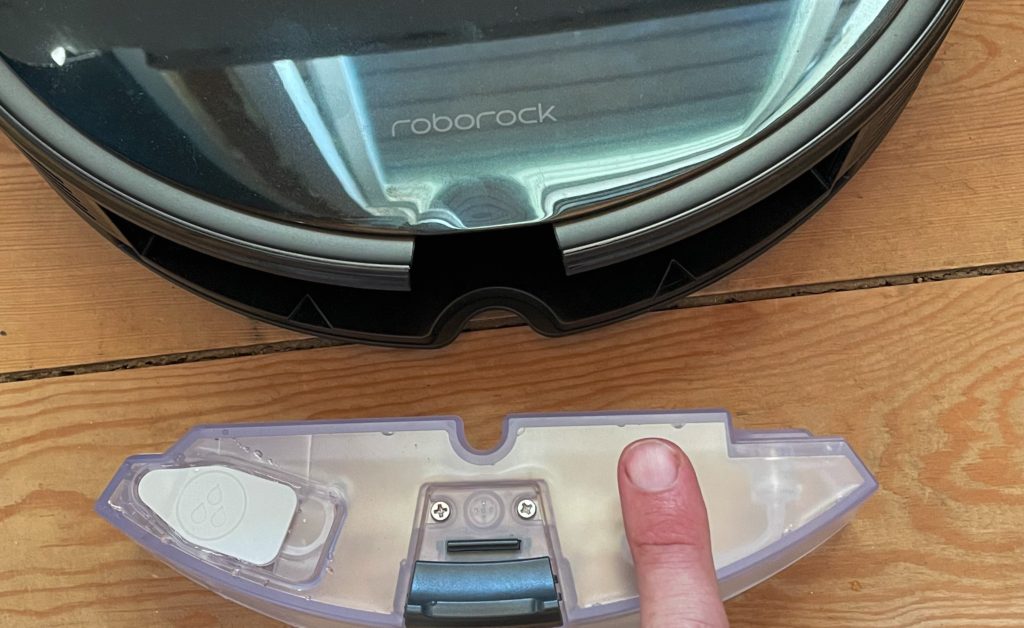
The water reservoir sits at the rear of the Roborock. You add water (and maybe cleaner) in the hole to the left. When the reservoir is mounted, the Roborock voice confirms that it is now mounted.

Another thing that makes the Roborock easy to work with is that every time you have done some change, like installing the water container at the rear of the Roborock, it will confirm with a computer voice what you have done. In the beginning I found this a bit annoying, but after a little while I started to appreciate the confirmation that the operation was successful.

Roborock S7 robot vacuum cleaner
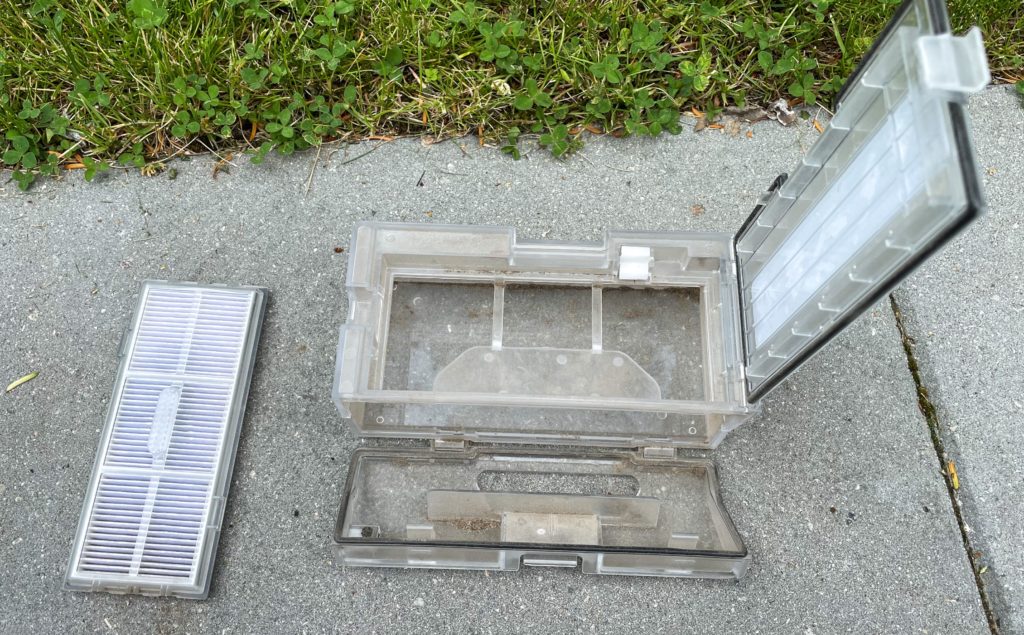
The dust bin is not big, but if you run the Roborock regularly, then it is not an issue. The filter to the left sits on top of the dust bin and catches all the finer parts of the dust.

The dust bin is accessed via a lid on top of the Roborock. It is easy to pull out and clean, and maybe the only complaint that I have is that it is also relatively small, so it runs full easily. However, after running the Roborock in a room for the first time, the second time picks up very little extra dust. So my take is that if you let the Roborock clean on a regular basis, the small dust bin will not be an issue, simply because there is not much dust to collect.

Does it work in real life?

Yes. First of all, the battery life is good. It can cover a lot of square meters in a single charge. And you can follow the battery percentage left in the app. I did notice that it takes a bit of time for the Roborock to charge, but as it in my case returns to charge when the job is done, this is less of an issue. I have not cleaned areas bigger than 45 square meters at the same time.

Roborock S7 robot vacuum cleaner
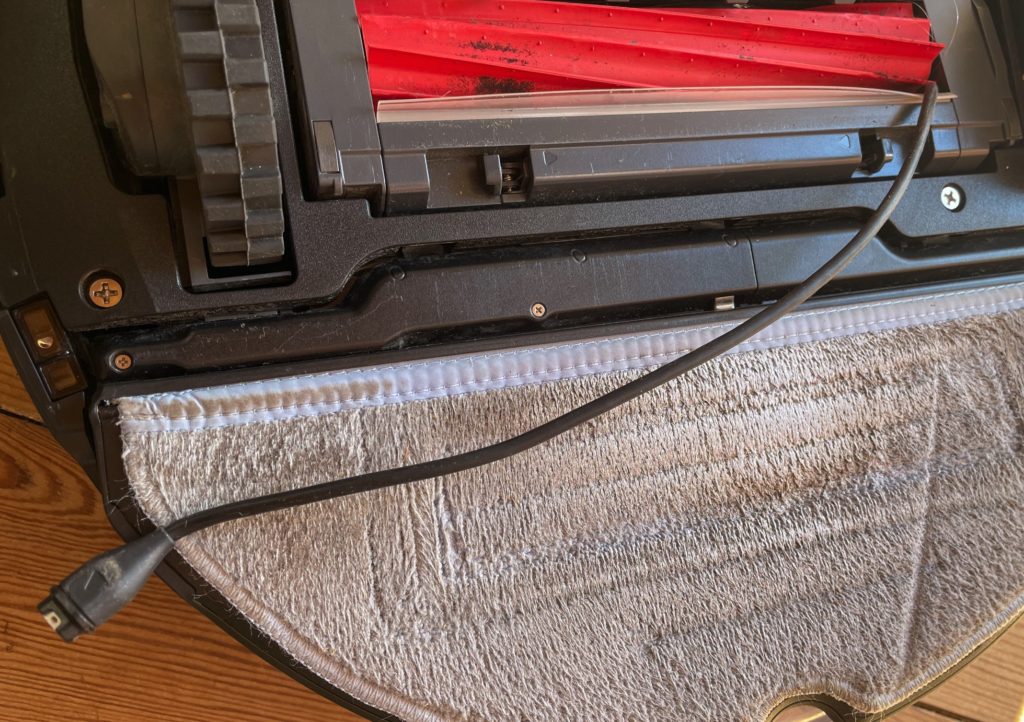
If you leave small items on the floor, the Roborock will find it and get it “in the machinery”. This will halt operations. Here it is a small cable that I had forgotten on the floor.

The same rules applies for the Roborock as for normal vacuum cleaning: the less items on the floor, the better the Roborock can get the job done. For large furniture like a bed, the Roborock does an excellent job cleaning around the legs very thoroughly. But of course, if you can remove obstacles and e.g. put dining chairs on the table prior to starting the Roborock, then you will get a better result. Also, as the Roborock is very systematic, it will find and pick-up anything that is left on the floor. In the image above, I forgot at small cable on the floor, and it got caught in the rotating parts of the Roborock. This halted operations, and I was notified via the app.

Roborock S7 robot vacuum cleaner
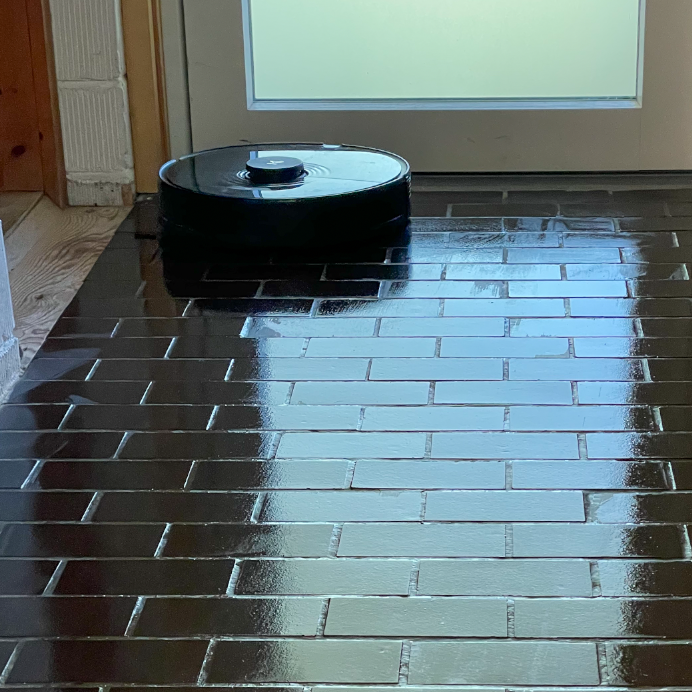
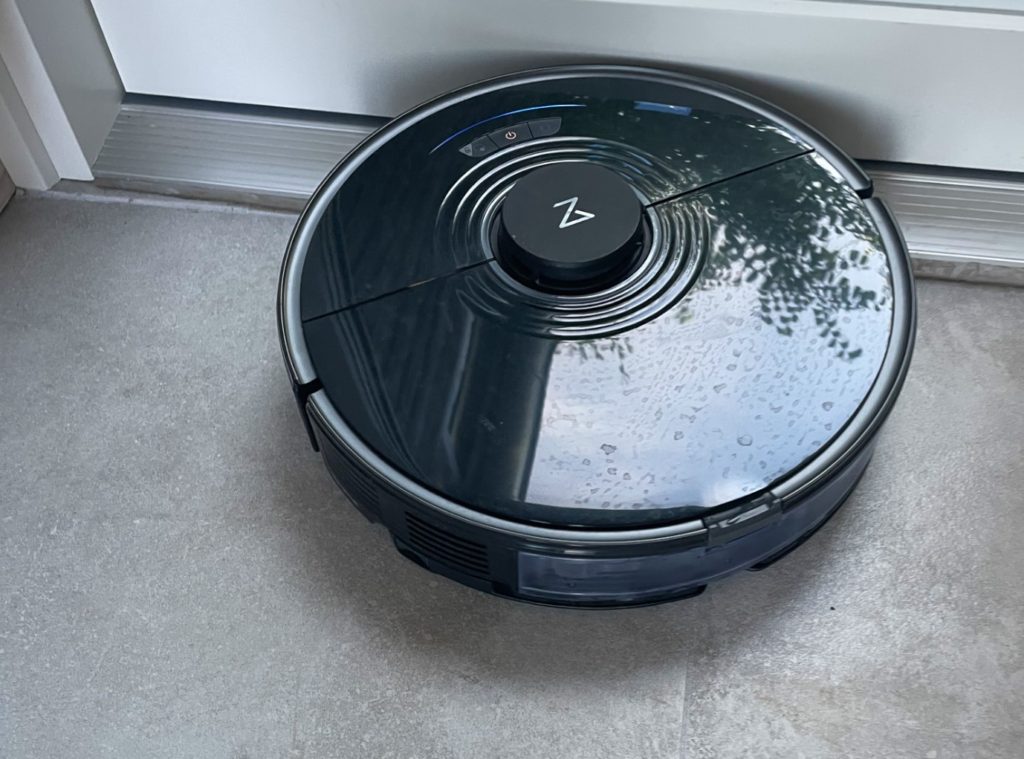
The Roborock does not take no for an answer, but keeps challenging “the boundaries”. Here it is working on a doorstep.

It also does cleaning edges really well. It does not only run along a wall or an edge, but constantly tries to “attack” the wall by driving slightly into it, meet its master, give up and go a bit out again, only to repeat the “attack” a bit further down the line. It is very convincing and makes sure the cleaning gets as close to the edges as possible. The Roborock has a small bumper so it can “feel” obstacles before it hits them, so no need to worry that these “attacks” will hurt your walls or furniture. It is gentle, but persistent.

Roborock S7 robot vacuum cleaner
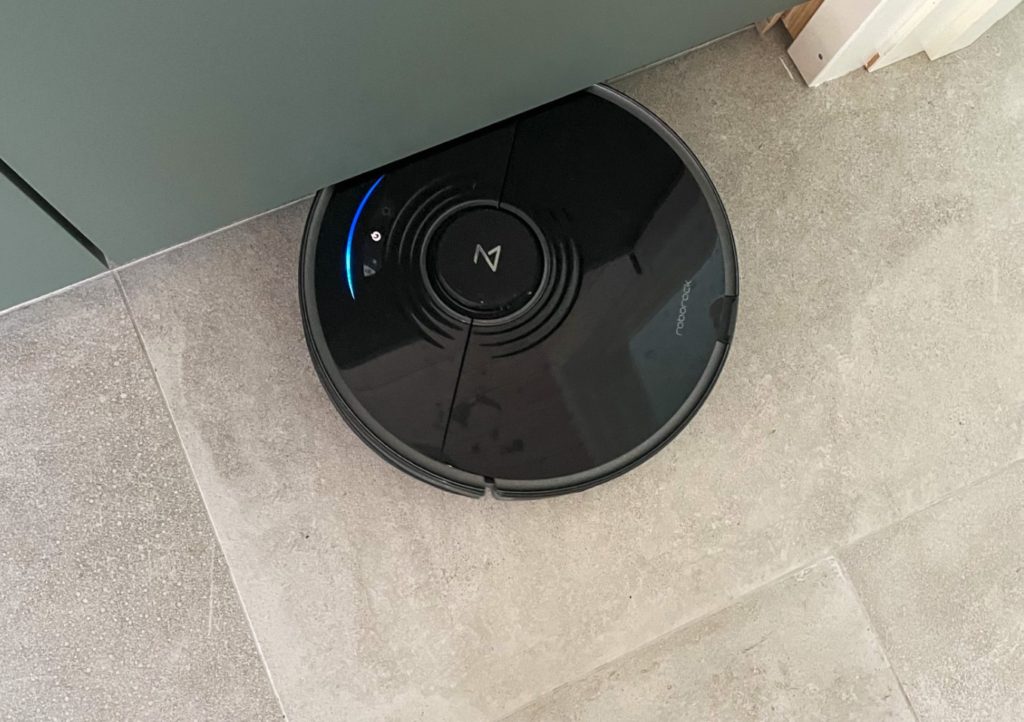
The Roborock is low and easily cleans under a bed. Here it is cleaning in the kitchen.

The Roborock is low and easily finds it way under a table, a sofa and a bed. In my kitchen it is too tall to make it all the way under the kitchen cabinets, but it cleans some way under the cabinets (se image above) and does so well.

The little rotating arms at the side of the Roborock finds outside the main cleaning area and “throws” into the middle of the Roborock, that then picks it up there. These arms are prone to be tangled up in hairs and the like, but I find that cleaning them is easy.

Does the cleaning mop work?

Yes, if you don’t expect miracles, i.e. that it looks like you have been scrubbing the surface 100 times with a hard brush. That is not what happens.

Roborock S7 robot vacuum cleaner
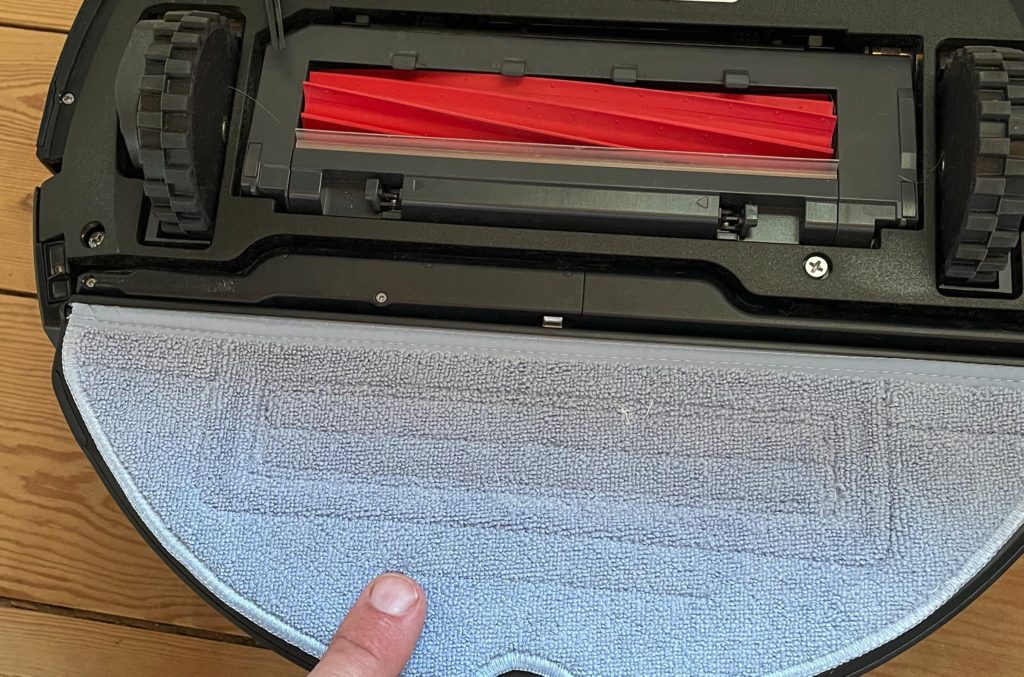
The cleaning cloth at the bottom rear of the Roborock. The Roborock can lift and lower the plate with the cleaning cloth subject to the surface it detects.

The Roborock simply drags a wet cloth over the floor to wipe it clean. And it of course detects if the surface is a carpet, and lifts the mop.

Roborock S7 robot vacuum cleaner
The Roborock cleans using the mop also. It is not as good as you cleaning the floor with a mop, but it does add a nice touch to the experience of a clean room.

The water reservoir is intended to keep the cloth wet during cleaning, but I find it works the best if you start with a wet piece of cloth at the outset, so the water reservoir is only used for “topping up” the moist of the cloth.

How long time to clean?

The largest area I have asked the Roborock to clean is 39 square meters. It took the Roborock 72 minutes to complete the work and the battery level dropped to 53%, starting at fully charged.

Roborock S7 robot vacuum cleaner
The less obstacles, the better cleaning.

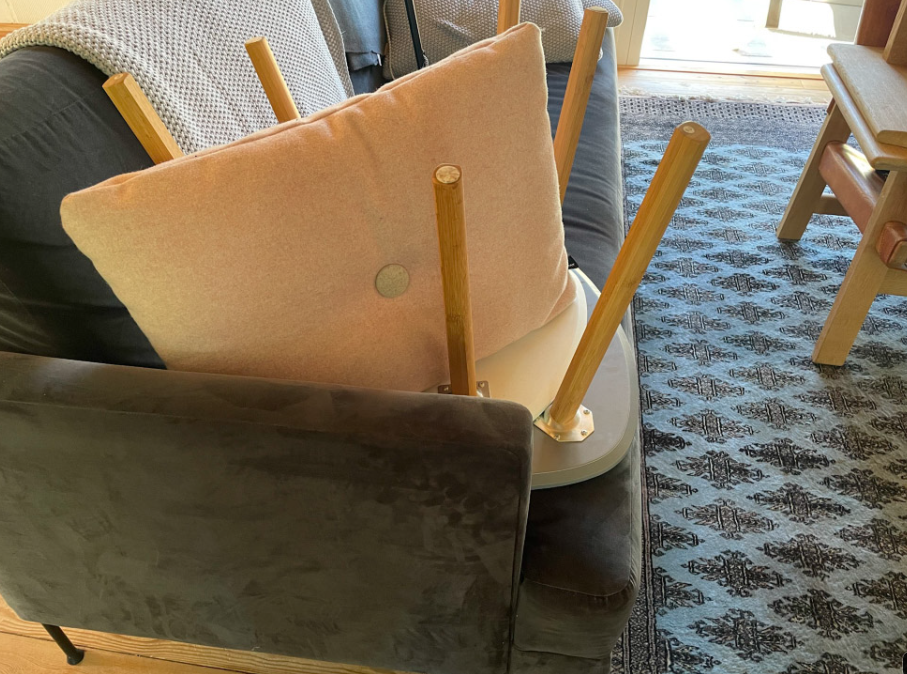
As you can ask the Roborock to go to work when you are not at home, the time required to clean your home may be less important. You can help the Roborock cleaning better by removing furniture from the floor. i.e. take small tables and chairs away from the floor by lifting them to higher ground, i.e. a sofa or a table. Pretty much like you would if you were to clean yourself. This will also make the Roborock work a bit faster, as it can get the job done in fewer uninterrupted sweeps across the floor.

Can I recommend the product?

Yes. We bought the Roborock 7 for the summer cottage, but we are seriously considering buying one for the home. It is that good. And it is priced very reasonably, so we are tempted. Think you will be as well.

Related reading

Review: Worx Landroid M700


Review: Asus TX-AX58U router – Smart WiFi 6

Back in the day…

I like Apple products. They are perhaps over-priced, but very nice in design and for me easy to understand. So when my trusty router, the Apple Airport Extreme finally gave in after many years of service, I was ready to make a replacement purchase. But I was to learn that Apple stopped producing routers back in 2018! I felt very alone all of a sudden, but also the pressure from the family missing the router for both work and streaming!

So there was nothing to do but consult the homepage of the local IT hardware pusher to see what I could find. And as I feared, the list of routers was long and intimidating, leaving only network engineers happy: routers of many different manufacturers with strange names and prices that range from next-to-nothing to crazy expensive.

I would love to claim that my purchase of the router was a rational man decision after scanning the market for all available options. It was not. This little label pushed me in the direction of the Asus router.

I know from experience that buying the most expensive gear is seldom worth it, and the other end of the scale is also to be avoided. So a good middle-of-the-road alternative is what I was looking for. Me eyes fell on the Asus RT-AX58U for two reasons: it was on sale, and it had a little “readers choice” award that lifted my confidence from zero to just a little bit. The name itself (RT-AX58U) meant nothing to me, other than sending a strong signal that Asus has hired more engineers than marketing people!

From the tin. Lots of things I don’t understand!

The “key selling arguments” on the tin meant next to nothing to me, but I have later learned that the AiMesh is a way to connect several units into the same network in a smart way. So with only the worst of expectations, I pushed the purchase button and started to wait for the parcel to arrive at my doorstep.

Setup

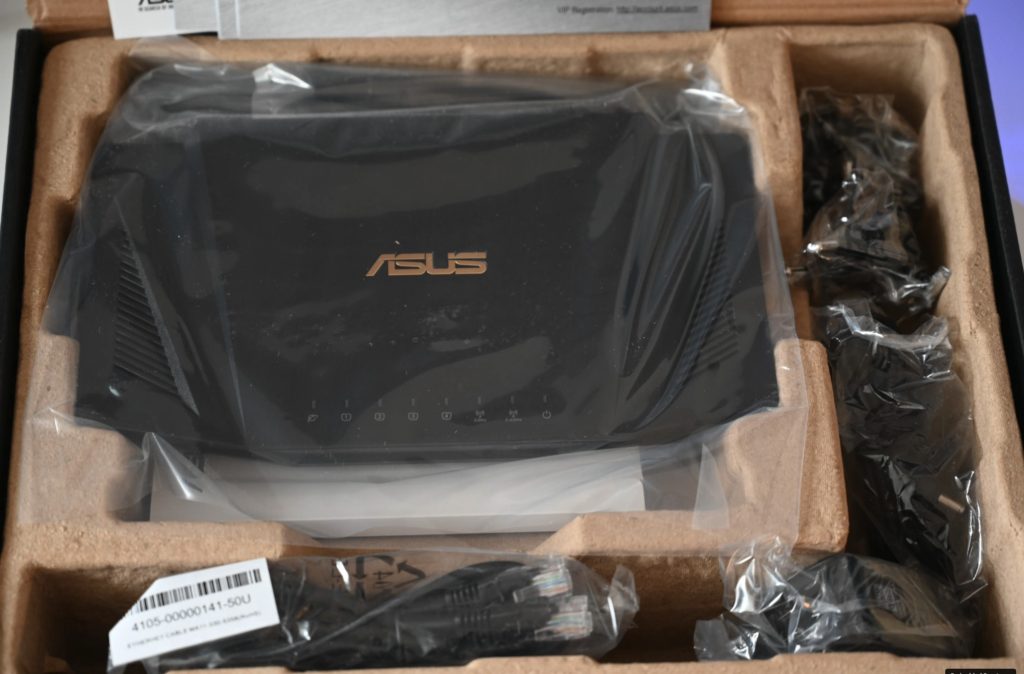
When I opened the box, this is what met my eyes. Intimidating for a non-engineer. But it turned out to be not bad at all.

Opening the parcel, I found what I feared the most: a complex looking compilation of items to be assembled – my IKEA complex started growling in the distance. But I quickly learned that it essentially was the router itself, a power supply and a network cable! What a relief

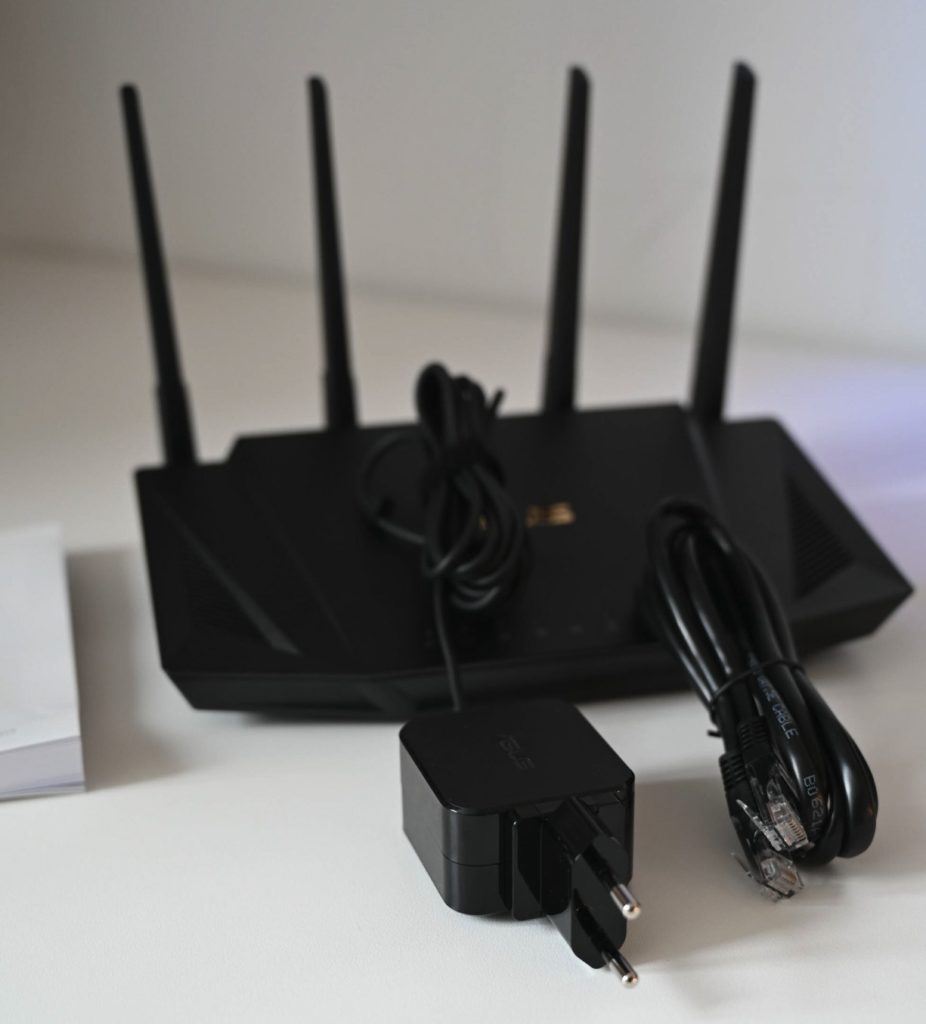
Power supply and a network cable. That is all that is required other than the box itself. The intimidating booklet named “Quick start guide” to the left.

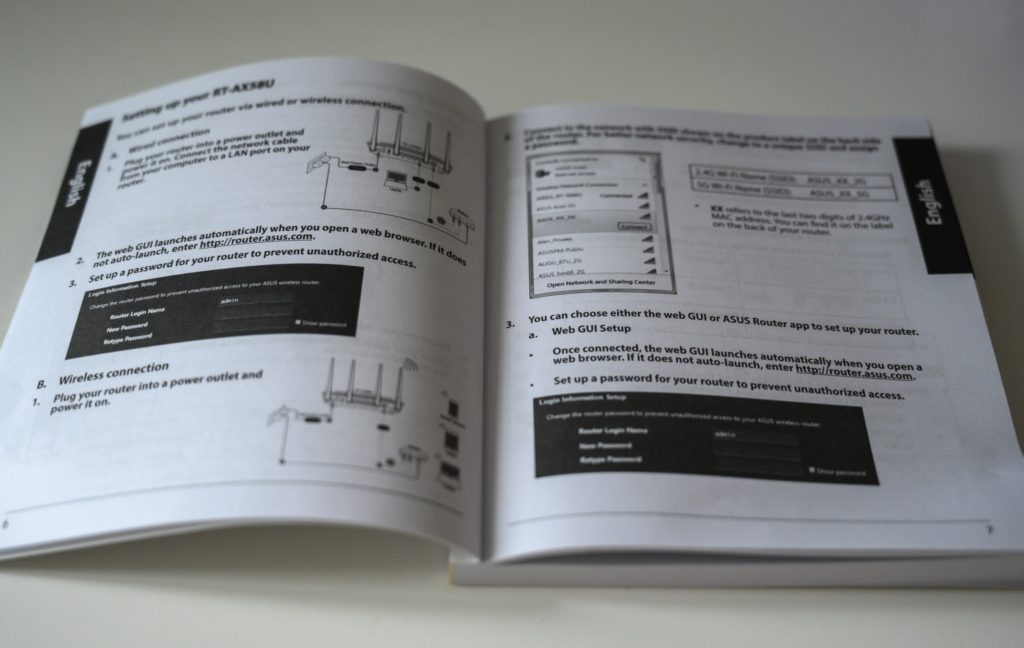
However, the “quick start guide” quickly reversed that: it was a thick booklet! What! Apple’s quick start guides can fit into a single A5 paper!

The user guide is a book! But the reason is that it comes in a large number of languages. The relevant section is only a few pages – phew!

But it turned out that the size of the booklet was related to the number of languages involved, and that the relevant pages were only a few! I was back in business!

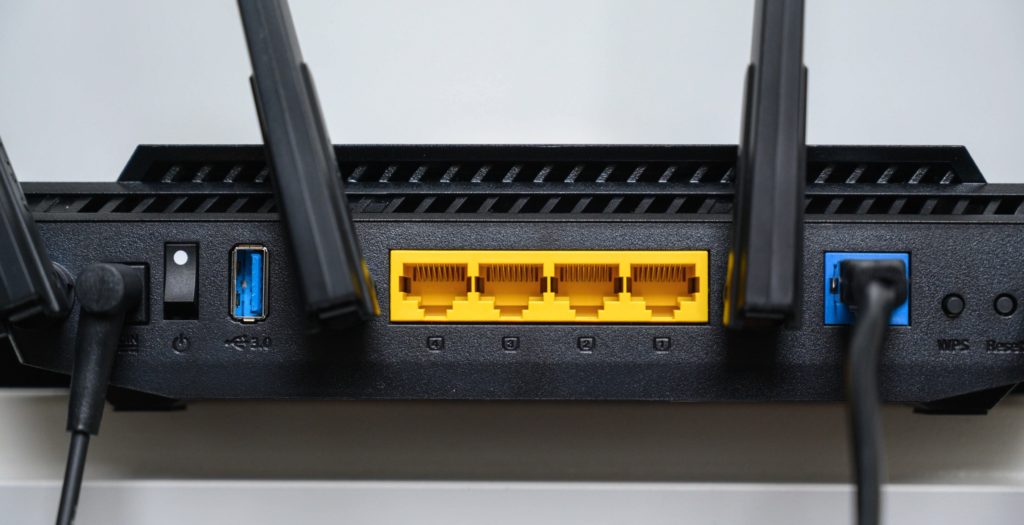
Router rear. Leftmost the power supply, then the power on/off switch, then a USB plug that I have never used, 4 physical network connectors in yellow, the network connector for the internet, a WPC button and rightmost a reset button.

So I plugged the power supply cable into the rear of the router along with the supplied network cable, which I connected to my LAN. My ISP has provided another router that connects to the internet so the role of the Asus is to give WIFI on first floor where the ISP router has insufficient reach.

You can setup the router two ways I learned from the guide: using a browser and a URL, or by downloading the Asus app and take it from there. I chose the latter, and was asked for two things during the setup: A SSID plus password, and an ID and password for logging onto the router. That’s it! After that the network just worked!

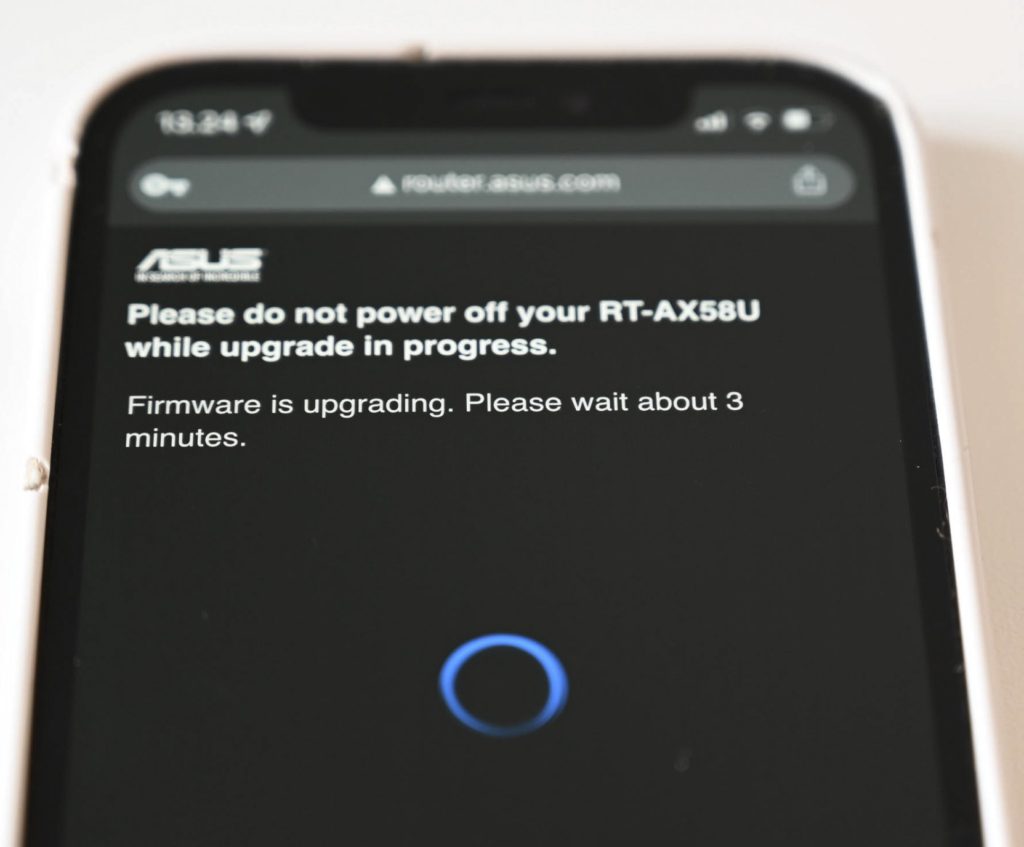
Everything I buy seems to be in need of a firmware upgrade. This one is no different. Luckily it was a fast and hassle free experience.

Of course I cannot buy a gadget without the first thing that happens is that it demands to have the firmware updated! It seems to be a thing that haunts me, and this one was no different. But it was both quick and easy.

And then – of course – I misspelled the SSID! I found that the easiest was to reset the router to factory settings and re-do the installation process, this time with the correct spelled SSID. Although there is a “reset” button on the rear of the router, the way to reset it is to turn it off, hold the “WPS” button and then turn it on. I tried to do that holding the “reset” button instead and that led nowhere, so remember that reset to factory settings involves the “WPS” button and not the “reset” button.

I love this: you push a button in the app and the network optimizes itself. It could be a big make believe button, but it feels great that I don’t have dive into technical details to have a optimized network!

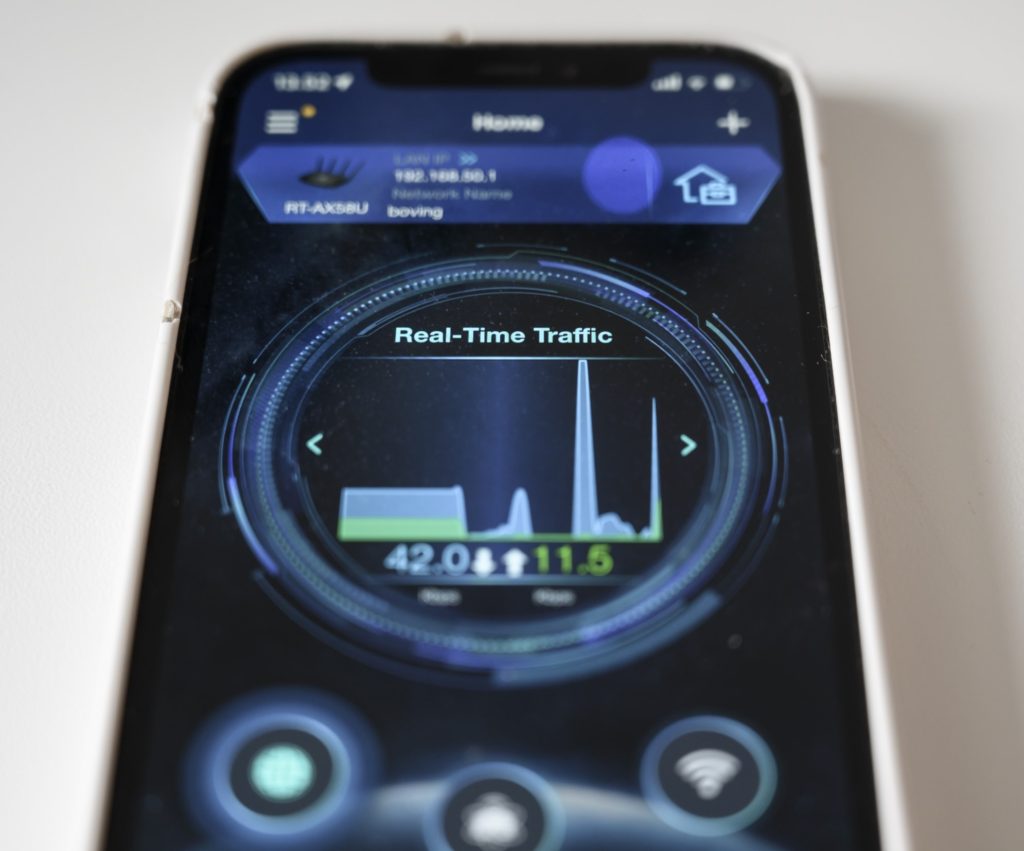
The app is easy to use and hold a lot of good information, for example a list of the units logged on to the WIFI, and you can rename them from mumbo jumbo to something useful like “Frederiks Ipad” or the like. Great! Also the app has features like network optimization and allows you to give priority to certain types of network traffic over others. I have no idea if this works or not, but it seems smart.

The app has lots of interesting screens and metrics. Here a real time traffic overview. Another useful screen is one that lists all units logged onto the WIFI.

Conclusion

I found this little router easy to set-up and install, despite my track record of messing up even the simplest network things. The app gives useful information in a not-too complicated user interface.

In terms of alternatives to this router or if the price around 120 EUR is fair or not, I have no idea or baseline to assess. There are cheaper alternatives out there, and maybe they can do the job as well, but I just wanted a hassle free solution with quick installation, and that I got.

I am glad the router is in a location in the house we seldom visit. It is a little black plastic thing with 4 antennas, and the design immediately makes you want to wear a silver hat and talk to UFO’s. I have no idea if the antennas play an important role or not, but this router has no better reach than my deceased and beautifully designed Apple router, unfortunately.

Related reading

Apple AirTag Review

RAVPower PD Pioneer Power Bank Review


Review: Waycap refillable capsules

Save the planet, save Money

No, I did not make up the headline above – it is a quote from the Waycap cardboard box! And it certainly does sound promising! I am not sure your coffee capsules can save the world, but moving from disposable coffee capsules to re-usable ones sounds to me like a small step in the right direction in terms of doing something positive for the environment. If you then in addition can save some money and on top of that have better control of what coffee goes into your capsules, then I think we are approaching something that sounds like good answers to the “why?” question: (1) Eco-friendly, (2) saves you money and (3) potentially gives you better coffee.

The promise on the tin.

I must admit that I recycle also my disposable coffee capsules from Nespresso, so maybe the gain in that light is less, but saving money and making better coffee also sounds attractive to me. The review here is using a Nespresso coffee machine, but it works with many other brands according to the tin.

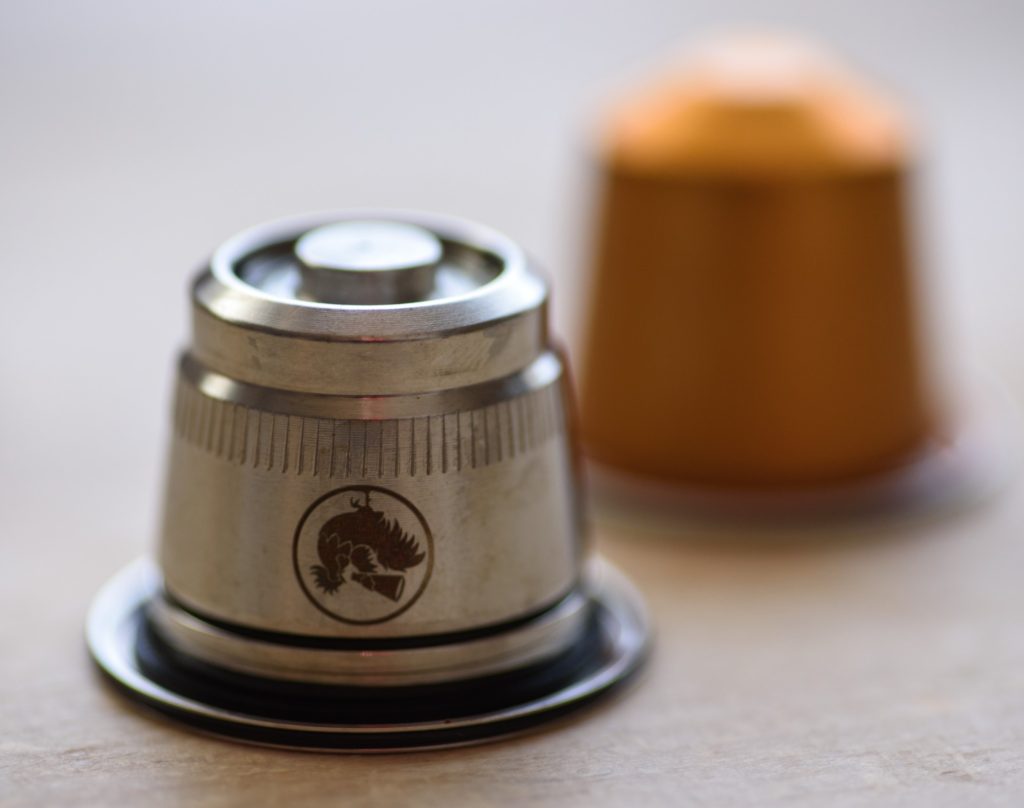
Waycap in the front, more traditional disposable alternative in the back. Notice the hollow ring where the needles from the coffee machine will go to.

The content of the package is two capsules, a tamper, a dispenser and a set of rubber rings to replace the ones mounted from the factory.

Content according to the tin, but you also get a range of plates to control the water flow and spare rubber bands to seal the capsules.

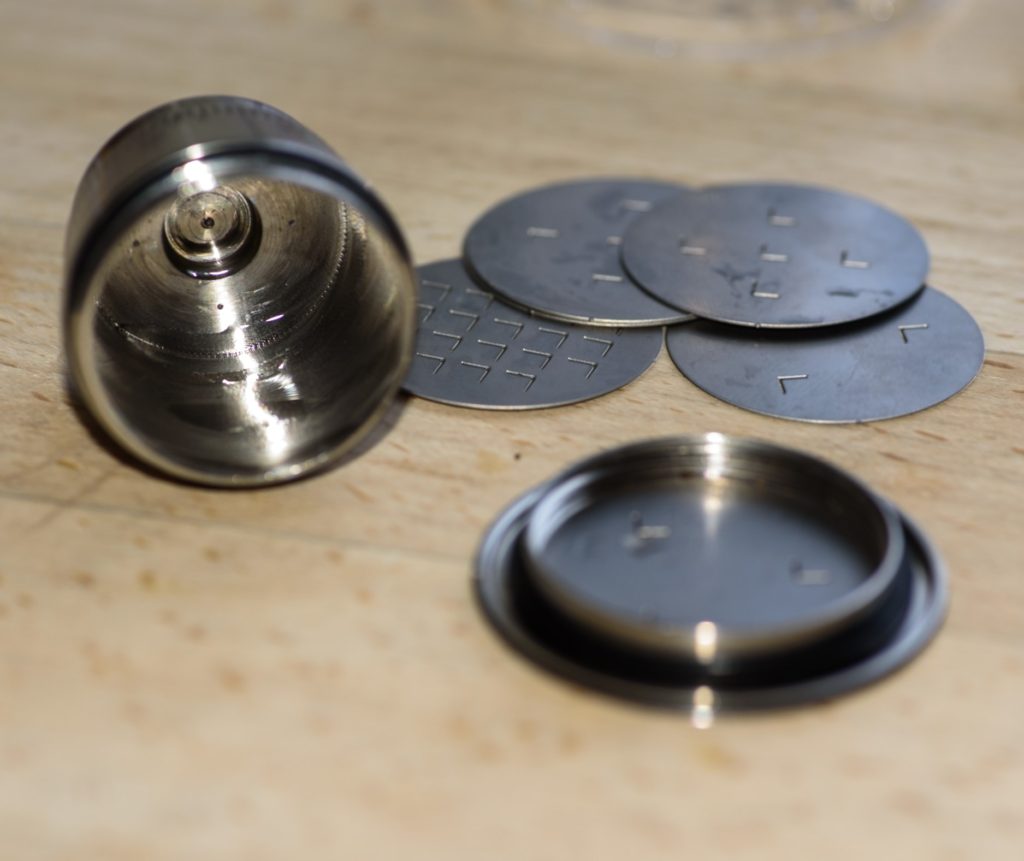
In addition to this a few plates with L-shaped holes in it is supplied. The point is that you can vary how long the water is to flow though the capsule, and you can experiment with different options to adjust to taste.

The plates to be mounted inside the capsule. The number of holes (L-shaped) determines how long time the coffee is in contact with the water. More holes, less time.

After you have mounted a plate inside the capsule, the simple process is to use the dispenser to get coffee into the capsule and after that use the stamper to pack the coffee.

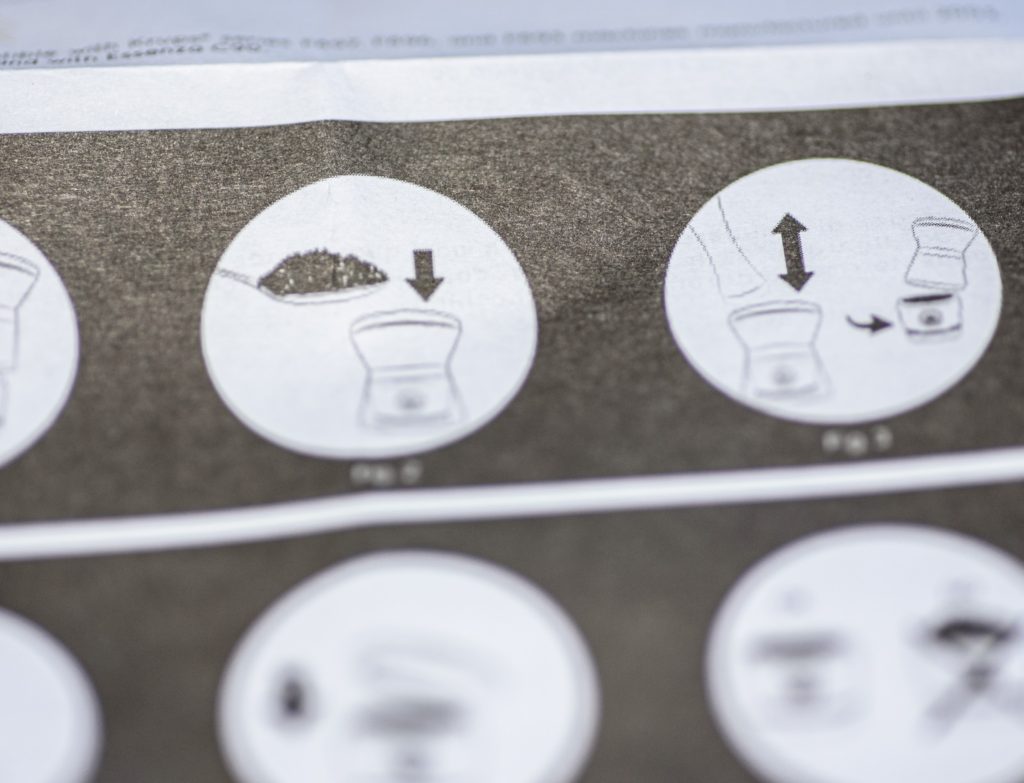
The user guide is a bit intimidating at first, but once you get a hang of the system it quickly becomes a routine. But my first attempt at reading it Christmas eve was not successful. Find a quiet moment to take in the details.

The two capsules comes with a plastic tube to aid filling coffee into the capsule and a plastic tamper (right) to help you pack the coffee in the capsule.

A precision made super thin thread allows you to screw the lid on the capsule. It seems to me like really well made precision work by the Italian factory, and although I have not used the system for more than a few days, I would expect this to be a durable product that will last many years.

Also, there seems to be a solid supply of rubber rings to keep you going for many years forward, so this product should last you for many years.

The two capsules comes with a lot of rubber rings to replace the ones mounted from the factory.

I do miss somewhere to store both the extra plates and the rubber rings, but in daily use (once you have selected your favorite plates) the only thing you need is the capsules themselves, and they store neatly in the dispenser using the supplied lids for the top and bottom.

The plastic tube to aid filling the coffee into the capsules, doubles as a storage container, when the two lids (top and bottom) are added.

Verdict

Does it work? Yes, it does. I will say though that mounting the capsules, as well as removing it again, requires use of more force with my Nespresso machine than the disposable capsules, actually to a level where I in the beginning suspected that something was wrong. I am not sure if this will have a negative long term effect on my machine – time will tell, but there definitely is a big difference in the force you need to apply.

Any downsides? Yes, the time required to prepare a cup of coffee. One of the wonderful things about the Nespresso system is the ease and speed. And that you only make one cup, so you don’t waste coffee by brewing a full bowl only to drink a fraction. The latter is still maintained with the Waycap system, but it takes a lot more time to fill the capsule yourself. The speed and convenience drops. If you are willing to make this investment in going from fast-food to slow-food, then of course it is not an issue. But brewing 4 fast cups when friends drop by is not that easy. The use case is a bit different.

Any upsides? Yes, other than the gain for the environment, I can confirm that it is both cheaper and that you get better coffee. I love the Nespresso coffee, but you can afford to buy some really good coffee and still save money relative to the 1/2 EUR per cup that Nespresso charges. You will have to play a bit with the number of holes in the plates, the coffee type and how fine the coffee is grinded, but once you get that under control, it is a pure pleasure.

Any quirks? Yes, other than the capsules being a bit tougher to mount in the machine, I find that removing the plates with the holes from the capsules can be a pain. I think it is because water between the plate and the capsule creates a small vacuum that is difficult to overcome. The user guide also mentions that the capsules are rather hot just after you’ve made a cup, but I find that it gets cold much faster than the 10 minutes the guide recommends you wait.

Bottom line? I really like the Waycap system. It seems like a solid product of very high quality. And its key selling arguments are solid if you ask me. But sometimes I miss the speed of my disposable capsules. And for that reason I probably will use both, but the Waycap system will definitely make my use of disposable capsules drop dramatically. And that is not bad at all.

Related reading

Apple AirTag Review

RAVPower PD Pioneer Power Bank Review

Review: Worx Landroid M700

At approx. 750 EUR the Landroid M700 is certainly amongst one of the more budget friendly lawn mover robots, but will it get the job done?

Price

The Landroid M700 will set you back around 750 EUR, and hence it is one of the less expensive lawn mover robots available. You should however be aware that it comes without GPS tracking, which is an additional 200 EUR approximately. It is sold as a separate module you plug into the Landroid. You may not need it if your WIFI covers your entire lawn and if you don’t want to be able to track your Landroid,  if stolen.

How it works

The Landroid needs you to install a boundary cable that defines the area in which the Landroid is to work. It is very important that you follow the installation instructions and give sufficient room between the cable and objects, as the Landroid follows the cable when it returns home to the base.

Landroid and boundary cable.
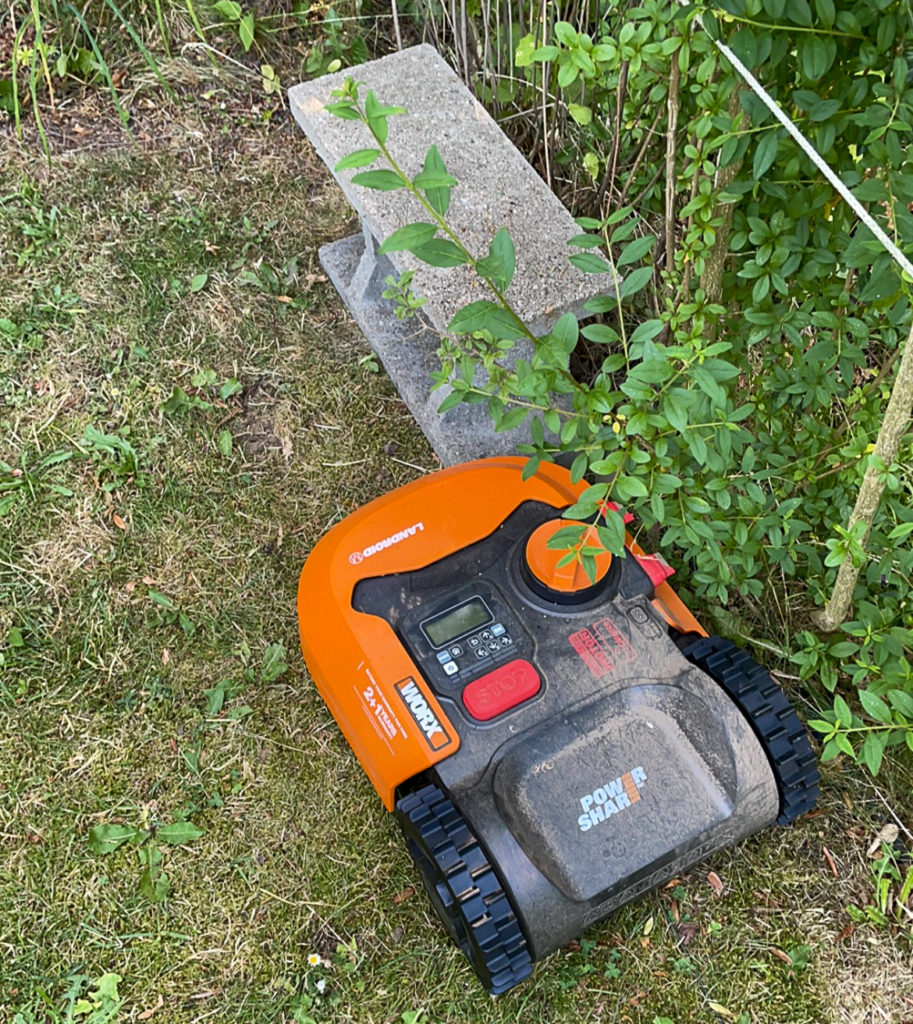
Make sure to make room between the boundary cable and objects like stones and walls – here the Landroid cannot pass the concrete block….

Compared to more expensive robots that have a so called guiding cable, which is a separate cable guiding the robot back to the base, the Landroid finds it way back to the base by searching for the boundary cable and following this counterclockwise until it is at the base. Any object along the boundary cable that stops the Landroid will be a show stopper, as the Landroid logically follows the boundary cable to find home.

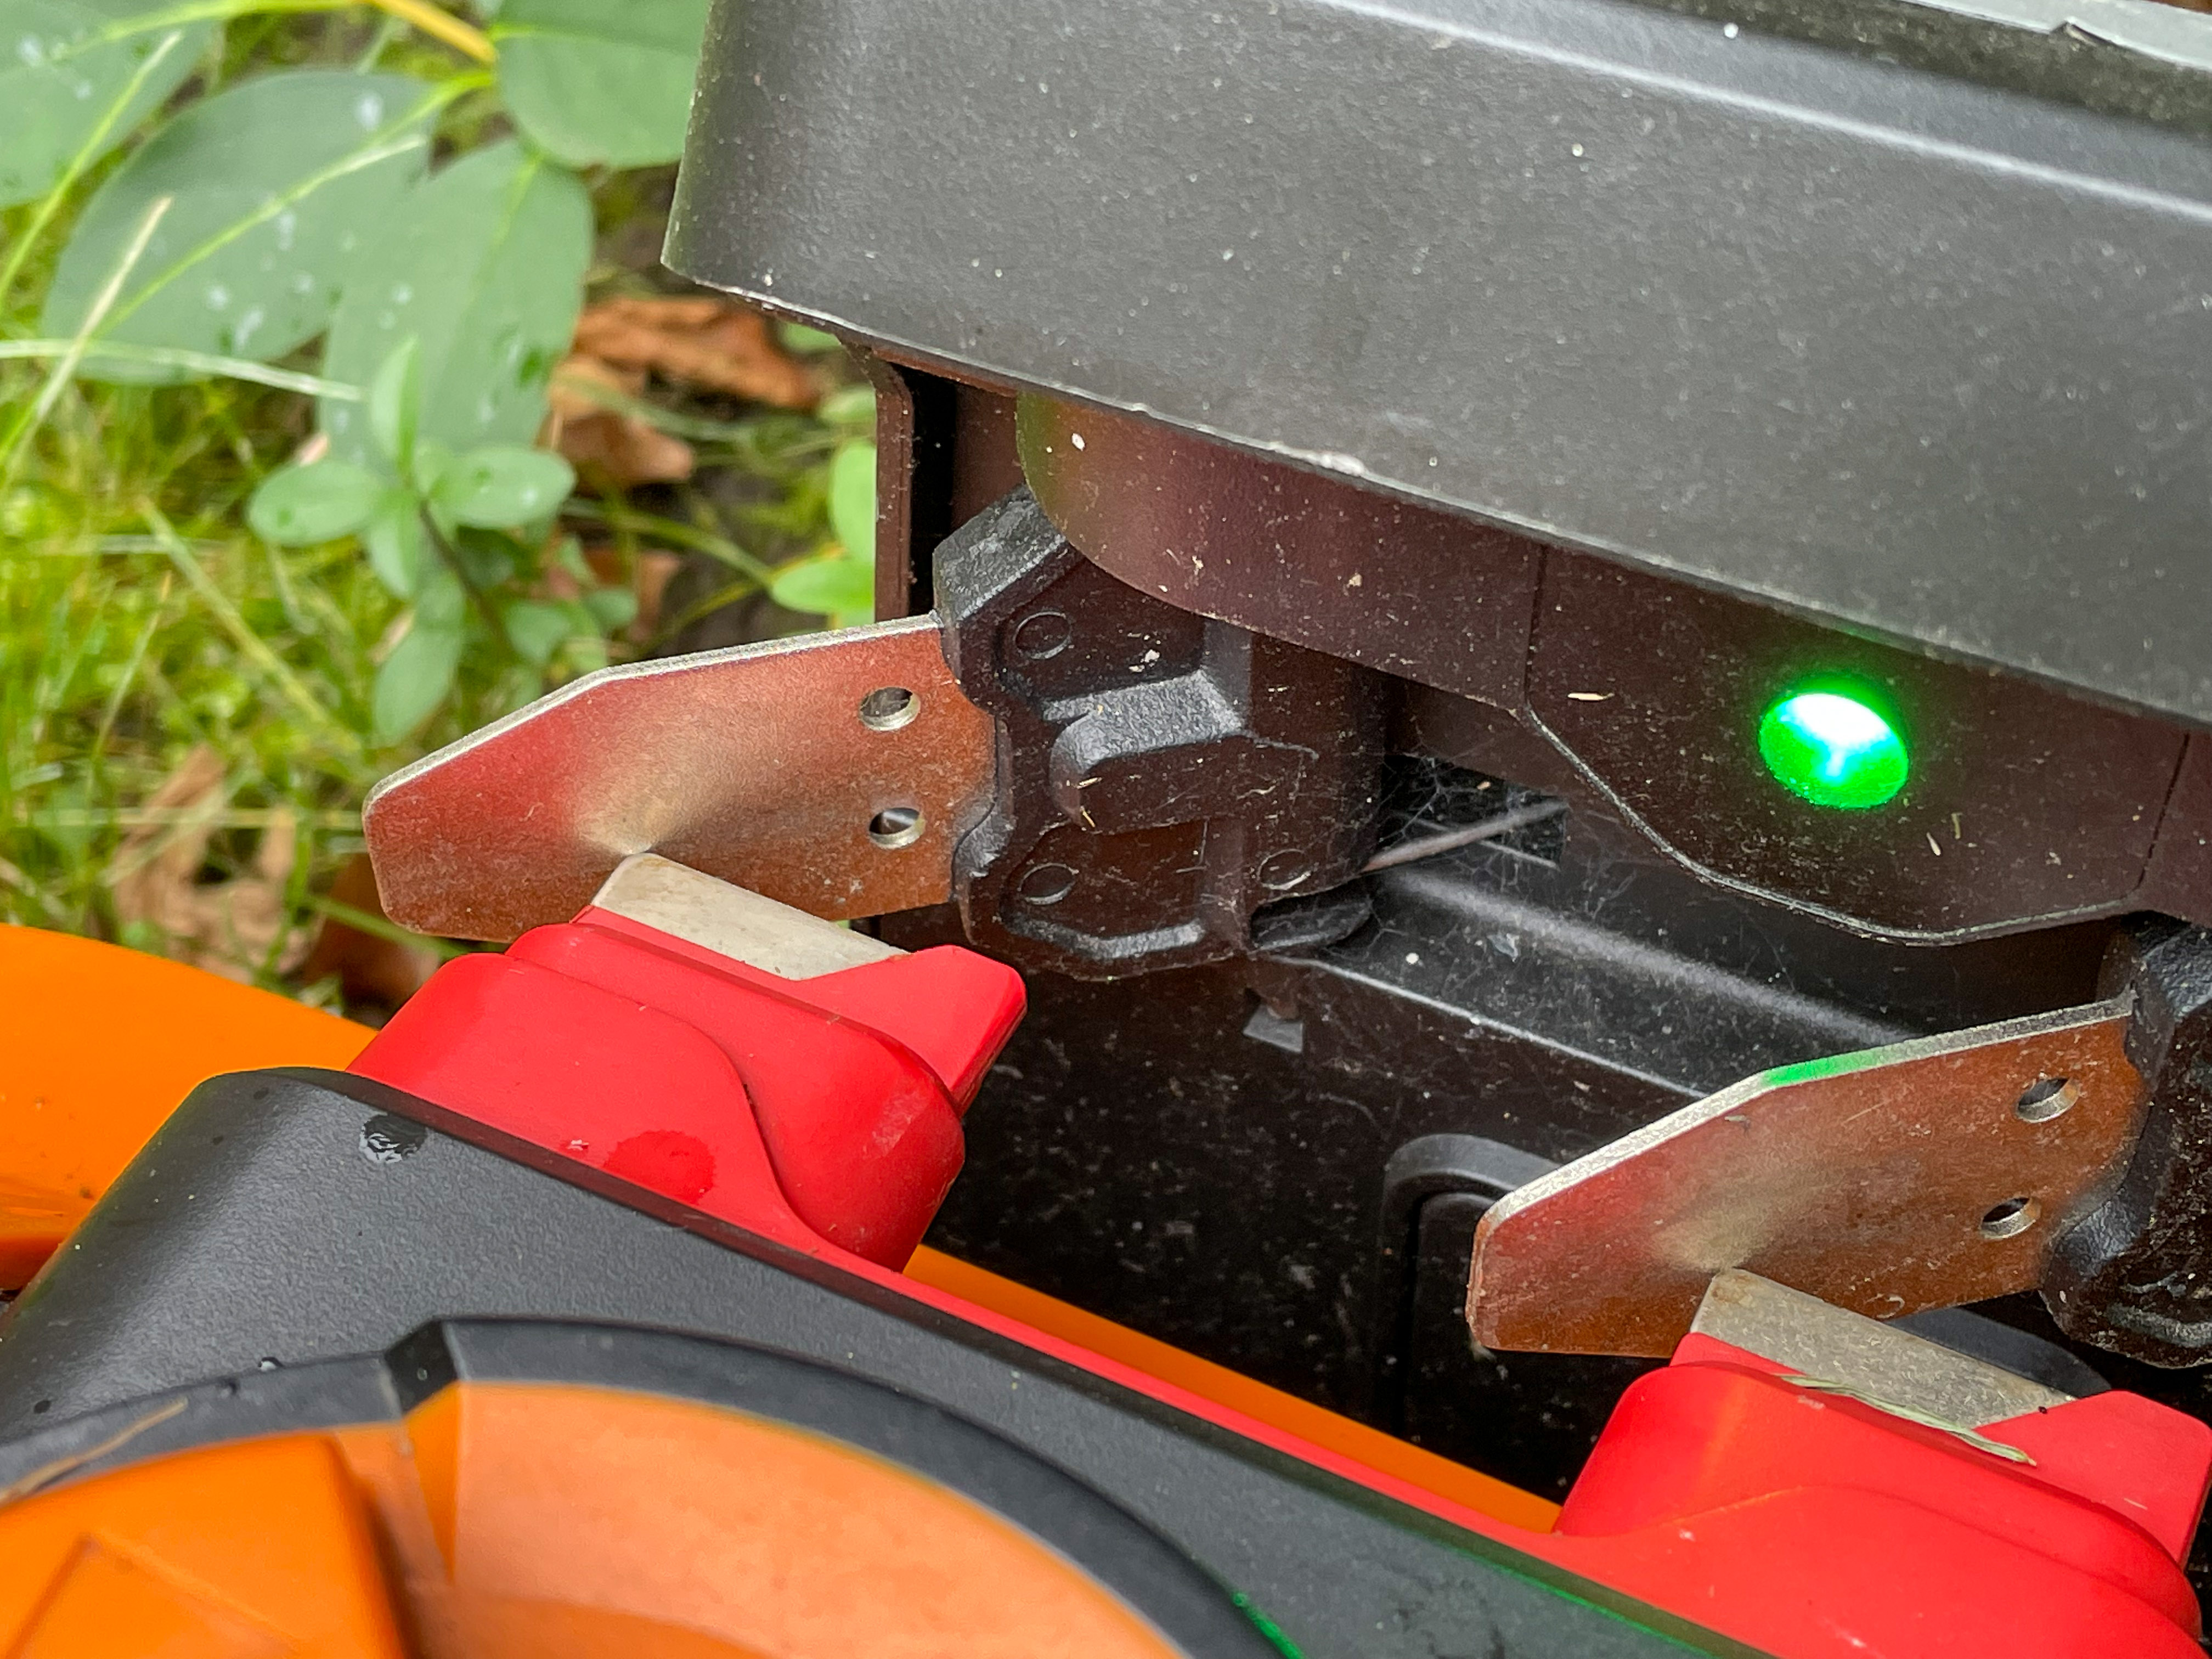
Landroid and charging.
Two metal arms stick out to the right hand side of the Landroid and connects to the base for charging. The green flashing light shows charging is in progress.

It is also important that the lawn is free from any obstacles like fallen down branches, apples and tools from the shed, otherwise it will impair the operation of the Landroid. This was a little new to me, it is just like having a toddler where you keep objects out of reach to avoid problems…

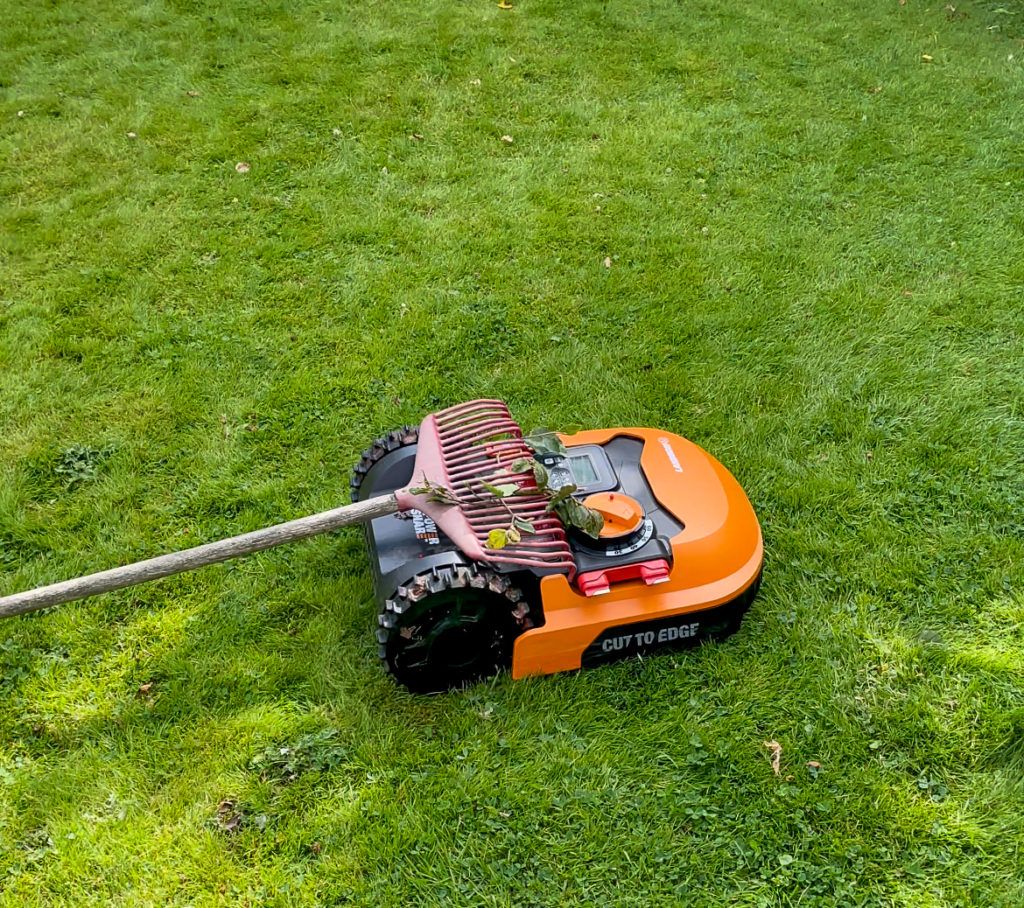
Landroid and objects.
The Landroid has decided to battle a rake and at this point it is difficult to call a winner…

The philosophy

Maybe a big word to use about a lawn mover, but it does operate somewhat differently from the Husquarna that I also have had the pleasure to test:

First, the Landroid has only one nose wheel, and this makes it very vulnerable to holes in the lawn. I had to fix several holes that I did not know I had before the Landroid would operate without interruptions. So you may want to get a lawn mover robot with 2 nose wheels if you plan to use it in less-than-perfect lawns.

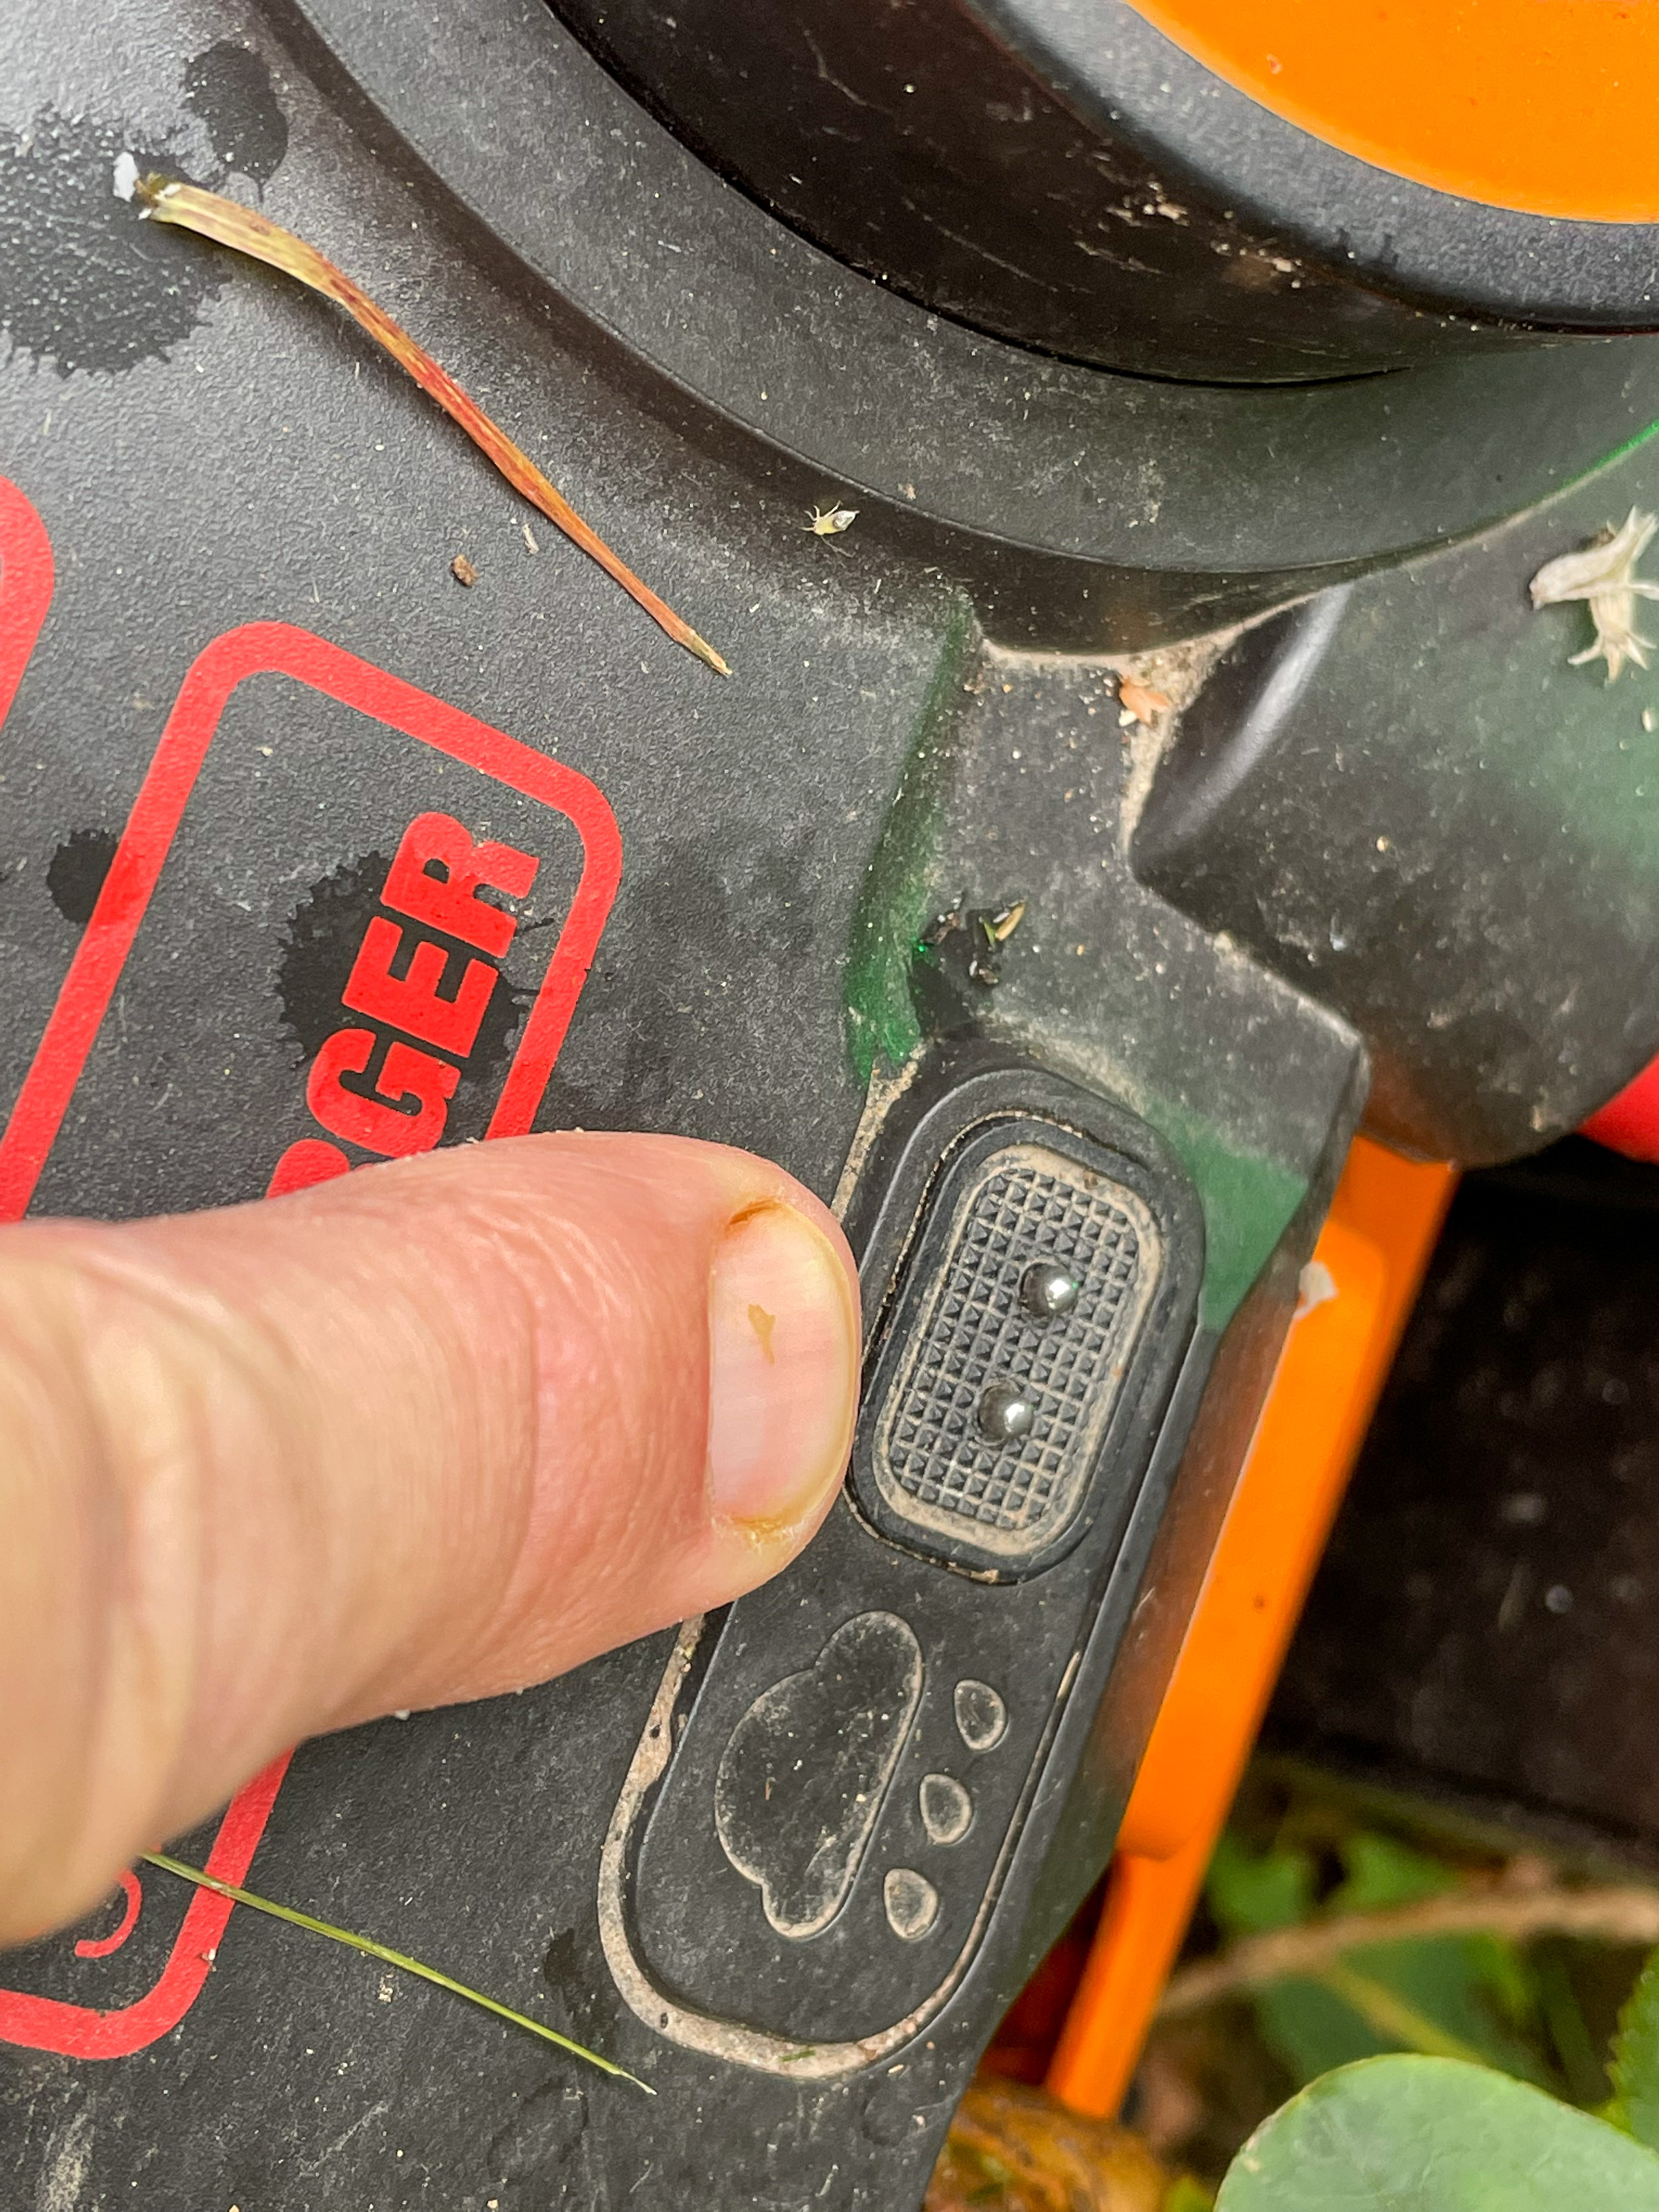
Second,  the Landroid only cuts 1/2 the width of the body. You can see here in the image below that the black area is where the crass is cut (my fingers show the cut area), behind the orange area there is nothing going on! So the Landroid needs to do a lot of back and forth in order to cut the lawn, as the blade is rather small. My guess is that the advantage is that the motor is less a strain on the battery and hence the Landroid can go for much longer stints than had it needed to power the motor to drive a larger blade. And it brutally drives the battery down to 10% before returning to base – other more conservative robots do that at 30%. And the battery can be used in other power tools from Worx and the other way around. So if you have several tools from Worx, you can share battery “pool” with the Landroid.
Cutting width.
The “mouth” where the grass is cut. It is not the full width of the robot.

Third, the designers at Worx have prioritized that the robot is not to work when it rains! I have always been told that cutting the grass in rain is a waste of time, as the grass just bends and is not cut. But the much more expensive Husquarna I have tested did not have this ability.

The Landroid comes with sensors to detect rain, and if it is working, it returns to base, and if it is about to start, you can set up how long time it should delay its work, once the rain has stopped.

Rain sensor.
The rain sensor on top of the Landroid

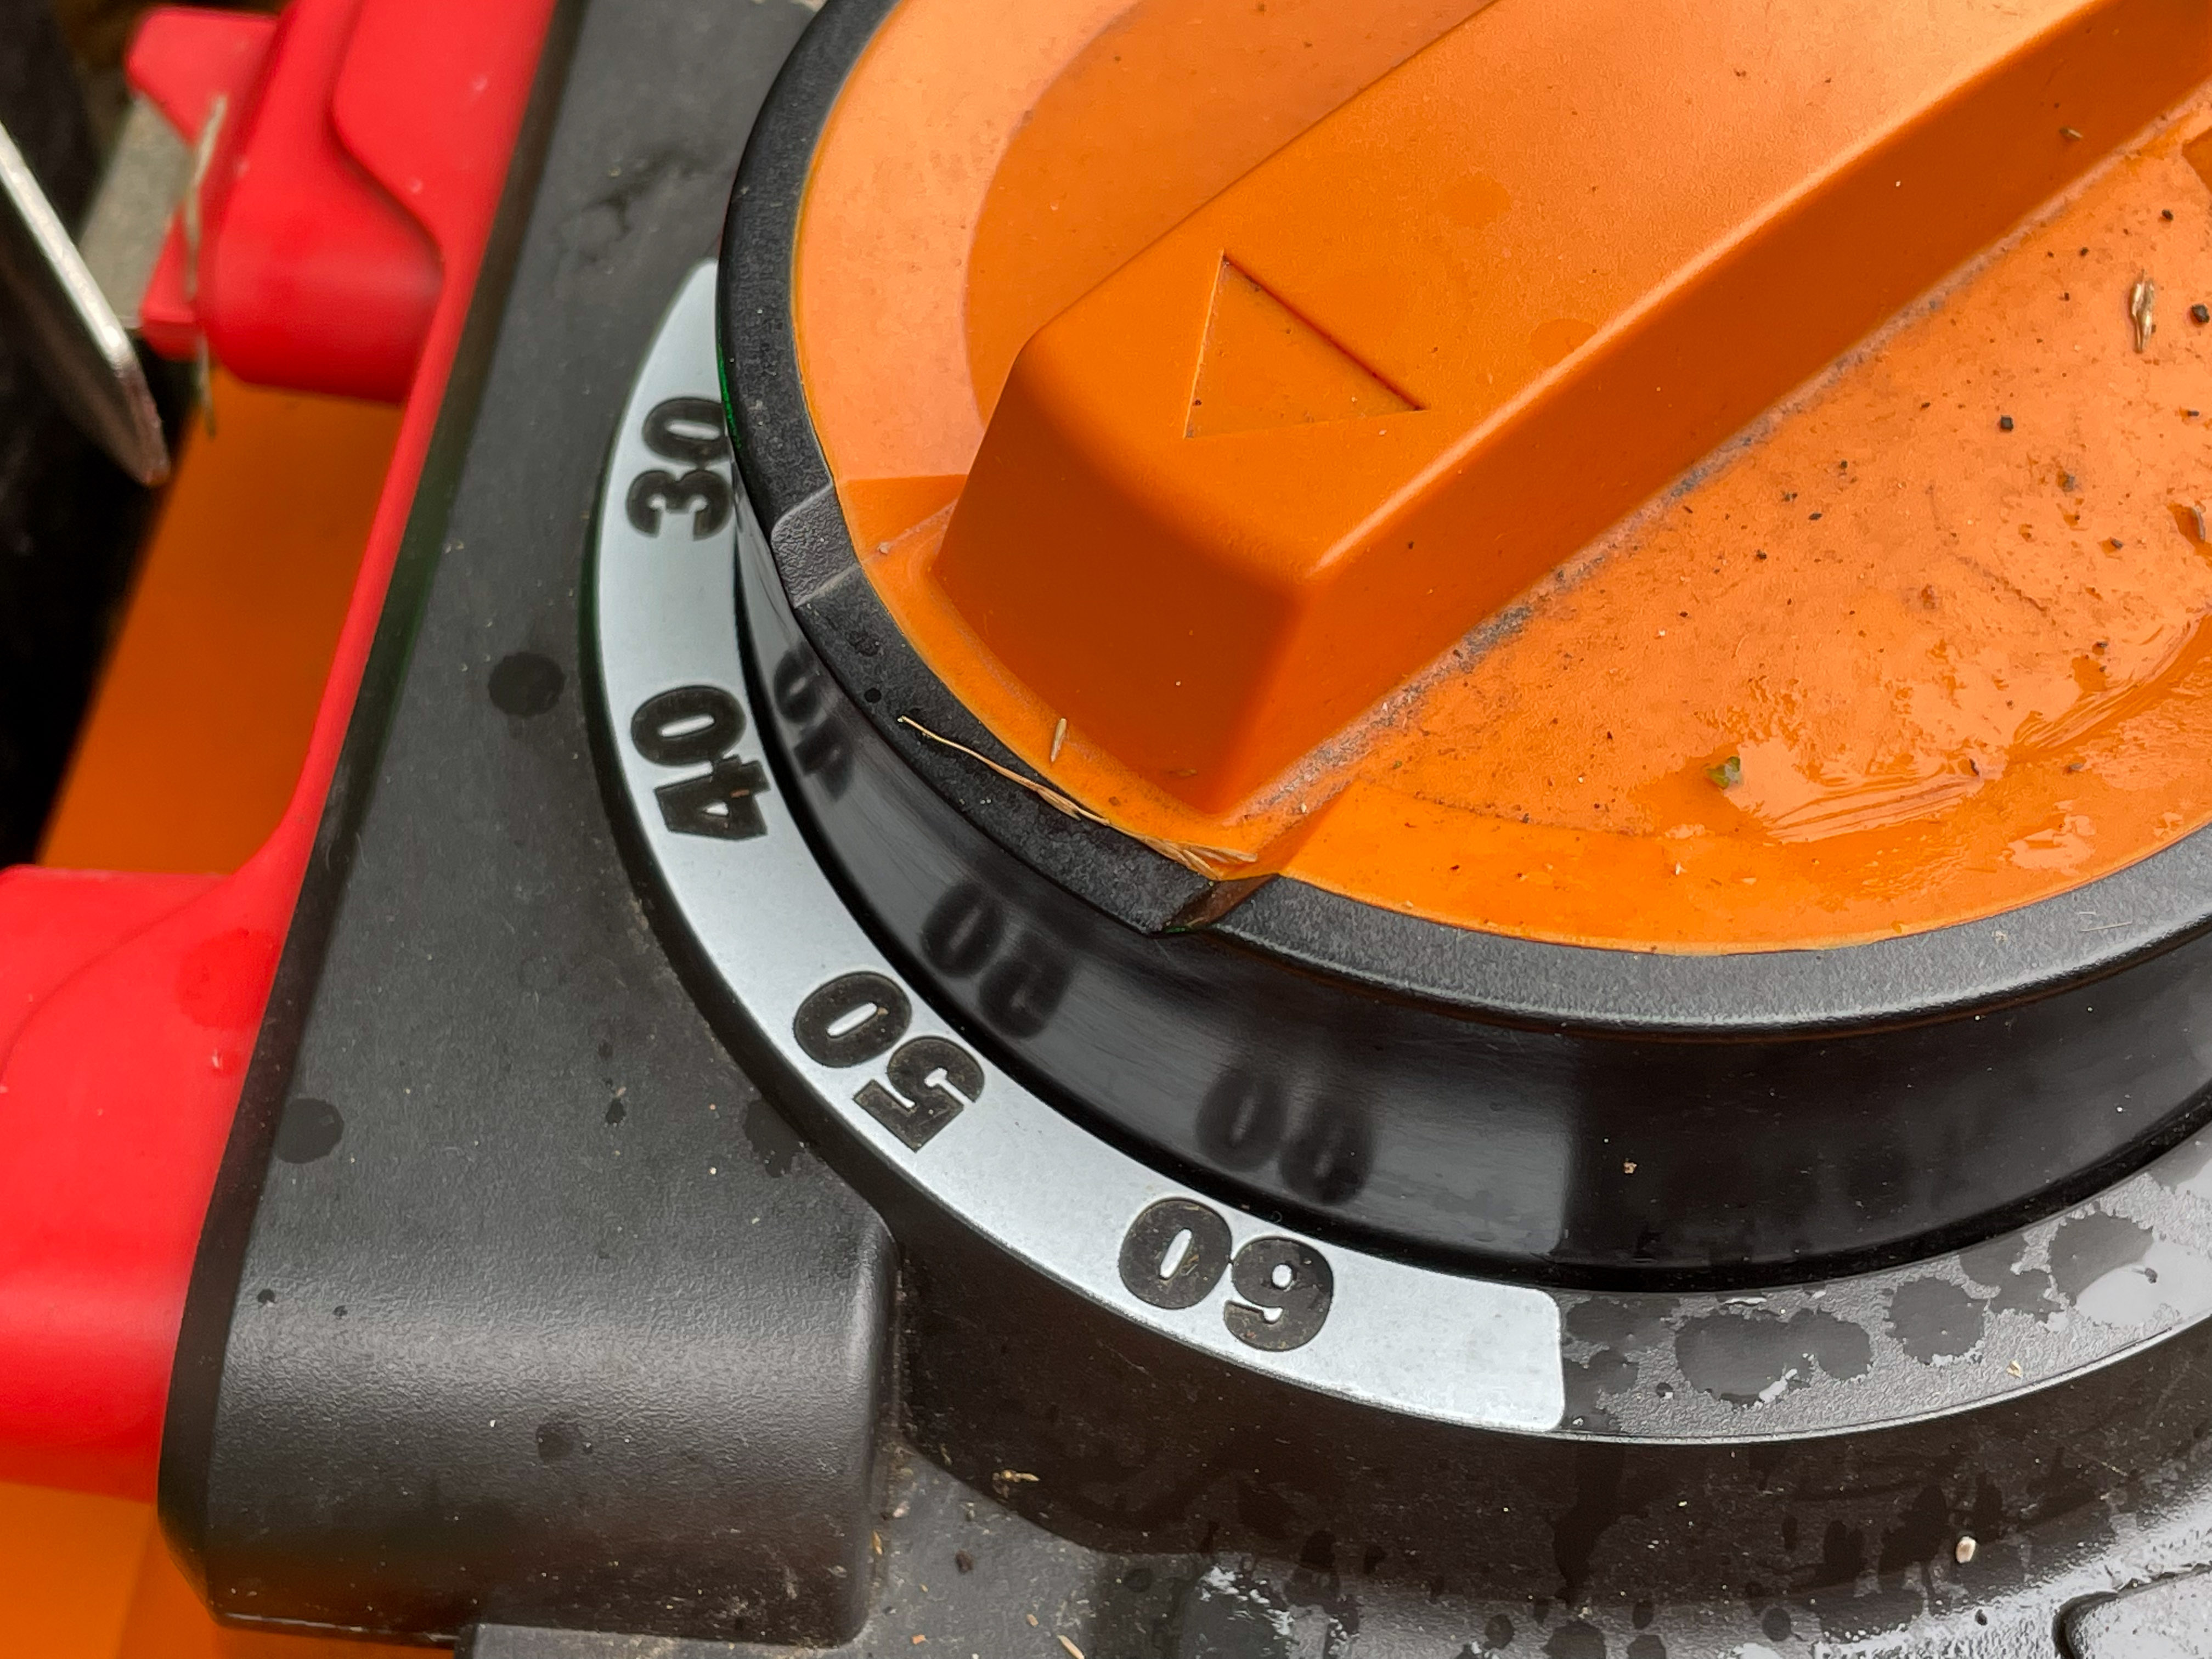
In contrast to the rain sensor, the cutting height cannot be controlled via an app as some of the more expensive robots offer. On the Landroid the height is controlled by a large turning knob on top of the body that determines the cutting height in mm’s. It feels a bit primitive, but when I think about how few times I have changed the cutting height, this seems to be a good place to lower the ambitions.

Setting cutting height.
Cutting height is set to 50 mm here.

Operation

The Landroid is rather quiet. You can hear it working, but it is certainly not bad at all. Actually, it has several times bumped into me, as I was so absorbed in garden work that I did not hear it approaching.

The name M700 indicates that it can handle a lawn up to 700 square meters – mine is a bit smaller than that, and the Landroid seems rather relaxed maintaining the back yard of my house. In order to also handle the very small front yard that I have, I would need to install a second boundary cable, and move the robot. The front yard is simply too small for that, so my trusty old petrol driven lawn mover is still with me, and we cut the front yard in approx. 5 minutes. Notice also that the Landroid does not do corners very well, nor the area just outside the boundary wire (remember: you need some safety margin) so the good old petrol driven one also helps me out here.

The Landroid drive is pretty powerful. The two large rear wheels and a very small front wheel gives it lots of traction and it happily pushes smaller chairs around on the patio. It also detects non-movable objects such as a wall and makes recovery moves to get on with the job. In few cases have I seen the Landroid trapped, but that has been when the arms on the right hand side of the body have been caught in a branch or two, otherwise the Landroid does an pretty good job of pulling itself out of problems. But mind you that it does not like lack of space between the boundary cable and solid objects. And if holes in the lawn catches the tiny front wheel, then the Landroid gets stuck.

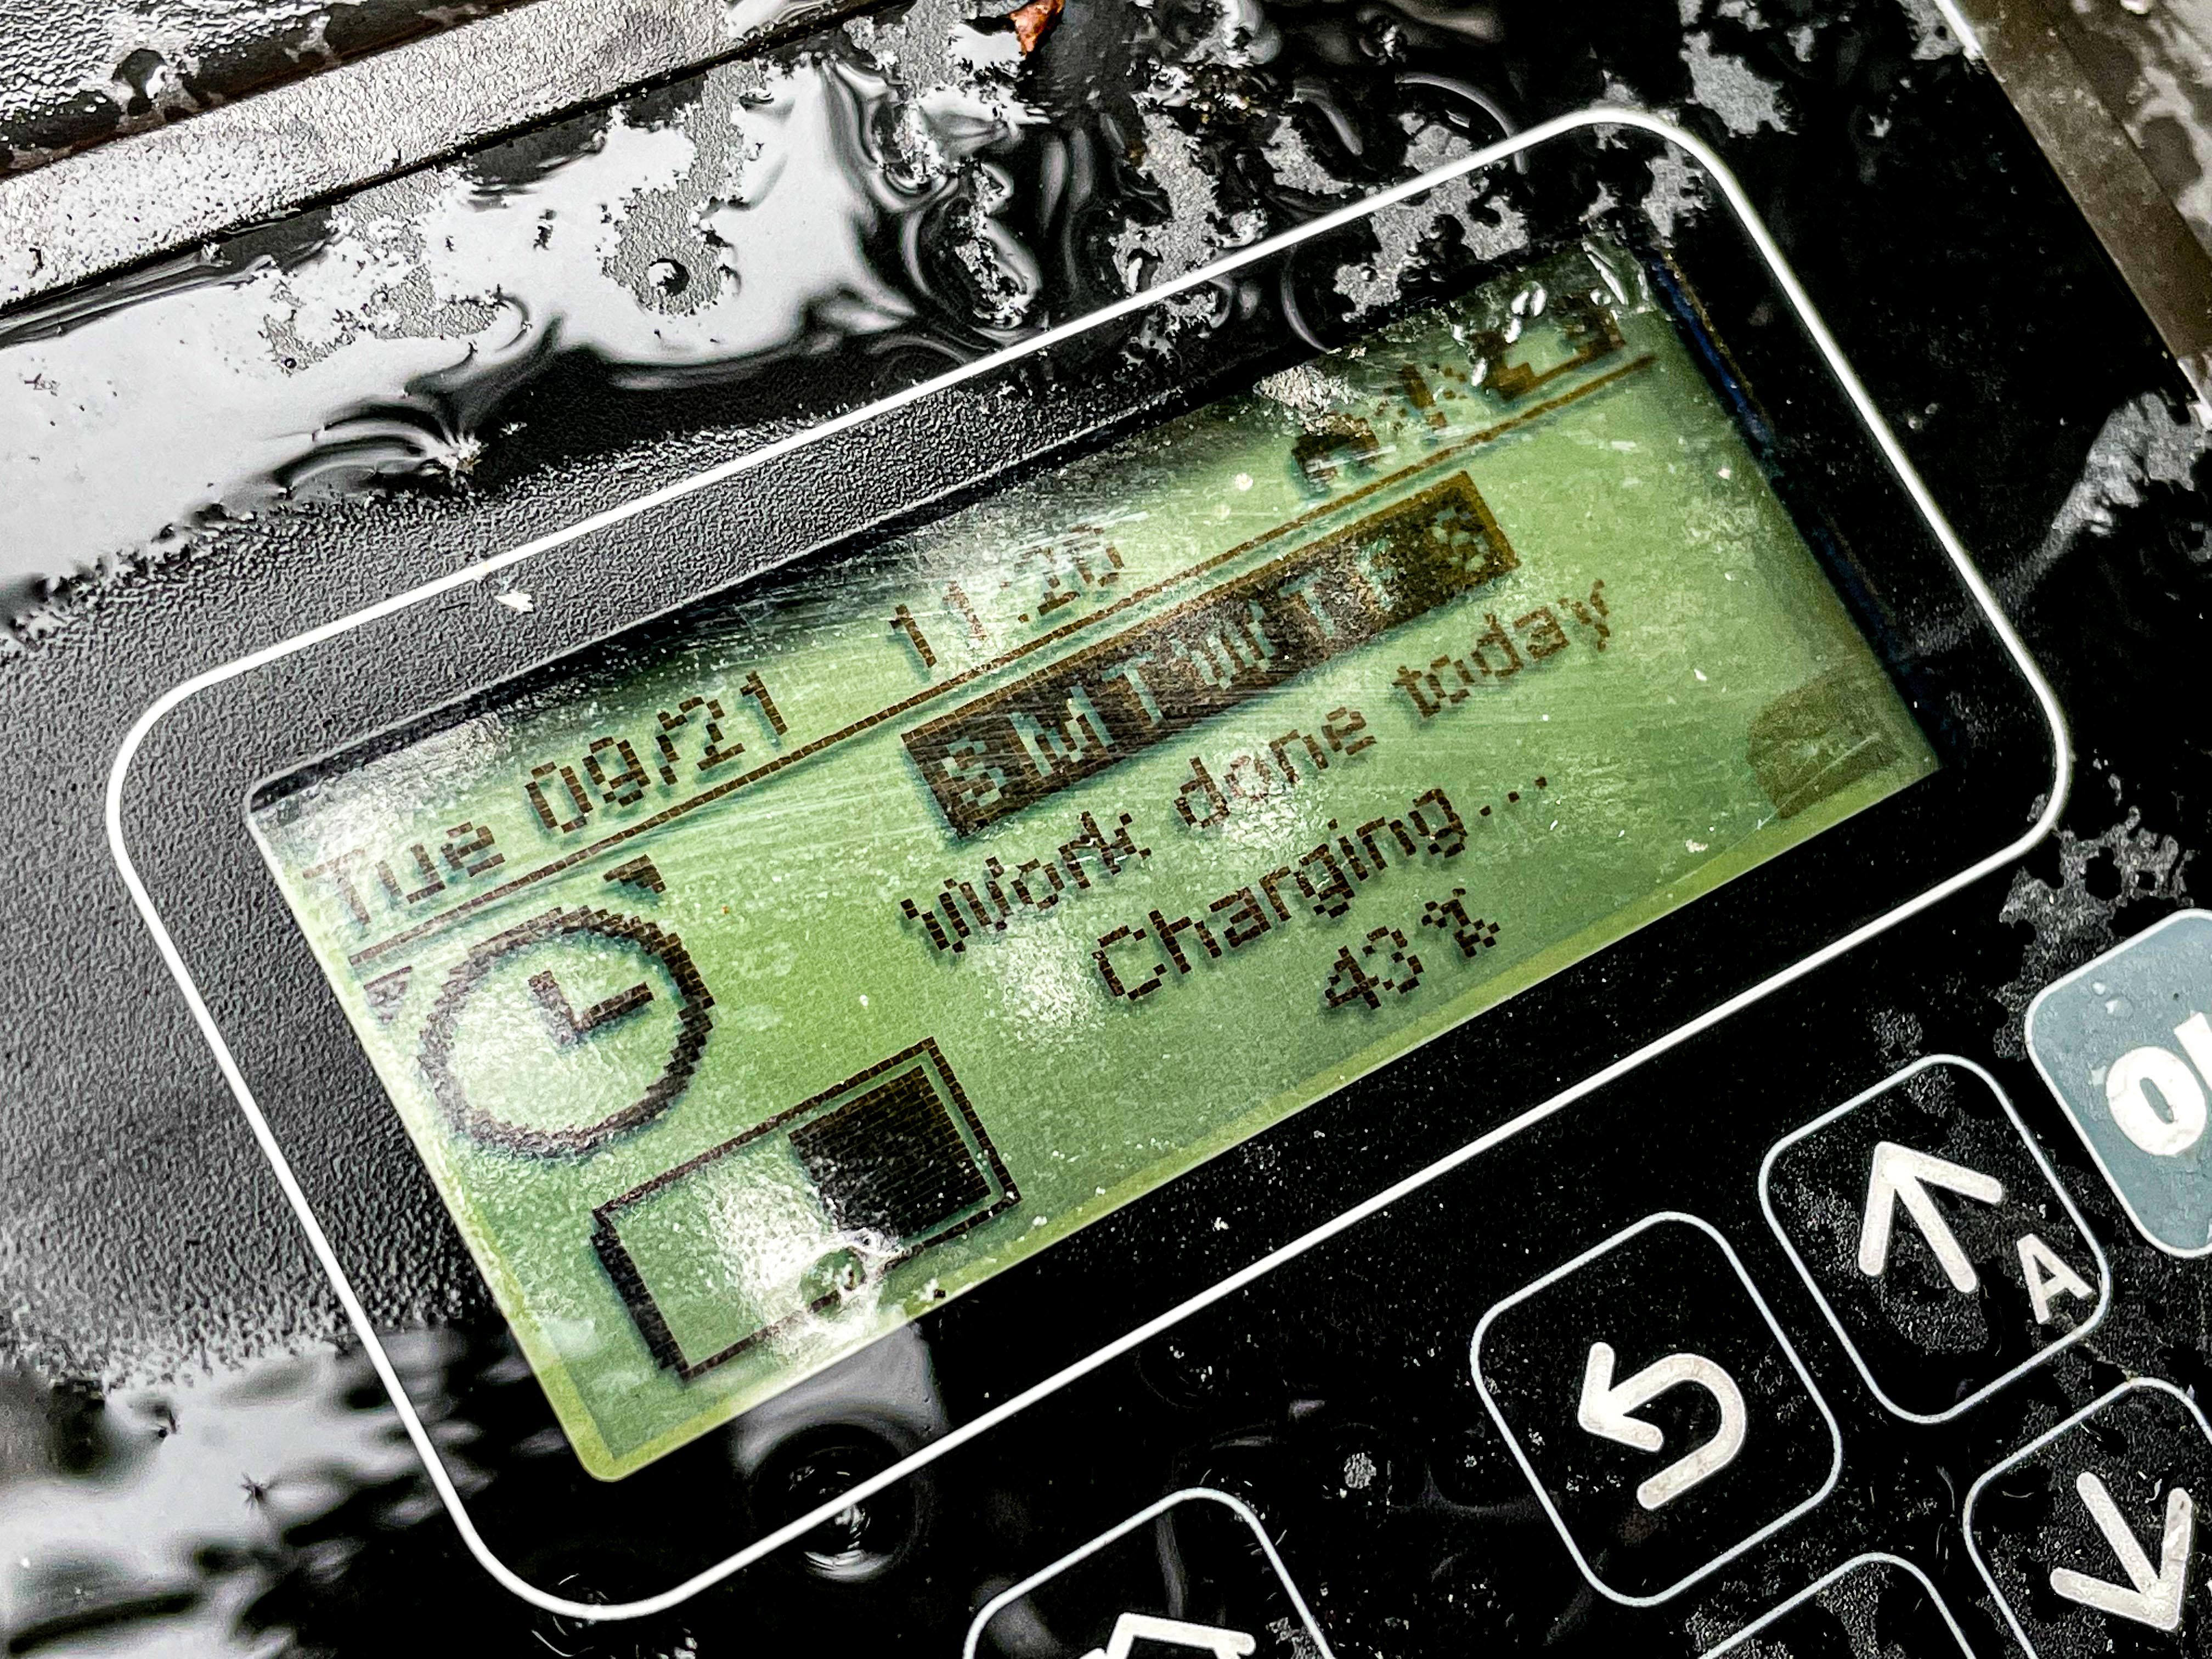
In terms of configuration I have simply asked the Landroid to generate a standard scheme, and made a few modifications on top of that. That works fine. You can see here in the display below that the Landroid is charging (43%) and that the schedule covers all days of the week – if no black box behind the letter of the day, then the Landroid has a day off (I’m a tough employer and it has duties all 7 days a week, but starts later in the day Saturday and Sunday).

You protect the Landroid settings with a passcode, but I am not sure how effective that is when it comes to theft – in that case you need to buy the GPS module to find your Landroid again.

The Landroid will make lines in the grass when cutting. In the image below, the morning dew clearly shows where the Landroid has been, but that quickly disappears and in general the lawn appears very neat and tidy when the Landroid takes care of it.

What is worse is that the Landroid works along the boundary cable so much that it eventually makes small tracks in the grass… Even if you ask the Landroid not to cut along the boundary wire, the Landroid will make tracks in the grass. Here I really miss the guiding cable from more expensive models…


Conclusion

What I like:

  • Price
  • Battery life / stint duration
  • Quiet operation
  • Easy setup
  • Good traction and trap recovery
  • Battery share with other Worx products

What I did not like:

  • Leaves tracks along the boundary cable
  • Does not handle corners well, nor the outside if the perimeter cable
  • Only one nose wheel – vulnerable to holes in the lawn
  • No GPS tracking (additional investment)
  • Vulnerable to boundary cable blunders
  • App does not work then WiFi coverage is missing / weak