Review: Waycap refillable capsules

Save the planet, save Money

No, I did not make up the headline above – it is a quote from the Waycap cardboard box! And it certainly does sound promising! I am not sure your coffee capsules can save the world, but moving from disposable coffee capsules to re-usable ones sounds to me like a small step in the right direction in terms of doing something positive for the environment. If you then in addition can save some money and on top of that have better control of what coffee goes into your capsules, then I think we are approaching something that sounds like good answers to the “why?” question: (1) Eco-friendly, (2) saves you money and (3) potentially gives you better coffee.

The promise on the tin.

I must admit that I recycle also my disposable coffee capsules from Nespresso, so maybe the gain in that light is less, but saving money and making better coffee also sounds attractive to me. The review here is using a Nespresso coffee machine, but it works with many other brands according to the tin.
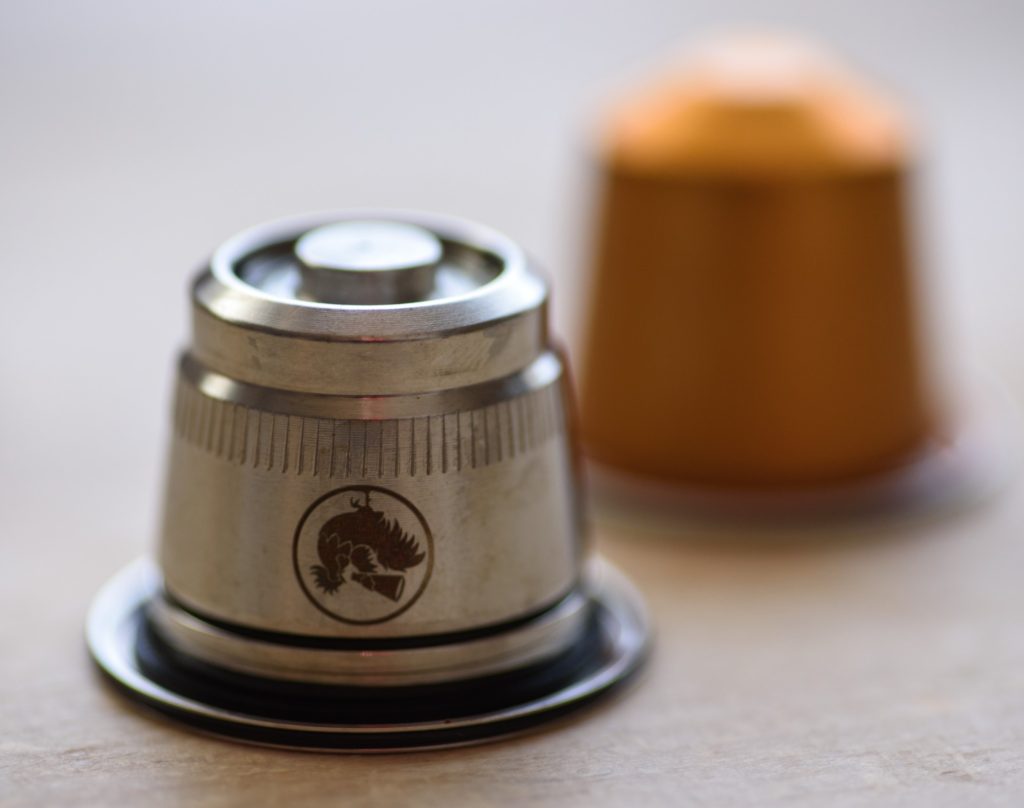
Waycap in the front, more traditional disposable alternative in the back. Notice the hollow ring where the needles from the coffee machine will go to.

The content of the package is two capsules, a tamper, a dispenser and a set of rubber rings to replace the ones mounted from the factory.

Content according to the tin, but you also get a range of plates to control the water flow and spare rubber bands to seal the capsules.

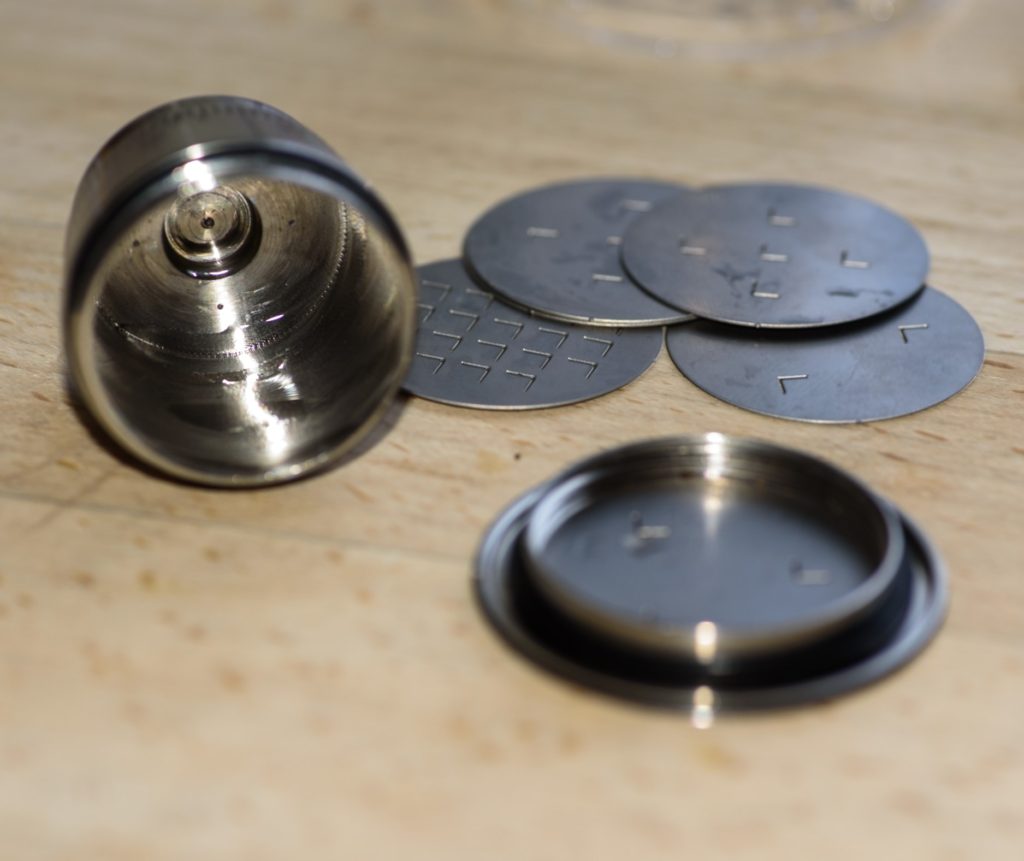
In addition to this a few plates with L-shaped holes in it is supplied. The point is that you can vary how long the water is to flow though the capsule, and you can experiment with different options to adjust to taste.
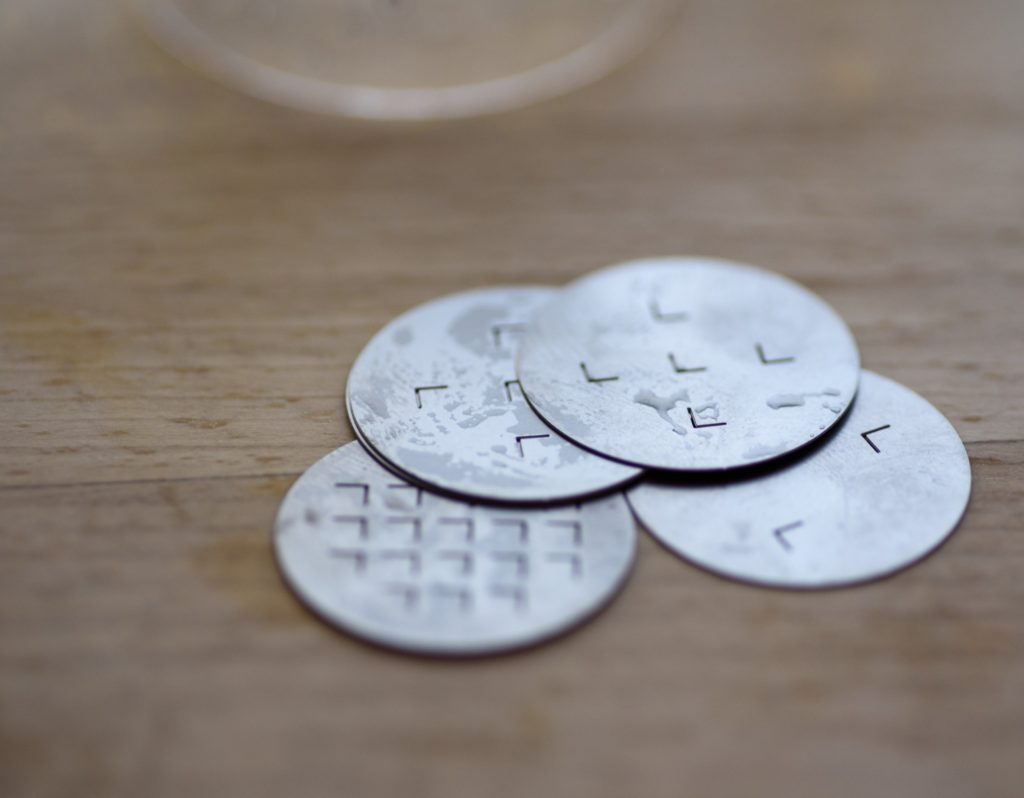
The plates to be mounted inside the capsule. The number of holes (L-shaped) determines how long time the coffee is in contact with the water. More holes, less time.

After you have mounted a plate inside the capsule, the simple process is to use the dispenser to get coffee into the capsule and after that use the stamper to pack the coffee.
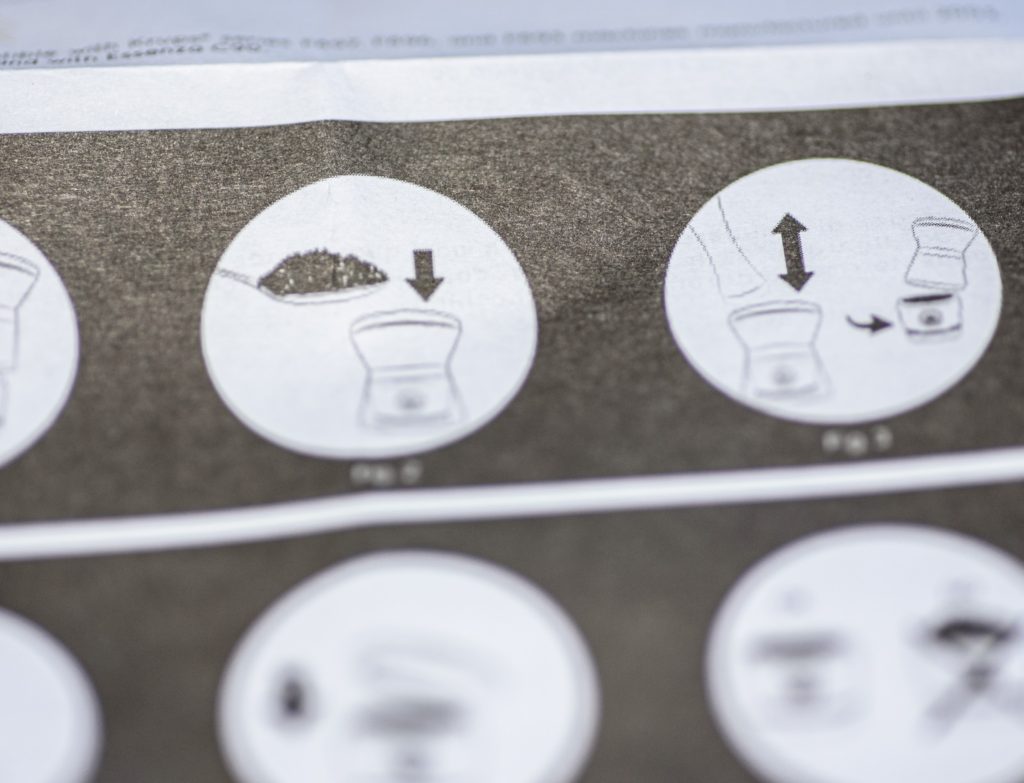
The user guide is a bit intimidating at first, but once you get a hang of the system it quickly becomes a routine. But my first attempt at reading it Christmas eve was not successful. Find a quiet moment to take in the details.

The two capsules comes with a plastic tube to aid filling coffee into the capsule and a plastic tamper (right) to help you pack the coffee in the capsule.

A precision made super thin thread allows you to screw the lid on the capsule. It seems to me like really well made precision work by the Italian factory, and although I have not used the system for more than a few days, I would expect this to be a durable product that will last many years.

Also, there seems to be a solid supply of rubber rings to keep you going for many years forward, so this product should last you for many years.
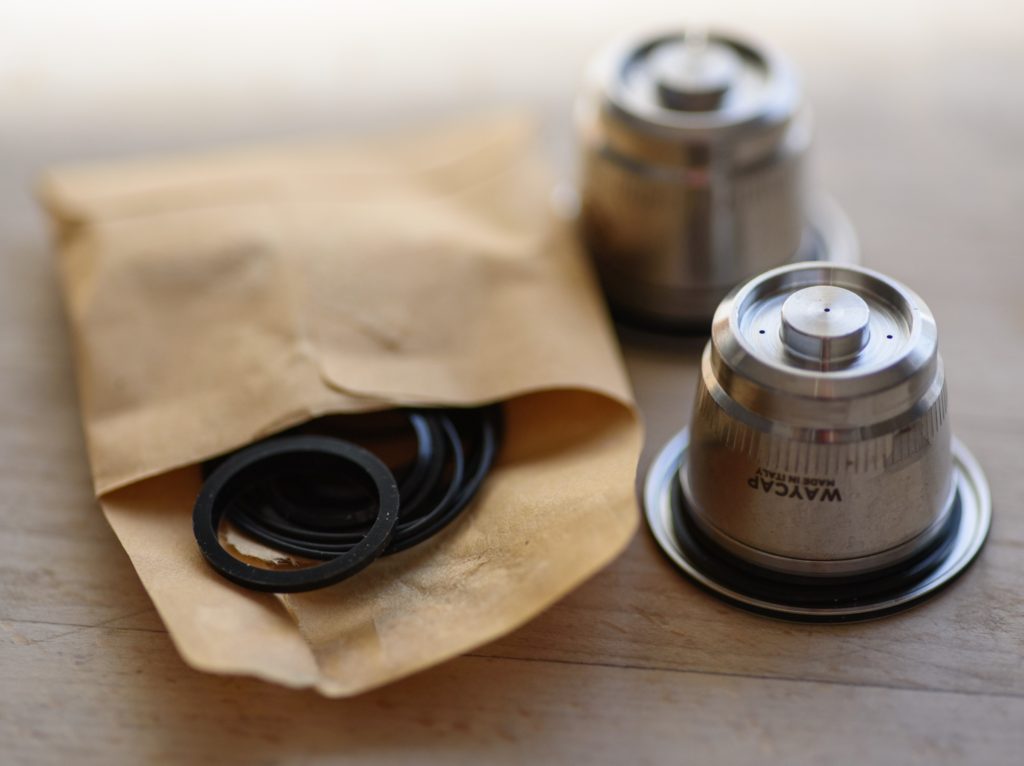
The two capsules comes with a lot of rubber rings to replace the ones mounted from the factory.

I do miss somewhere to store both the extra plates and the rubber rings, but in daily use (once you have selected your favorite plates) the only thing you need is the capsules themselves, and they store neatly in the dispenser using the supplied lids for the top and bottom.

The plastic tube to aid filling the coffee into the capsules, doubles as a storage container, when the two lids (top and bottom) are added.

Verdict

Does it work? Yes, it does. I will say though that mounting the capsules, as well as removing it again, requires use of more force with my Nespresso machine than the disposable capsules, actually to a level where I in the beginning suspected that something was wrong. I am not sure if this will have a negative long term effect on my machine – time will tell, but there definitely is a big difference in the force you need to apply.

Any downsides? Yes, the time required to prepare a cup of coffee. One of the wonderful things about the Nespresso system is the ease and speed. And that you only make one cup, so you don’t waste coffee by brewing a full bowl only to drink a fraction. The latter is still maintained with the Waycap system, but it takes a lot more time to fill the capsule yourself. The speed and convenience drops. If you are willing to make this investment in going from fast-food to slow-food, then of course it is not an issue. But brewing 4 fast cups when friends drop by is not that easy. The use case is a bit different.

Any upsides? Yes, other than the gain for the environment, I can confirm that it is both cheaper and that you get better coffee. I love the Nespresso coffee, but you can afford to buy some really good coffee and still save money relative to the 1/2 EUR per cup that Nespresso charges. You will have to play a bit with the number of holes in the plates, the coffee type and how fine the coffee is grinded, but once you get that under control, it is a pure pleasure.

Any quirks? Yes, other than the capsules being a bit tougher to mount in the machine, I find that removing the plates with the holes from the capsules can be a pain. I think it is because water between the plate and the capsule creates a small vacuum that is difficult to overcome. The user guide also mentions that the capsules are rather hot just after you’ve made a cup, but I find that it gets cold much faster than the 10 minutes the guide recommends you wait.

Bottom line? I really like the Waycap system. It seems like a solid product of very high quality. And its key selling arguments are solid if you ask me. But sometimes I miss the speed of my disposable capsules. And for that reason I probably will use both, but the Waycap system will definitely make my use of disposable capsules drop dramatically. And that is not bad at all.

Related reading

Apple AirTag Review

RAVPower PD Pioneer Power Bank Review

What is EV? And what is a stop of light?

Exposure language

EV is an abbreviation for exposure value. It is a way to express exposure in one number, i.e. the combination of shutter speed, aperture and ISO. To be quite honest, I doubt that many use EV’s today, as most rely on the exposure meter in their cameras, possibly in combination with the histograms.

But you can study EV as a way to understand exposure better. For example, if you shoot at f/4 and 1/125th, you are at EV 11, but if you open up the aperture to f/5.6 and maintain the shutter speed, you are now at EV 12. This is referred to as going one stop up.  So walking up and down the EV scale is referred to as stops of light. The light is doubled or halved for each stop. This gives you a “settings independent” way of talking about exposure, and you can say go one stop up in aperture and one down in shutter speed and arrive at the same EV.  So shooting at f/4 and 1/125th gives the same EV as shooting at f/5.6 and 1/60th. I half the light that comes though the lens (f/4 -> f/5.6) but double the exposure time (1/120th -> 1/60th). Both are EV 11.

For simplicity I have kept the ISO out of the description above, but it is the same logic: doubling of halving the ISO is the same as going one stop up or down in exposure. So the ISO scale is: 100 – 200 – 400 – 800 – 1600 etc. Many cameras allow you to select ISO values more granularly than full stops, and that can be handy, but remember to double/half to make a full stop difference.

Another area where EV is useful is when it comes to the spec list for a camera. The cameras dynamic range is expressed as an EV. For  example the Nikon D750 over at DxOMark is listed as having a dynamic range of 14.5 EV’s, whereas the Nikon D810/D850 has 14.8 EV’s. Higher is better, as it enables you in one shot to span across more difference in light in the scene, without blowing out the highlights or loosing details in the shadows. So if dynamic range is important for your kind of shooting, then the EV for a camera you consider buying  could prove an important part of your decision making.

Related reading

What is exposure compensation?

What are exposure metering modes?

What is a camera image sensor?

Read the light

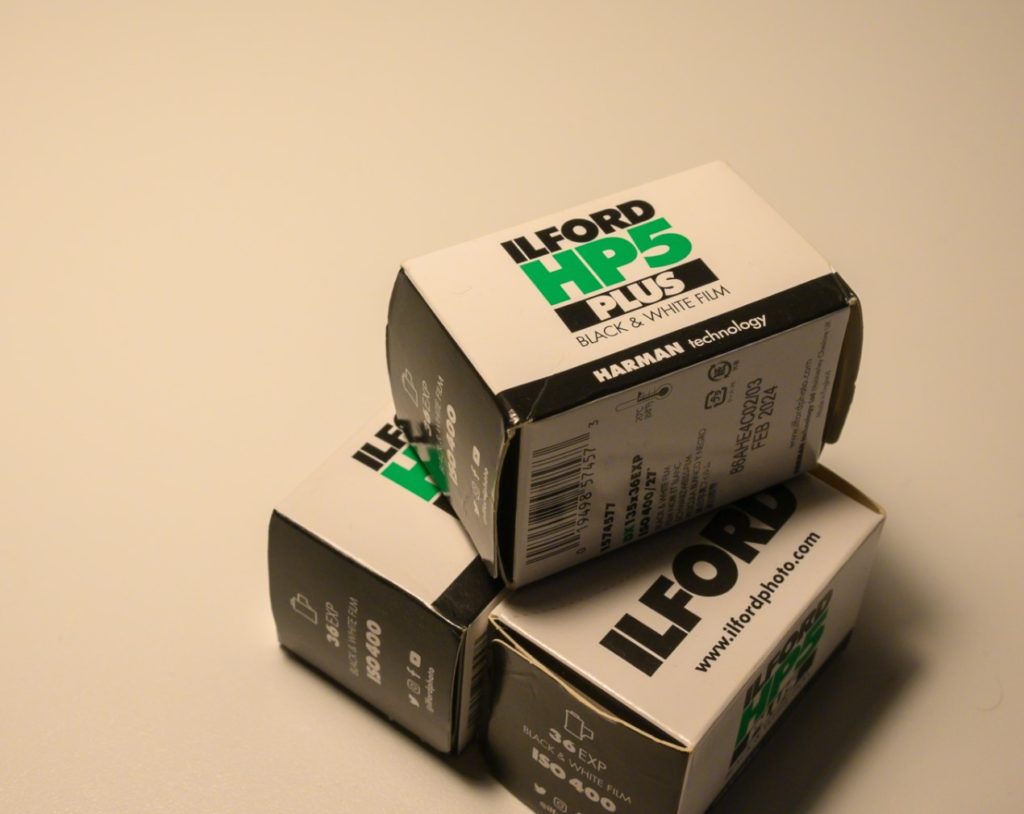
The image sensor has replaced the 35mm film as the receptor of light. This gives many advantages, for example that you don’t have to change film every 24 or 36 images, that you can preview the result immediately and don’t have to wait for the lab to deliver results. Further, you can carry a very large number of pictures on a small memory card and it is easy to transfer the files to a PC for post processing. Most shoot with digital cameras these days, but – just like the revival of the vinyl records – there as some that mix film shooting into their work simply because they like the expression you get this way.

The 35mm film has been replaced by a sensor that is able to read the light it is exposed to.

The image sensor is the unit that has replaced where the film used to be – and this is very literally. The sensor sits in the same position as the film used to do and the size is – provided you shoot full frame – also the same (35 mm).

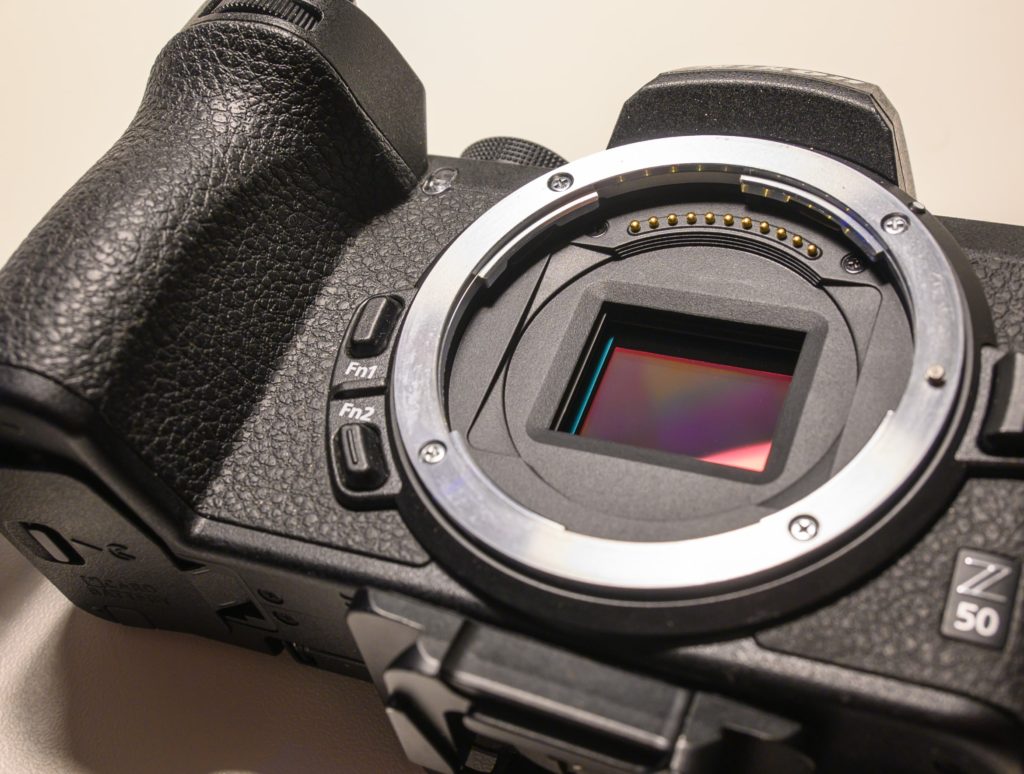
The camera image sensor, here from the Nikon Z50. In a mirrorless camera the sensor is completely exposed when the lens is removed; on a DSLR the sensor is hidden behind a diagonal positioned glass.

With the introduction of mirrorless cameras you can now actually see the sensor when the glass is removed from the camera body. This also makes the sensor vulnerable to dust and dirt if you change lenses in the field. With a DSLR, the sensor is to some extend protected behind the mirror.

The sensor is not exposed entirely, as there is a thin layer of glass in front of the sensor; otherwise the sensor would be too vulnerable. You can buy sets to clean the sensor and to blow air onto the sensor in order to remove dust and particles. Never remove dust from the sensor using your breath – it contains moist and that is dangerous for your camera in general and the electronics in particular. Always use a (rocket) air blower for such work.

The sensor reads the light just like the film used to do and the values read are then made into an image stored on the memory card in the camera. You cannot change the sensitivity of the sensor, it remains the same as when the sensor left the factory. But you can change the ISO value, which is a factor applied to the light read by the sensor by the cameras image processing software (firmware). Unfortunately, cranking up the ISO means that both signal and noise is amplified, and with a weak signal, it can be difficult for the camera to distinguish between signal and noise. For that reason images taken with high ISO values are grainy and have washed out colors.

Related reading

Is mirrorless cameras better than DSLRs?

Should you upgrade from APS-C to full frame?

What is a mirrorless camera?

Mirror and optical viewfinder

A mirrorless (ML) camera is as the name says, a camera without a mirror, nor does it have an optical viewfinder. Light flows directly from the lens to the camera sensor. The ML camera can be seen as a natural evolution of the DSLR and even the SLRs, but the ML concept is also used in cameras that do not have an interchangeable lens system, like a point-and-shoot camera or a smartphone.

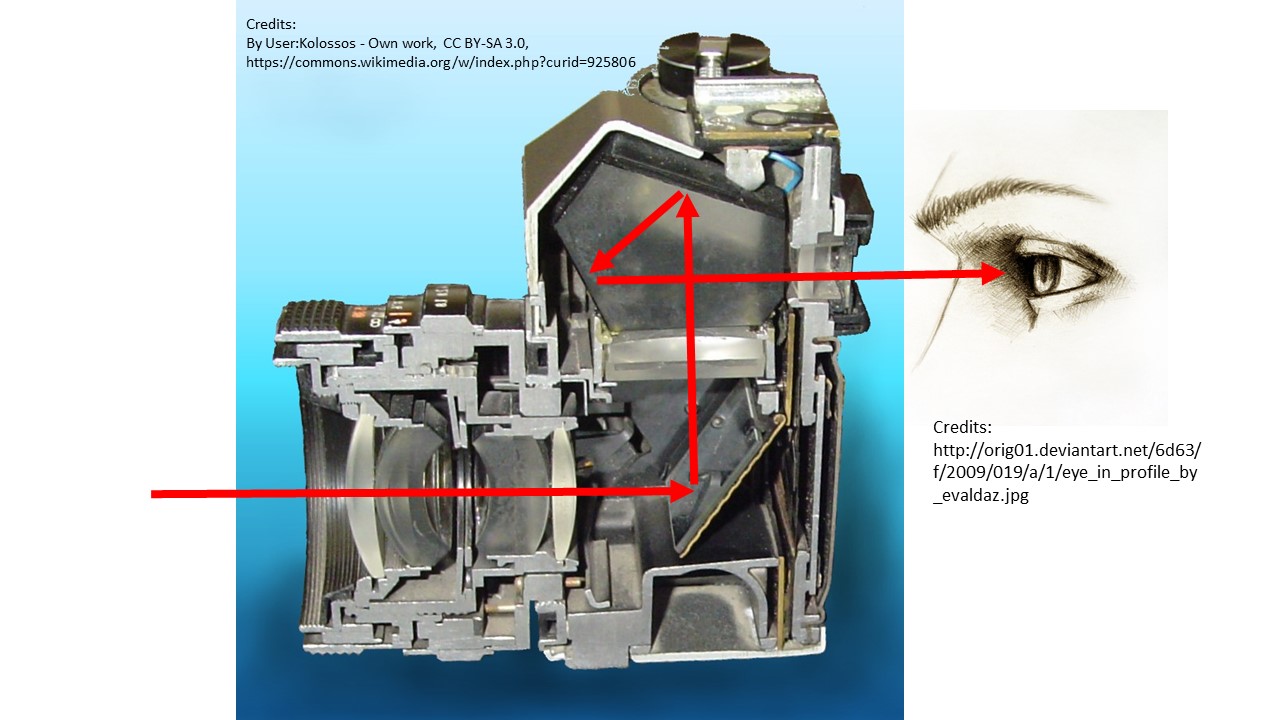
The image below shows how a DSLR works. The light is sent to the optical viewfinder via several mirrors, most notably the first one that keeps the light away from the sensor (or film).

With a mirrorless camera, the light is constantly and directly sent to the sensor. The optical viewfinder is replaced by a electronic viewfinder, which basically is a small TV screen located where the optical viewfinder used to be. Not all ML cameras have a viewfinder, but instead uses the rear LCD as viewfinder.

Many DSLR cameras can flick away the mirror and show on the rear LCD what you can see in the electronic viewfinder of the ML camera. In that way, the DSLR can work as a ML when using the rear LCD.

The lack of a mirror is not to be confused with the shutter. Many ML cameras have both a mechanical and an electronic shutter. The mechanical shutter has two curtains that allow the sensor to be exposed according to the selected shutter speed by moving the curtains across the sensor. The electronic shutter turns the camera sensor on and off to get the same effect. It is all about measuring the light at the timeframe dictated by the shutter speed. Notice that for flash photography a mechanical shutter is required.

On a DSLR/SLR, the focus system is often a separate system that via a small hole in the glass uses a small area of light to determine focus or not. Therefore a DSLR focus system often only allows you to select a focus area in the center of the frame. With a ML system, the entire sensor in real time receives light and determines focus or not – this requires good software and computing power, but it also opens up for selecting focus points in the entire frame (incl. corners) and intelligence to recognize people (their eyes) and animals, and thereby take the sophistication of the auto focus systems to a new level.
Related reading

What is a DSLR?

Is mirrorless cameras better than DSLRs?


Nikon Z6ii: Manual exposure, how to

Manual exposure

Many find manual exposure a bit intimidating and stay with the automated mode or one of the semi automated modes like aperture priority or shutter priority. Good news is that manual exposure is not complicated at all and that you have a lot of room for making exposure mistakes and still be able to fix it in post, provided you shoot RAW, which I highly recommend. And you will understand your camera a lot better when you know how to operate in manual exposure mode.

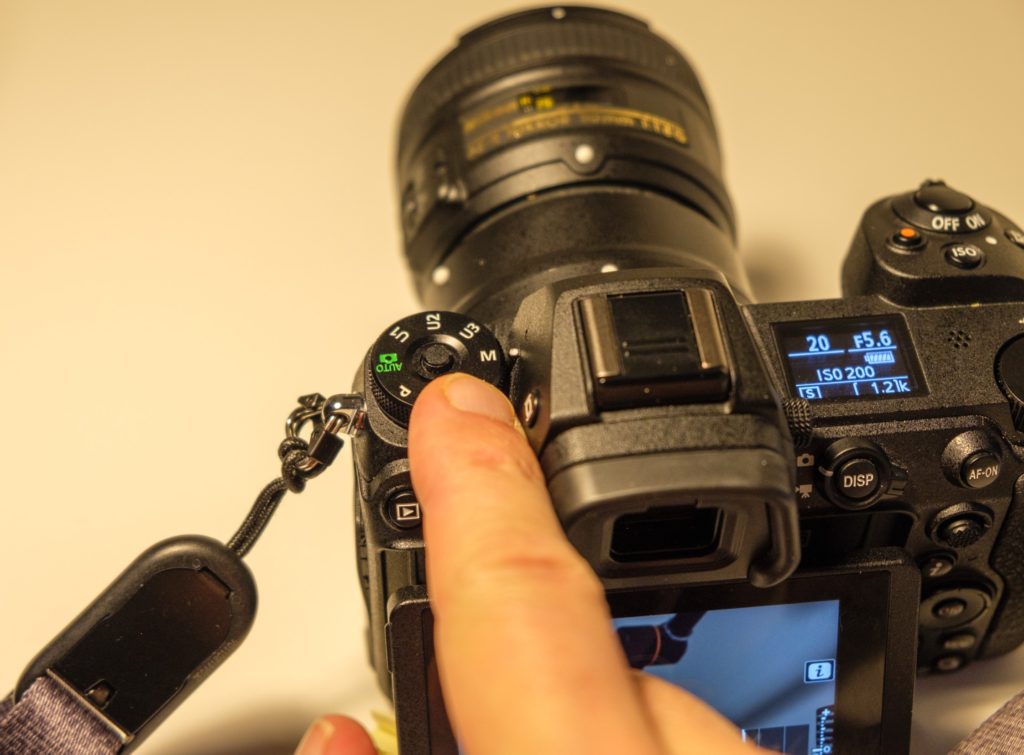
You camera has a built in metering system, that constantly measures the available light. This system continues to work also when you set the camera in manual mode. Select the manual mode on the PASM dial top left on the Nikon Z6ii.

Manual exposure mode
Mode dial top left – here the mode “M” for manual is selected.

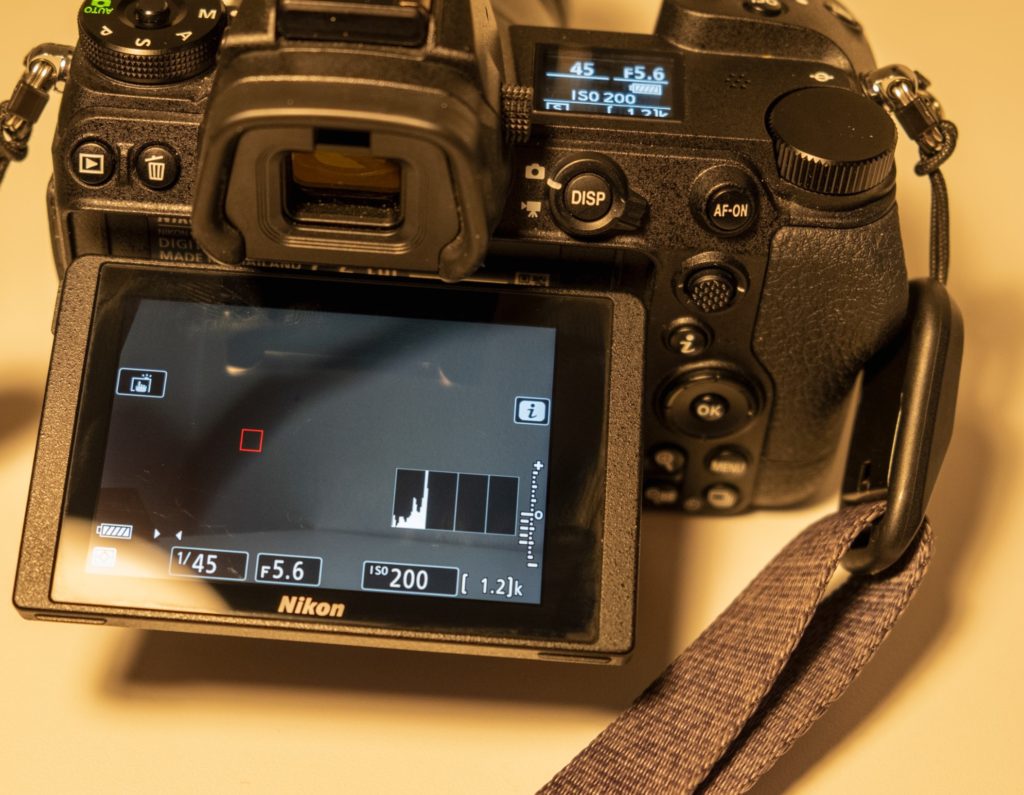
Once in manual mode, you will notice a little exposure indicator appearing, both in the viewfinder and in the rear LCD. This indicator will tell if the camera finds that the aperture, shutter speed and ISO settings will give a correctly exposed picture when you hit the shutter.

Metering scale. Rear LCD.
Notice the scale bottom right on the rear LCD. Here the metering system says the image will be significantly underexposed. The histogram seems to agree!

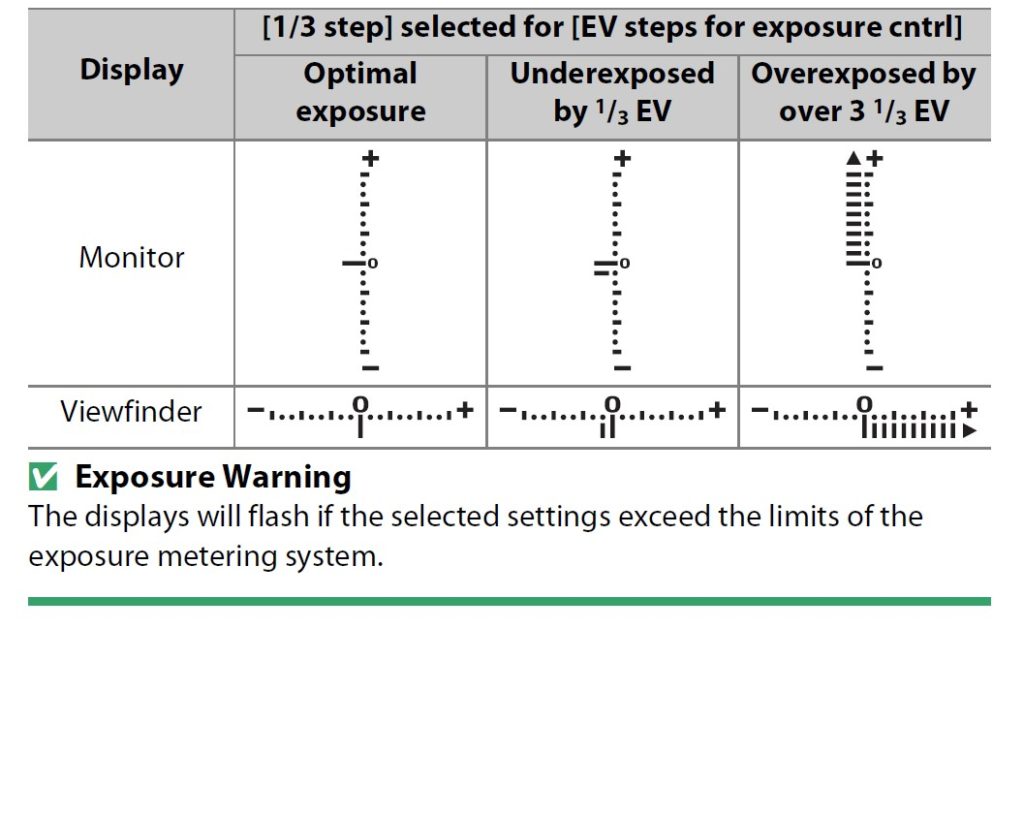
It is a good thing to keep an eye on the exposure indicator to make sure you get the exposure you are after. Sometimes you want deliberately to over- or underexpose your picture, and the exposure indicator is a good tool to make sure you get what you want.

exposure indicator guide
The exposure indicator shows if the picture will be over- or underexposed or correct exposed. Notice the difference between the viewfinder orientation and the rear LCD ditto. Credit: Nikon Z6ii manual.

Another way to see the same information as the exposure indicator is to use the histogram – you can make it appear by hitting the “disp” button on the center top rear on the camera. Finally, as you have WYSIWYG, you can simply notice if the LCD or electronic viewfinder turns very dark or very bright – a good indication something is off relative to a technically correct exposed picture.

Aperture and shutter speed

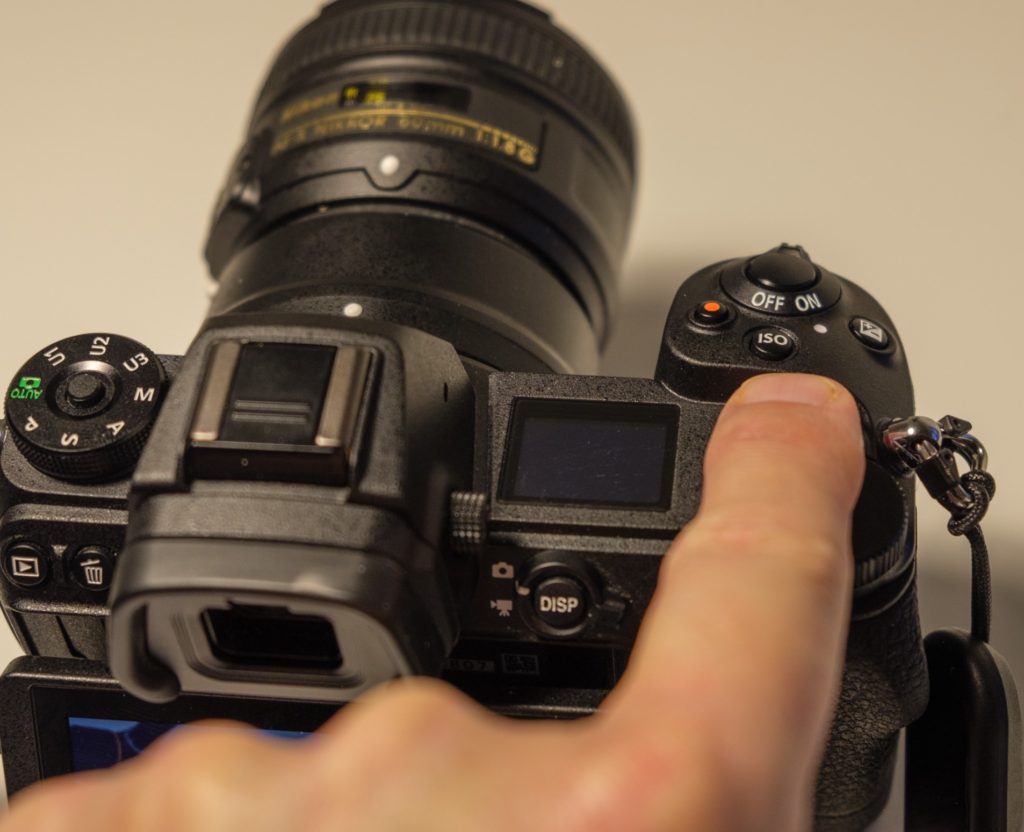
You control the aperture and the shutter speed by turning the front and rear command dials respectively.

The thumb is on the rear command dial that sets the shutter speed. The index finger is on the front command dial that controls the aperture.

As you do so, you will notice that the exposure indicator changes in accordance with the selected settings for the two.

If the camera flashes “FEE” in the top LCD when you mount the lens, it is probably because you have not locked the aperture on the lens to the highest f-stop number possible – the camera needs this setting to be so, in order for it to control the position of the aperture blades when shooting with AF or AF-D lenses.

If your lens is an older model (say AI or AIS) where you have an aperture ring on the lens, it is not always possible to change the aperture with the front command dial – instead you will have to set the aperture on the lens. The top LCD will not show the aperture but just a “F–” to indicate it cannot “see” the chosen aperture. The metering indicator works fine still though.

ISO

On a digital camera, ISO is actually not part of the exposure. The sensor has the sensitivity it had when it left the factory and it cannot be changed.

By setting the ISO to other values than the base ISO 100, you apply a gain to the values read by the sensor. It is camera internal post processing that happens from the sensor has read the light and until the image sits on the memory card. Just like in the old days when you turned up the radio, you both amplified the signal and the noise – the original signal remains the same. ISO works the same way, so the price for turning up the ISO is more noise and grain.

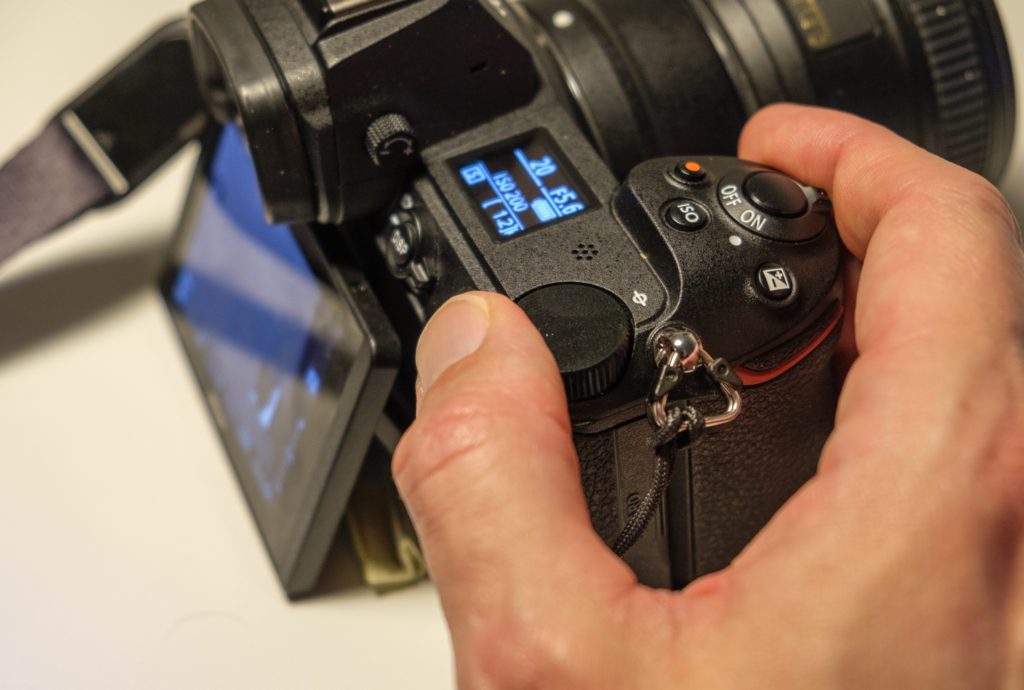
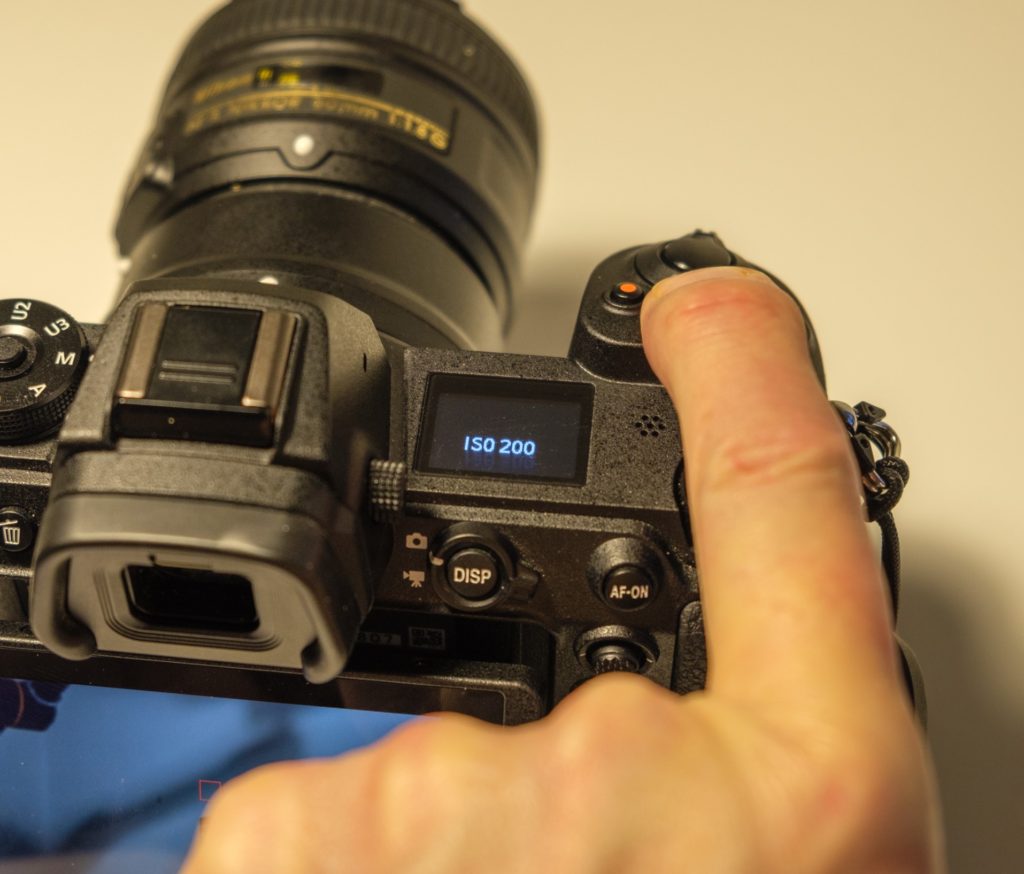
When you push the ISO button on top of the camera, you change the function of the front and rear command dial.

The ISO button is located on the top of the Nikon Z6ii.

Pushing the ISO button and at the same time turning the front and rear command dial, changes the ISO values. The front command dial switches between ISO and auto-ISO and the rear command dial shifts between ISO values, say from 100 to 140, and from 140 to 200, and so on.

Choosing the ISO on the Nikon Z6ii
Here the ISO button is pushed. Notice that the top LCD now shows the chosen ISO value.

When you have auto-ISO switched on, the camera will be in a – if not semi automatic – then quarter automatic mode. In other words, the camera will try to make the picture correctly exposed ALONE changing the ISO. So if you have a dark scene where the aperture is closed down and the shutter speed is fast, the camera will have to go to very high ISO values to compensate.

You can use auto-ISO to make sure you come home with images that show at least something, but be aware that grain and noise may be the price you pay for switching auto-ISO on. For starters, I would recommend that you have auto-ISO off, and keep an eye on the exposure indicator or the histogram to make sure the exposure is roughly right. Later, when you have some experience, auto-ISO can make you work faster.

Metering modes

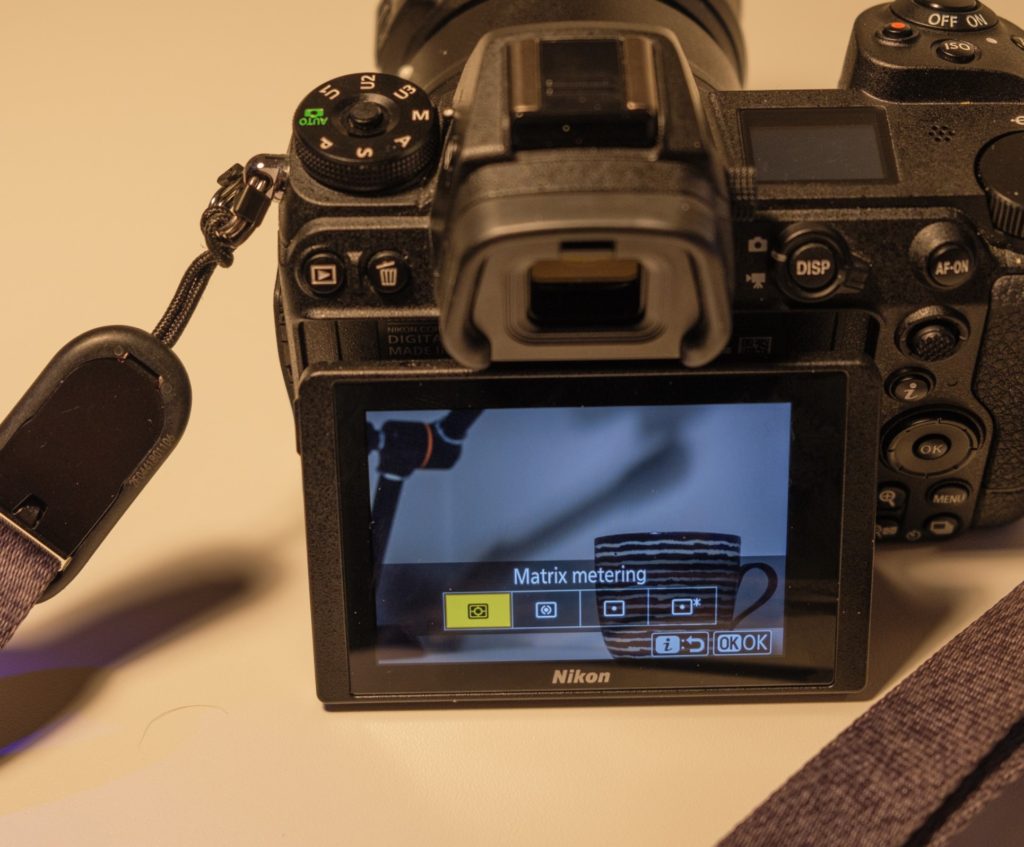
The Nikon Z6ii has 4 metering modes. You can access these by pushing the little “i” in the rear of the camera (middle) and this shows a 6×2 menu where the 9th option (counting top left to right) is “metering”. Selecting that one, brings a sub-menu with 4 options.

Choosing the metering options on the Nikon Z6ii
The 4 metering options.

The metering mode does NOT change the amount of available light, rather it changes how the camera meters the light that passes through the lens. I shoot almost entirely in the “matrix metering” mode as it is the most advanced one, that tries to take in the entire scene and find a good compromise.

Second option is center weighted metering. This one is good if you shoot portraits where you don’t really care of the corners are exposed correct – the important is that the person in the frame is exposed correct. The manual also mentions this as a good mode if you shoot with filters.

The third option is spot metering, where the focus point is where the metering is done entirely. This is a good option of you know that a particular point in the image needs to be correct exposed, but you do not care too much about the rest of the frame. In the settings menu B3 you can set the size of this point.

The final option is highlight-weighted metering. This one many street photographers use as they are not afraid of loosing details in the shadows. I use it for shooting silhouette photography, where the details in the shadows are also less important.

All of these modes may seem confusing, so my advice is to use matrix metering. If you shoot RAW, then there are plenty of options for adjusting the exposure in post and hence I find that these 4 options are more for backward compatibility with older DSLRs than anything else.

Video link

Related reading

Nikon Z6ii – Manual focus aid

Nikon Z6ii – any need for the Preview button?

What is silhouette photography? And is it for you?

Silhouettes…

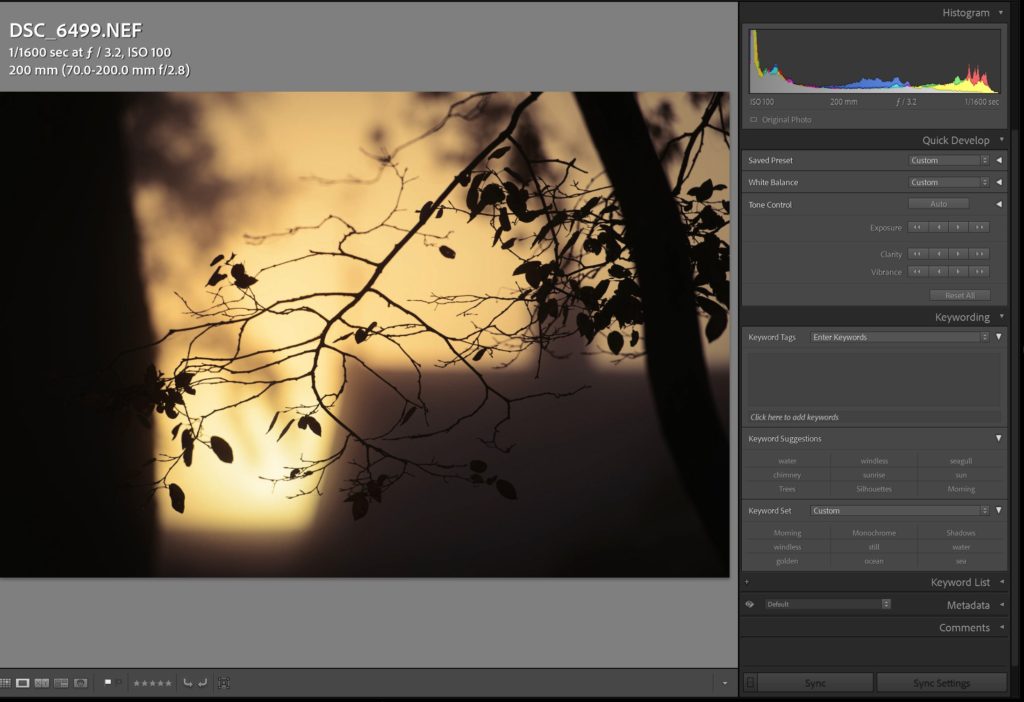
Many associate silhouette photography with shooting into the light where the dynamic range of the scene forces both bright areas to be blown out and all details in the shadows to be complete gone and pitch black instead. But take a look at the image below – it is possible to make silhouette photography without shooting into the sun!

Although there are no super bright areas in this image, the details in the dark of the branches are completely gone and you only see the branches as silhouettes.

But otherwise silhouette photography is, as the name says, shot in a way where the subject only stands out as a silhouette. A lot of detail and information is lost about the subject or subjects. And this is on purpose to bring the structure or the shape of the subject in focus.

Image left, histogram right. Notice how the histogram touches the left hand side, indicating that details are lost in the shadows.


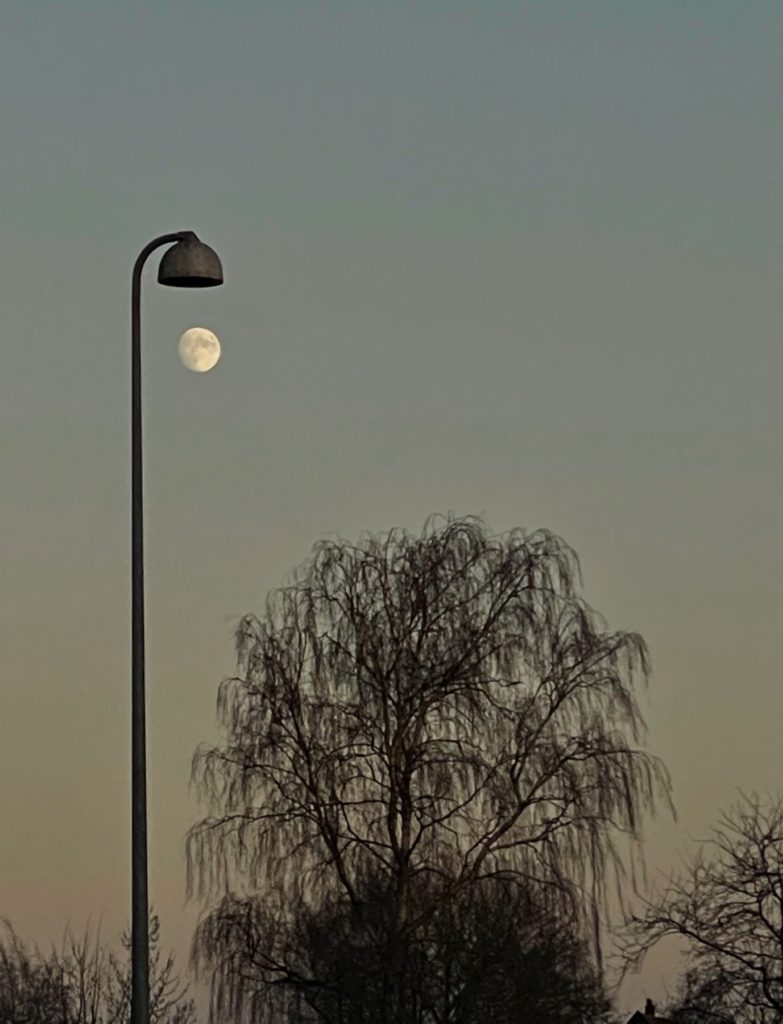
Although some details of the lamppost is provided, the tree and the lamppost stand as silhouettes against the moon top left. Notice how the image plays with lack of depth information.

Another often overlooked feature in silhouette photography is that it is 2 dimensional. Often photographers add depth in an image by having something both in the foreground, middle and background to compensate for a photo being a 2D representation of a 3D world. Silhouette photography deliberately seeks a more 2D expression just like a Chinese shadow theater.

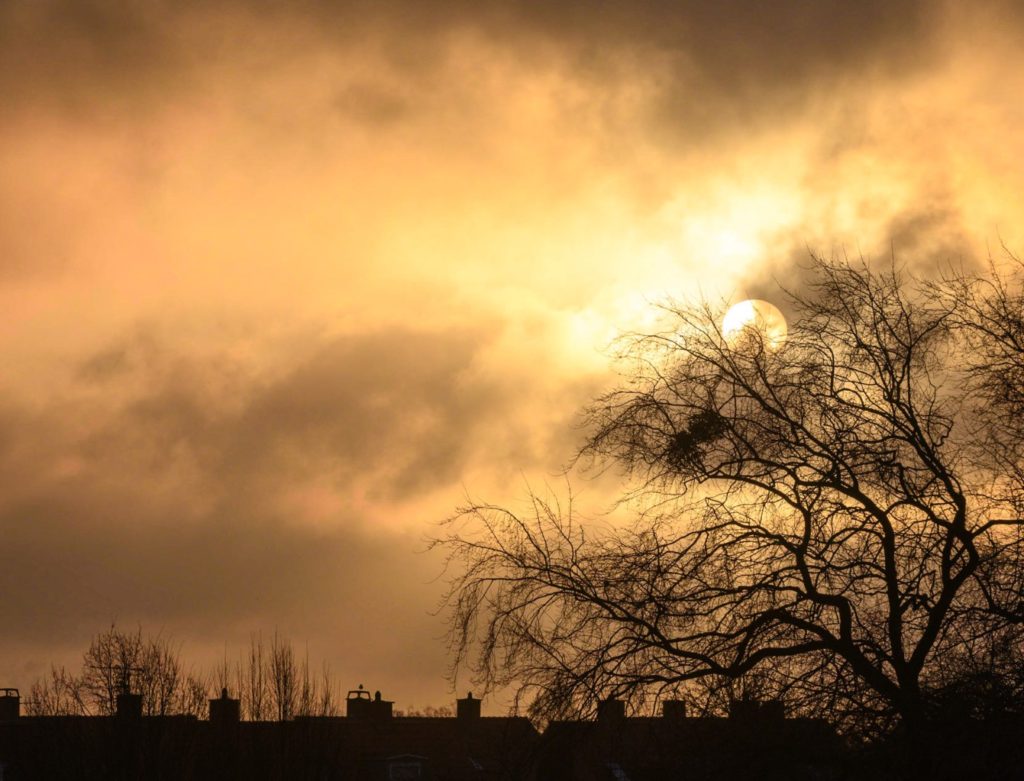
A more classic silhouette photography with lots of dynamic range. The houses are reduced to black shapes and so is the tree. Morning sun.

You can try out silhouette photography: Shooting into the sun is the “classic” way of doing it, and your camera will often not be able to capture the dynamic range of it all and hence create an image that looses a lot of detail in the shadows – just like you want it to. If your camera has an metering setting that allows you to expose for the highlights, you can try this option – it is excellent for shooting silhouette photography also when you are not shooting into the sun.

Related reading

What is hard light vs soft light?

What is light falloff in photography?

Nikon Z6ii: Manual focus is much easier than before!

Manual focus

Manual focus may not be the first you think of when considering the Nikon Z6ii as your next camera. But in this post I ask you to reconsider, as manual focus can be very rewarding and bring you closer to the shooting experience.

Manual focus of course has its limitations. Unless you are a photographer with almost supernatural skills, manual focus is not relevant for shooting fast moving subjects like birds in flight, events or sports. But for landscapes, architecture, product shoots, portraits and the like, manual focus can work just as well as auto focus.

Further, the Nikon Z6ii like the other mirrorless cameras from Nikon has no auto focus motor built into the camera body. As a consequence, AF and AF-D glass with mechanical auto focus does not work on mirrorless cameras, and you are left with manual focus. So if you are heavily invested in AF or AF-D glass with no appetite for changing your glass, and you want to switch to mirrorless, then you are left with manual focus. This is a step down from the most Nikon DSLRs (the 3×00 and 5×00 excluded) that has a focus motor built into the camera body and hence offers mechanical auto focus for AF and AF-D glass.

Mirrorless cameras offers some options for determining if you have obtained focus that DSLRs do not offer.  And it actually helps you when working for example with a vintage lens with no auto focus system built into it. This has led to a revival of vintage lenses from Nikon (AI and AIS), as there is a lot of good (“oldie but goldie”) glass to be found. Nikon has produced glass since the 1950’s, and there is lots of options to choose from.

Now, without further ado, lets look at 4 different ways of focusing manually, 3 of them that are exclusive to the mirrorless cameras.

Focus peaking highlights

Focus peaking highlights mark in the electronic viewfinder with a red, yellow, white or blue color which areas that are in focus.

Focus peaking highlights.
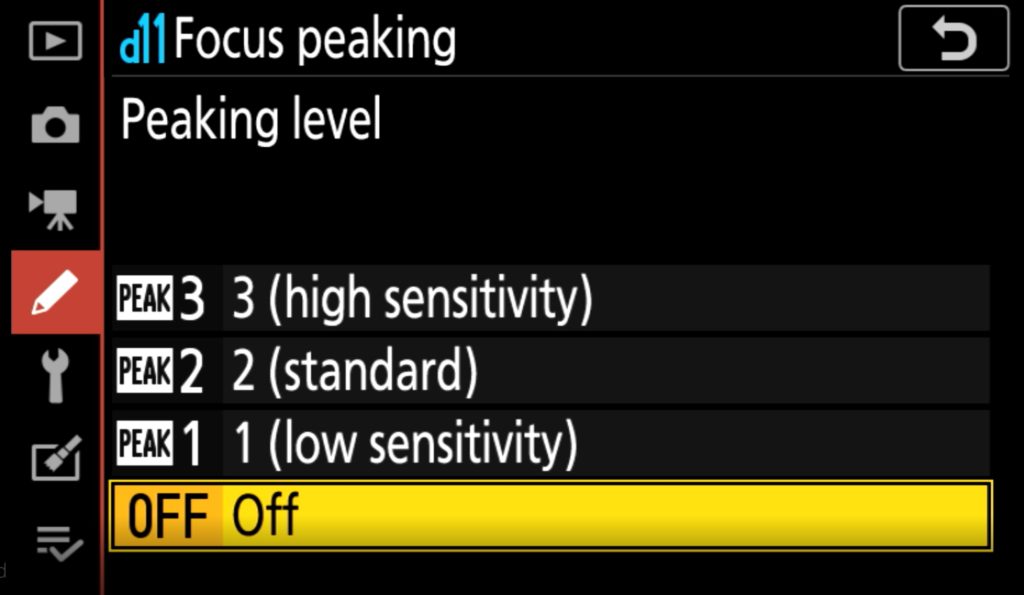
You can set both the strength and the color of the focus peaking highlights. Go to the menu item d11 in the setup menu.

You will see this as coloring of your subject that is not there in real life, but is added to the image by the camera. You may know this from Live View on a DSLR, but here the great news is that it works both in the rear LCD (Live View) and in the electronic viewfinder.

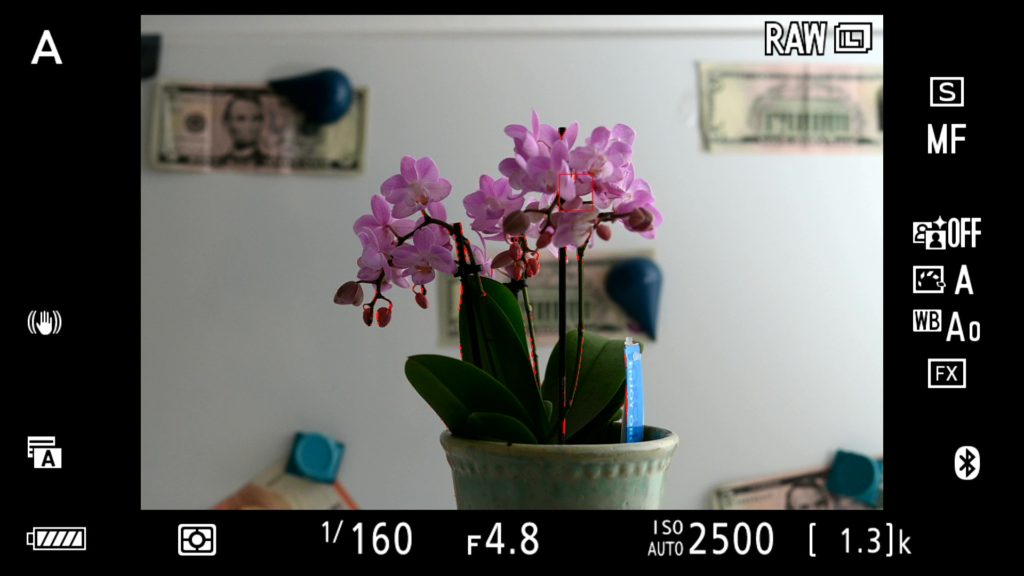
Peaking highlights example.
The dark red edges around the petals of the flower shows the area in focus.

In the example above, you can see that there is a little bit of red around the both the petals and the stem of the flower . That’s the area in focus.

Zooming in

Another feature that you may know from Live View on a DSLR, is the ability to zoom in. The zoom function works both in Live View as you may know it from a DSLR, but also in the electronic viewfinder. I use this a lot, especially when shooting flowers or the like.

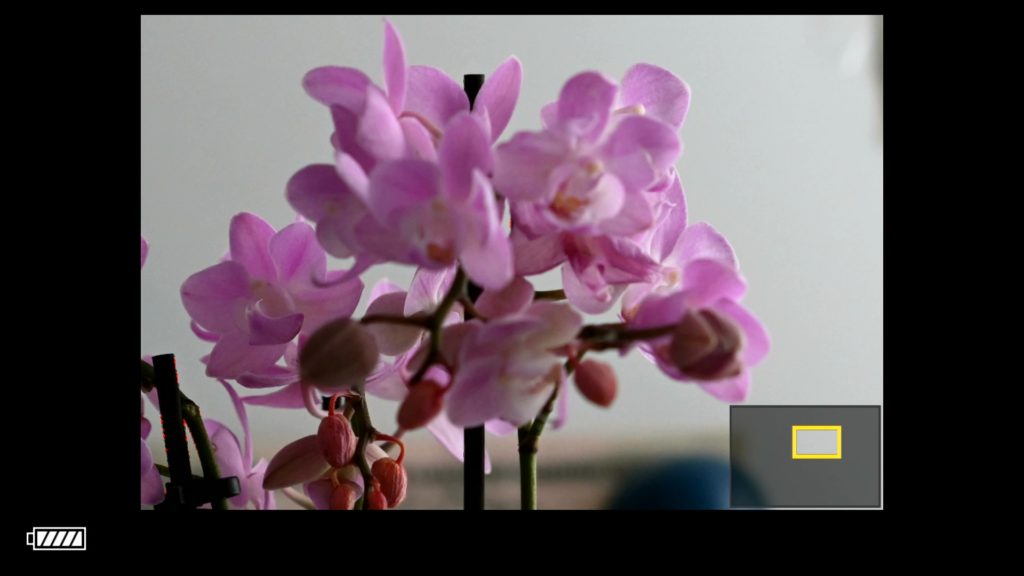
Viewfinder, zoomed in.
Here zoomed in on the flower. Notice the graphics bottom right that shows the size of the zoomed in area (yellow) relative to the entire frame.

You can zoom in to varying degrees using the plus and minus buttons bottom right on the rear of the camera. The max zoom is 200% and that is a lot! The graphics bottom right shows the size of the zoomed in area (yellow) relative to the entire frame (the dark grey box).

Focus confirmation

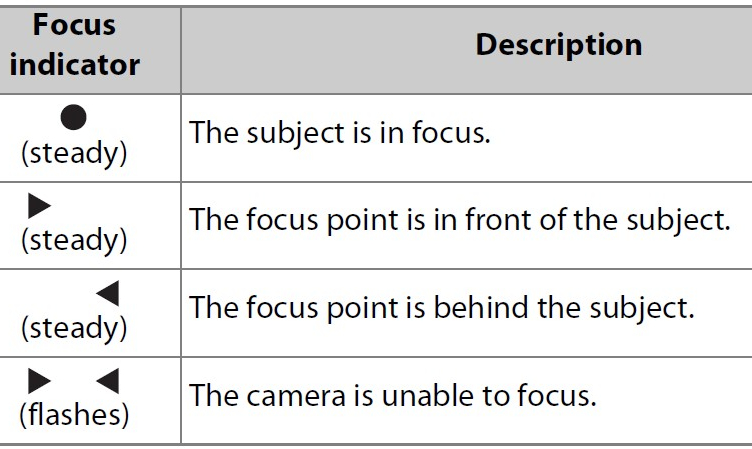
You probably know the focus confirmation “dot” and the associated arrows that show if the focus plane is too close to you or to far away.

Focus confirmation.
The classic focus dot and how Nikon describes its function in the manual.

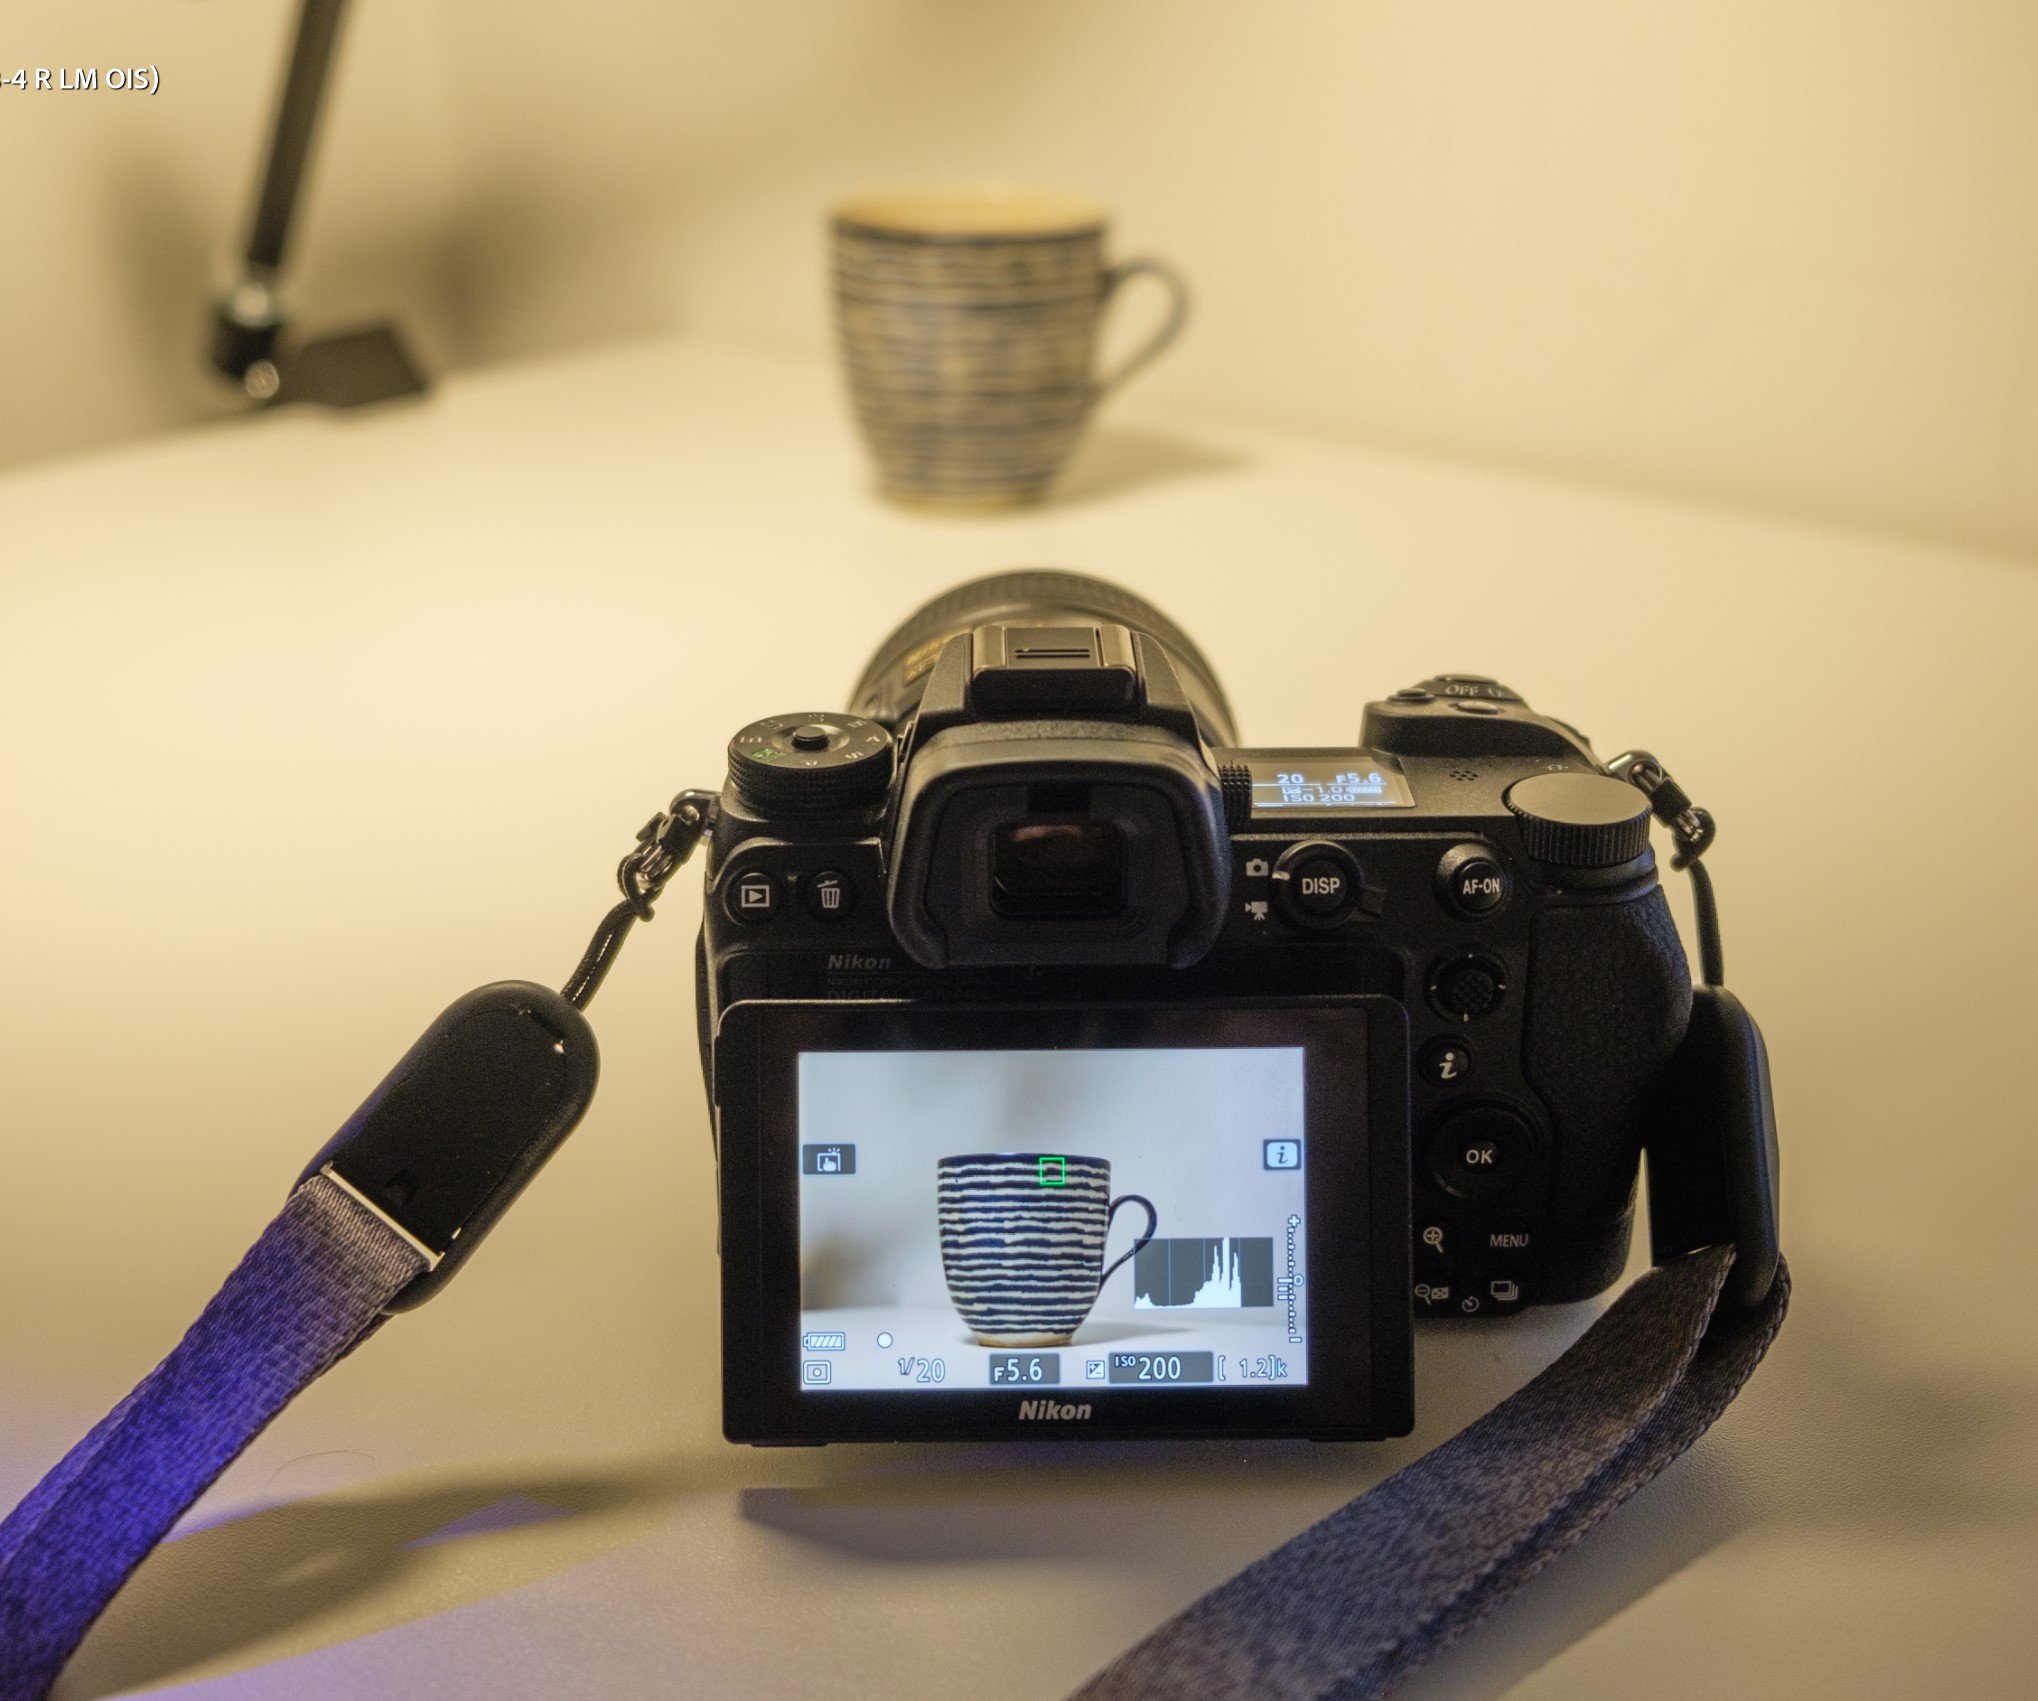
With a mirrorless, the focus confirmation is provided two ways. First in the shape of the graphics illustrated above. In the image below, the focus confirmation dot is bottom left, just to the right of the battery level indicator.

Focus confirmation dot
Focus confirmation dot bottom left is in alignment with the green box showing the focus point. Both signal that the subject is in focus.

But also notice the green focus area selector in the center of the LCD. It can be moved around using the joystick. This box is red when the area in the box is out of focus, but turns green when focus is obtained. So you will see the dot appearing at the same time as the box turns green.

Availability

The focus peaking highlights works for all lenses, at least as far as I have been able to test, also AI and AIS lenses. However, mind you that if the subject is moving, for example waves on the ocean far away, the camera may have problems illustrating the peaking highlights as it cannot keep up with the movement. Also, when fully zoomed in, the peaking highlights do not work either.

Zooming in happens electronically, so this also works for all lenses.

The focus conformation dot requires distance information to work on a mirrorless, and this part only works for AF-D, AF-S and S-series lenses. It can seem a little strange as it works on ancient DSLRs with old lenses, but mind you that the focusing system of a mirrorless is very different from a DSLR.

Video link

Related reading

What is a DSLR?

What is Live View on a DSLR?


What is a camera battery grip? And why use it?

A grip on ergonomics

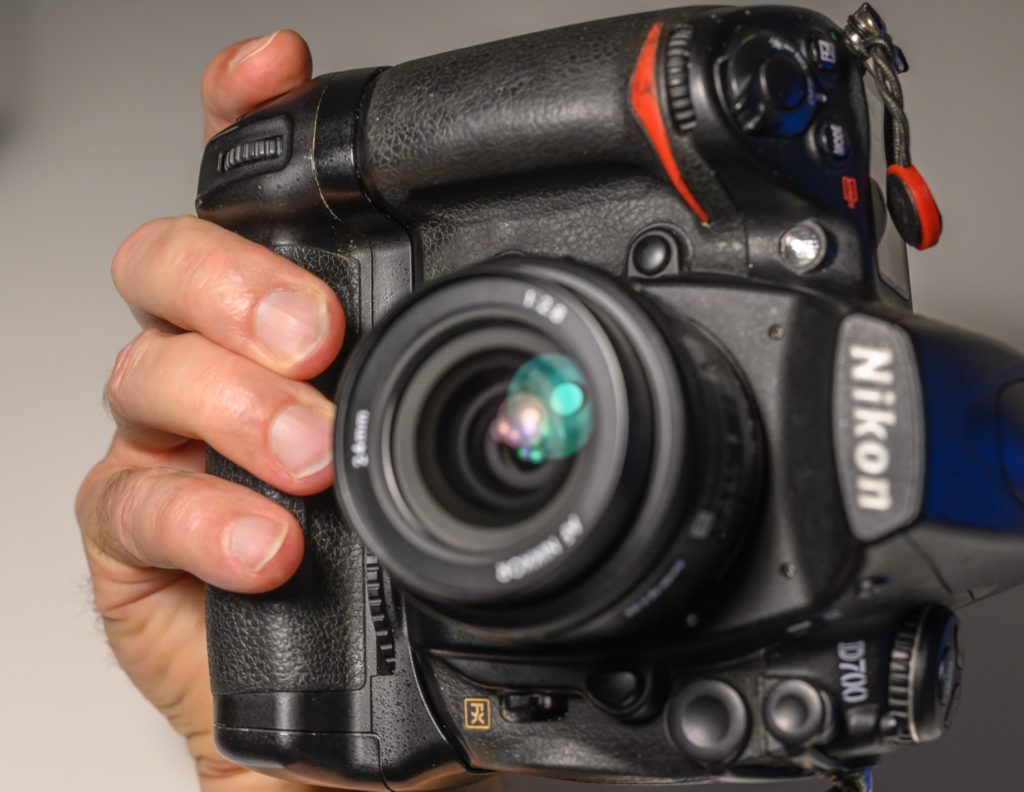
A battery grip is an optional extension of your camera body, that allows you to mount more batteries than what can be in the camera body as such. Some cameras like the Nikon D4 are “born” with the grip as an integral part of the camera, but most cameras has a battery grip as an option.

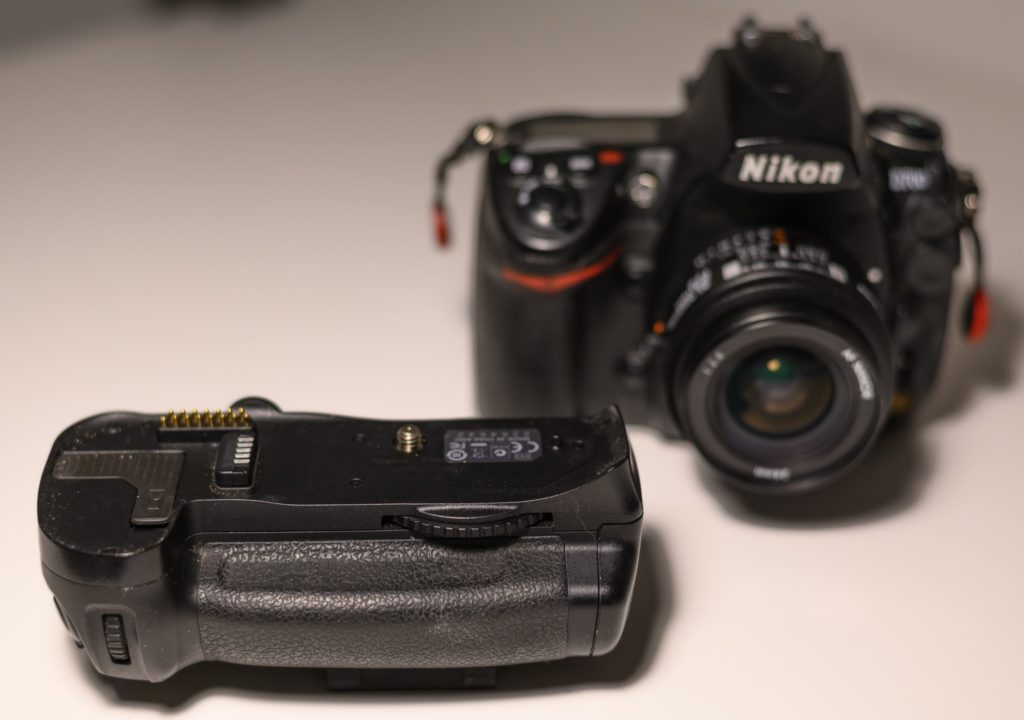
A battery grip for my Nikon D700 here front left. Notice the contacts that enables the grip to talk to the camera.

You can always carry an extra battery in your pocket, but the first advantage of a grip is that it extends the number of “built in” batteries. Some camera grips even allows you to charge the battery while mounted in the camera which further eases the job of leaving home with sufficient battery power.

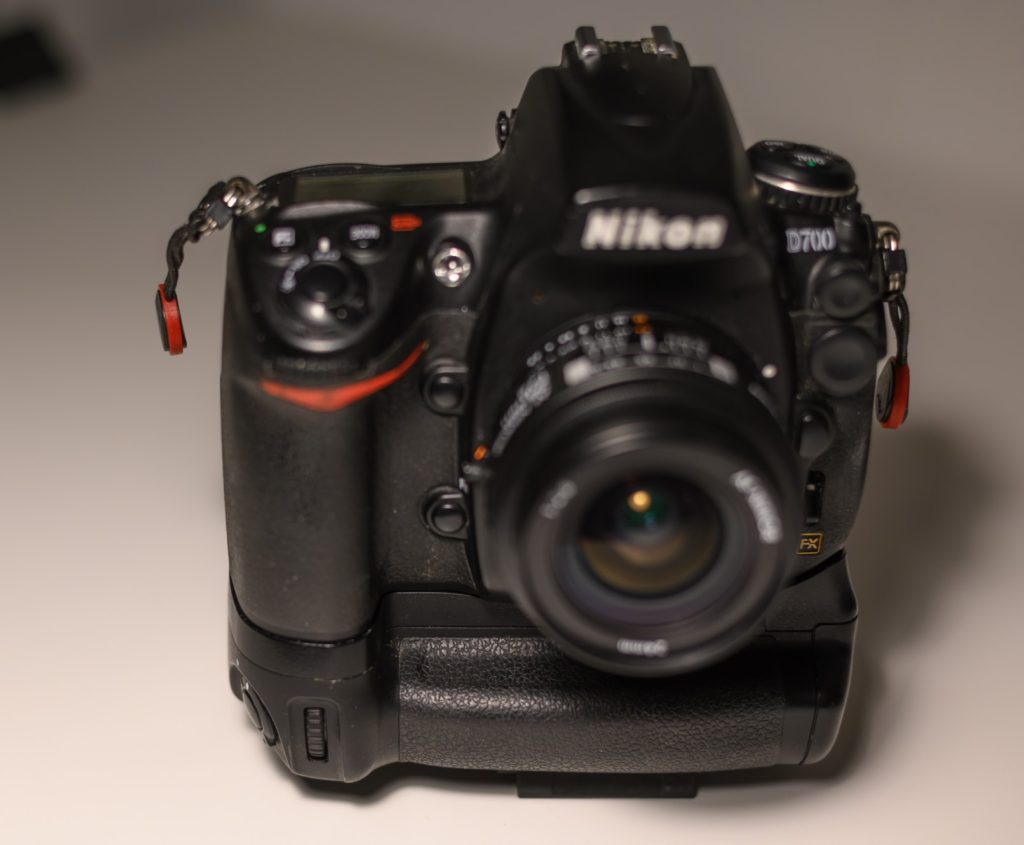
Battery grip mounted here on the Nikon D700.

Another advantage is improved ergonomics. In the image above, you can see that the camera body is extended downwards, and there for gives more real estate for your hands to hold on to. When shooting in landscape mode, especially the pinky on large hands will find much better support and grip than without the grip.

Shooting in portrait mode with improved ergonomics.

A third advantage is also related to ergonomics. When shooting in portrait mode as many portrait photographers do most of the time, the battery grip provides ergonomics very similar to the grip in landscape mode. You avoid the twist in the wrist, as your hand can stay in the same position while you turn the camera. This may sound like a small thing, but when you are working with heavy cameras and/or for extended periods of time, the relief a grip provides for your wrist is vital.

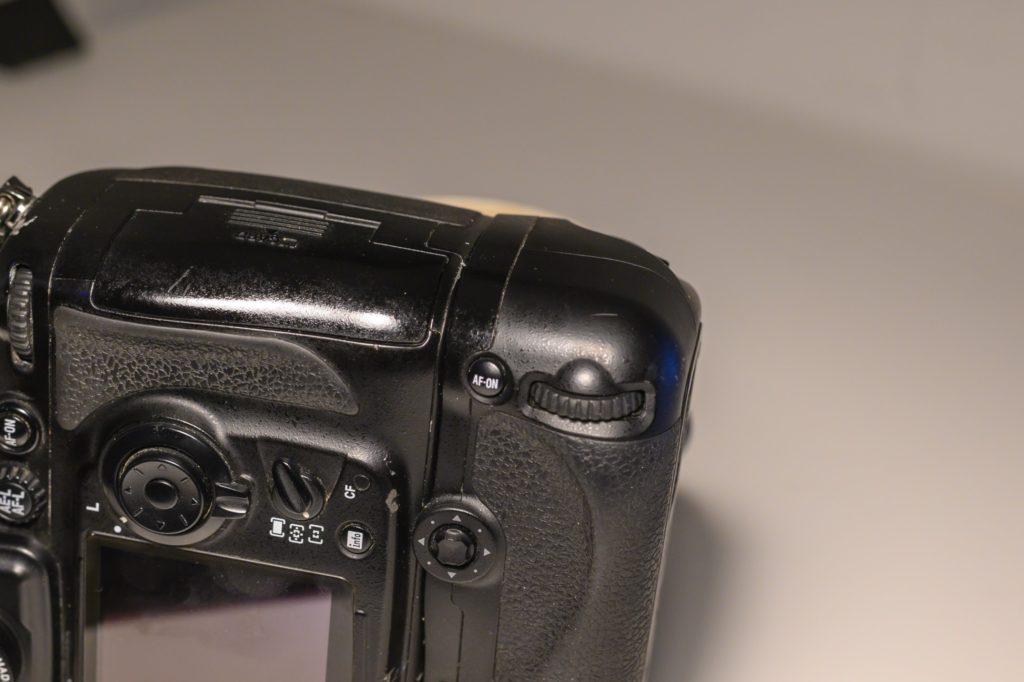
On battery grips, it is often the case that the shutter release and the most vital controls are replicated. Not all grips have this feature, so make sure to check the one you consider to buy. Lack of controls on the grip reduces the ergonomic benefits somewhat.

Vital controls are replicated on the grip here, and even a joystick is added which is not part of the camera body as such – it “only” has a command wheel.

In the example above from my Nikon D700, the grip actually has better buttons and dials than the camera body as such, as the command wheel is replaced by a joystick!

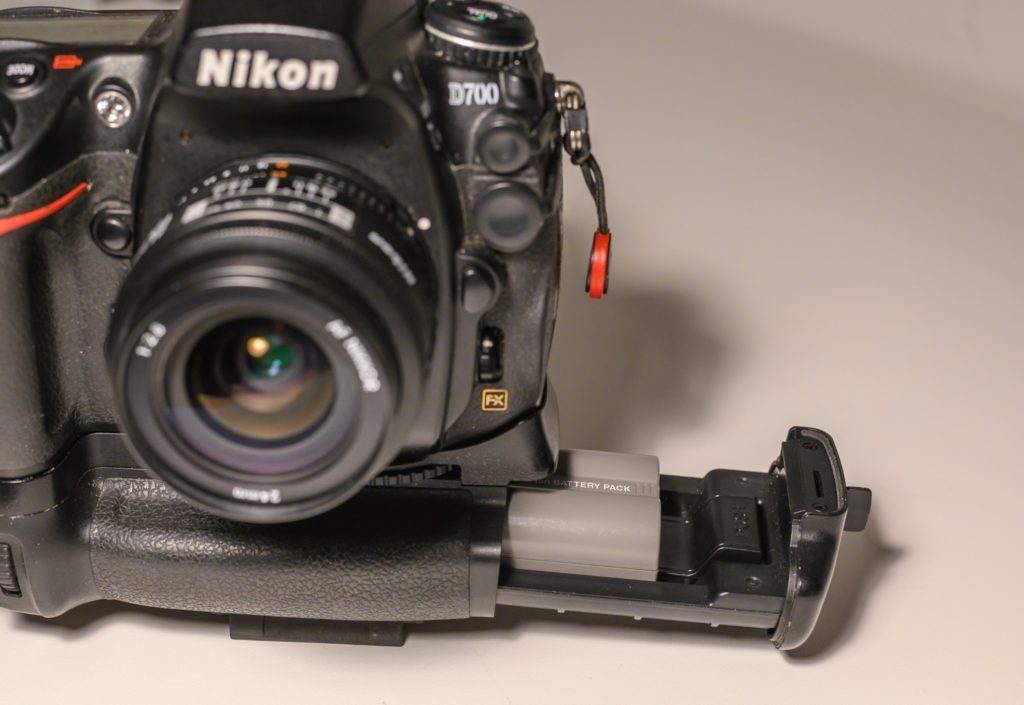
A final benefit is the ease of access to the batteries in the grip, when mounted on a tripod:

Easy access to the battery in the grip. A little tray that slides out horizontally holds the battery.

The battery in the camera body sits vertically, where as the grip holds the battery in a horizontal position. This makes access much easer. A slight disadvantage is though that access to the battery in the camera body can be more cumbersome, as it involves removing the grip first.

The disadvantage of grips is extra cost and extra weight.

A grip can easily make up a significant investment relative to the price of the camera body. There are many off brand producers that make battery grips that price wise are significantly lower than the brand versions. But in my experience, the extra cost of the brand version is more than justified in better quality and feel.

Not everybody likes the added weight. I find on the contrary that the overall balance in the camera body and glass is improved, so I love my grips! But we are into personal preference territory here,  and I recommend that you try out a grip before you buy exactly for that reason.

Related reading

What is a DSLR?

Is mirrorless cameras better than DSLRs?


Nikon Z6ii: Any need for the Preview button?

Way back when…

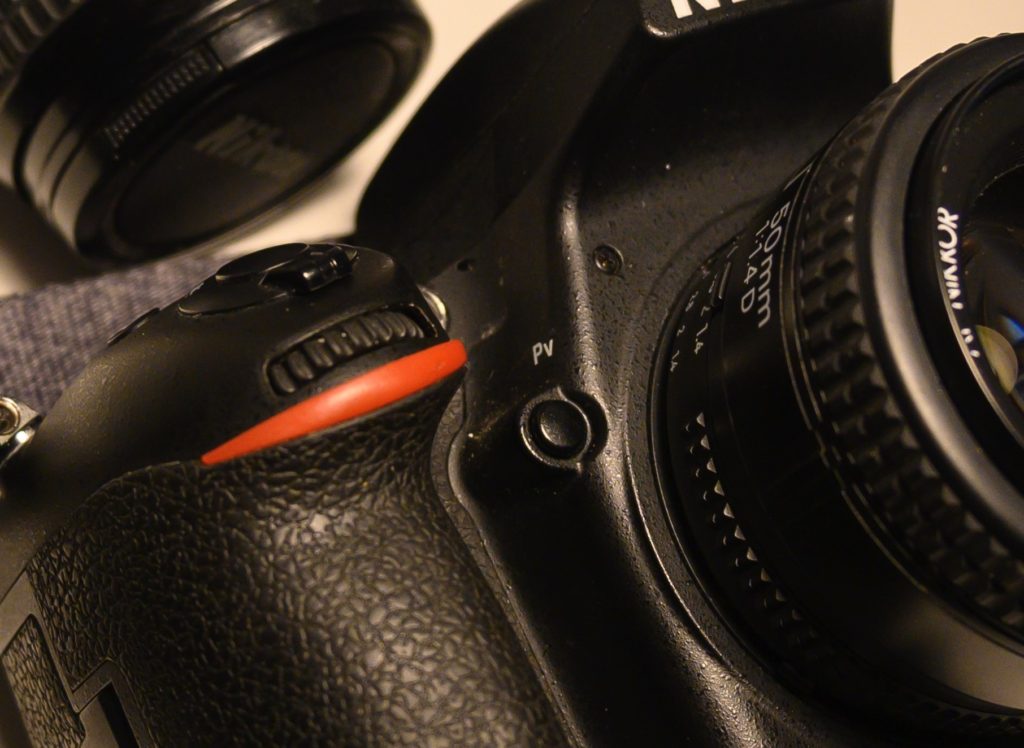
Since the dawn of mankind, Nikon cameras have been equipped with a so called preview button. The image below shows the preview button of the D750, but I find a similar one on my old F100!

The role of the preview button on a camera.
The preview button (PV) on my trusty Nikon D750
The role of the preview button on a camera.
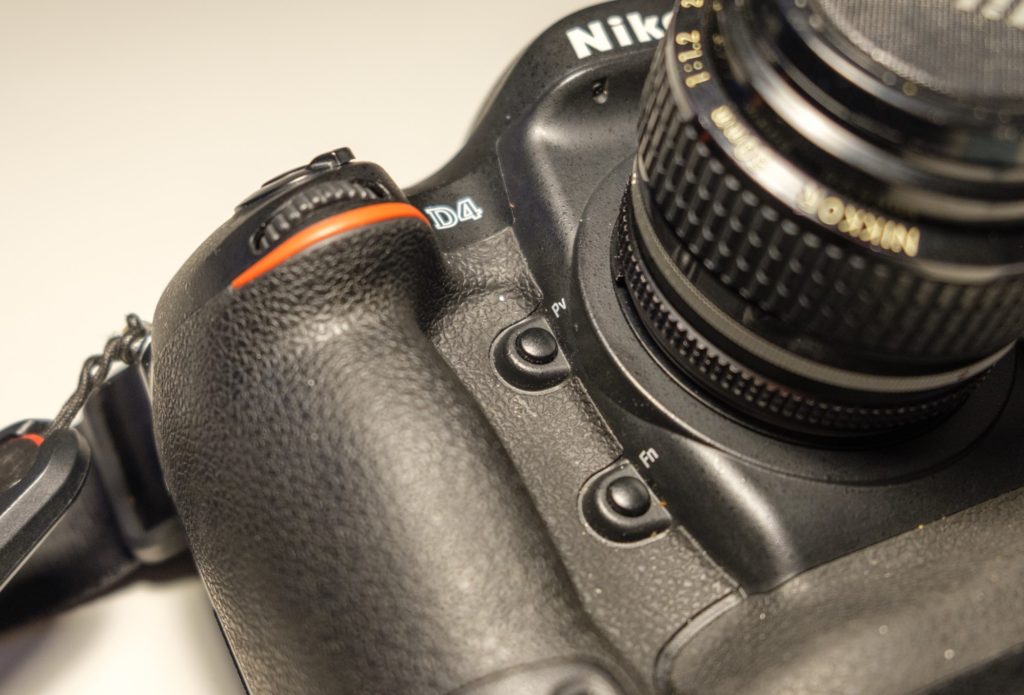
The preview button (PV) on my trusty Nikon D4

Sadly, on the Nikon Z6ii that button is gone! Yep, it is no more. Replaced by two programable buttons instead.

The role of the preview button on a camera.
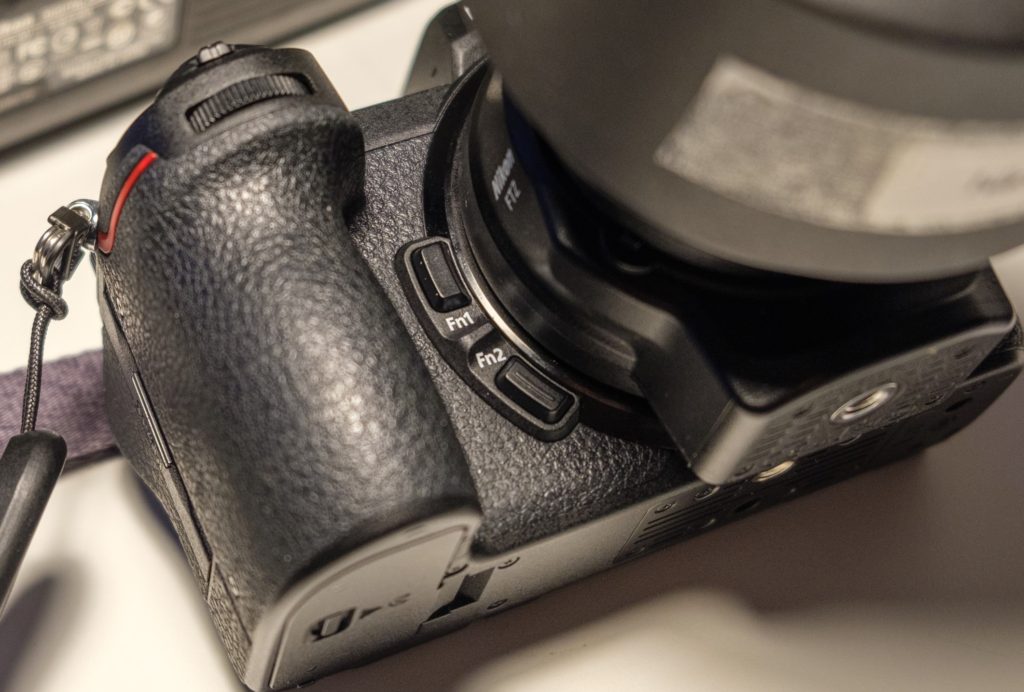
The two programmable function buttons on the front of the Nikon Z6ii.

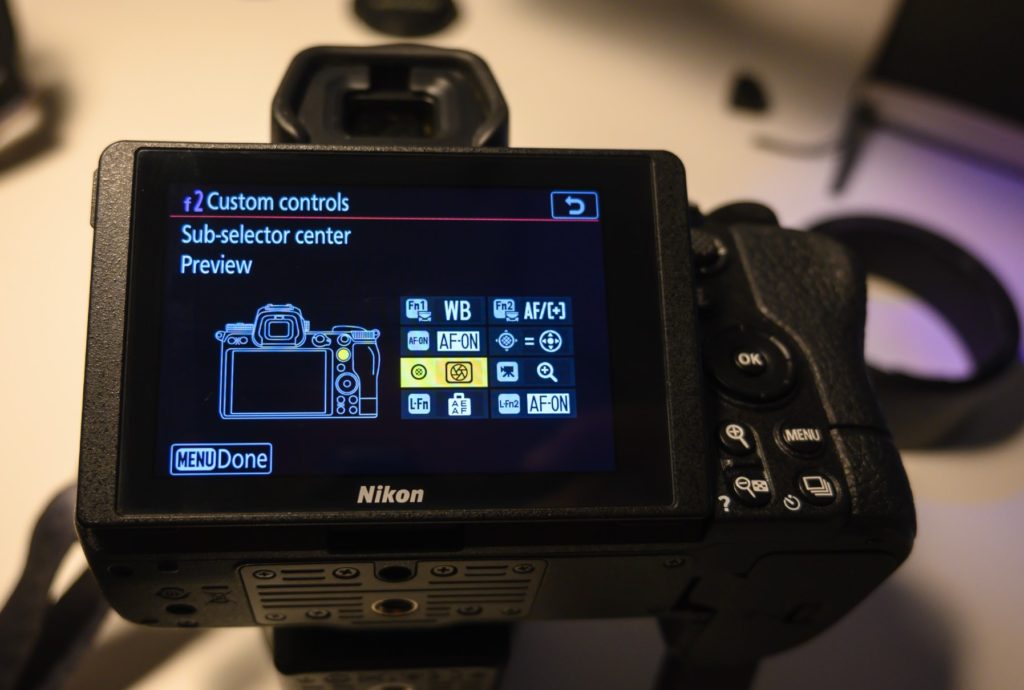
But luckily it is possible to assign the function of preview to a range of buttons using the settings menu. I assigned it to the joystick when pushed, but you can assign it in many different ways.

The role of the preview button on a camera.
Preview button assigned to the joystick (when pushed).

The good question is of course if you no longer need this button? Is it a appendix from way back when todays grumpy old men were happy kids playing football in the yard? The boring answer is: it depends. Let me explain.

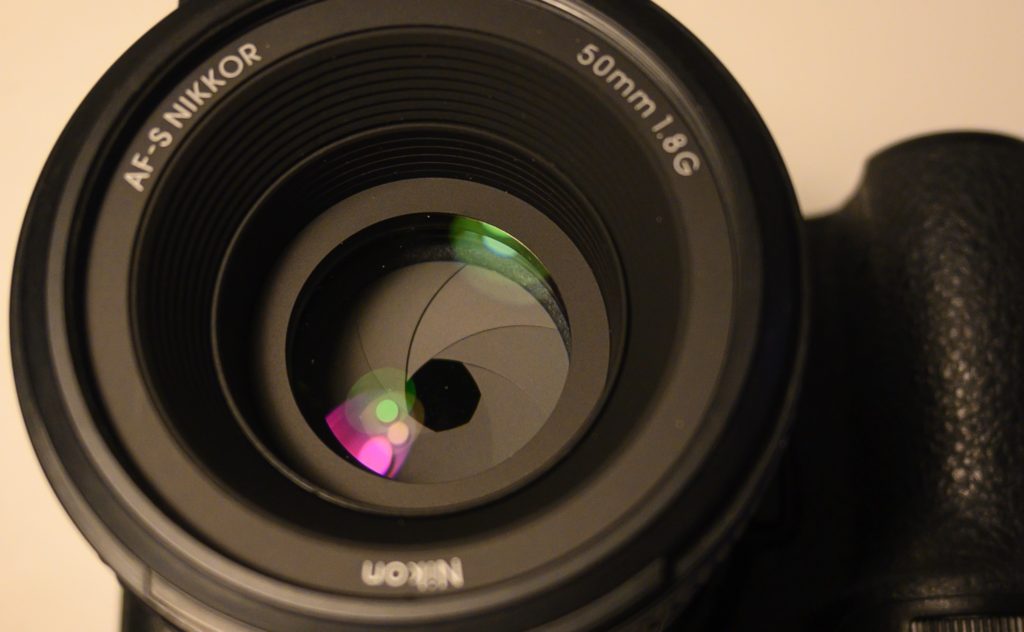
In order for the camera to receive sufficiently light to do all the complicated readings, calculations etc. associated with especially focusing, there are limits to how narrow the aperture can be. As you probably know, if you take a lens and close it down to say f/11 or even higher, it is a very small hole the aperture blades leaves to let light in. So what does your camera do? It cheats a bit. It keeps the aperture unchanged when you turn the front command dial, and waits to adjust the aperture blades until you hit the shutter. At that exact moment it moves the blades to the desired position (say f/11) takes the picture and moved the blades back out. So what you see is not what you get if you shoot with narrow apertures (above f/5.6).

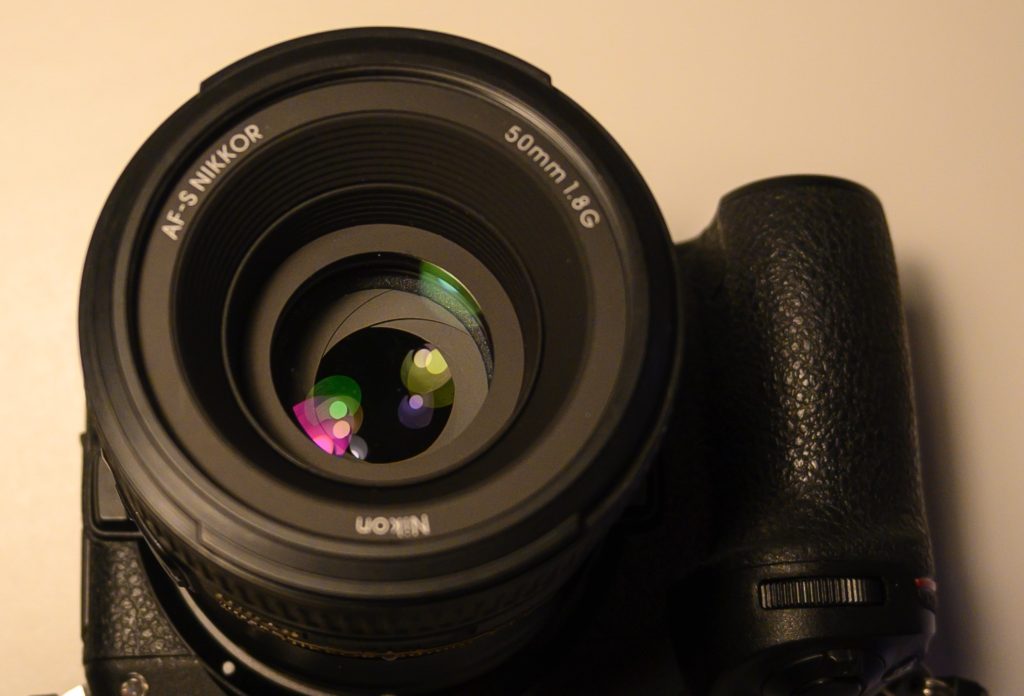
The camera has no problems opening up wide, say to f/2.8 and adjusting the blades to let in a lot of light. You can see here that the blades are in the “correct” position at f/2.8 here.

The role of the preview button on a camera.
Between f/1.8 and /f/5.6 the blades and the camera settings are aligned.

But when you close down the aperture to say f/11, the camera secures a minimum of light inflow by stopping the blades at f/5.6 – so when you turn the front command wheel beyond f/5.6 the blades are not moved. The “hole” in the lens remains the same.

The role of the preview button on a camera.
You cannot tell that the camera setting here is f/11 as the lens is not stopped down beyond f/5.6

So from f/5.6 and upwards, what you see in the viewfinder and what the camera captures are drifting apart. More and more as you stop down.

The purpose of the preview button is to temporarily bring alignment between the camera aperture and the position of the blades in the lens. And as you have probably guessed, pushing the preview button will potentially dramatically change the depth of field.

The preview effect

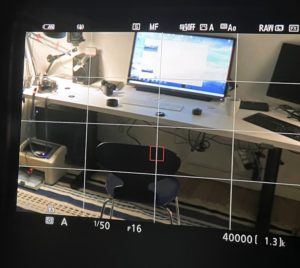
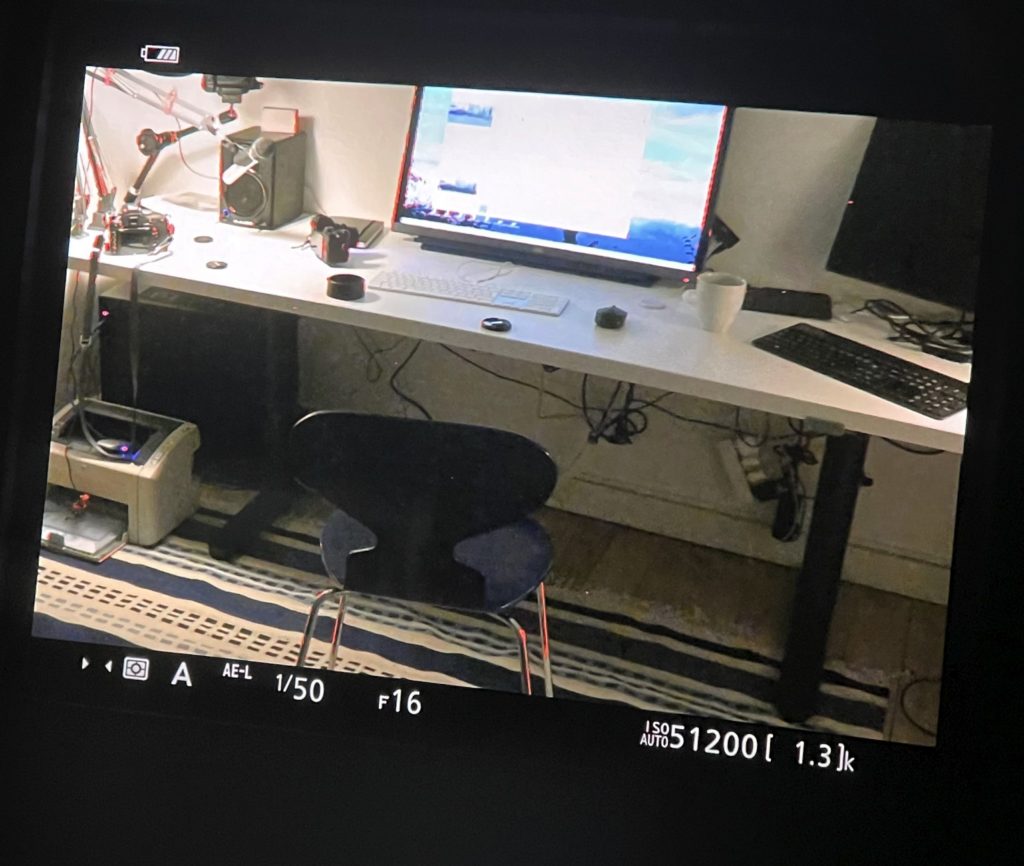
The extremely poor image below shows my office captured through the electronic viewfinder. I am at f/16 camera setting wise, but the lens is at f/5.6.

The role of the preview button on a camera.
Preview not pushed.

When I then push the preview button, other than the grid disappearing, the lens now moves the blades from f/5.6 to f/16 (the ISO goes ballistic as I am shooting this at night during winter, but please ignore that).

The role of the preview button on a camera.
Preview button pushed.

Although the image is horrible, the legs on the chair shows the difference: Due to the increased depth of field, the red focus peaking highlights now show on the legs much more than in the first image. You will also notice the same bottom left on the computer screen.

To preview or not to preview

As a landscape photographer, I use preview a lot. I need to see that as much as possible of the landscape is in focus (I am not a fan of hyperfocal distance calculations); and the preview with focus peaking highlights is the only way to do so when shooting at small apertures.

If you seldom shoot beyond f/5.6 or the depth of field is not that important to your style of shooting, then I think you can have a great photography life without the preview function.  And enjoy that what-you-see-is-what-you-get really is what-you-see-is-what-you-get.

Video link

Related reading

Nikon Z6ii vs Z6 – Which one for you?

Nikon Z6ii ergonomics review


Triangles as a way of composing and creating interest

Triangles

I must admit that I don’t really know why triangles are such a universal shape – maybe because it reminds us of a mountain or the shape of a pine tree? I have absolutely no clue, but the effect of using triangles in photography is often more order, structure and interest, that helps both obtaining the viewers interest but also help decode the message.

You can go a little nuts when you start to notice triangles in your photo work – both explicit triangles like a mountain or implicit triangles created by the relationship between objects in the frame. As with any new photography skill there is the risk that you use it too much, i.e. when you have a hammer, then everything becomes a nail. Over time you will  however incorporate your awareness of triangles as any other composition skill, e.g. leading lines or the rule of thirds.

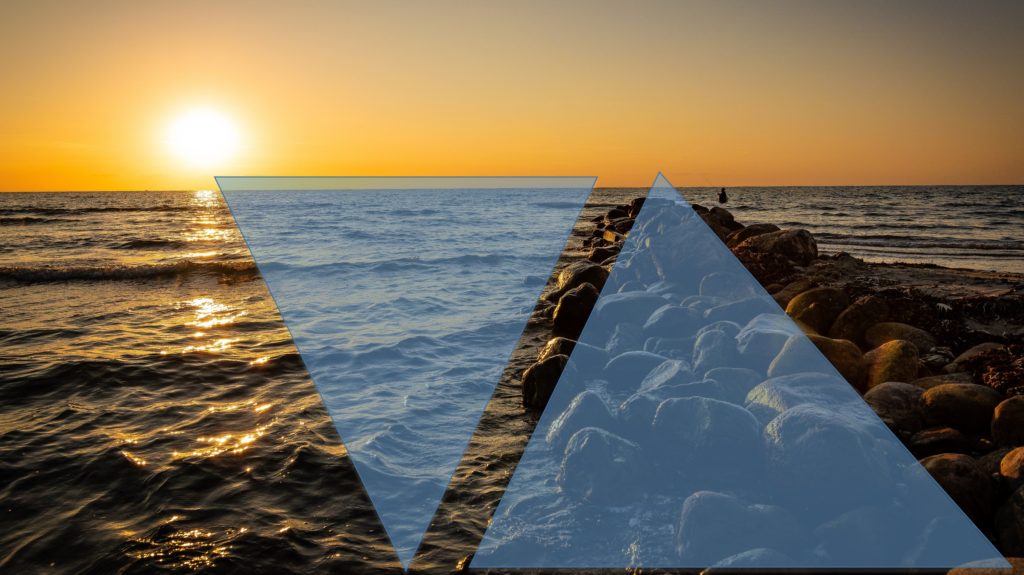
Take a look at this sunset for example. Notice any triangles?

I’m sure you did. In the image below I have marked a few, but there is also a triangle top right where the fisherman is standing; a triangle made up of the horizon, the right edge of the frame and the stone pier. Some of the waves also make up triangles if you look carefully, etc. As I said, when you got a good new hammer, everything becomes a nail.

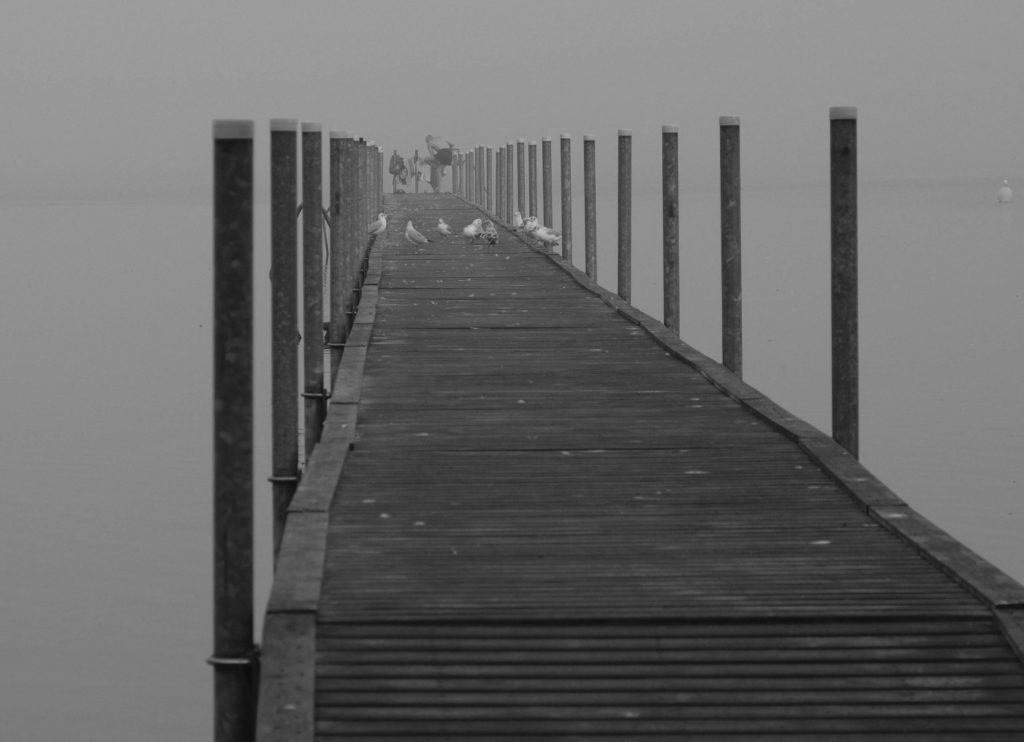
Infinity views often gives naturally created triangles, like a road that disappears in the distance or as in the example below, a long pier.

Especially roads, streets and buildings can create triangles of interest – in the image below I shot from a relatively low position, which underlines the triangles created by the staircase.

You can use triangles to almost point to your subject as in the example below where the building both left and right create triangles that seem to point to the subject a create an area of interest – helped by the big arrow in the bottom of the frame!

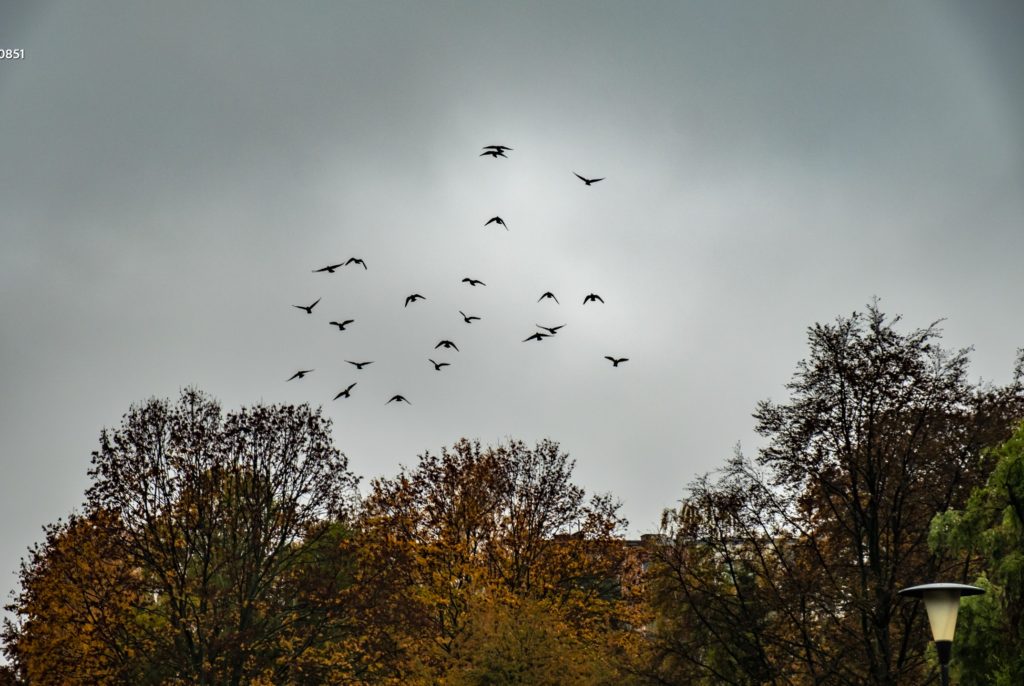
Triangles can also be less explicit and more implied, like the triangle created by the birds and the trees together, pointing in the direction the birds are moving and hence emphasizing the action.

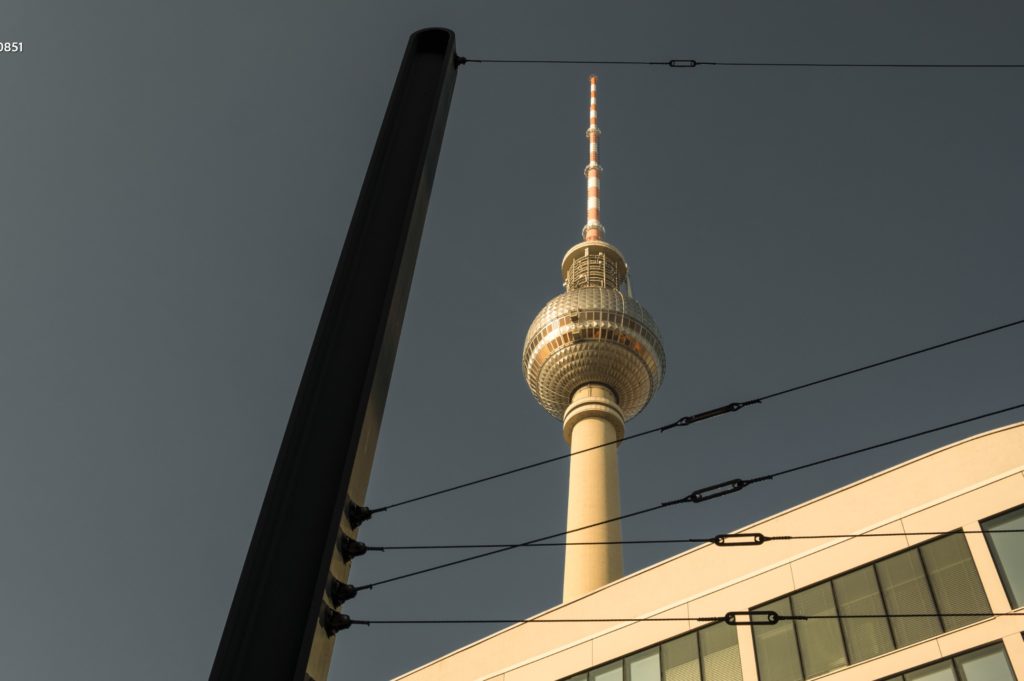
In the example below, I have stopped counting the number of triangles! The framing and the lines crossing creates more interest to the iconic Berlin tower than had I just shot the tower stand alone.

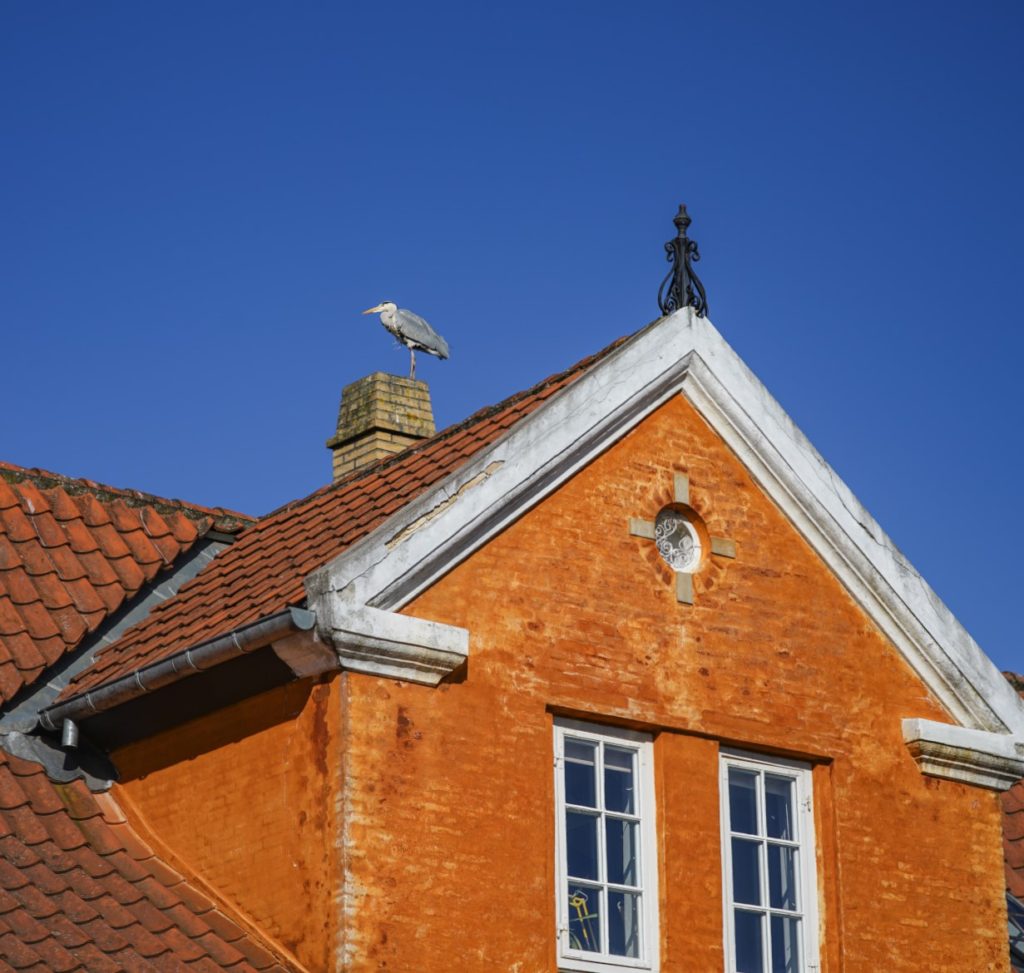
Buildings often hold many triangles that you can use for interesting angles and cropping – the example below is perhaps not brilliant, but illustrates the point.

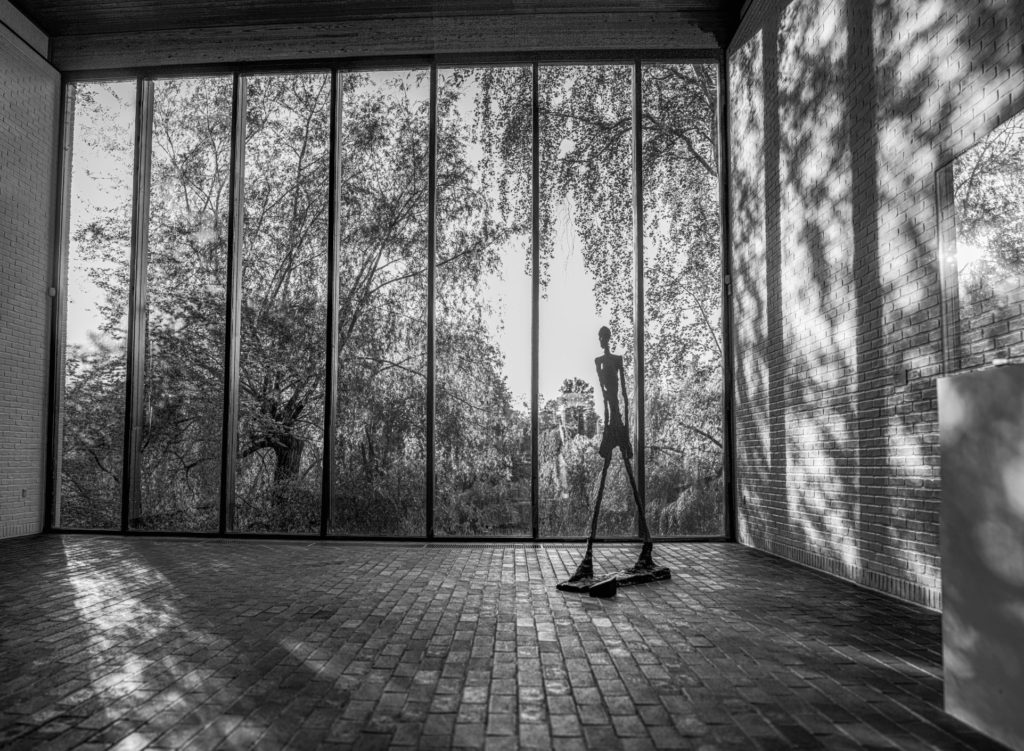
Triangles can also be used to stand out in a universe of circles or squares – in the image below from Louisiana Museum of Modern Art north of Copenhagen, then legs of the Giacometti shape makes a triangle that stands out relative to all the squares created by the window and the shades cast by the same. Also notice the implied triangle created by the tiles in the floor, pointing towards a single point to infinity.

I hope the above served as inspiration for your composition work, both in general and when it comes to triangles specifically. If triangles in a composition is new to you, it is only natural that you in the beginning see triangles everywhere! Don’t worry, it will fade and afterwards just be another tool in your photography toolbox.

Related reading

What is balance in photography?

What is the golden ratio in photography?