I guess anyone can read the specification sheet for both the Nikon D700 and the Nikon D4 and come up with a list of differences. But another thing is working with both cameras side by side for an extended period of time. Then you get to know the differences from a real world experience. In this blog I want to share how it is to live and work with these two cameras, based on a few areas that I have selected that are important to me.
Introduction
The Nikon D4 is in the single digit line of Nikon cameras, meaning that Nikon calls this a flagship camera. It is a good as it gets basically. However, the camera is more than 10 years old and the original ask for 6000 USD is not dropped to a more manageable 1000 EUR on the used market. So you can get your hands on a pro level camera for a fraction of what a new one would set you back.
The D700 was made between 2008 and 2012, so it is older than the D4. It shows in many ways: the pixel count is lower, no video, etc. But the D700 is a legend, and many consider the combination of sensor and processing logic to be unique, actually so unique that Nikon never since has made a camera with color rendition and micro contrast as good as the D700. Also, the D700 can be had for a lot less than 1000 EUR, but the challenge is more to find a copy that is not too beaten up / has too many clicks on the clock, than to find an affordable copy.
Many consider the D700 a baby version of the D3, and believe that Nikon with the D700 made a mistake and produced a camera in the enthusiast lineup that came too close to their flagship cameras. Nikon learned their lesson, and subsequently made sure to have good distance between their flagship, pro-level and enthusiast level lineup.
Image quality
Especially skin tones are known to be unrivalled and unique for the D700. I leave it up to you to decide if you want to believe the magic and hype related to the D700. I have seen it periodically shine and give a 3D pop never seen with other cameras, and many of my landscape pictures look more like paintings than pictures. So yes, I can confirm there is something about the D700, but I am skeptical if all of the hype is justified.
I will say though that when it comes to B&W images, the D700 in my humble opinion has something special – the images are very clean and rich in contrast, far better than any other camera I have had the pleasure to use.
On the other side I find that the D4 makes mincemeat of the D700 when it comes to colors and color rendition – the D4 in my opinion is simply some of the best with rich saturated colors, where I find the D700 to be more pale or less saturated. This is up to personal preference and taste, but for me the D4 shines when it comes to colors.
In terms of the more technical or specs related differences, the D4 has both more pixel count and more dynamic range. I have produced large prints (100 cm times 70 cm) with the Nikon D700 with no problems, so I am a strong believer that 12MP is more than plenty also for large prints, when we are talking natural viewing distances. If you need to crop, then the D4 clearly has an advantage with its 16MP relative to the 12MP of the D700, and for wildlife I often find that I need to crop, and then the D700 clearly has an disadvantage. However, for many applications (landscape, street, products, candid), I find that 12 MP is more than plenty.
Many shy away from the D700 when they understand it “only” has 12MP. But I say: fear not, it is plenty! Unless you want to make very big prints that needs to be viewed very close up, or you want to crop your pictures heavily. If not, then 12MP is more than enough. And when you load your pictures into Lightroom or wherever you do your post processing, you will enjoy the smaller file size. And storage wise you will find that the D700 files take up less space on your hard-drive and backup storage facilities. So I will claim that the smaller pixel count makes living with the D700 somewhat easier than the D4.
Ergonomics and build quality
The D700 and D4 have significant differences in build quality. Even though the D700 is built very solid, the D4 takes it up a notch, and comes with what I call a built in battery grip. The D4 is also a very heavy camera body weighing almost 1.5 kilo, which paired with a heavy lens is a very heavy combo. If you don’t like a heavy and bulky camera, then you probably want to stay clear of both the D4 and the D700, but especially the D4.
Both cameras have great ergonomics and I am in general a fan of Nikons way to design their cameras and button layout so you do not get tired working with them for extended periods of time. One area where you will notice that these are older cameras is the rear screen, where both of them are fixed. No tilt of flip-out or anything. Fixed:
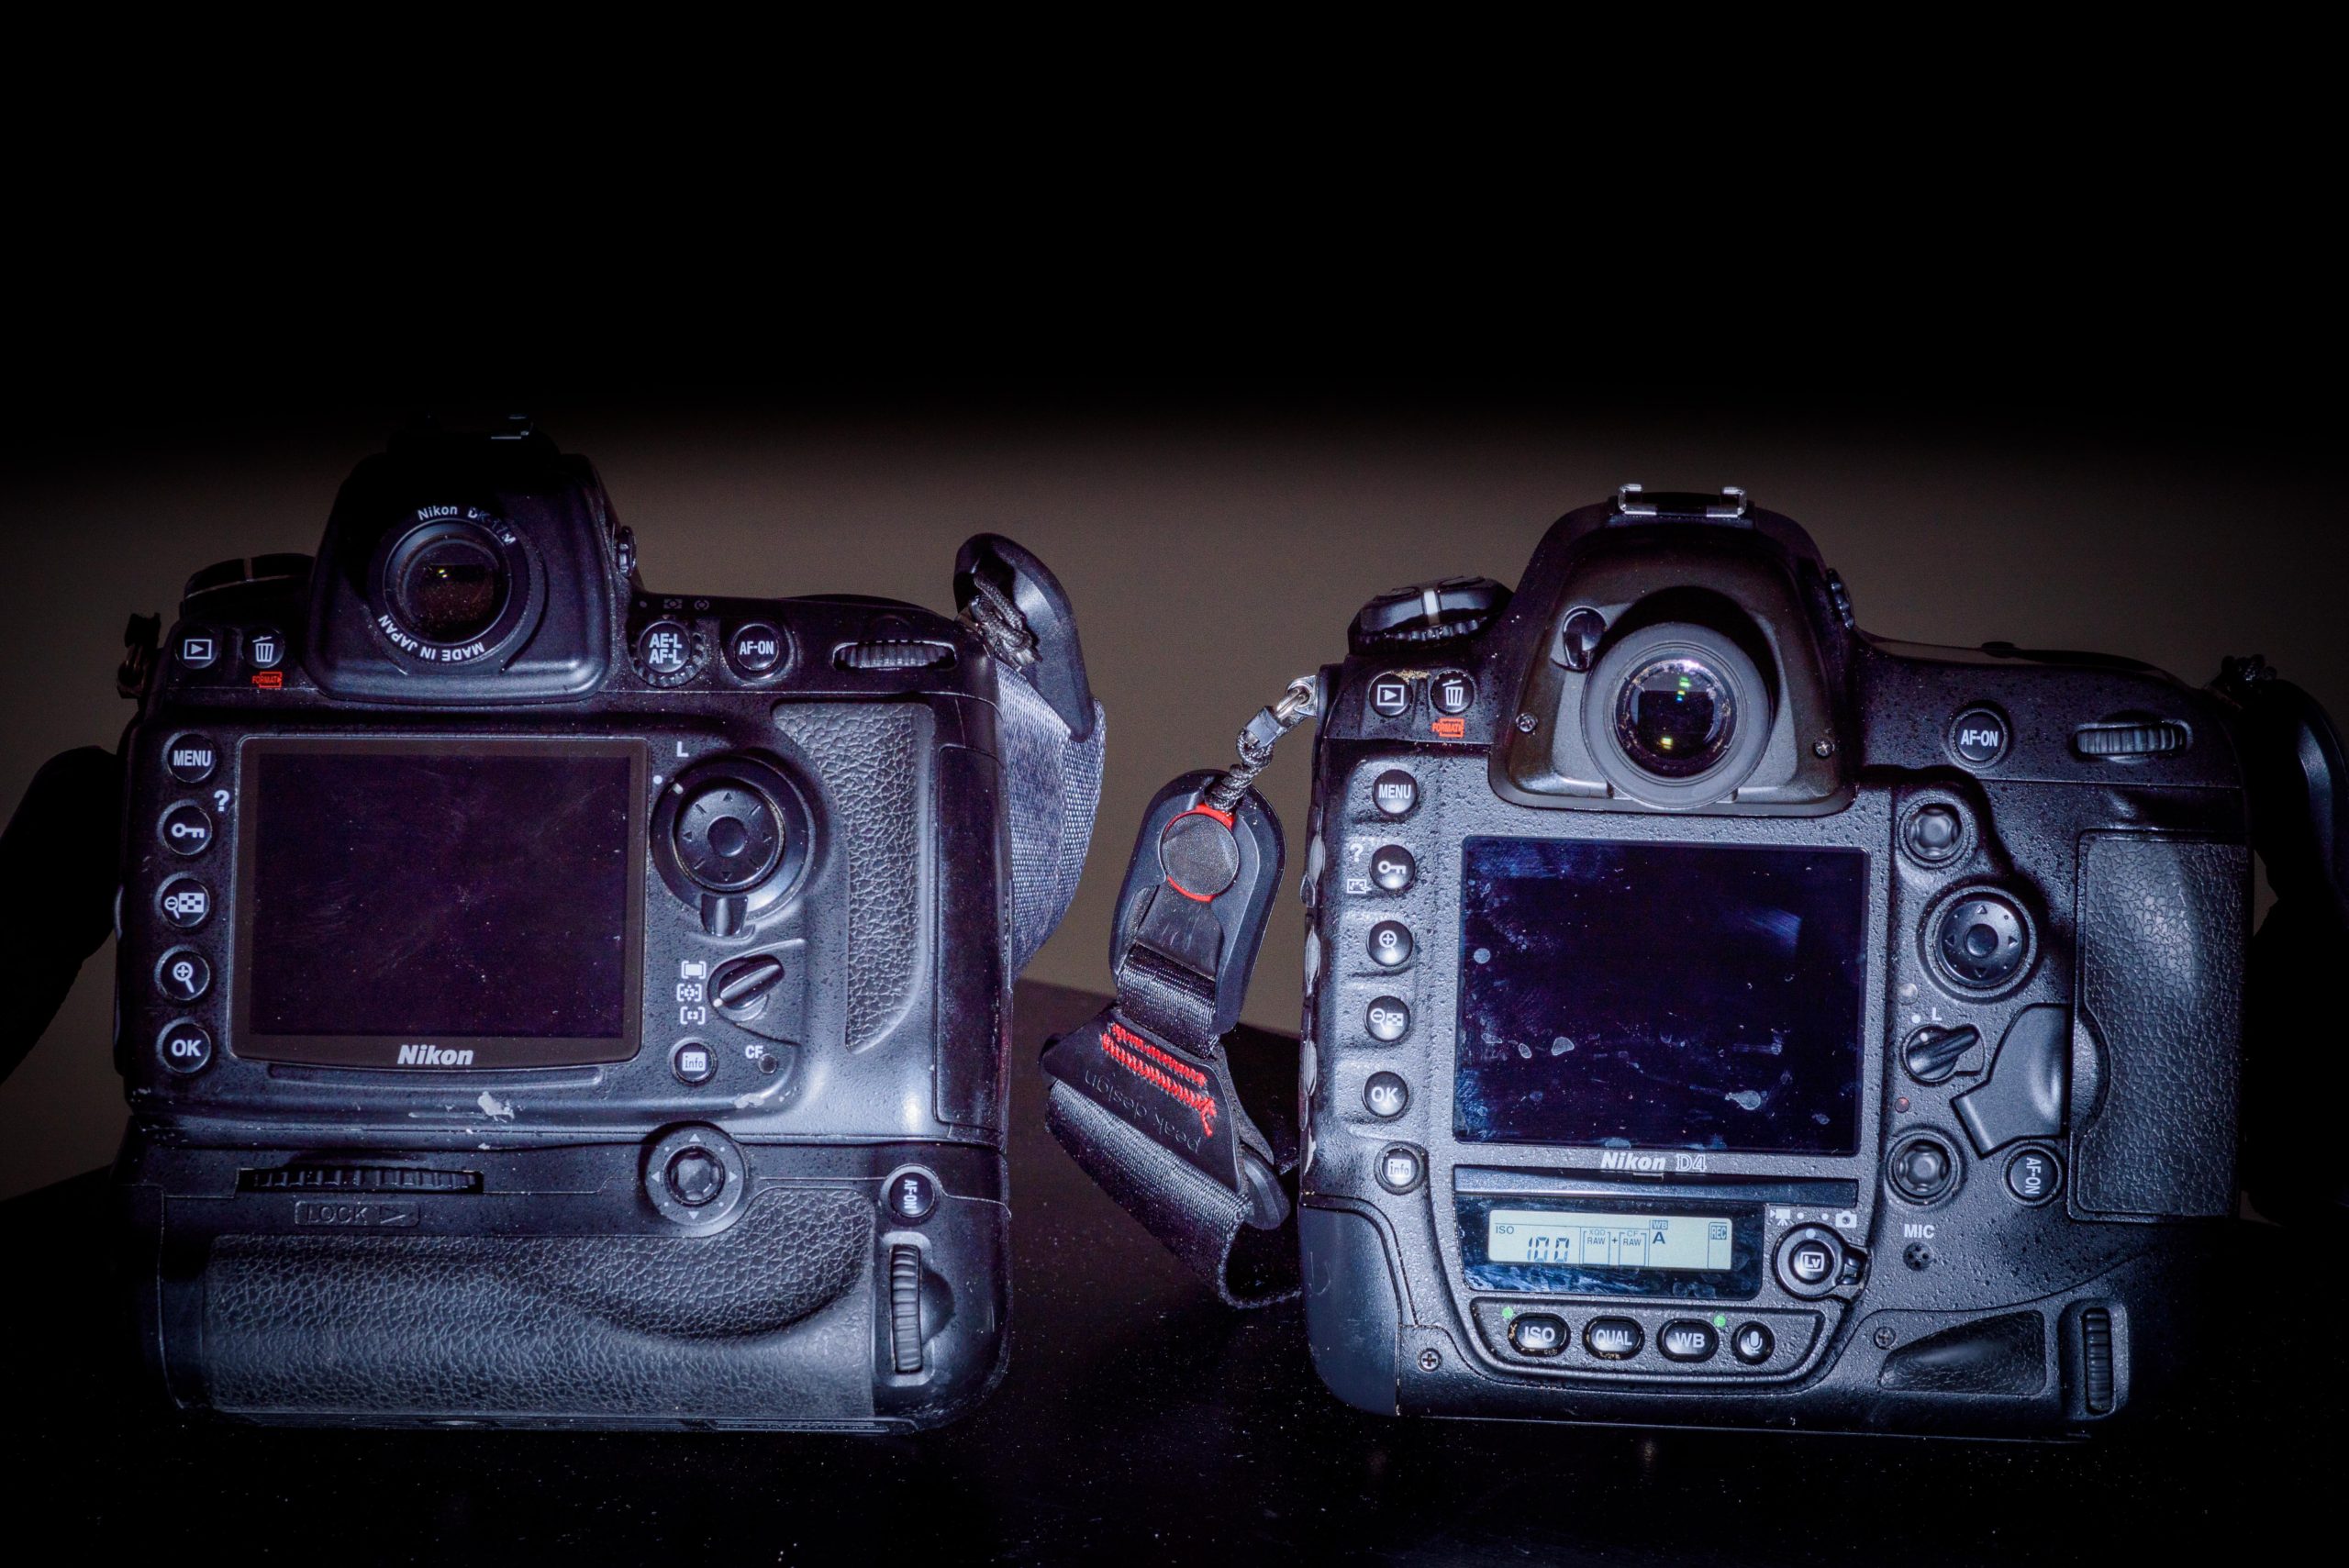
With the D700 you have the option to add a battery grip, which makes it – in terms of height and ergonomics – very similar to the D4. However, the D4 comes with 2 joysticks for moving the focus point around, with the D700 that only comes with the battery grip, in landscape mode you have to do with the command wheel. Some complaint that the joysticks on the D4 easily fall of, but I am so lucky to not have had this issue.
One area that buggers me senseless with the D700 is the lack of 100% viewfinder coverage. The D4 has 100%, but the D700 only has 95%. You may think that this is a small thing, but if you like me try to crop your images precisely when shooting only to learn that the camera added 5% more, then I think you will feel the annoyance of the additional 5%. Switching between the D4 and the D700, it always strikes me how much this little difference means to me in real life.
Auto ISO
I know it is a small thing, but with the D4 I can switch between setting the ISO myself and asking the camera to do it for me very easily. I hit the ISO button bottom left on the rear of the D4 while turning the front command dial. Then it flicks between auto-ISO and “manual” ISO. Not so on the D700 – here I have to go into the menu system to change this. I know it is a small thing and I know you can configure “my menu” to have the ISO on top of the list and have it assigned to a dedicated button, but I find that the D4 implementation is so much easier to work with and also here – like the viewfinder coverage – it always strikes me how much this little difference means to me in real life.
Card slots
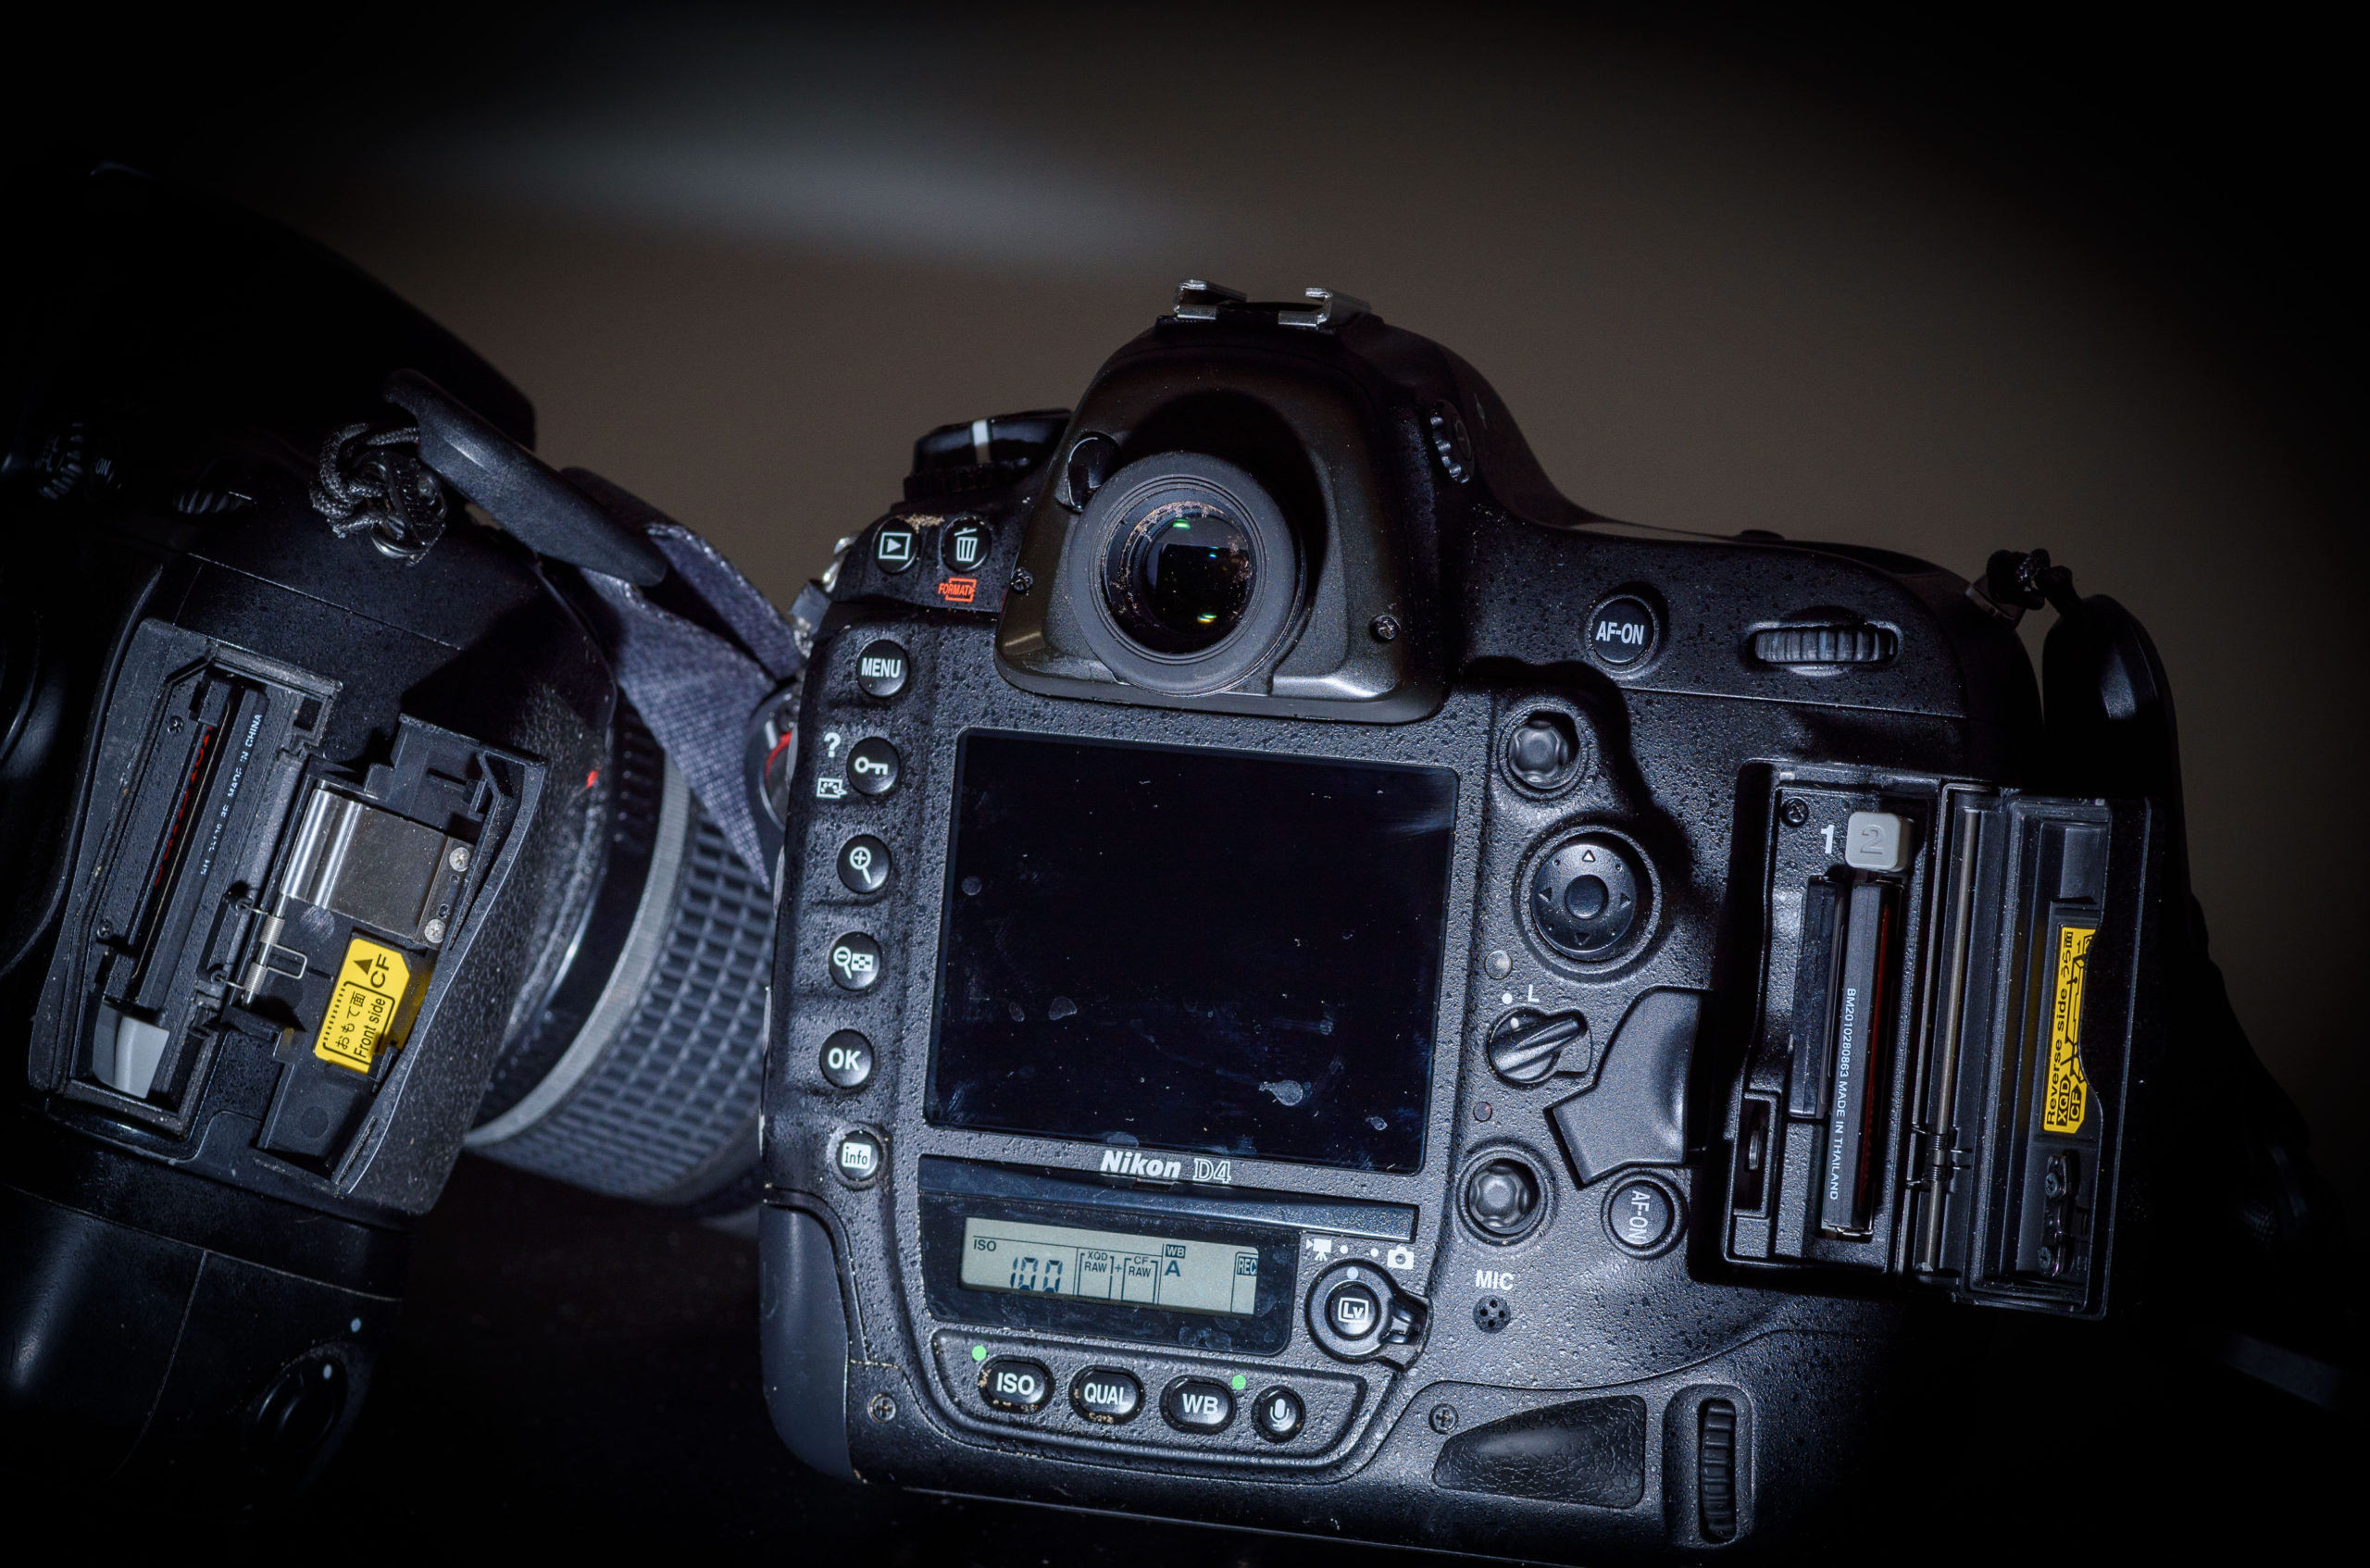
One area that always causes a lot of debate is one or two card slots. The D700 to the left comes with one CF card and the D4 to the right has both a CF card slot and an XQD slot. Especially for wedding photographers but basically anybody that appreciates the philosophy of “no single point of failure”, the value of having 2 card slots cannot be exaggerated. You may be of the “I have never had a card failing on me”, but Murphy is alive and kicking and it is only a matter of time. There have been days when I came home from a shoot thinking that the content of the cards was far more valuable than the camera holding them. But of course up to you how important 2 card slots is!
Live view
You may not use Live View much, but if you do, then this is one of the areas where the D4 shines relative to the D700. I think the Live View implementation on the D700 was one of the first implementations Nikon did, and it is a bit quirky. There is no dedicated Live View button and you have to select between two different Live View modes. A0nd the autofocus is slow when you opt for the “Tripod” mode, as it is called. You will quickly enjoy the Live View implementation on the D4 with a dedicated button.
What to choose?
If you are about to choose between the D4 and the D700, then you are in for a tough choice. Boiled down to one sentence? You choose the D700 with your heart and the D4 with your head. The D4 is a more modern camera, and although heavier, it is easier to work with. Personally I find that I shoot a lot more with the D4 than the D700, simply because it is a camera I find a lot easier to work with (100% view finder coverage, dedicated live-view button, easy AUTO ISO switch etc).
If you are in doubt, buying a good copy of a D700 will not set you back much – you can always get a very good price for a D700 due to its legend status, and then the price of owning it is only the difference between what you bought it for and what you sold it for. And even without being a top negotiator, I think you will find the gap to be small.

