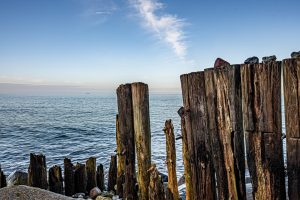
High Dynamic Range (HDR) is a technique used to get the best dynamic range in a picture, when the subject is comprised of both very dark parts and very bright parts. Your eyes have an amazing capability to see bright and dark subjects at the same time. Your camera does not, at least not to the same degree, although dynamic range has improved a lot over the recent years. So your camera has to cheat a bit, and combine an over exposed, an under exposed and a normally exposed picture into one, picking the best parts from each picture.
HDR on your smartphone
You probably have heard about HDR from your smartphone, where HDR is a feature that can be switched on and off. Often the camera factory settings is so that the camera will make the call if HDR is needed and it then processes the pictures behind the scenes without involving you, simply presenting you the final result as one picture and ditching the individual pictures.
Most DSLRs and mirrorless cameras do not offer this service level – all they do is enable you to take a series of pictures with different exposure levels, so the combination of the pictures has to be done like post processing software like Photoshop or Lightroom. And the camera manufacturers will refer to the series of pictures as bracketing – and to complicate matters you can bracket for all sorts of things other than exposure, but to keep things simple we stay with exposure here.
Example HDR
Your DSLR or mirrorless will typically have a mode selector or a menu option that enables bracketing. Factory settings are typically that the camera takes one normally exposed picture, one over exposed and one under exposed. However, it is possible to increase number of pictures to 5, 7 or even 9 and also control how much each picture is over and under exposed. I normally stay with 3 pictures and over/under expose by 2 stops, but more pictures and smaller exposure steps would probably yield a better result.
Take a look at these 3 pictures. The one to the left is under exposed, the one to the right is over exposed and the one in the middle is normally exposed.
The camera typically varies the shutter speed or the ISO or a combination to over and under expose the pictures. In the picture to the right, you can see the details in the wood, but the horizon and the sky is completely blown out. It will hence make sense to use the rightmost picture for the woodwork. Similarly, the sky and the clouds are most visible in the center and leftmost picture, so the horizon part of the picture should be picked here.
Luckily the post processing software has the ability to figure out all this so we can enjoy the combined picture without worrying too much about which parts are combined:

Of course the above picture has had more editing done than the simple combination of the pictures, but the result above would not have been possible had the dynamic range not been built with the help from all 3 pictures.
Related reading
What is exposure compensation?
What is a histogram in photography?


