Canon EOS 5D: Manual Exposure Guide

Many find shooting in manual exposure mode a bit intimidating, maybe because you run the risk of getting images that are either over- or under exposed. However, a digital camera gives you the option to immediately see the result of your work a few seconds after you have hit the shutter, so the feedback loop is fast and there is every opportunity to learn from the feedback and adjust the exposure. In addition, if you shoot in RAW format, even wrong exposure by several stops can be fixed in post. So the digital age has certainly made photography in manual exposure mode less risky than back in the film days, when you got the feedback in the darkroom!
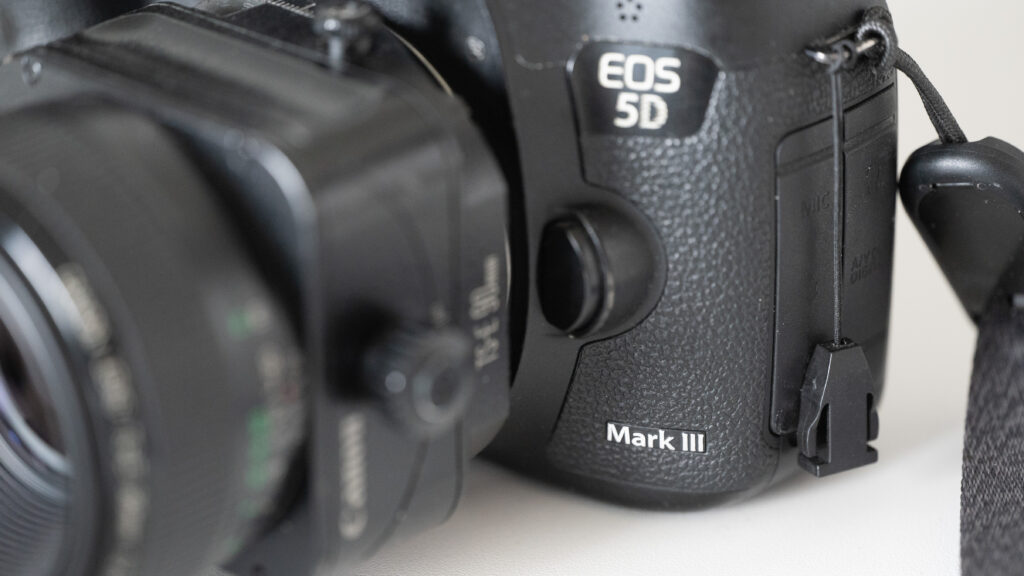
Canon EOS 5D
This blog is based on the Canon EOS 5D mk III, but I am sure it is applicable to most versions of the Canon 5D.

In this short guide I will take you though the parameters you need to control in order to manage the exposure of the images. If you like to learn from a video instead, there is a link in the bottom of this post to a youtube video that takes you though the same topics as this post.

Mode dial
Canon EOS 5D
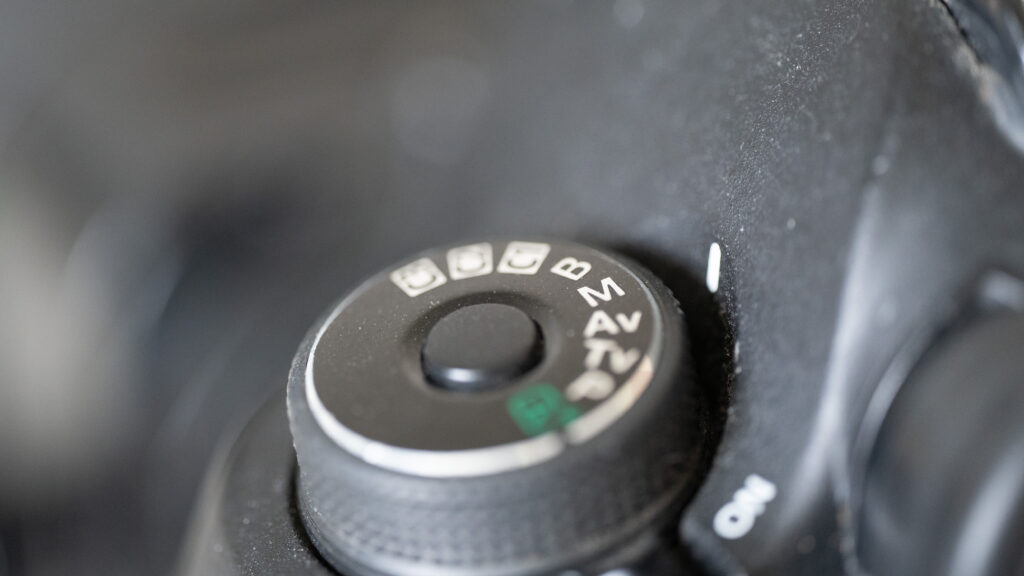
Remember to push the centre button on the mode selector when changing between modes. Here “M” for manual is chosen as it is aligned with the white dot on the camera body.

The first step is to get the Canon EOS 5D in manual exposure mode: top left on your camera the mode selector button is located. Press the centre button down and at the same time turn the mode selector so the letter “M” for manual is flush with the little white dot on the camera. Then you have set the camera in manual mode.
Canon EOS 5D
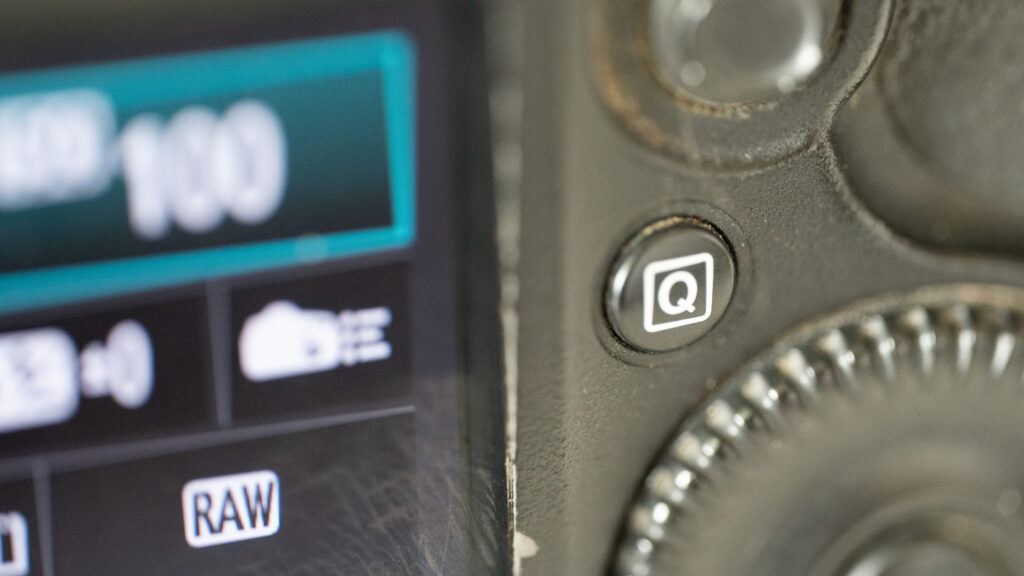
The Q-button is just to the right of the rear LCD, sitting over the large command wheel.

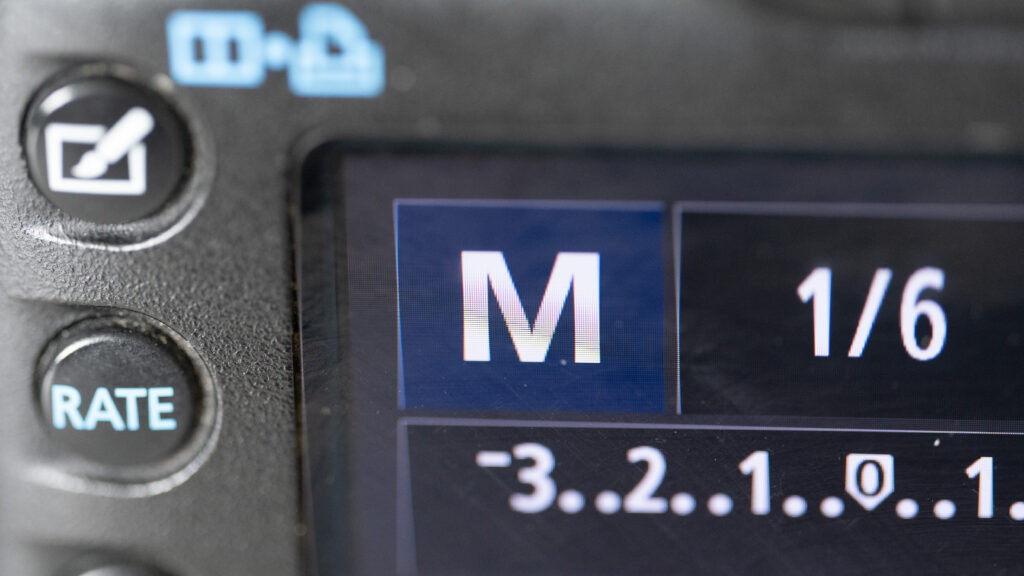
If you press the “Q” button just right to the rear LCD, the screen that appears will top left show an “M” if you have successfully put the camera in manual mode. Press the “Q” button again to turn off the rear LCD.
Canon EOS 5D
The large M top left on the rear LCD shows the camera is in manual exposure mode. You control both the aperture and the shutter speed.

Shutter speed

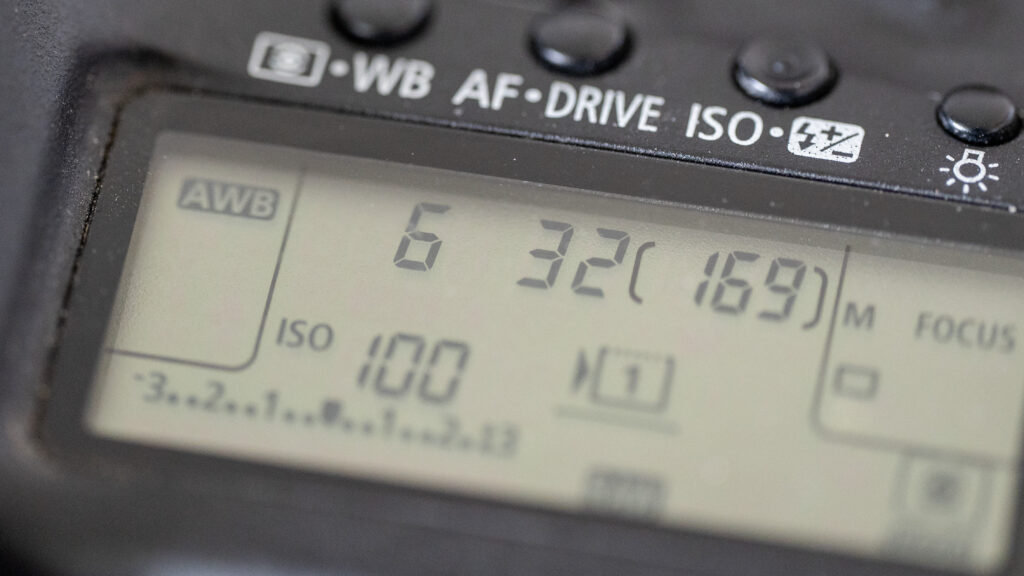
Just behind the shutter release button, there is a command wheel you can turn left and right. When you turn the wheel, the shutter speed changes by each “click” of the wheel – you can see the values changing in the small LCD top right on the camera.
Canon EOS 5D
Here the top LCD is shown. The shutter speed is 1/6th of a second, the aperture is at f/32 and the ISO is set to 100.

The shutter speed is shown top left in the small LCD as a reciprocal value, so if the value 100 is displayed, it means 1/100th of a second. Again, if you push the “Q” button, the shutter speed will be shown top left in the rear LCD, just right of the “M” mentioned before. Press the “Q” button again to turn off the rear LCD.

Aperture

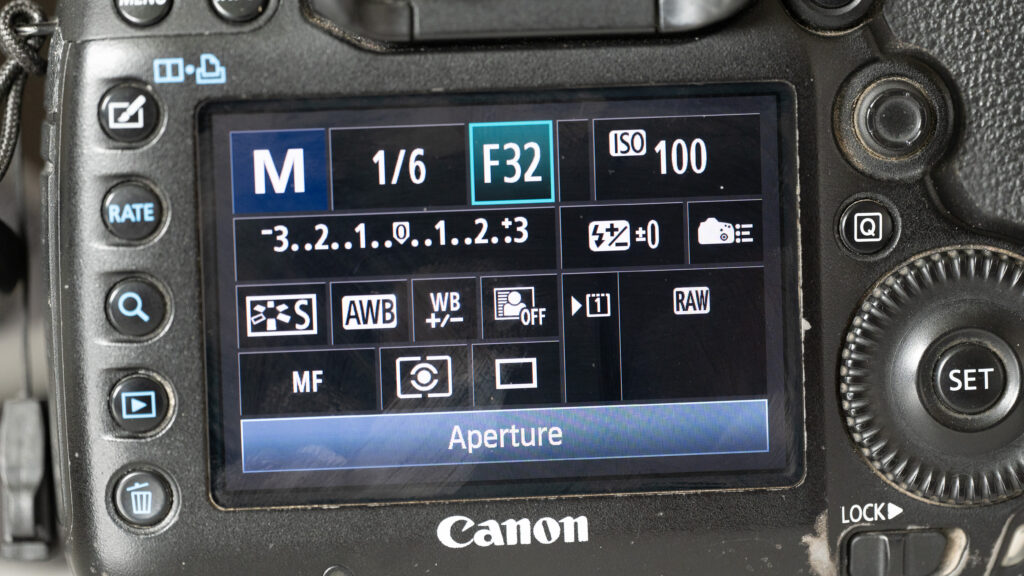
You control the aperture by turning the big command wheel just right of the rear LCD (it has a “set” button in the centre). Again, the selected aperture can be viewed in the top LCD just to the right of the shutter speed, and just like with the shutter speed, you can also see the aperture on the rear LCD if you press the “Q” button just above the bug command wheel.
Canon EOS 5D
The large M top left here on the rear LCD shows the camera is in manual exposure mode. The cursor is over the f/32 and as the blue bar in the bottom of the LCD shows, this is the chosen aperture.

The widest aperture you can select, i.e. the smallest F-stop number, is determined by the lens. I am often shooting with a 90 mm Canon tilt-shift lens TS-E and it has a maximum aperture of f/2.8. At the other end I can close the aperture down to f/32. So I can select between 2.8, 3.2, 3.5, 4, 4.5, 5, 5.6, 6.3, 7.1, 8, 9, 10, 11, 13, 14, 16, 18, 20, 22, 25, 29 and 32. Quite a number of options!

Be careful not to close the aperture down too much, you will let in very little light and also diffraction starts to set in when beyond f/16 approx.  Shooting wide open lets in lots of light, but the price you pay is that the depth of field gets very shallow, so unless you want to isolate the subject with a blurred background, a middle-of-the-road aperture of say f/5.6 or f/8 may be a better choice.

ISO

ISO is not the sensitivity of the sensor, but a factor that is applied to the amount of light the sensor has registered during the exposure. So turning up the ISO will amplify both the light and the noise the sensor has registered – that is why shooting with very high ISO numbers gives grainy images with washed out colours. The camera is simply amplifying both the signal and the noise and the closer the two are to each other (i.e. the less light) the more the noise will dominate relative to the signal. So be sure not to go too high with the ISO, unless you like grain for artistic reasons.
Canon EOS 5D
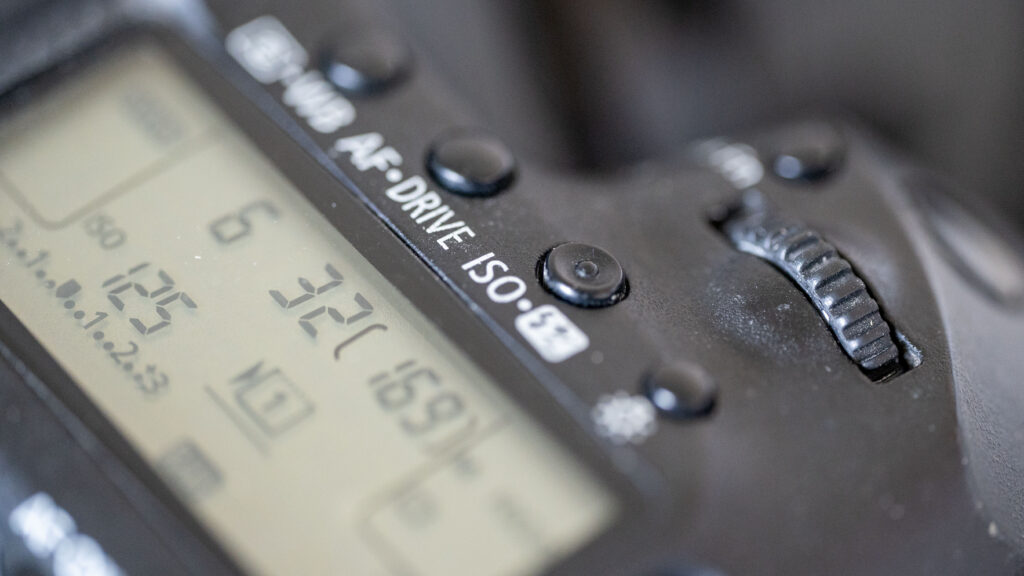
The ISO button is the second from the right, sitting just above the top LCD.

Just on top of the top LCD there are 4 buttons. The rightmost turns on the light in the LCD, and just to the left of that button is the ISO button. If you press it once, most of the values in the LCD will disappear and only the ISO value will be shown to the left just above the metering scale. You can see that it says “ISO” just to the left of the ISO setting.

You can now change the ISO value by turning the same command wheel as you use for setting the shutter speed. ISO ranges from 100 up to at least 25.600, but I would advise you never to use so high values. I try to stay at 1600 as my highest value.
Canon EOS 5D
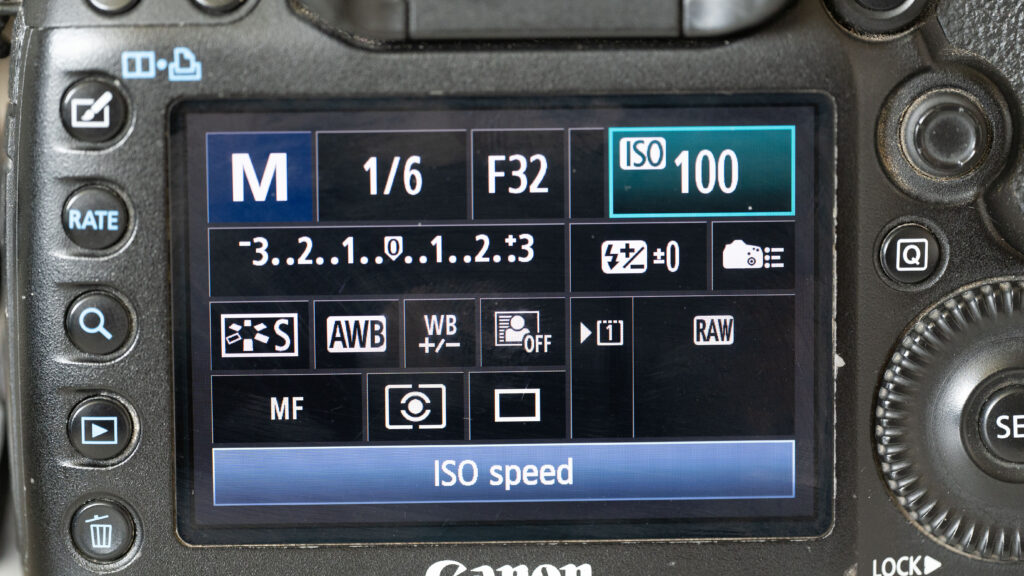
With the joystick top right, you can move the cursor around. Here the cursor has been positioned over the ISO field and the blue bar in the bottom shows that ISO is highlighted. If you hit the “set” button in the centre of the large command wheel, you will get into a menu where all ISO options are displayed for selection.

If you turn the command wheel all the way to the left (i.e. down to 100 and then one more), then an “A” will appear and this indicates that the camera will now select the ISO value automatically. Using the built in light meter and the aperture and shutter speed selected by you, the camera will now set the ISO so that the image is correctly exposed. Be mindful that if you stress the camera with either very little ambient light or brutally closed down aperture / fast shutter speed, the only thing the camera can do is to turn up the ISO to a very large value. So keep an eye on the ISO settings also if you have the auto-ISO turned on.

Adding it all up

Now you know how to set the aperture, shutter speed and ISO and you are in full control of how these values are set. There is help to be found in the fact that the metering system of the camera continues to work and tell you if the 3 parameters you have chosen add up to a technically correct exposed image.

Keep an eye on the scale bottom left on the top LCD; the scale can also be found in the bottom of the viewfinder. If the little dot on the scale is to the left of the middle, your image is under exposed and to the right the opposite. If you are more than 3 stops over- or under exposed, the camera will show this with a little arrow pointing out of the scale in the relevant direction.

All the best with shooting in manual exposure mode!

Video link

Nikon Z6ii: Manual exposure, how to

Manual exposure

Many find manual exposure a bit intimidating and stay with the automated mode or one of the semi automated modes like aperture priority or shutter priority. Good news is that manual exposure is not complicated at all and that you have a lot of room for making exposure mistakes and still be able to fix it in post, provided you shoot RAW, which I highly recommend. And you will understand your camera a lot better when you know how to operate in manual exposure mode.

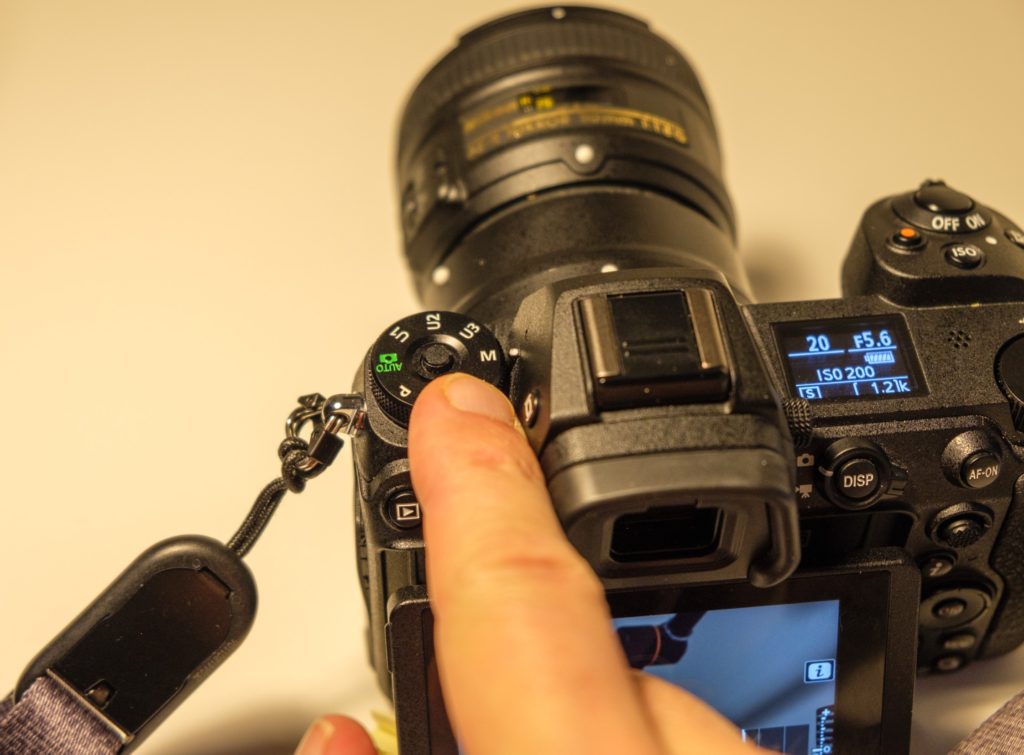
You camera has a built in metering system, that constantly measures the available light. This system continues to work also when you set the camera in manual mode. Select the manual mode on the PASM dial top left on the Nikon Z6ii.

Manual exposure mode
Mode dial top left – here the mode “M” for manual is selected.

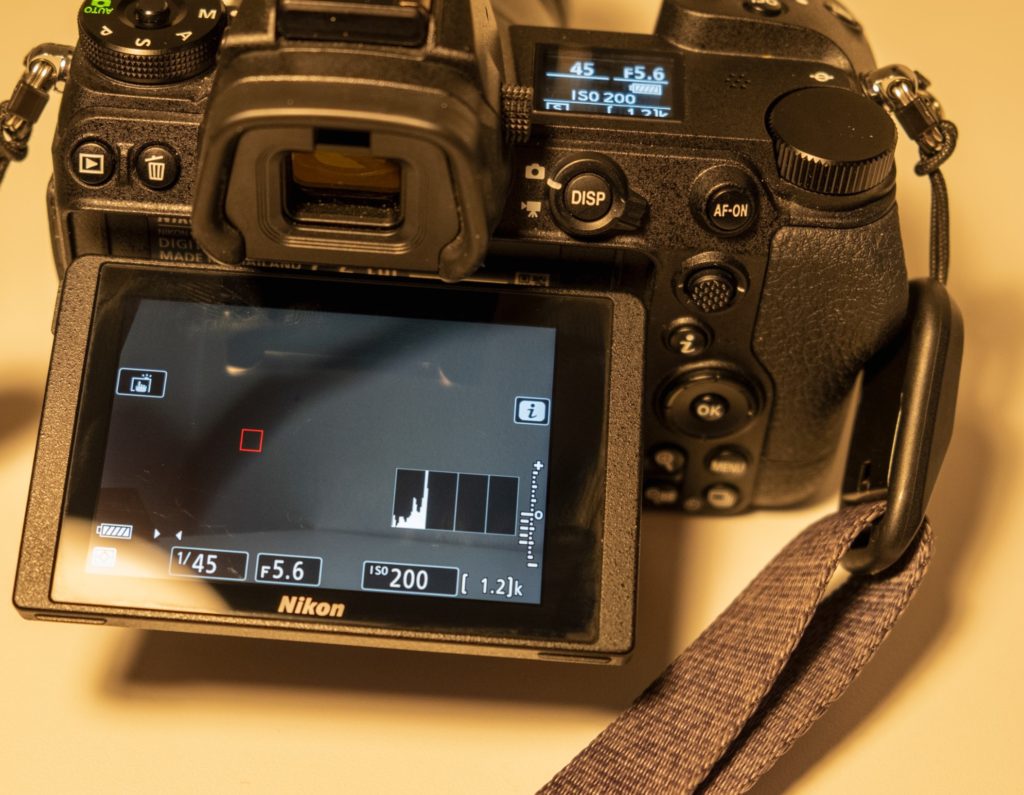
Once in manual mode, you will notice a little exposure indicator appearing, both in the viewfinder and in the rear LCD. This indicator will tell if the camera finds that the aperture, shutter speed and ISO settings will give a correctly exposed picture when you hit the shutter.

Metering scale. Rear LCD.
Notice the scale bottom right on the rear LCD. Here the metering system says the image will be significantly underexposed. The histogram seems to agree!

It is a good thing to keep an eye on the exposure indicator to make sure you get the exposure you are after. Sometimes you want deliberately to over- or underexpose your picture, and the exposure indicator is a good tool to make sure you get what you want.

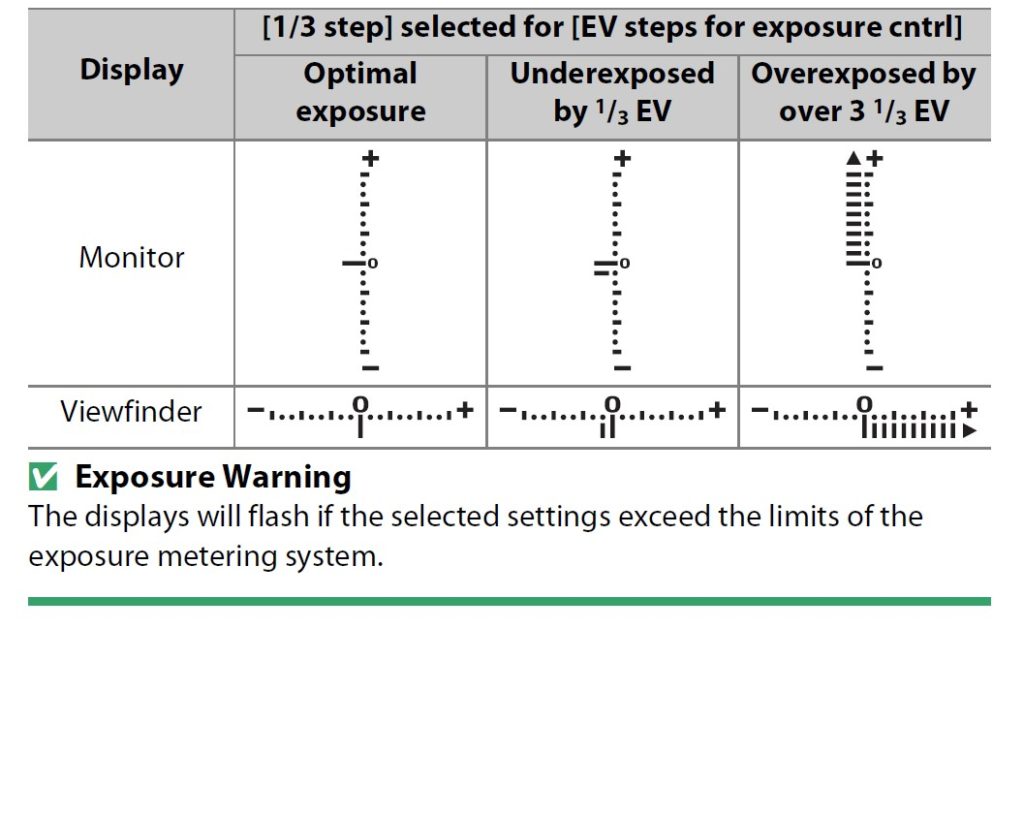
exposure indicator guide
The exposure indicator shows if the picture will be over- or underexposed or correct exposed. Notice the difference between the viewfinder orientation and the rear LCD ditto. Credit: Nikon Z6ii manual.

Another way to see the same information as the exposure indicator is to use the histogram – you can make it appear by hitting the “disp” button on the center top rear on the camera. Finally, as you have WYSIWYG, you can simply notice if the LCD or electronic viewfinder turns very dark or very bright – a good indication something is off relative to a technically correct exposed picture.

Aperture and shutter speed

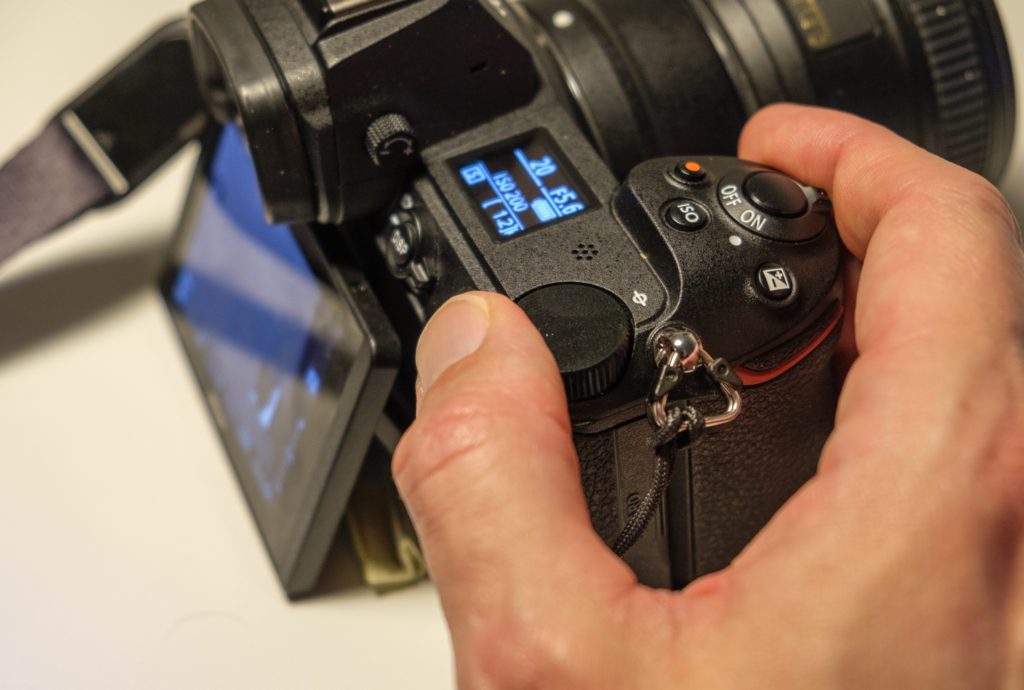
You control the aperture and the shutter speed by turning the front and rear command dials respectively.

The thumb is on the rear command dial that sets the shutter speed. The index finger is on the front command dial that controls the aperture.

As you do so, you will notice that the exposure indicator changes in accordance with the selected settings for the two.

If the camera flashes “FEE” in the top LCD when you mount the lens, it is probably because you have not locked the aperture on the lens to the highest f-stop number possible – the camera needs this setting to be so, in order for it to control the position of the aperture blades when shooting with AF or AF-D lenses.

If your lens is an older model (say AI or AIS) where you have an aperture ring on the lens, it is not always possible to change the aperture with the front command dial – instead you will have to set the aperture on the lens. The top LCD will not show the aperture but just a “F–” to indicate it cannot “see” the chosen aperture. The metering indicator works fine still though.

ISO

On a digital camera, ISO is actually not part of the exposure. The sensor has the sensitivity it had when it left the factory and it cannot be changed.

By setting the ISO to other values than the base ISO 100, you apply a gain to the values read by the sensor. It is camera internal post processing that happens from the sensor has read the light and until the image sits on the memory card. Just like in the old days when you turned up the radio, you both amplified the signal and the noise – the original signal remains the same. ISO works the same way, so the price for turning up the ISO is more noise and grain.

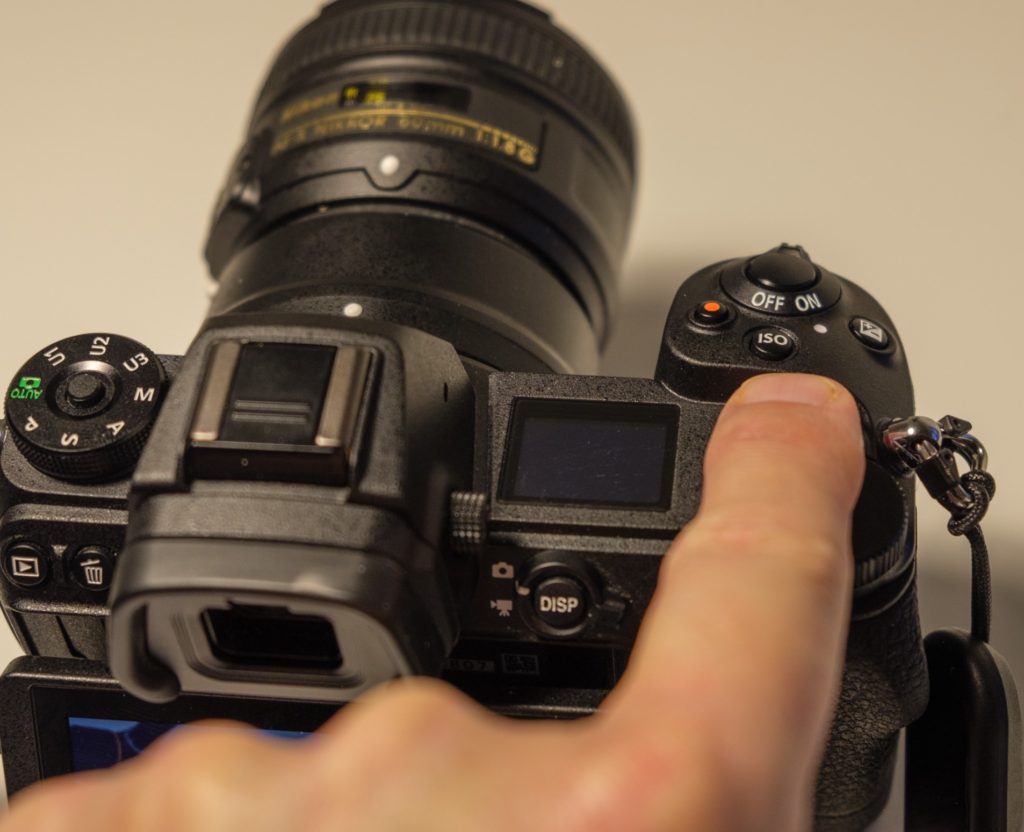
When you push the ISO button on top of the camera, you change the function of the front and rear command dial.

The ISO button is located on the top of the Nikon Z6ii.

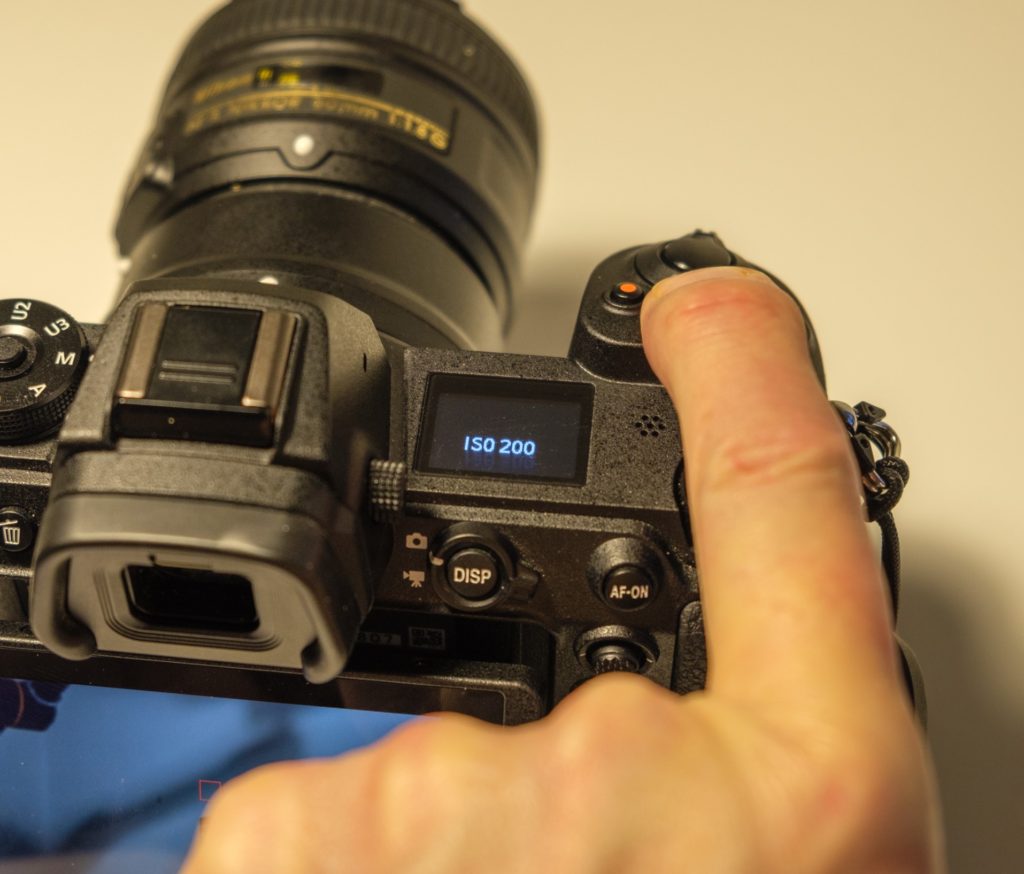
Pushing the ISO button and at the same time turning the front and rear command dial, changes the ISO values. The front command dial switches between ISO and auto-ISO and the rear command dial shifts between ISO values, say from 100 to 140, and from 140 to 200, and so on.

Choosing the ISO on the Nikon Z6ii
Here the ISO button is pushed. Notice that the top LCD now shows the chosen ISO value.

When you have auto-ISO switched on, the camera will be in a – if not semi automatic – then quarter automatic mode. In other words, the camera will try to make the picture correctly exposed ALONE changing the ISO. So if you have a dark scene where the aperture is closed down and the shutter speed is fast, the camera will have to go to very high ISO values to compensate.

You can use auto-ISO to make sure you come home with images that show at least something, but be aware that grain and noise may be the price you pay for switching auto-ISO on. For starters, I would recommend that you have auto-ISO off, and keep an eye on the exposure indicator or the histogram to make sure the exposure is roughly right. Later, when you have some experience, auto-ISO can make you work faster.

Metering modes

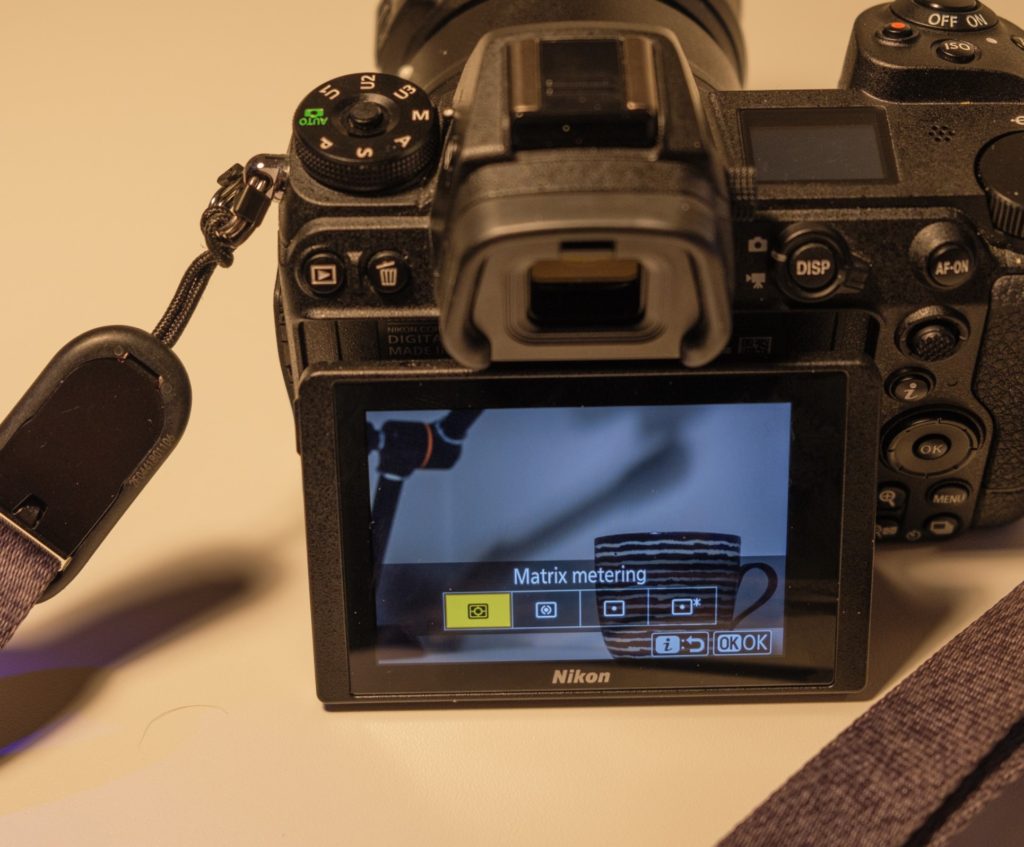
The Nikon Z6ii has 4 metering modes. You can access these by pushing the little “i” in the rear of the camera (middle) and this shows a 6×2 menu where the 9th option (counting top left to right) is “metering”. Selecting that one, brings a sub-menu with 4 options.

Choosing the metering options on the Nikon Z6ii
The 4 metering options.

The metering mode does NOT change the amount of available light, rather it changes how the camera meters the light that passes through the lens. I shoot almost entirely in the “matrix metering” mode as it is the most advanced one, that tries to take in the entire scene and find a good compromise.

Second option is center weighted metering. This one is good if you shoot portraits where you don’t really care of the corners are exposed correct – the important is that the person in the frame is exposed correct. The manual also mentions this as a good mode if you shoot with filters.

The third option is spot metering, where the focus point is where the metering is done entirely. This is a good option of you know that a particular point in the image needs to be correct exposed, but you do not care too much about the rest of the frame. In the settings menu B3 you can set the size of this point.

The final option is highlight-weighted metering. This one many street photographers use as they are not afraid of loosing details in the shadows. I use it for shooting silhouette photography, where the details in the shadows are also less important.

All of these modes may seem confusing, so my advice is to use matrix metering. If you shoot RAW, then there are plenty of options for adjusting the exposure in post and hence I find that these 4 options are more for backward compatibility with older DSLRs than anything else.

Video link

Related reading

Nikon Z6ii – Manual focus aid

Nikon Z6ii – any need for the Preview button?