Review: Nikon AF-S 85mm 1.8G lens

I got my Nikon AF-S 85mm 1.8G lens over at mpb Europe for 334 EUR used –  this was October 2021. The lens was rated by mpb to be in excellent condition, which in my experience is close to brand new! The same lens from new in Denmark is around 500 EUR, but mind you that here in little Denmark prices are per usual some of the highest in Europe. But still, I find that I save a lot buying used gear in good to mint condition.
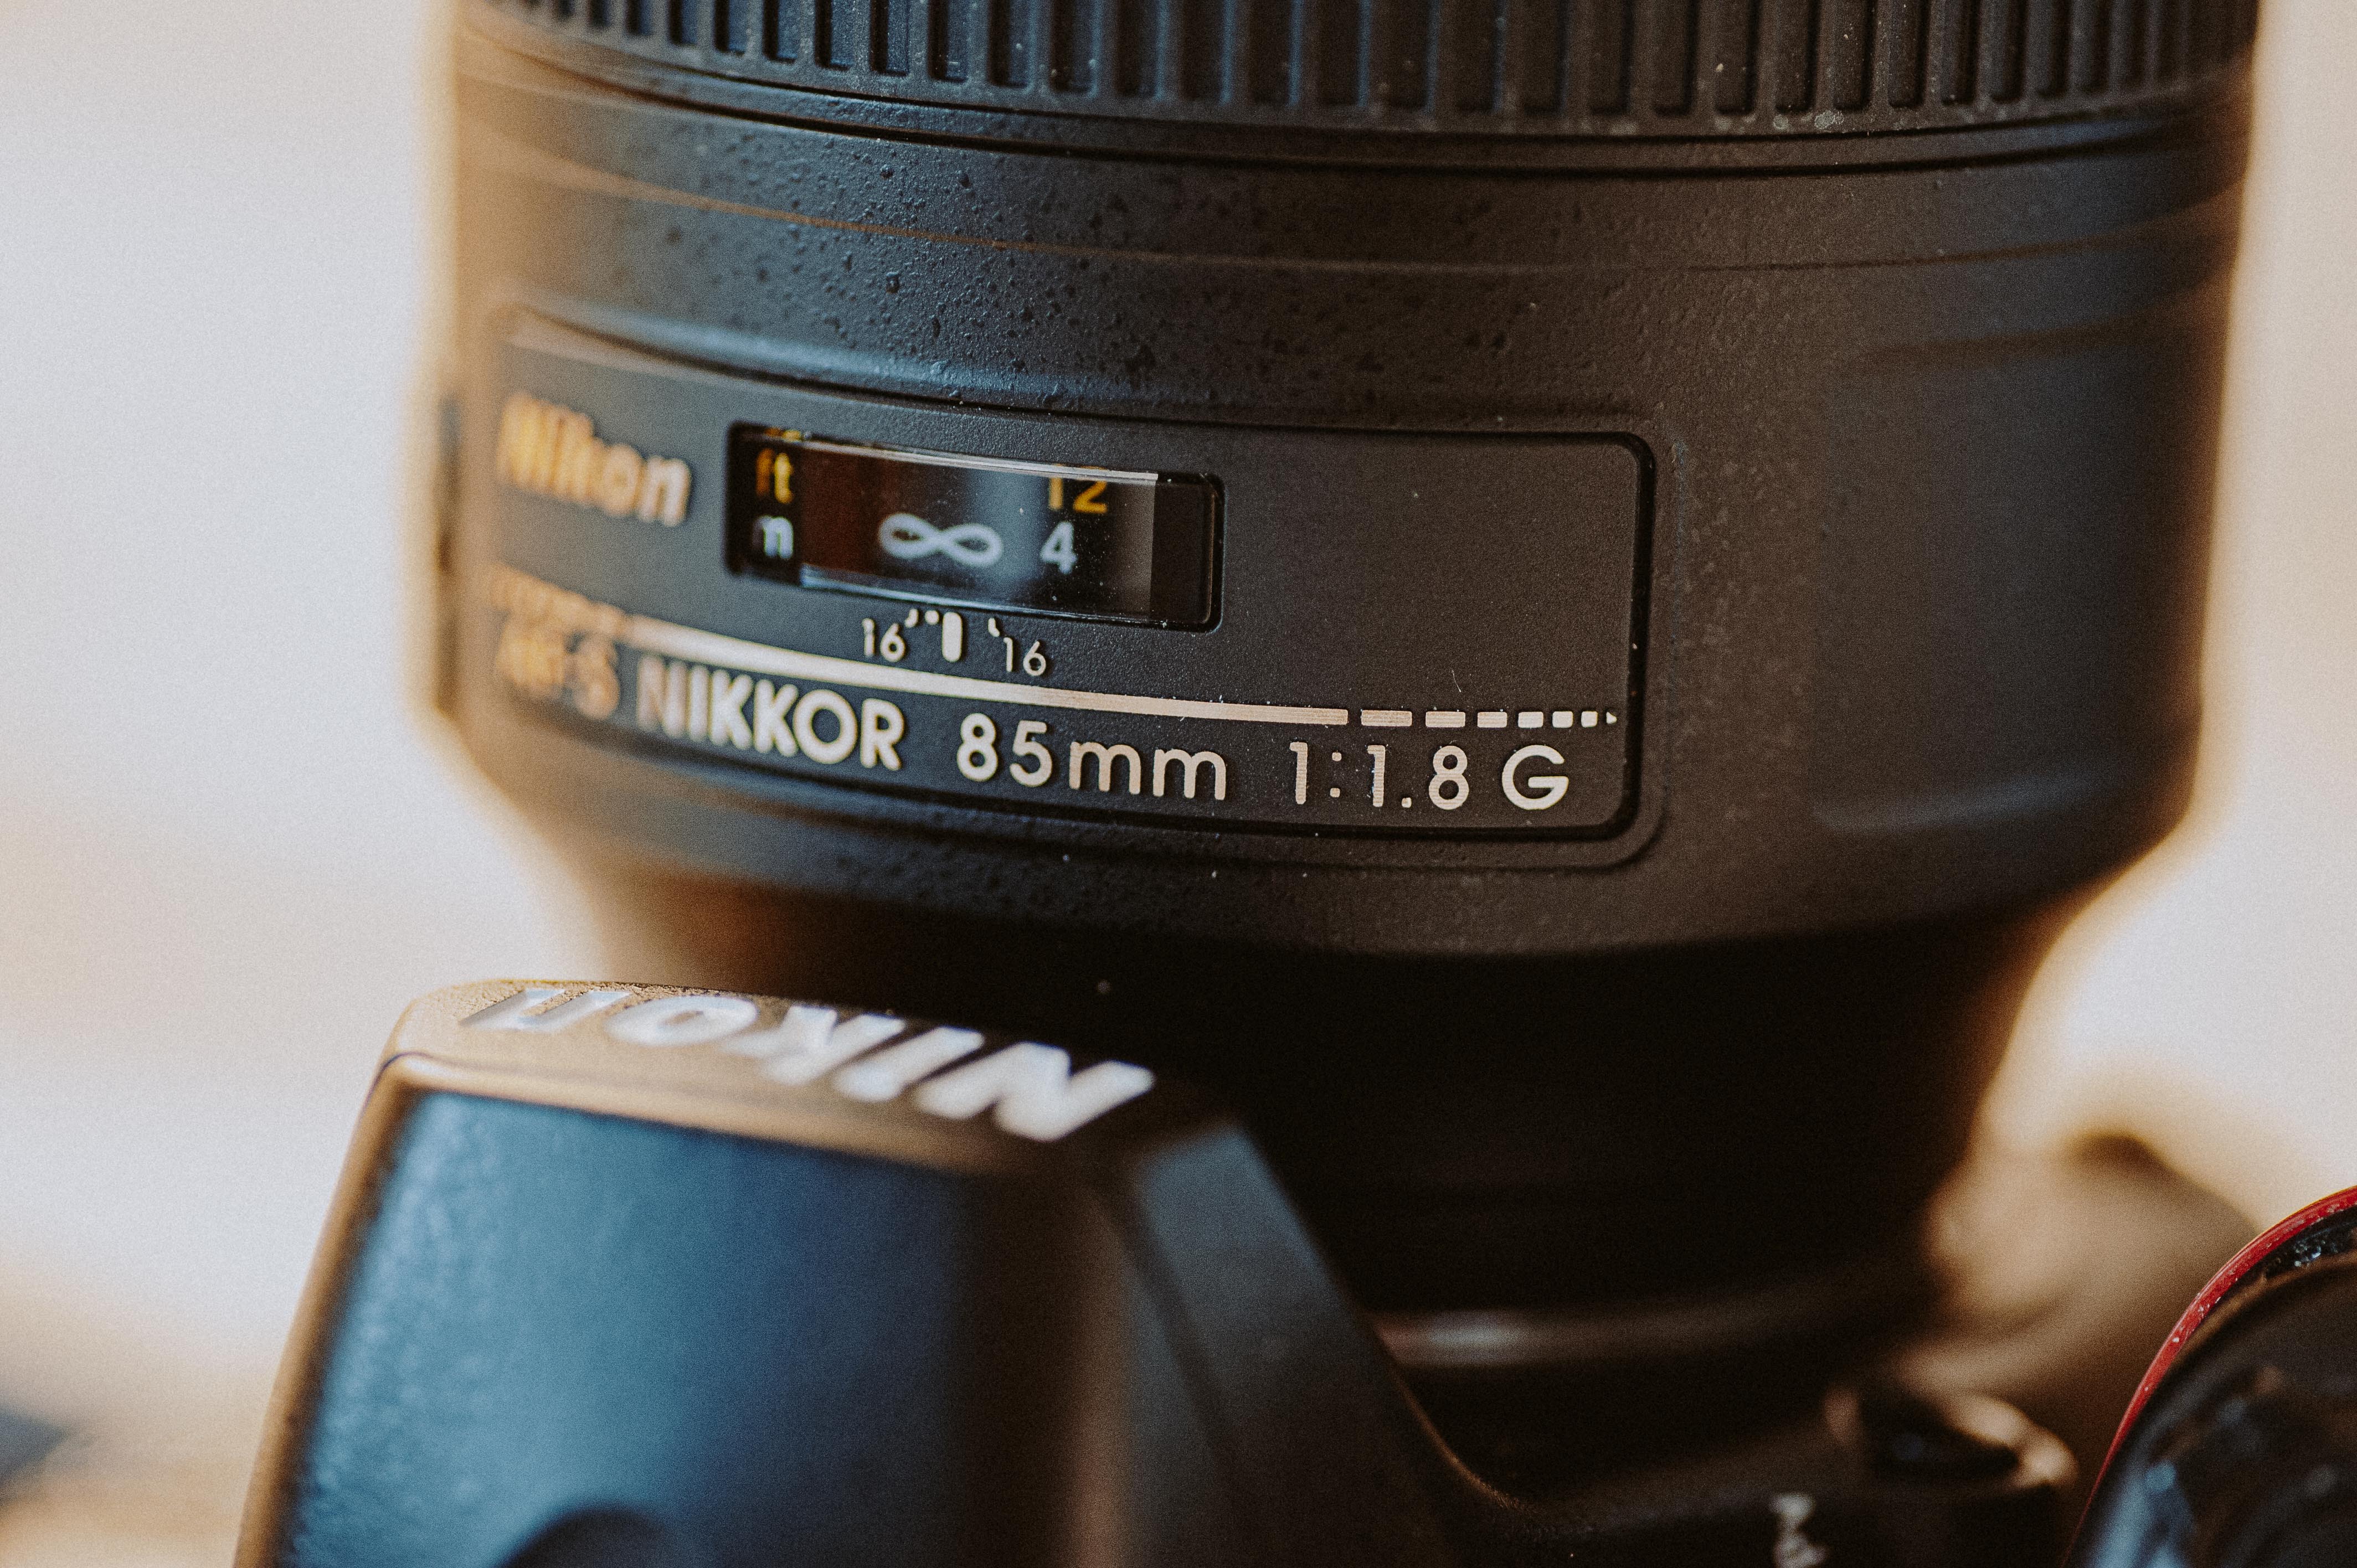
Nikkor 85mm AF-S 1.8G lens

The first that I noticed when mounting the lens is how big it is in terms of circumference. It protrudes beyond the f-mount size significantly as the images above and below show. I knew the 1.4G lens is a “dramatic” lens in terms of size, but it surprised me that the same can be said about the 1.8G lens.
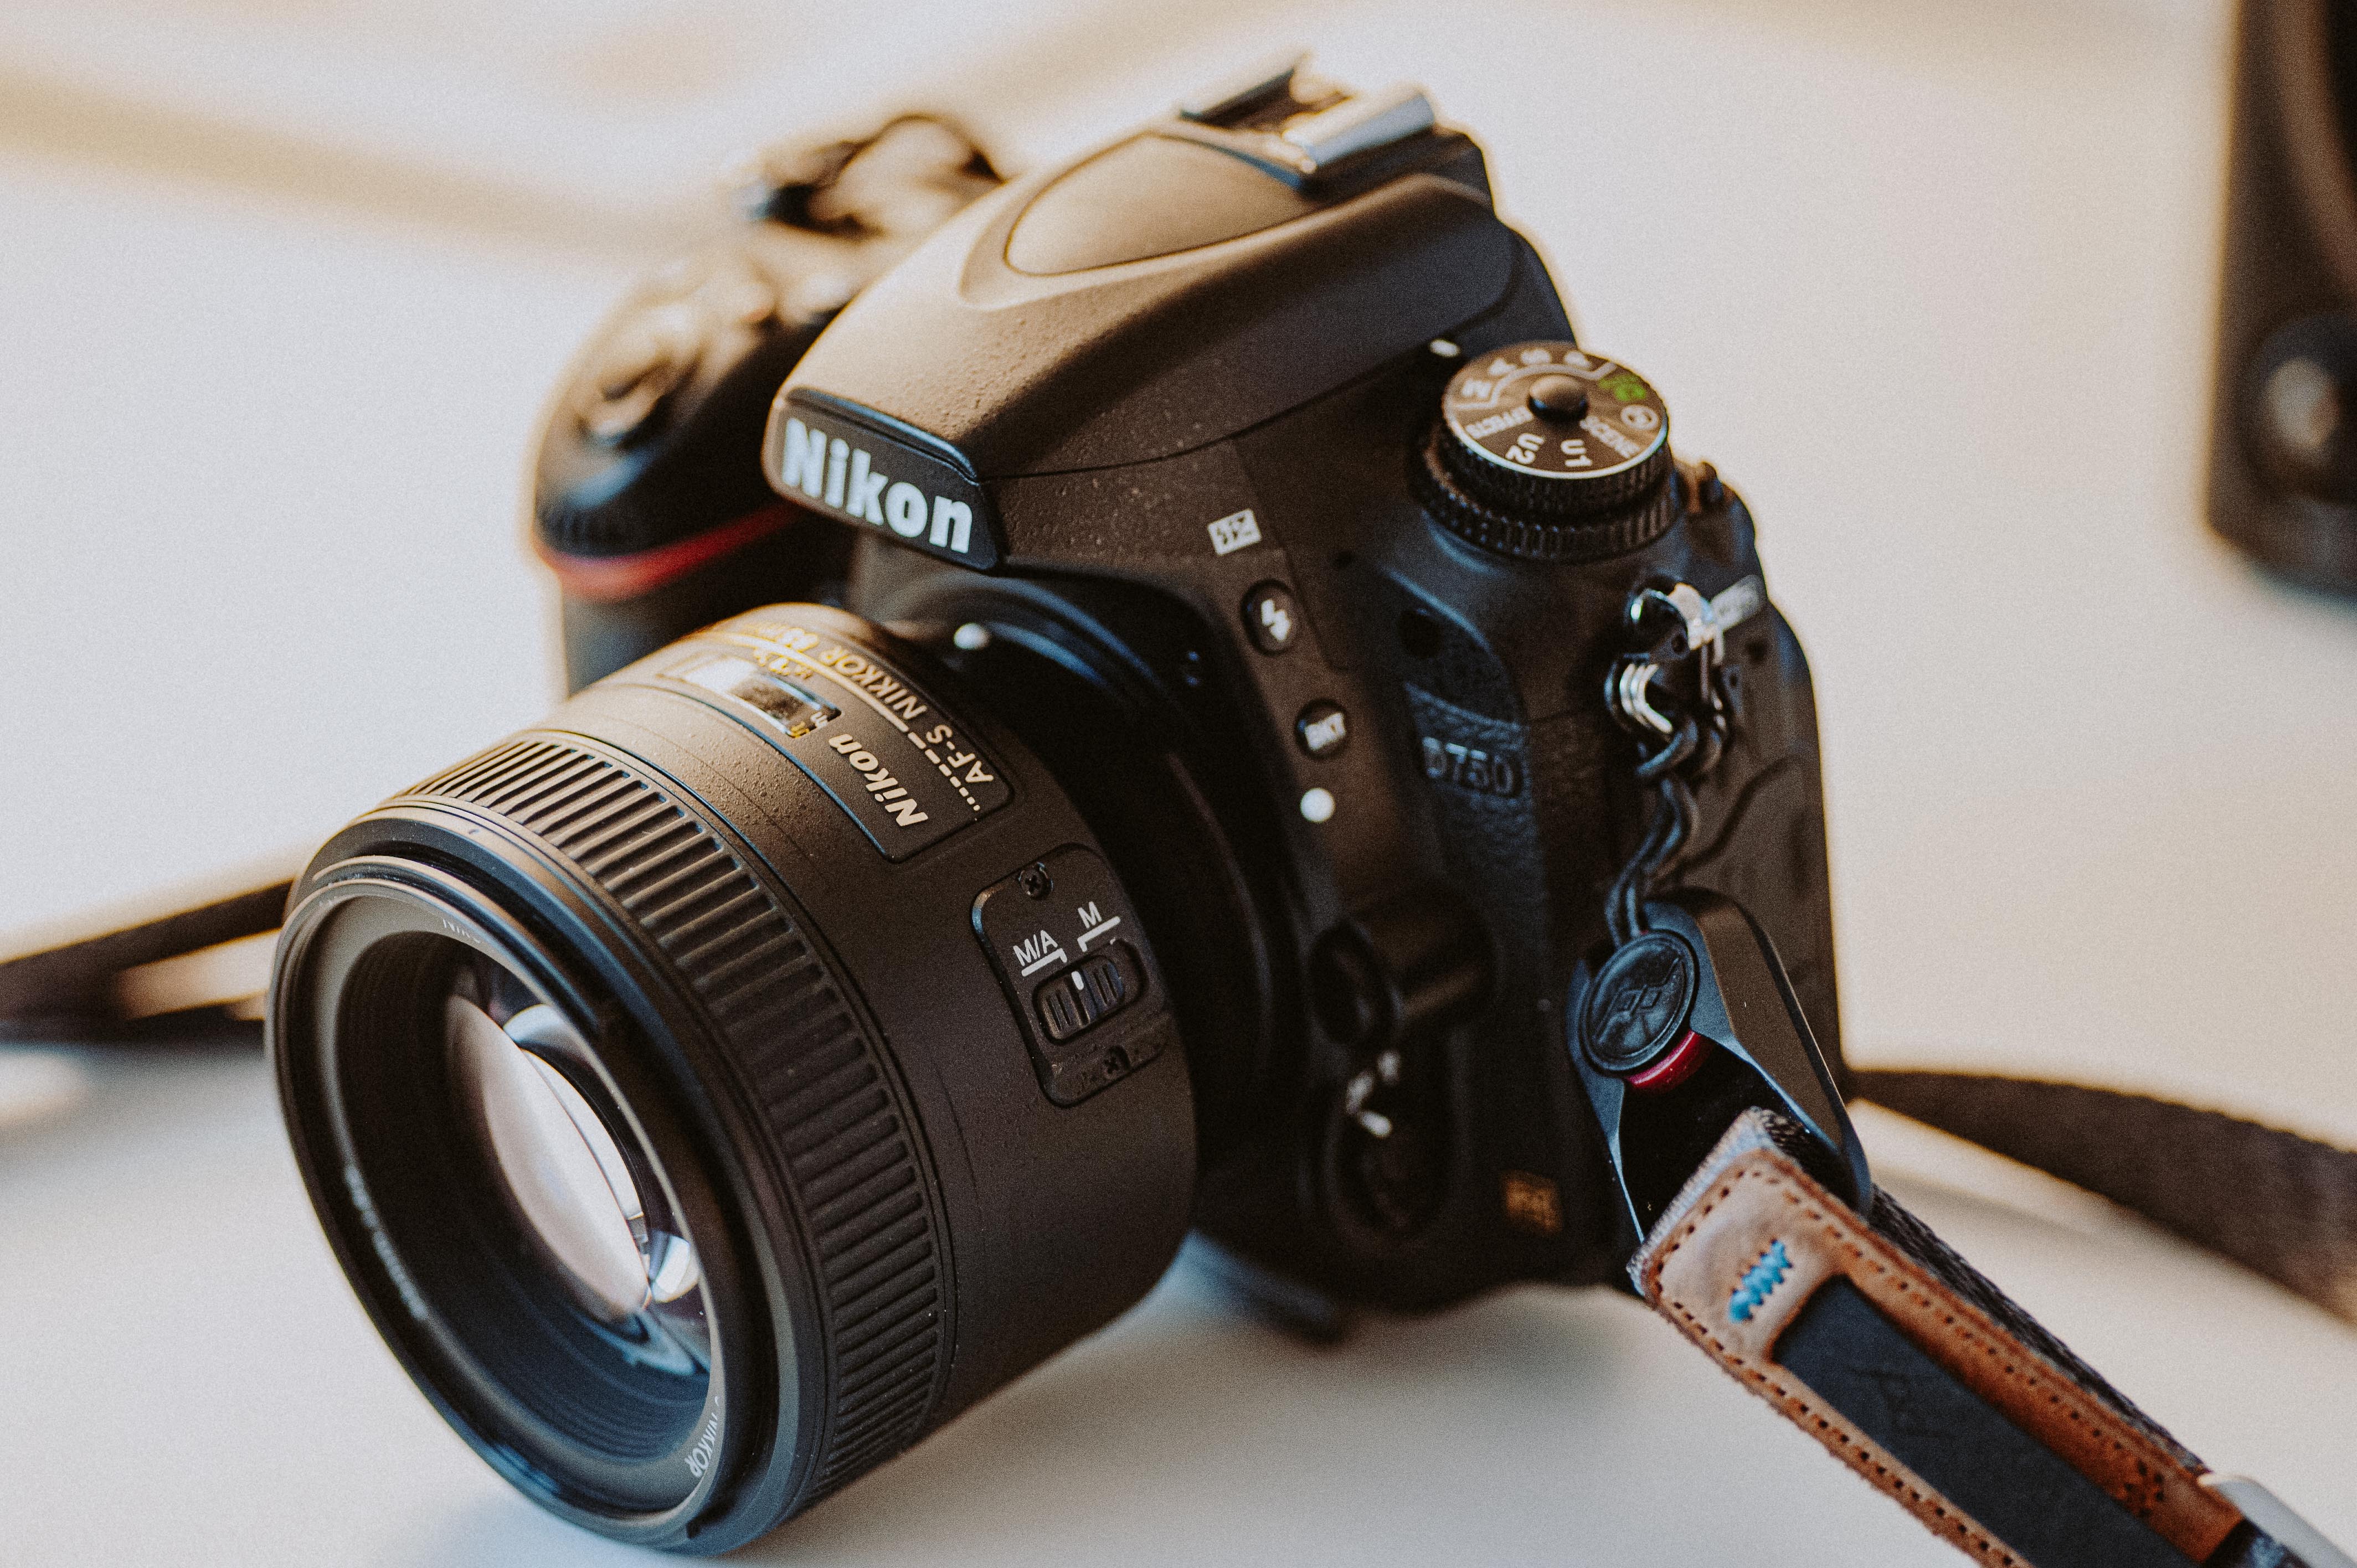
The 85mm 1.8G mounted on a Nikon D750

The lens does not have a golden ring on the nose, so apparently Nikon does not think this is a professional grade lens; my guess is they left this to the 1.4G lens instead. The body is made up of plastic, and the f-mount is metal as we know it. The feel and appearance of the lens is quite good considering we have left the days of “all metal, all glass and made in Japan”. This one is made in China.

The weight is around 350 grams which is super light, especially considering the lens volume. Although Nikon does not market this lens as weather sealed, I did notice that there is a rubber gasket on the f-mount, so at least dust will have a hard time finding way in between lens and body.

Speaking of the 1.4G lens, your question is probably why I did not buy the 1.4G? I would have loved that lens, but the price tag is around 3 times as much as the 1,8G! And although I love fast lenses, I simply could not cough up the cash to go for the 1.4G.

The lens comes with a lens hood of good quality albeit plastic, it takes Ø67mm filters and there is no issue with moving parts out front, your filter will be sitting in the same position as when you mounted it!
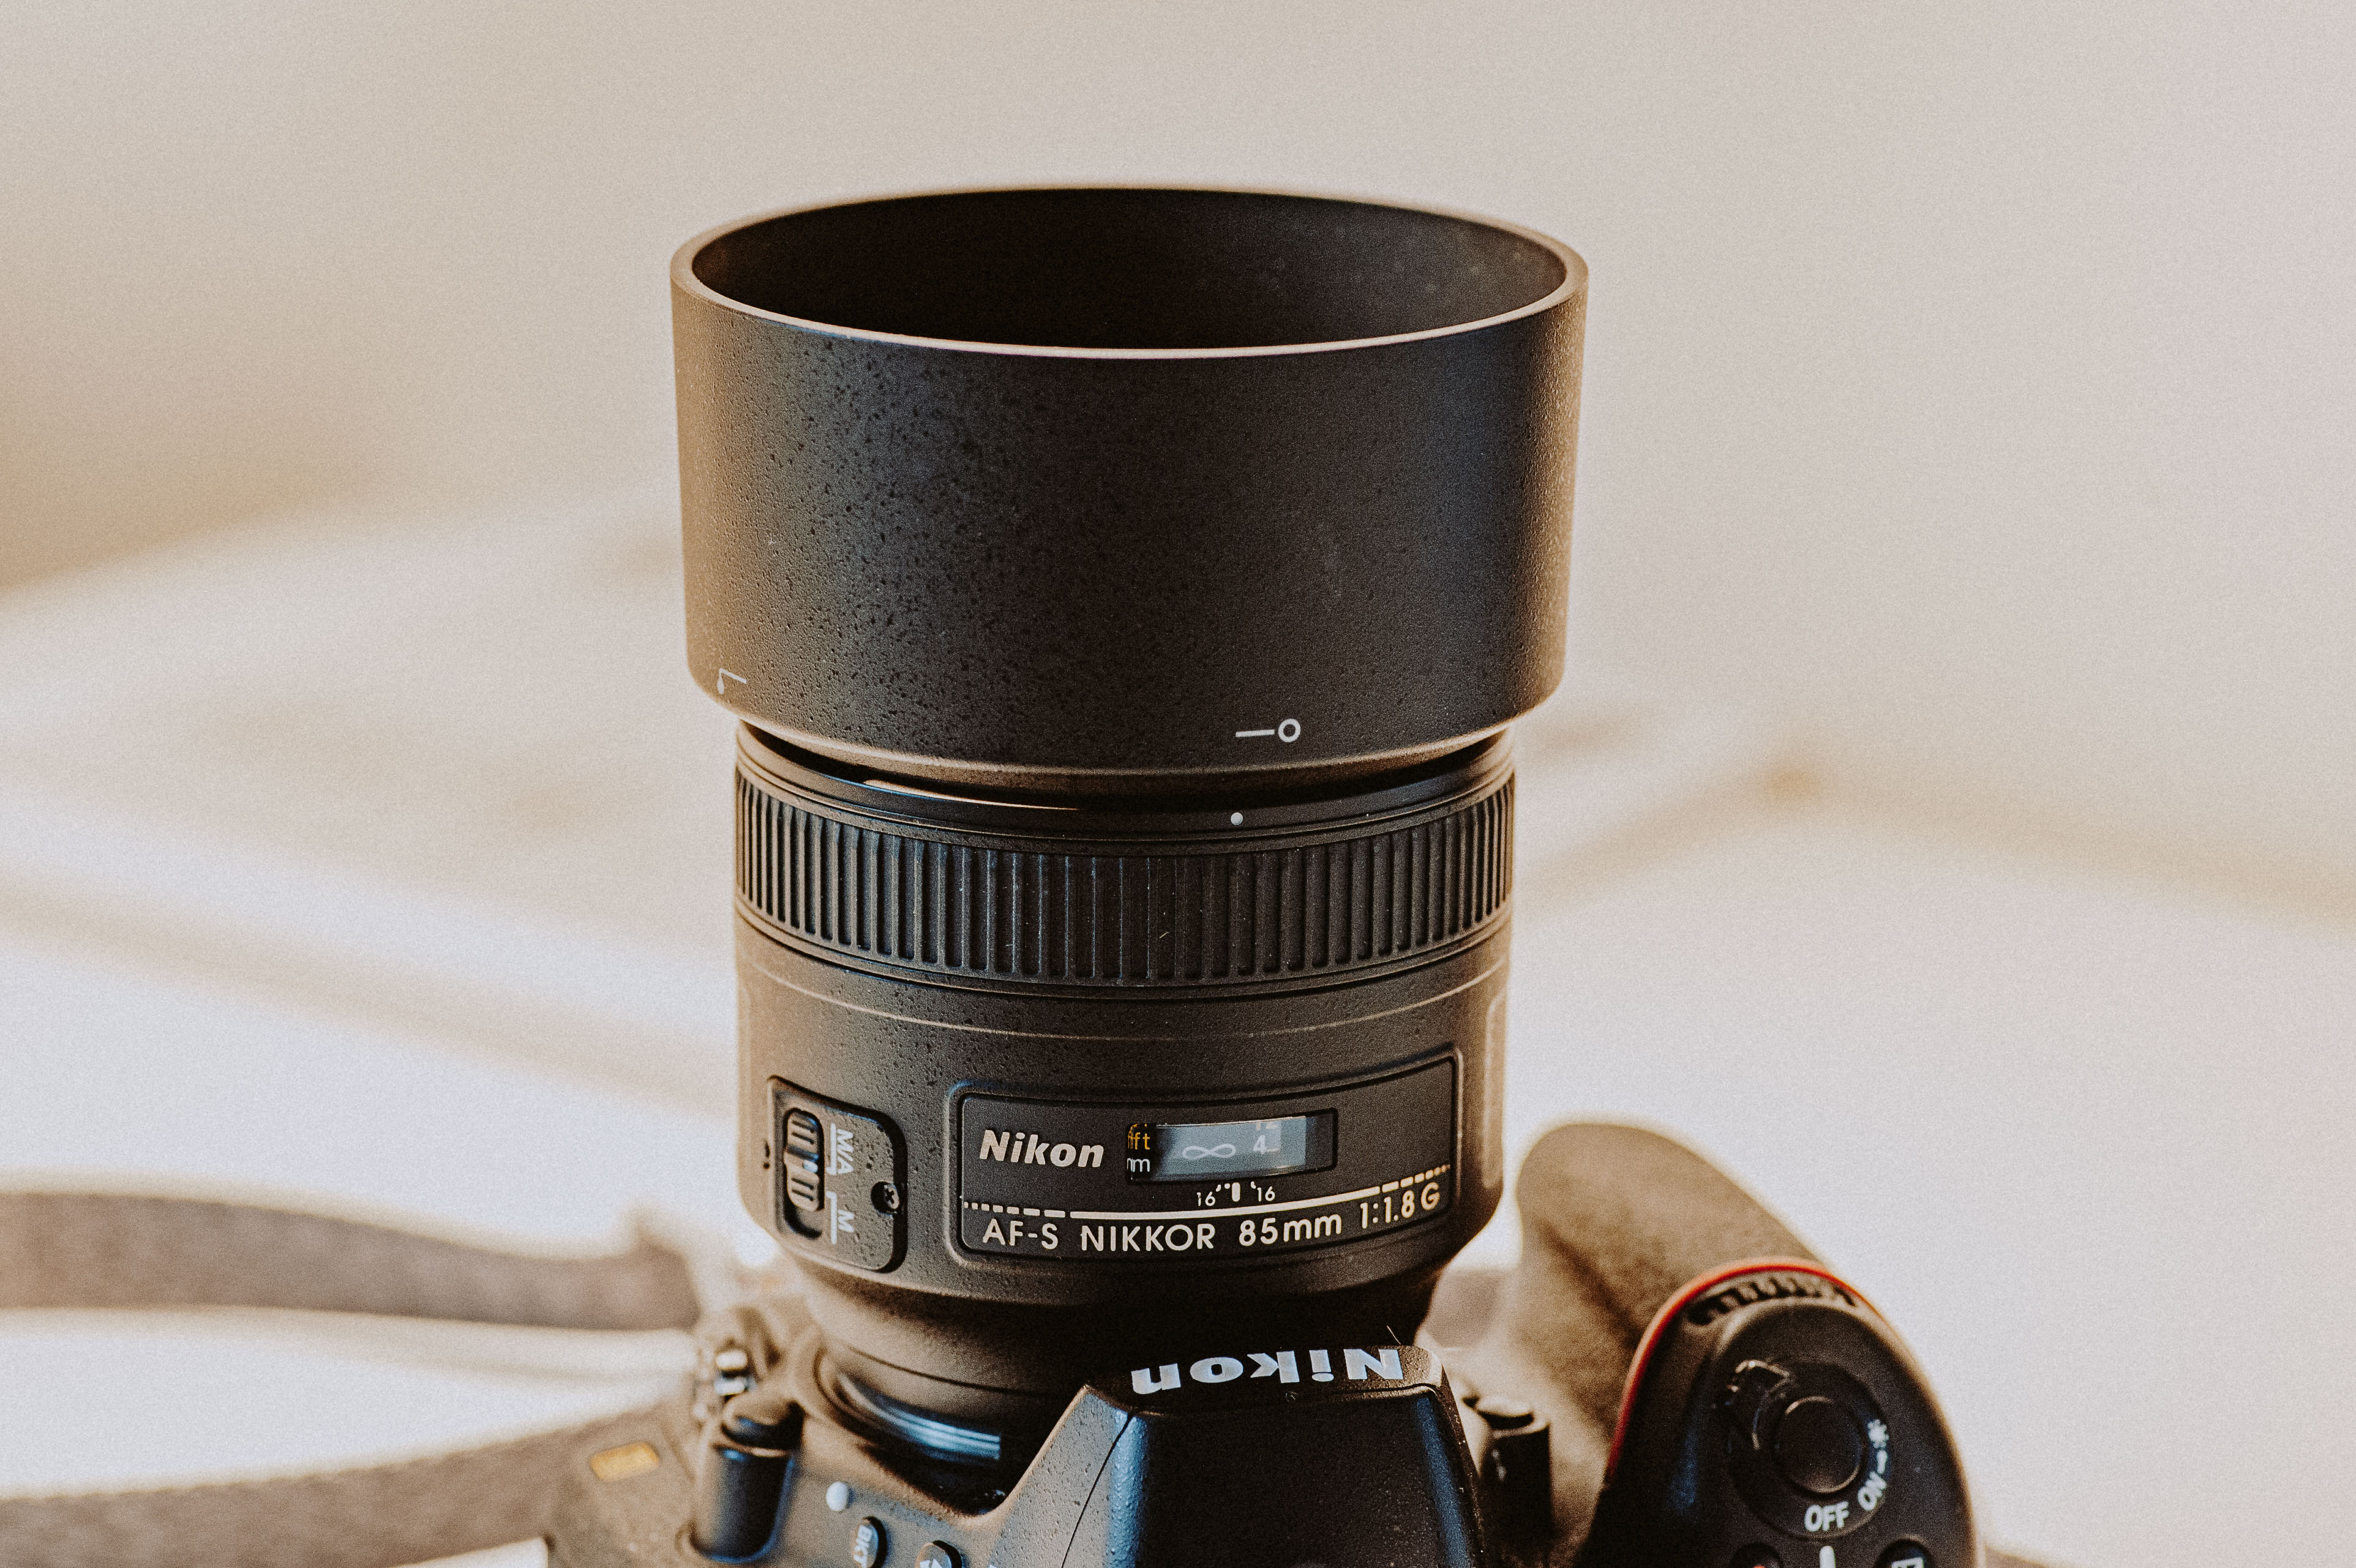
Lens hood.
Here the lens hood is mounted on the 85mm 1.8G

The lens has no aperture ring – all adjustments to aperture are done via the camera body. There is only one button on the lens itself, and that is the auto focus to manual focus switch. The former can always be overruled by manual focus as soon as you start turning the focus ring.

I am happy to say that the focus ring works really well. There is no play as I reported for the 50mm 1.8G lens. The feel of the manual focus ring is not super smooth, but it works ok. The AF-S is as you would expect both silent and fast, but not the fastest Nikkor I have tested. But as this is mainly a portrait lens, maybe some street as well, I doubt that you would need blazing fast AF as you do for wildlife and sports. The built in AF motor allows you to use the lens also with AF on Nikon entry level bodies like the D3x00 and D5x00.

Minimum focus distanc
Minimum focus distance measured to 75cm; official numbers say 80cm.

The distance scale is there working from the minimal focus distance of 0.8 meters to infinity, although my own non-scientific testing showed that I could get 5 cm closer than that. They have even found space for DoF markings on the distance scale, although only for f/16. There are 7 rounded aperture blades, which is a bit on the low side, especially for a portrait lens where the bokeh per tradition is vital.

The lens comes with what Nikon calls SIC – super integrated coating, and the dampening of flare when pointing the lens to a street light at night is some of the best I have ever seen. The SIC is really sick, pun intended! There is no ED glass at all, so it is really a “back to basics” construction with no modern fancy stuff, but just good glass in a relatively simple construction.

Performance

This lens is sharp! You may have guessed that if you took a look at the MTF chart from Nikon or read other reviews, but it really is! Take a look at these two images from Lightroom measuring the center sharpness at 300%:
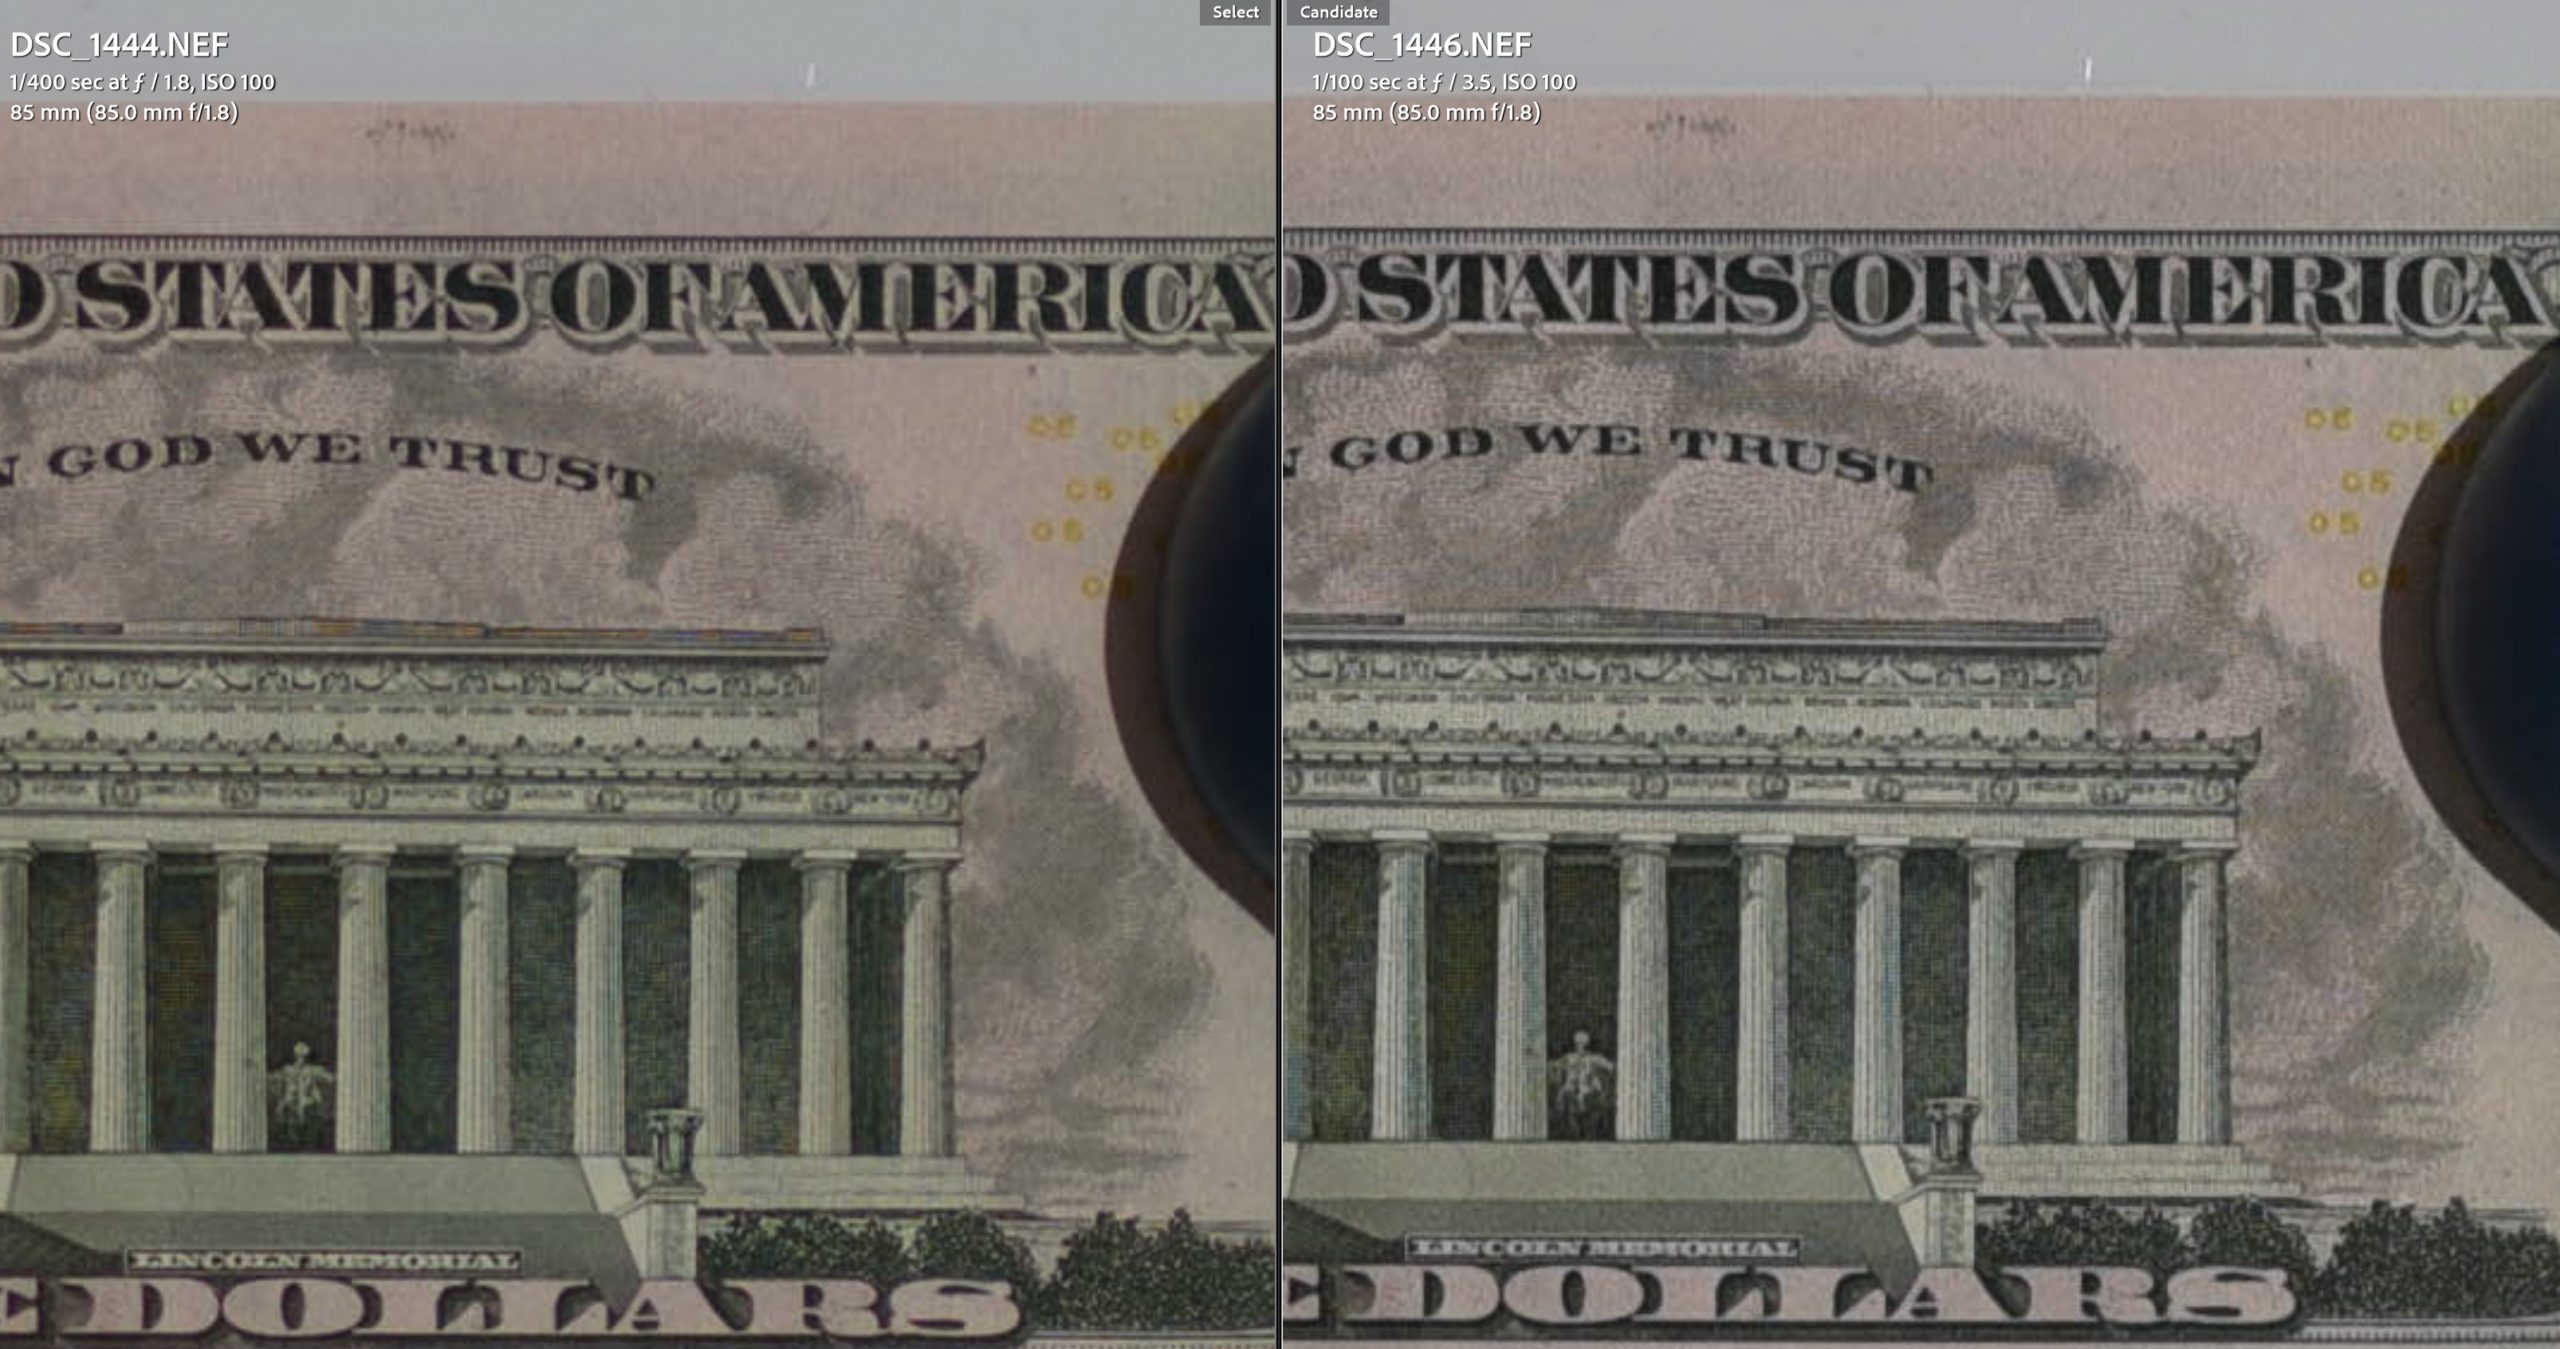
Lens center sharpness.
Center sharpness.

Wide open left (f/1.8) and stopped down a bit to the right (f/3.5). If you have seen other of my reviews, you know that I like to shoot a whiteboard with a few dollar and EUR bills to test sharpness and contrast, and when I can read the state names, then I know I am dealing with a very sharp lens. In this case I can read that NY is to the rightmost! The sharpness gets slightly better stopped down, but this is impressive performance!

Looking at the corner sharpness, it gets even better (still 300%):

Corner sharpness.
Corner sharpness.

This is from the bottom left, and the performance wide open (left) is impressive! I may be able to see that it stopped down has slightly better contrast (look at the white in the EUR sign top left), but still this is some of the best corner performance wide open that I have ever seen! Well done Nikon!

And when you shoot at f/1.8 you really get a shallow depth of field! I know that f/1.4 or even f/1.2 will give you more, but still:

Out of focus elements.
Out of focus elements – notice the cat to the left.

Same motive, but 2 different focus points: left the flower in the foreground and right the cat in the couch. Even when there is only 1.5 meter between the subject and your background elements, the latter gets rendered beautifully out of focus!

The bokeh I have found to be beautiful. When shooting wide open, the aperture blades are not engaged, and hence you of course get nice round bokeh balls, although the bokeh towards the corners tend to be more oval and shaped like an American football:
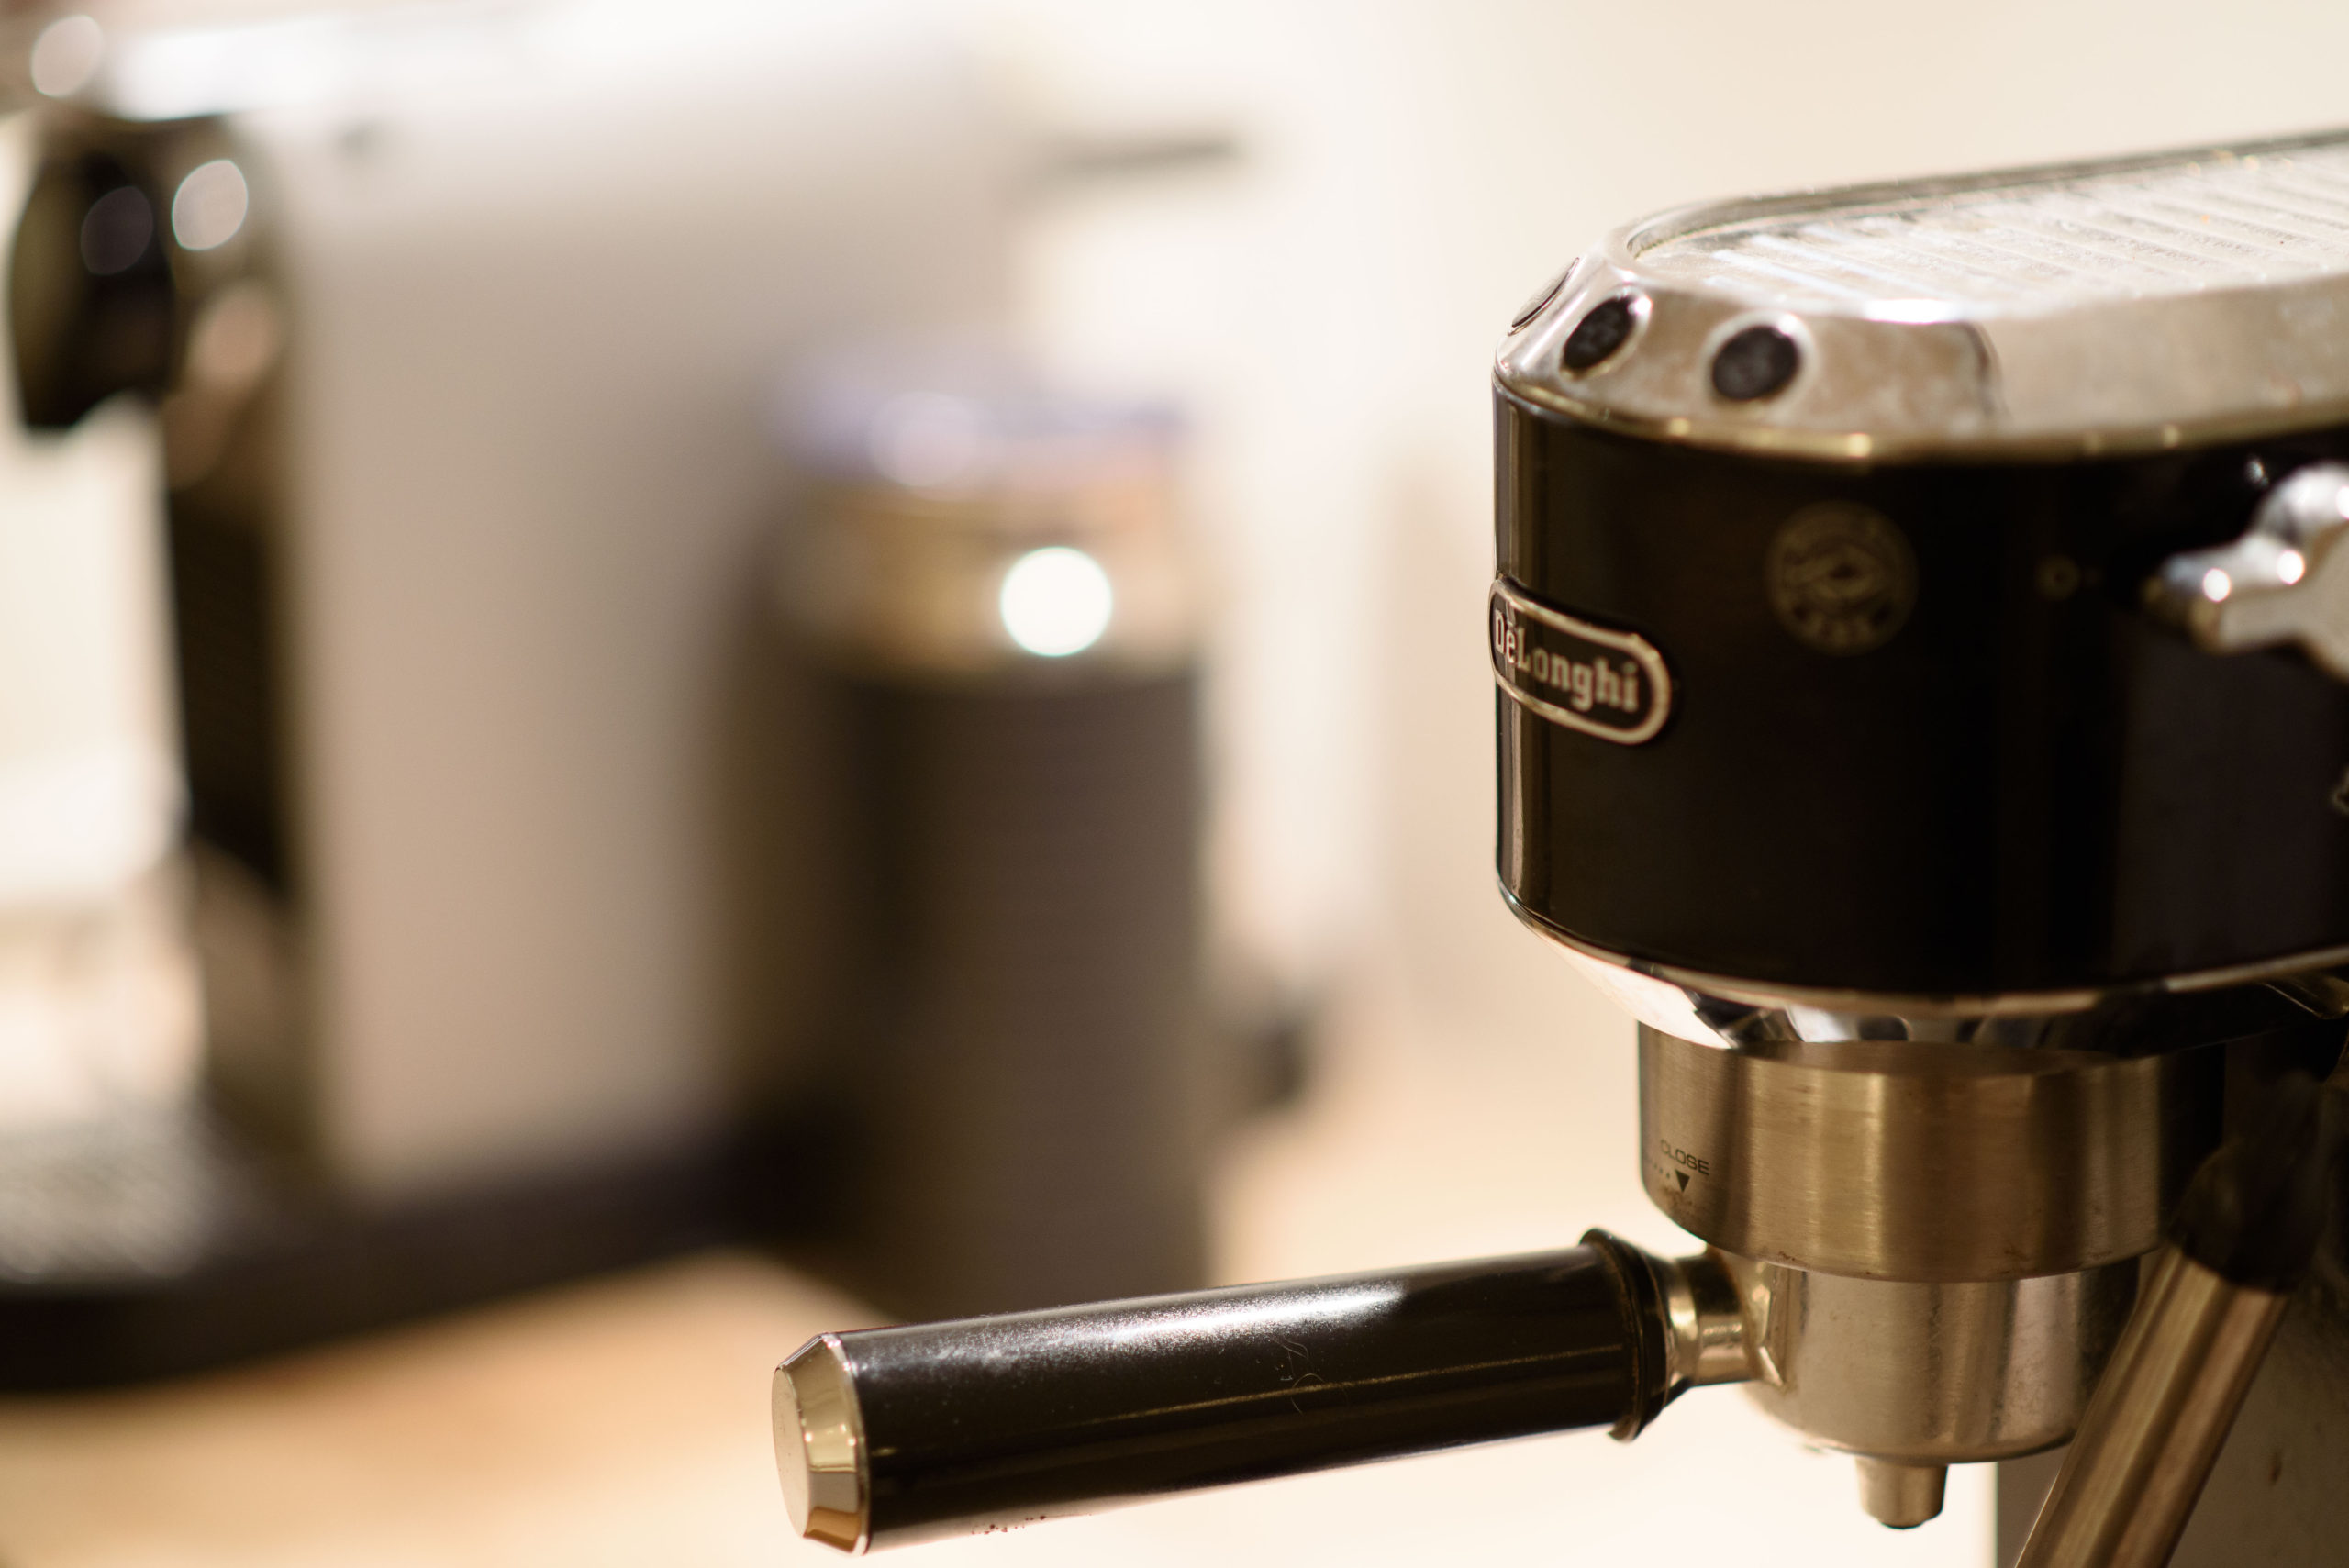
Beautiful bokeh.
Out of focus elements at f/1.8.

I had high hopes for aberrations, but apparently I can get any lens to generate at least purple fringing:
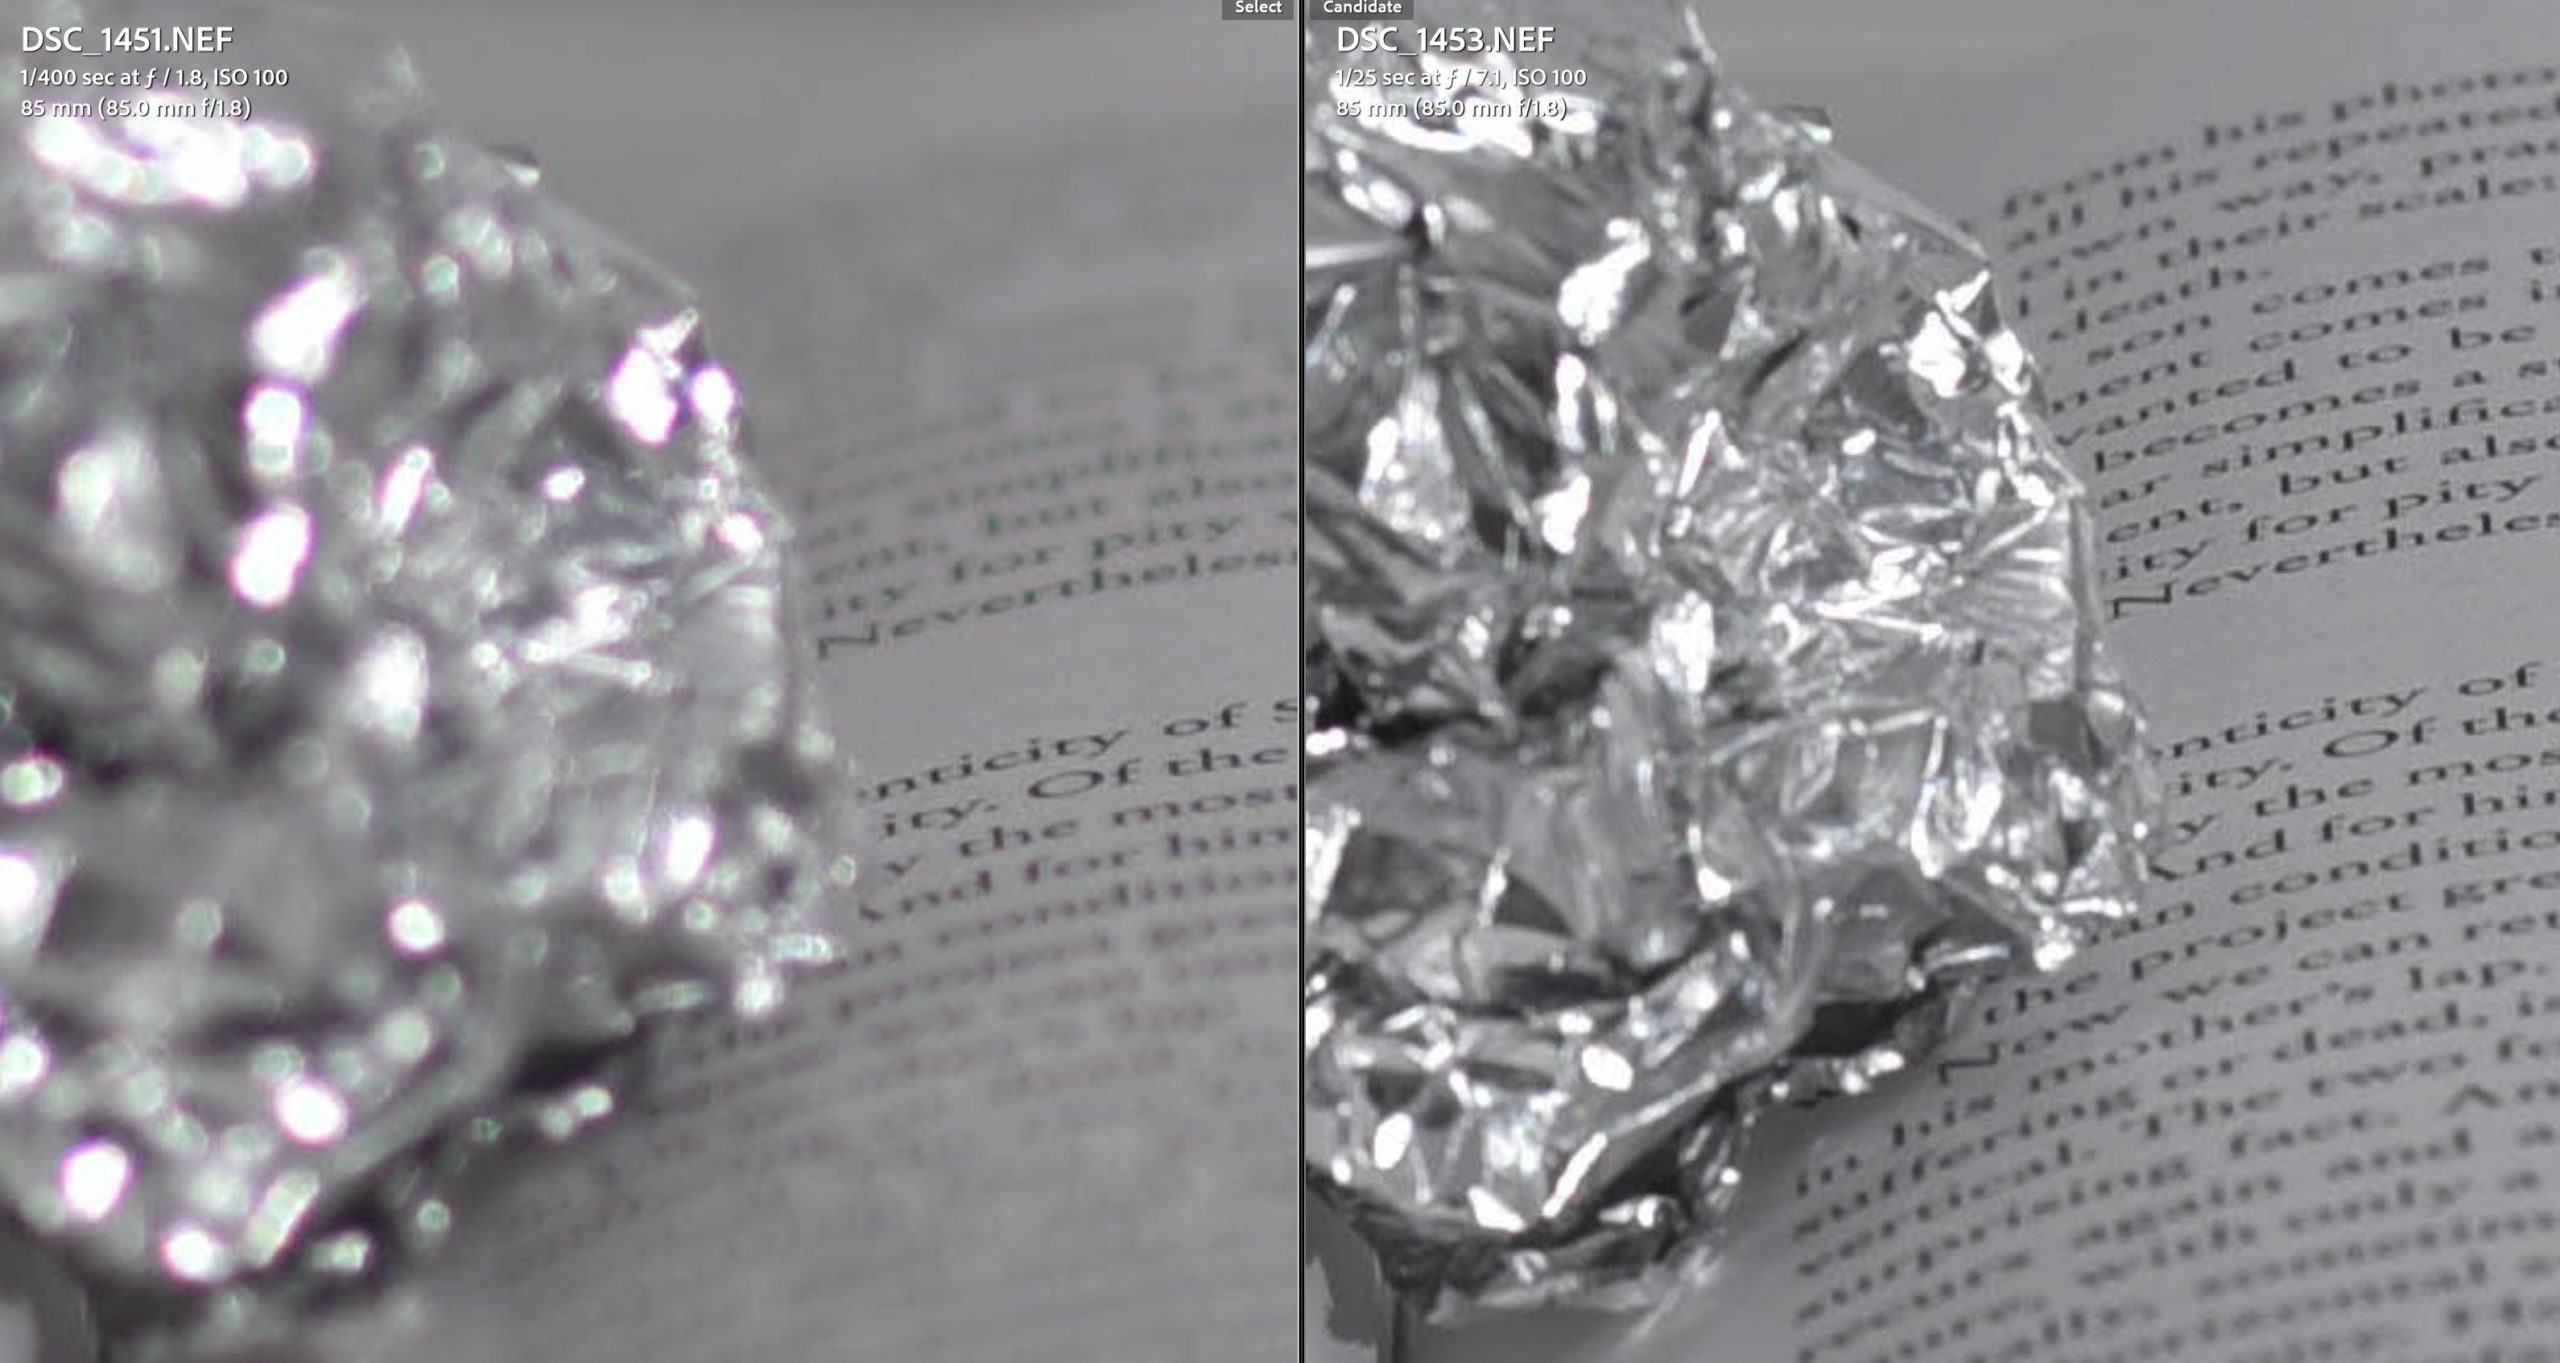
chromatic aberrations.
Noticeable chromatic aberrations to the left.

Wide open to the left you can see purple fringing in the high contrast zones of the tinfoil. Not so much stopped down to the right (f/7.1). So there is a bit of aberrations and shooting streetlights at night (yes, a hobby yours truly practices) it gets noticeable – but I have always been able to remove it in Lightroom by pulling a few sliders. And speaking of streetlights at night, my test of flare showed that this lens has some of the best control of flare that I have ever seen.

The lens does suffer from focus breathing, so if you are considering it as an option for videography you may find that this is a showstopper. Especially when you ALSO consider how well flare and ghosting is controlled by this lens (videographers for some reason love this stuff and do not want to well dampened lenses in this regard).

In my reviews I don’t test distortion or vignetting. The simple reason being that you can fix this in Lightroom with a push of a button. Only for  demanding architecture or real estate photographers can I imagine that distortion and vignetting would be a problem, and I am pretty sure they are not in the market for a 85mm.

Conclusion

Pro:

  • Super sharpness, both center and corners
  • Super contrast, both center and corners
  • Light – 350 grams
  • Ok build quality, albeit no gold ring from Nikon
  • Well working manual focus ring
  • Takes filters with no issues
  • Good handling of flare and ghosts
  • Price performance
  • Works on Nikon entry level cameras

Con:

  • Not the widest of wide – there is the 1.4G to mention an alternative
  • Some aberrations in high contrast areas wide open
  • Not for videographers (flare too well controls + some focus breathing)
  • AF not the fastest in the AF-S family
  • Not sure how long-term durable the build quality is

You probably have picked this up reading the review above, but I absolutely love this lens. It is clear to me that all attention has been given to the internals of this lens, and hence you get a “budget-feel” lens on the outside and a top performer on the inside. If you are to prioritize, then if you ask me, this is as it should be.

Right now, I cannot think of a lens where the price / performance ratio is better than this one when we are talking modern lenses (vintage lenses you buy on a flea market may have a better ration, but that stems from the price primarily). So if you need a 85mm prime from Nikon, this one should definitely be on your short list.

My only concern is if the lens will stand the test of time – will it survive the constant use in a demanding pro environment? I am not sure; maybe better to go with a gold ring lens if you are a demanding pro.

Video link

Related reading

Nikon AF-S 16-35mm ED 1:4G lens review

Nikon AF-S 70-200mm F2.8 G VR II lens review

Nikon AF-S 50mm 1.8 G lens review


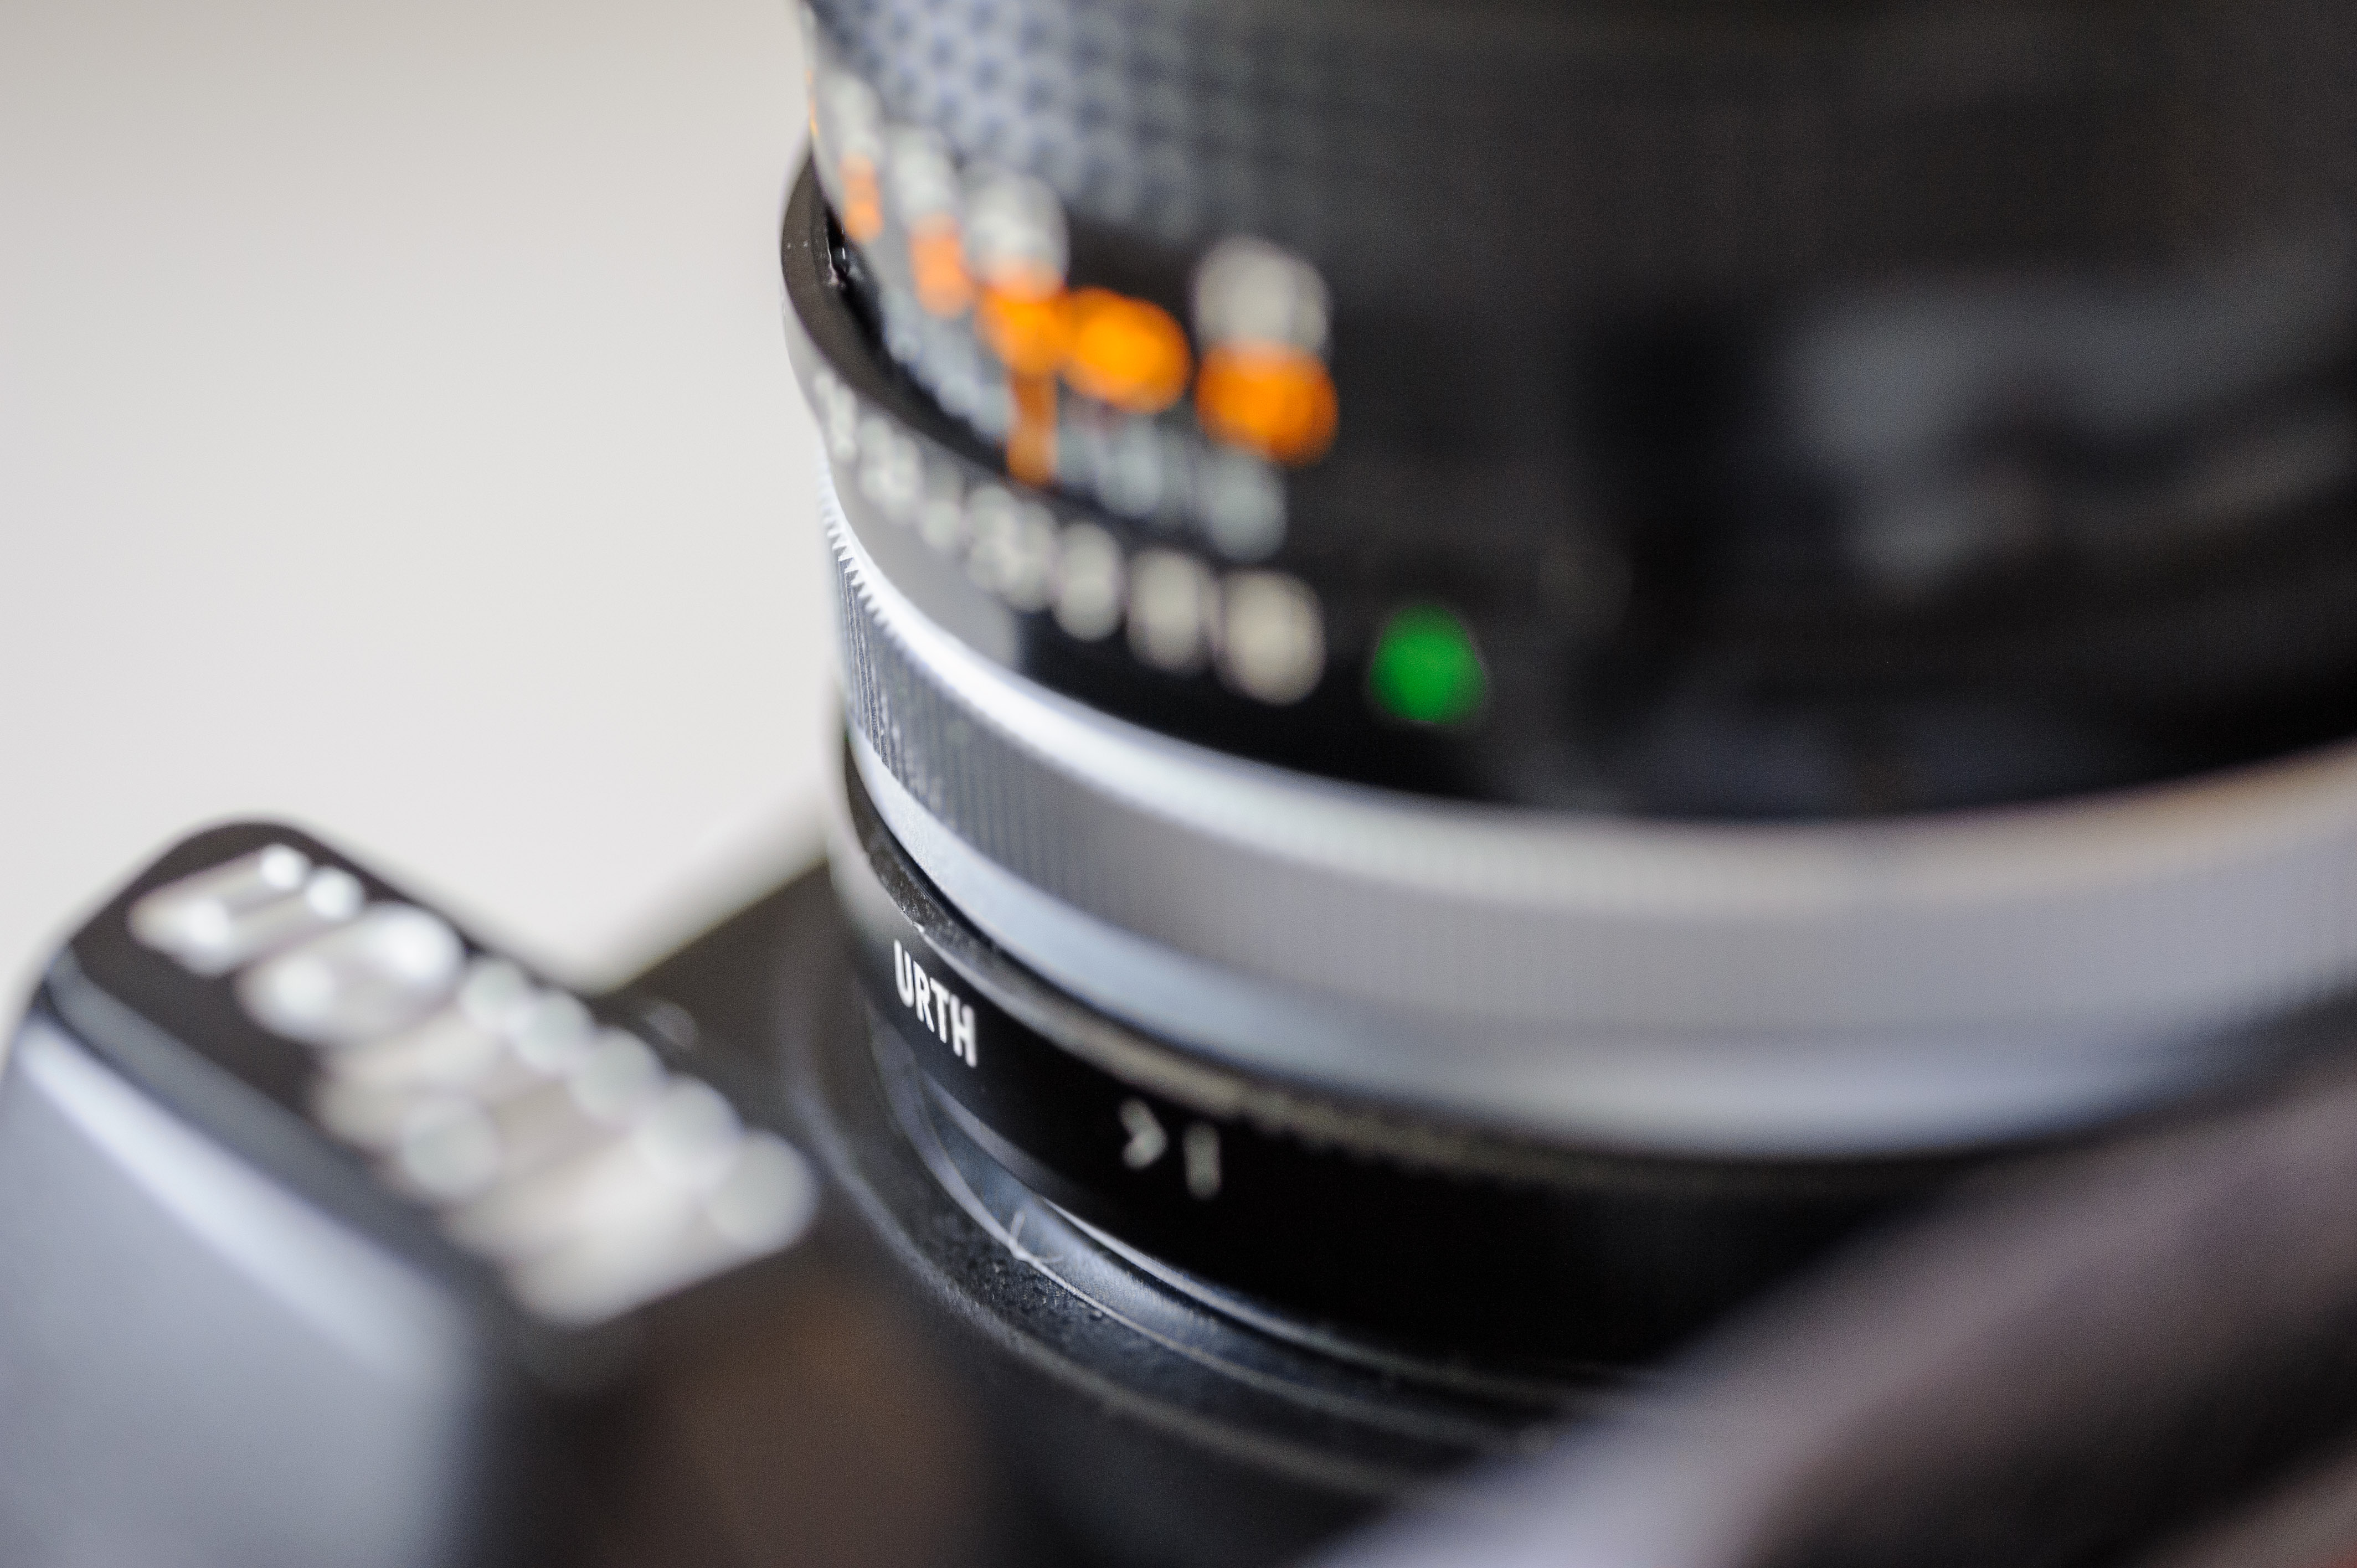
Adapting a Canon FD 1.8 50mm lens to a Nikon DSLR with Urth FD-F

I have always been a bit curios when it comes to Canon. Peter McKinnon and his delicious videos and images with a coffee color tint has always led me to believe that the Canon glass is a bit special. So, as a Nikonian, I decided to buy a classic Canon lens – the nifty-fifty FD 50mm prime – and of course a vintage one, to see how it would work out on my Nikon D750 DSLR camera body.

Canon lens FD 50mm 1.8 SC – a true vintage lens made in Japan

What I did not know at the time I ordered the Urth adapter is that adapters comes in two versions: one with glass that enables you to focus infinity, and another with no glass which unfortunately does not allow you to focus to infinity. Introducing an extra layer of glass is never good – it is one more layer the light has to travel through and the lens performance could be negatively influenced. Not so with the adapter without glass, but you may need to focus to infinity as part of your photography work, and then there is no way around the adapter with glass. I bought the one with glass more as a coincidence than an enlightened decision!

The Urth adapter of course sits between the Nikon camera body and the Canon lens.

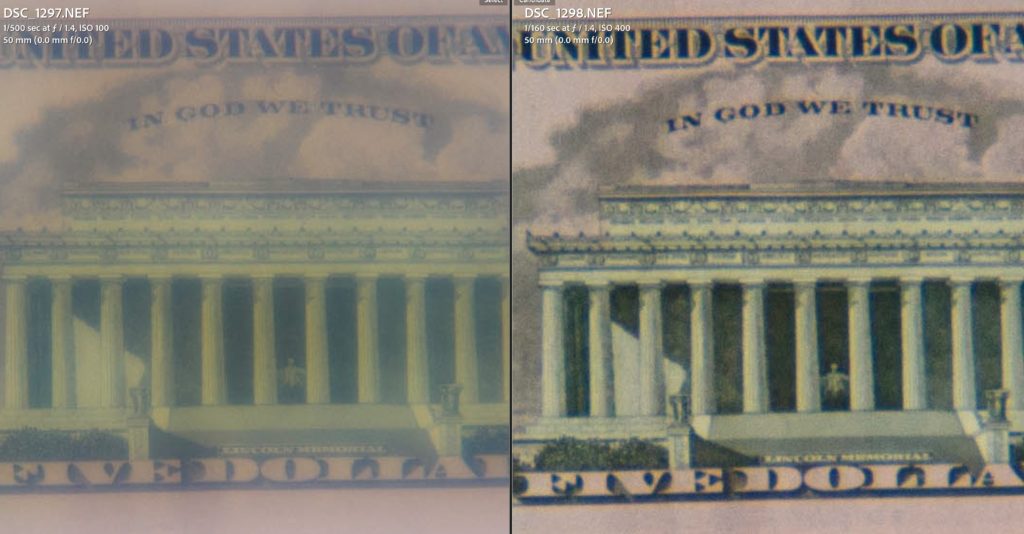
I must admit that I was quite shocked when I started to test the lens and adapter combination when I saw the results shooting wide open (f/1.8). The image was covered by a slightly white halo, almost like the lens had been covered with a thin layer of Vaseline:

f/1.8 left and f/5.6 right.

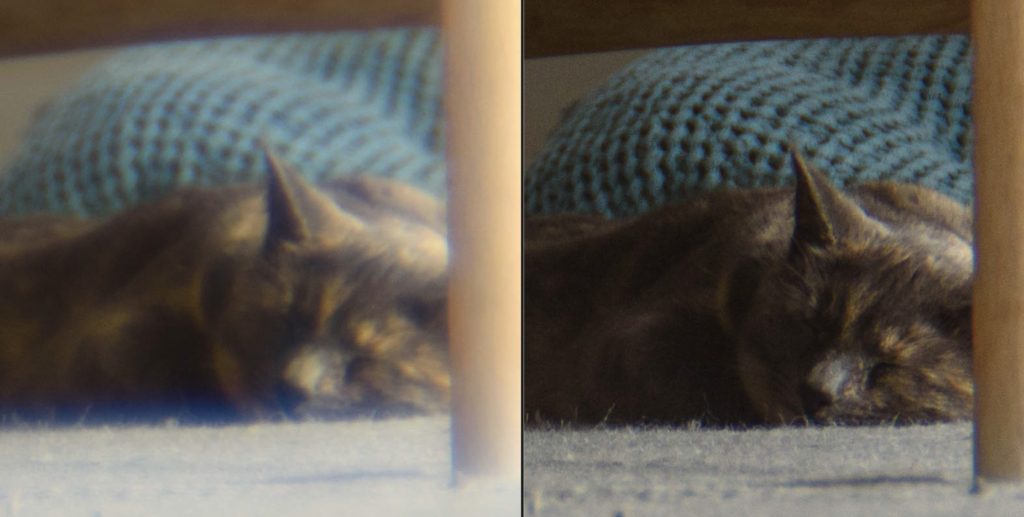
Stopped down to f/5.6 the problem is completely gone and the image quality is as you would expect with a 50mm prime that has made the test of time – I think most will agree that the 50mm FD lenses from Canon offer excellent optical qualities for a fraction of the costs associated with a modern lens. But combined with the lens adapter that gives focus to infinity, the wide open shots are of unacceptable quality.

I then suspected the lens adapter from Urth, but googling a bit I could find YouTubers and other users that had tried the same type of adapter but of different brands and reached the same conclusion. So there is something about the concept or the design that does not work.

F/1.8 left, f/5.6 right. Notice the line between the cat and the carpet in front of the cat.

I also tried to put the lens+adapter on my Nikon Z50 – and APS-C camera – just to see if that would help, as it uses a smaller part of the glass. The answer is no – I got exactly the same result wide open on the Z50 as I did om my Nikon D750. So there is something about the adapter design that simply does not work wide open.

What to do…

My take on this is that you have these options:

  • Buy the adapter with the glass that gives focus to infinity, but don’t use the lens wide open; always stop down a bit for good results
  • Buy the adapter without the glass and work around the fact that it will not focus to infinity
  • Buy the adapter for a Nikon mirrorless (say a Z50, Z5, Z6 or Z7). The flange distance on a mirrorless camera is different from a DSLR, and hence the adapter comes without glass and you can focus to infinity.
  • Don’t try to adapt Canon glass to Nikon bodies – use Nikon with Nikon and Canon with Canon.

Which one works for you is of course a matter entirely dependent on your decision criteria and personal preferences.

Related reading

Nikon AF-S 16-35mm ED 1:4G lens review

Nikon AF-S 70-200mm F2.8 G VR II lens review

Nikon AF-S 50mm 1.8 G lens review
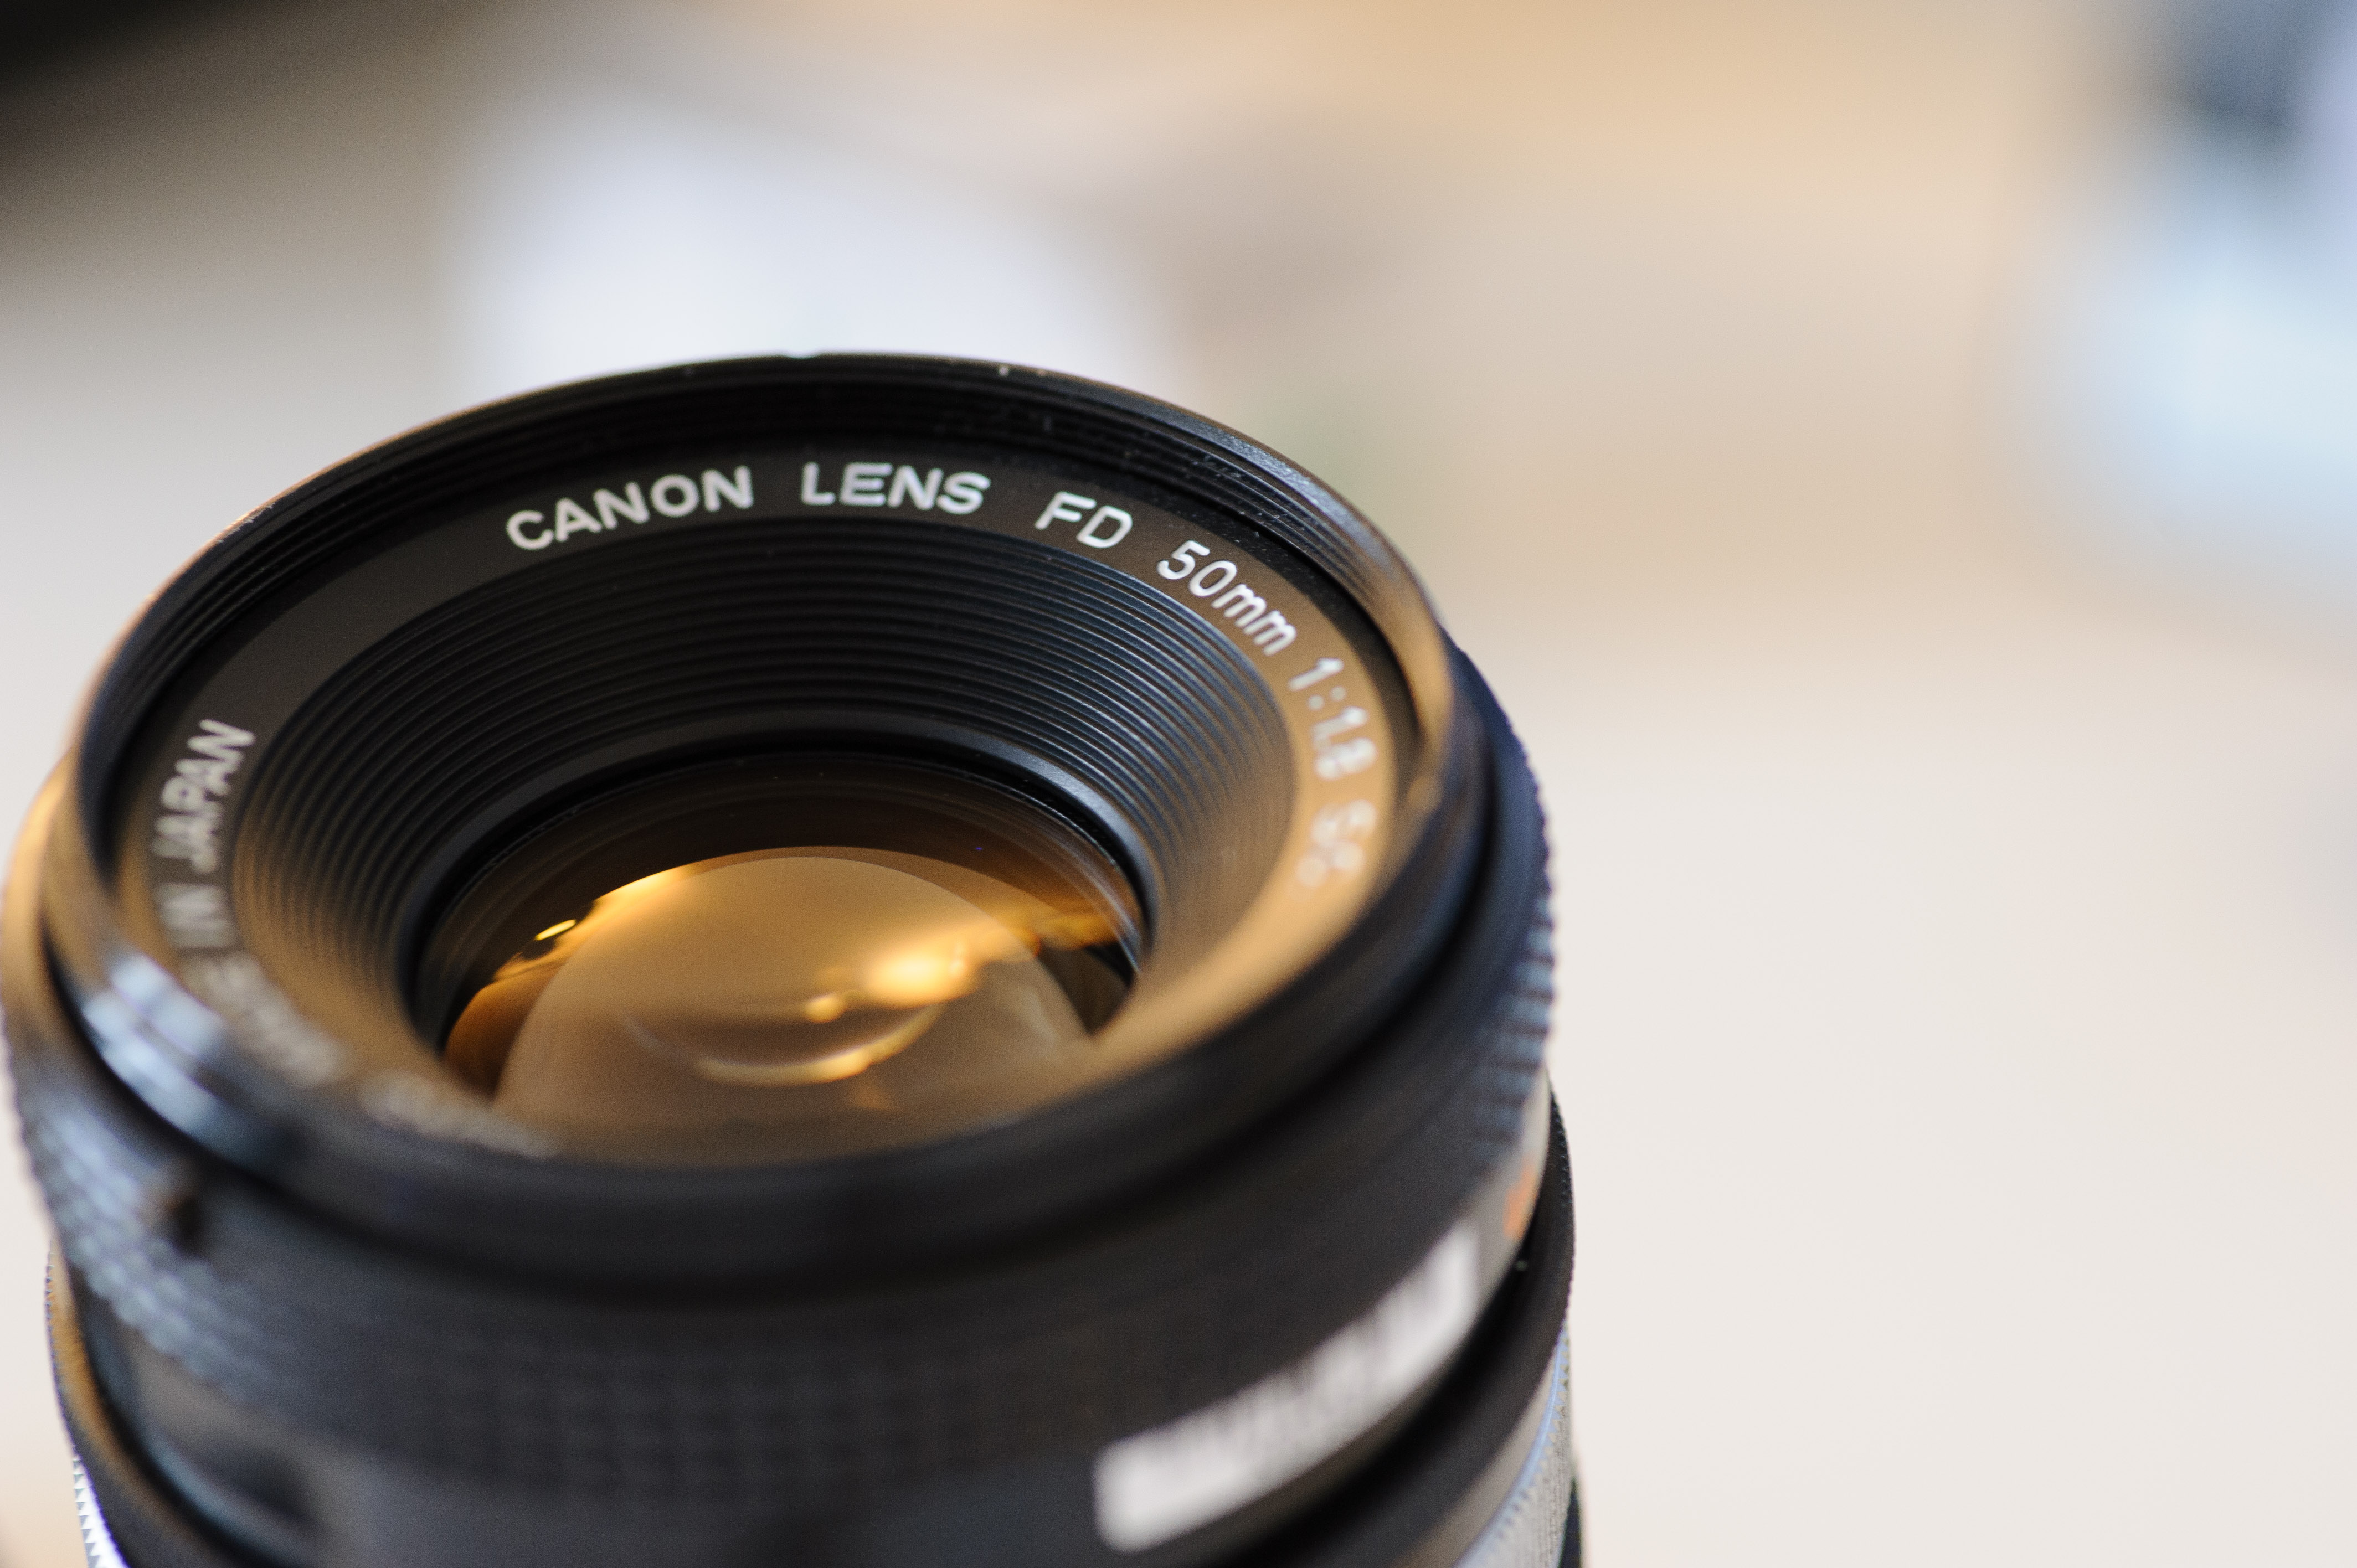
What is lens vignetting?

Vignetting is simply that the corners or edges of your image are darker than the center. It is caused by the lens, but can also be created artificially in post processing software. The term light falloff is also used for the same.

Some use vignetting to draw attention to the center of the image and hence find it useful.

Most lenses exhibit some level of vignetting and it is most common for lenses that can open up and let in a lot of light (say f/1.4 or f/1.2). Some cameras are able to correct the vignetting as part of the cameras processing of the image, so it is never visible to the photographer.

What is diffraction?

When light travels though the lens, the aperture blades can reduce the diameter of the hole the light travels through. Most lenses can close down the aperture to a very, very small area – the size of a pinhead or even smaller.

When light has to travel through such a small hole it simply changes slightly. This can get very technical, but the effect is that your images appear soft, i.e. as if out of focus – even when you have focused perfectly.

Photographers debate exactly when the effect sets in and how large the effect is. Macro photographers often shoot at crazy high f-stop numbers (closed down apertures) and seem to be doing fine, and in many find that the effect of diffraction is exaggerated.

The best you can do is to notice if your lens/camera combination gives diffraction – I think you should start to worry about this from around F/16 and onwards.


What is focus shift?

When your DSLR focuses, it typically does so by opening the aperture up as much as possible to allow all the available light to flow to the auto focus system. So if for example you are shooting with a f/1.8 lens at f/8, the camera will open up to f/1.8 to focus and then shift down to f/8 to take the picture.

Some lenses, especially lenses that can go very wide, i.e. a low f-stop number, suffer from focus shift, which means that the lens moves the focal plane as a consequence of changing the aperture.

This is nothing short of a catastrophe for an auto focus system, as the camera gets the focus sharp at f/1.8, but then when the image is taken at f/8 the subject is no longer in tac sharp focus.

There are a few ways to mitigate focus shift, as you can of course shoot at the maximum aperture – then the focus aperture and the shoot aperture is one and the same. You can also shoot in live view on your DSLR, as it the uses a different focus system than when not shooting in live view mode. The best option of course is to get a lens that does not suffer from focus shift!

What is the circle of confusion?

Short not-too-technical definition of the circle of confusion.

Lets say that a dot in reality is represented by a dot in your picture.  Your eyes and brain in combination will form an opinion about how well the picture shows the dot, and if it is in focus or not. The shape and the size of the dot is the deciding factor.

Here is the thing: Your evaluation is not binary! In other words, you don’t make a “flip a switch” assessment, rather you accept some minor deviations in the way the dot is shown in your image. Sometimes the dot is spot on (he-he) and other times it is a bit oval or a bit larger that the real thing.

The interval in which you accept the dot to be sharp is known as the circle of confusion. Don’t ask me how this term came about, but the point is that accept small variations and still think of it as sharp.

It is the circle of confusion that gives us depth of field! The fact that minor variations in how the dot in reality is represented in the picture, gives us some wiggle room before and after the focus plane and this is exactly the DoF. Without a circle of confusion there would be no DoF!

Related reading

What is aperture? And why important?

What is Depth-Of-Field?

What is lens distortion?

What is lens distortion?

A short description of lens distortion, the two main types and to what extend you as a photographer should worry about distortion.

Straight lines…

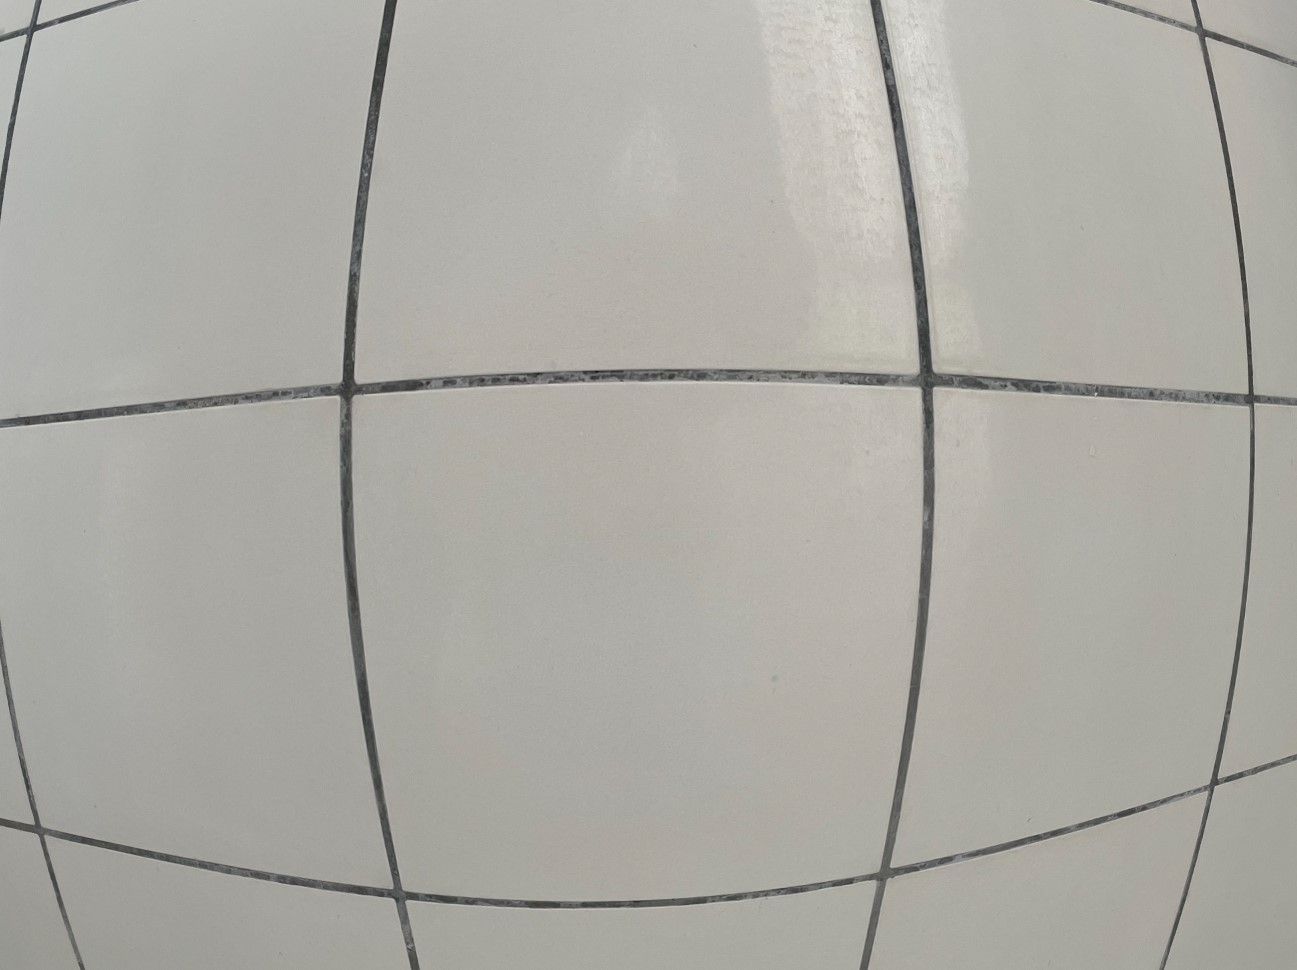
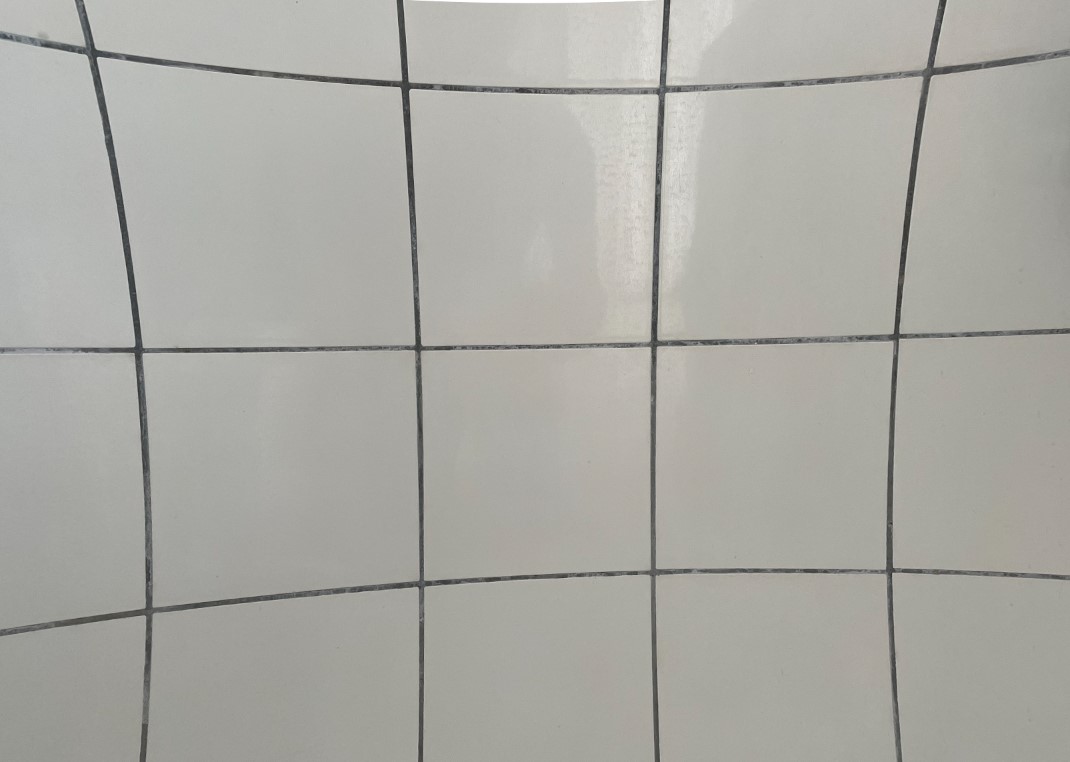
Lens distortion is when a straight line in reality is not represented as a straight line in your image. It is caused by the lens and the way the lens glass elements shape the light on its way to the sensor or film in your camera.

Barrel distortion makes the center of the image pop out to appear closer to you even if the wall with these tiles is as straight as they come!

Modern lens constructions seldom have significant lens distortion, as the lens designers know that reviewers by tradition will test the lens for distortion and make a point of it if the lens suffers from distortion. In reality, most of us will never notice the distortion, and only if you shoot architecture, real estate or landscapes with edge-to-edge horizons will you notice the potential distortion in your lens.

Pincushion distortion makes the center of the image appear further away….

Wide lenses, i.e. lenses with a short focal length, suffers more from distortion than longer lenses. The wide field of view that a wide lens has makes it more of a challenge for lens designers to make the edges of the image free from distortion. A good example where the designers deliberately have given up is a so called fish eye lens (say 8mm focal length), where the distortion to a large extend is the point.

In Lightroom and similar editing tools, the lens profile is available to the software and hence the distortion can easily be corrected in post, just by ticking off an option during post processing. In some cases the camera and the lens in combination is able to remove the distortion as part of the cameras internal processing of the image, and hence the image that you find on the memory card of your camera is distortion free from birth.

Thank you for reading this far! Comments and questions more than welcome!


Which Nikon lens type should you buy?

A long time ago…

Back in 1947 Nikon started making lenses and cameras for the F-mount, and even today (September 2021) they make both the lenses and DSLR cameras for this legendary mount. Contrary to Canon, Nikon’s F-mount is to a large extend backwards compatible all the way to the very first lenses.

Z-mount for mirrorless

A few years back Nikon introduced the Z-mount for their mirrorless camera series. The mount is bigger and has a smaller flange distance, which according to Nikon should give better image quality. I think this is most relevant for short lenses as long lenses will angle the light the same way irrespective of the mount size.

The Z-mount is not directly compatible with the F-mount. You need a so called FTZ (F-mount to Z-mount) adaptor to use the F-mount lenses on the mirrorless cameras. More about this later. Nikon is working hard to deliver more and more lenses to their mirrorless cameras and they have a roadmap defined for when what lenses comes out, but currently there are a lot to be desired and at the time of writing this, it is regarded as one of the drawbacks of the Nikon mirrorless cameras.

F-mount History

In very broad terms, Nikon has made 3 types of lenses for the F-mount: 

  1. 1947: Manual focus (pre-AI, AI and AIS) 
  2. 1986: Mechanical auto focus (AF and AF-D)  
  3. 1998: Auto focus with a focus motor built into the lens (AF-S or G-series) 

(1) The manual focus lenses of course do not provide any sort of automated focus capabilities; they were designed long before auto-focus technology was invented. So no matter how advanced your camera body is, the manual focus lens will stay manual focus.

(3) The auto focus lenses with a built in motor (AF-S) is the latest and greatest technology for the F-mount. A built in motor enables the focus to work both very fast and very silent as the motor can sit very close to the glass it is moving. It is a engineering masterpiece in terms of space management, as the motor and mechanics has to be squeezed into a very small space. 

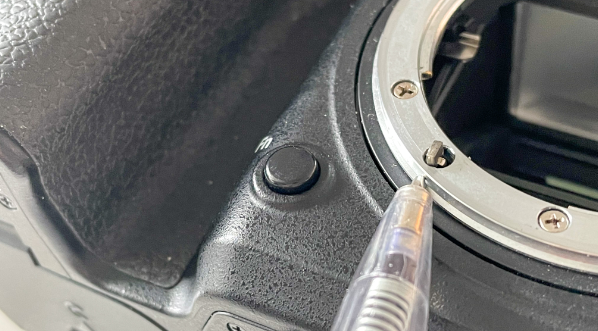
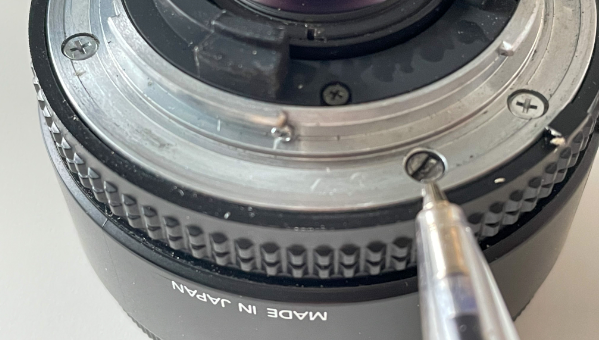
(2) The mechanical auto focus (AF) is based on a cooperation between your lens and the camera body – it is a very good practical illustration that it takes two to tango: The focus motor sits in the camera body and drives a metal piece that sticks out of the camera body, whereas the glass has a purely mechanical focus drive that links into the motor of the camera body.

The focus motor drives
The focus motor drives shown here – it goes flush with the lens mount when the switch on the camera body is change from AF to M

The camera body can then via commands to the motor drive the lens glass back and forth. Such glass is typically named AF or AF-D by Nikon.

Mechanical AF

One of the Nikon related questions I get the most often relates to AF glass: Will the auto focus work for this lens? The answer in most cases is yes, but there are a few exceptions: these are what Nikon call the entry level camera bodies in their DSLR setup. The Cameras named D3x00 and D5x00 (e.g. D5600) do not have the focus motor built into them and hence there is no way the camera body can drive the mechanical auto focus. That is why I do not recommend the D3x00 and D5x00 camera bodies. It is not because these cameras are APS-C cameras (i.e. cropped sensors relative to full frame) but because Nikon decided to leave the motors out of these bodies in the expectation that buyers of these bodies were unlikely to buy AF glass. For enthusiast level APS-C cameras such as the D500, D7100, D7200 and D7500 there is a motor in the camera body.

Here is the little screw that drives the mechanical AF. You can actually take a screwdriver and turn the AF yourself to get a feel for how it works!

Unfortunately Nikon did not build an autofocus motor into their mirrorless camera bodies, and hence these share the same fate as the D3x00 and D5x00, i.e. that AF F-mount glass will not yield auto focus. One could have hoped that Nikon would have built the motor into the FTZ adaptor, but so far this has not been the case. We are still many that hope this will come, either from Nikon or a 3rd party provided, but so far (September 2021) no luck! The AF-S series lenses where the motor is built into the lens will work with the FTZ adaptor, and hence some F-mount lenses do give auto focus on a mirrorless camera, but not those with mechanical auto focus.

Distance information

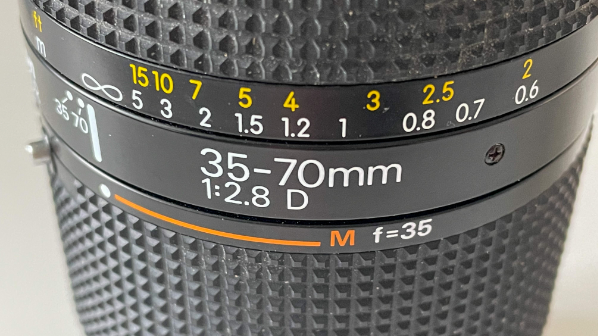
The difference between AF and AF-D lenses is that the -D ones gives distance information as well via the CPU contacts. This helps the more advanced metering options such as the matrix metering to give better results. As a rule of thumb, the AF-D lenses are optically similar to the -D lenses, but there may of course be slight variations for specific lenses.

The Nikkor 35-70 is a classic lens in the AF lineup, and it gives distance information
The Nikkor 35-70 is a classic lens in the AF line-up, and it gives distance information

Lens motor built in or not

Should you buy AF or AF-S glass? It depends very much on your budget and ambitions. AF-S glass is significantly more expensive than the AF glass, but it also works fast and silently, so for e.g. wildlife shooters or video shooters with a microphone close to the lens this could be crucial. Also, AF-S glass will work on a mirrorless camera with a FTZ adaptor, so if your plans are to go mirrorless at a later stage, then the AF-S glass is “future proofed” with autofocus.

AF glass on the other hand is available on say e-Bay for a bargain, and if you buy from a seller with a good reputation (and even factor in import taxes and transportation costs), you will find that you can get glass that is of astonishing quality for a fraction of the price of modern glass. But your camera body needs that AF motor…

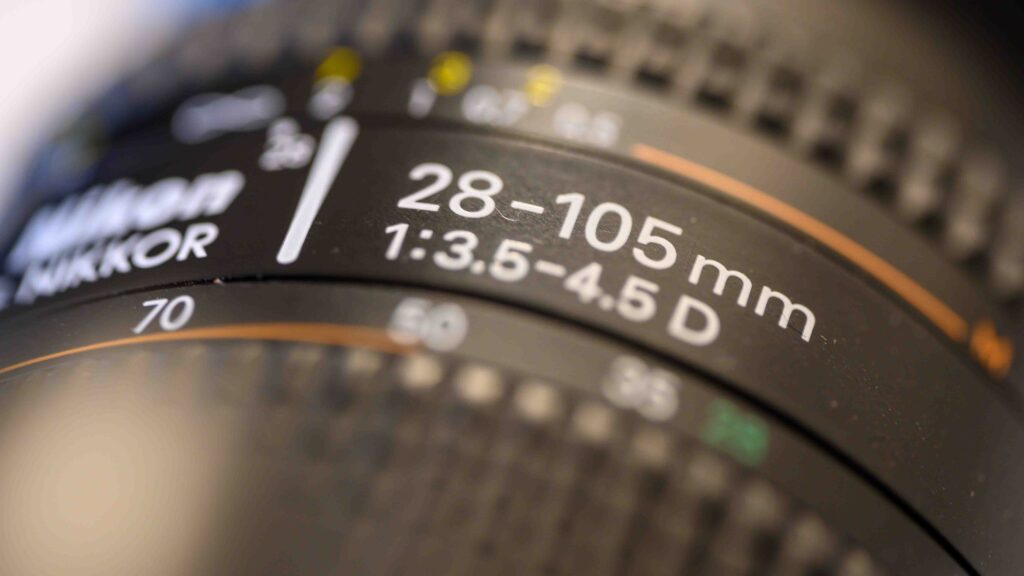
Nikon 28-105mm
Nikon 28-105mm with variable aperture and a macro mode. It is surprisingly light for a zoom lens and the image quality is really good. Only issue is the bad CA and that getting a good copy can be a challenge. AF on this one only works of your camera has a built in AF motor, e.g. AF will not work on the Nikon D5600.

Back to the past…

Glass that is older, i.e. AI, AIS and pre-AI, can also offer price/performance ratios that you will never get close to with modern glass. The further you go back, the more challenges you will face. The pre-AI requires you to modify the lens mount slightly to fit on a modern camera and the older lens constructions often have optical flaws and limited control of flare or distortion etc. So for these lenses you may want to do your homework carefully before buying, check that you don’t mind focusing manually AND make sure to look in the mirror and confirm that you see a vintage lens enthusiast before you buy.

Zoom versus primes

Zooms versus primes is a debate as old as photography itself. Back in the days the primes were clearly more sharp than zooms, as the construction is much simpler and hence easier to make consistent from copy to copy.

Variations between copies from the same production line is a known issue – Nikon has always been good at managing this, especially for lenses “made in Japan”, but the wear and tear on any lens can deteriorate performance, no matter how perfect it was when it left the production line.

More modern lenses have clearly proved that zooms are at level with primes, so I think that most AF-S zoom lenses can be considered as sharp as a prime. But the zoom still has two major disadvantages: weight and price. And if a zoom has to cover a large range, it becomes difficult for the lens designers to maintain a constant maximum aperture – here the (short) prime often makes mincemeat of the longer zoom lenses.

So if low weight and small size is important to you, then a prime may be the way to go. Also, a prime can be a true challenge as you impose a limitation that the zoom does not, and that limitation can spark some creativity that you did not know you possessed! And both weight and cost wise, you can “afford” two primes in the camera bag (say a 24mm and a 50mm) and still be below the price of a zoom to cover the same range.

Related reading

Should you buy a fast lens or not?

What is a prime lens? And why use it?

What is the holy trinity of lenses in photography?

In photography the notion of a holy trinity of lenses refers to a set zoom of lenses that cover the full range of focal lengths, going from the ultra wide 10 mm to the long 200 mm. This is typically achieved by 3 lenses that cover each their area:

  • Extremely wide – 10-24 mm
  • Standard zoom – 24-70 mm
  • Long zoom – 70-200 mm
  • (and some also have the 200-500 mm, good for wildlife and sports photography)

The beauty of this lineup is that you do not need any other lenses!

The holy trinity of lenses illustrated

The series of lenses is illustrated in the graphics above. Notice that all the above refers to full frame equivalents, so if you are shooting on a cropped sensor, you need to apply the cropping factor to get to the right values (1.5 for DX or APS-C lenses), but the idea is the same: to have a few lenses to cover the full range of focal lenghts.

Not all photographers like zoom lenses, and there are several reasons for this, one being that they are expensive compared to prime lenses, another that their weight can be significant, especially in the long end of the scale and then some argue that prime lenses with fixed focal lengths are more sharp than zoom lenses. Those who agree to these arguments typically cover the focal range with prime lenses to achieve the same end.

As you can see in the graphics above, the angle of view changes as you move up through the focal range, starting at a whopping 130 degrees and a lens of 10 mm (far left), ending at 5 degrees or less at a super long lens (far right). Here the photographer working with primes will have to change lenses each time a new focal length is needed, and as the prime lens only cover a point on the scale illustrated above, you may risk that the prime lenses in your bag does not make the desired focal length available. In such cases a prime lens that typically is too short is used and the frame is afterwards cropped in post processing. Some also “zoom with their feet”, but you have to remember here that the angle of view does not change, no matter how much you zoom this way, so you will not get the same result (due to compression) as you did would with a zoom lens.

Questions and comments

Thank you for reading this far. I hope you found this blog useful. Questions and comments (and likes!) are more than welcome!

How to use (Nikkor) Vintage lenses with a Fuji camera


Adapter

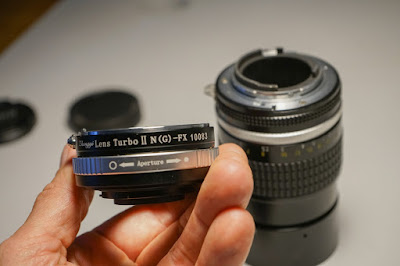
In order to use your vintage glass on the Fuji X-T20, the first thing you need is an adapter that enables you to mount the vintage glass on the Fuji body. I always go for a “dumb” adapter, meaning that there is no communication between the lens and the camera body which of course means the camera has no idea what focal length is mounted or what aperture is used, but I can live with that. What is probably worse is that you also loose the auto focus, but if you shoot mainly stills, portrait, landscape and street, then I think you will find the manual focus to be ok, some even start to like it more than auto focus, as they feel more involved in the process of taking a picture.

In my case, I have Nikkor (Nikon) vintage glass made for full frame cameras, and as the Fuji is a cropped APS-C camera, that means I will have to multiply the length of the lens with 1.5 due to the crop factor. However, you can get a so called speed booster to reverse this effect, and in addition it gives you a stop more light, i.e. makes your lens faster. I went for the Zhongyi Lens Turbo II:

Zhongyi Lens Turbo II
Zhongyi Lens Turbo II adapter.

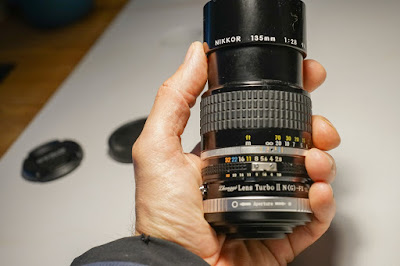
But there are many other good options to choose from. Here you can see what the Nikon 135mm f/2.8 looks like with the speed boost adapter mounted:

Zhongyi Lens Turbo II with the Nikon 135mm

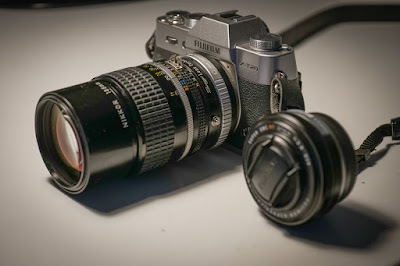
And here is the camera with the 135mm lens mounted:

Zhongyi Lens Turbo II with the Nikon 135mm on the Fuji XT20

As you can see it is in this case a long lens for such a small camera body and it also makes the camera quite “front heavy”. Some don’t like this – I don’t mind, but as the X-T20 is quite a light camera, mounting fast FX glass will often give a dramatic weight increase to the total system. I have the Fujinon 27mm lens to the right, just to compare.

Shooting “blind”

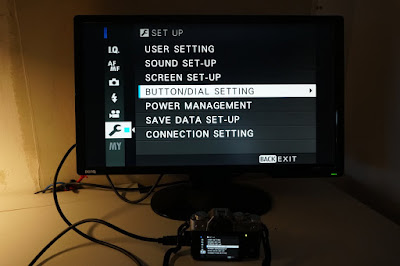
As the camera has no communication with the lens, you need to tell the camera it is OK to release the shutter with no lens mounted. It will look that way to the camera! Go find the tool menu and in that menu look for “button/dial settings” and select that menu:

"button/dial settings" menu
“button/dial settings” menu

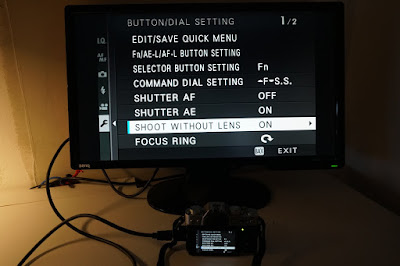
In that menu, find the item “shoot without lens” and make sure it is set to “on”:

"shoot without lens" and make sure it is set to "on".
“shoot without lens” set to “on”.

Now your shutter should work with a vintage lens mounted!

Focus aid

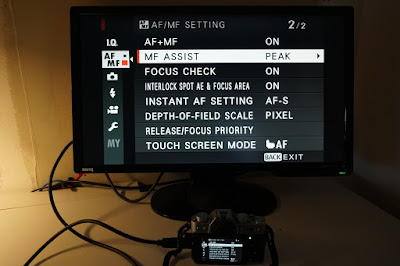
The next thing is to select how you want the Fuji to help you focus. I prefer the focus peak option, where the camera highlights the areas in the picture with strong contrast, which is often also where you will have the focal plane. In the “AF/MF” menu (the second from the top), select the “MF assist item” (MF is Manual Focus):

Manual focus assist in the shape of peaking highlights.

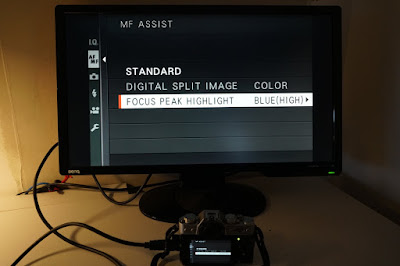
In the sub menu that appears, the manual focus assist settings can be chosen. I go for the focus peak and select the color to help me find the area of focus:

Manual focus assist in the shape of peaking highlights.

Now we should be ready to shoot!

Final hurdle

When shooting in this setup, there is however no focus peak assistance! It is possible to shoot and focus, but you get no help with the manual focus! How come?

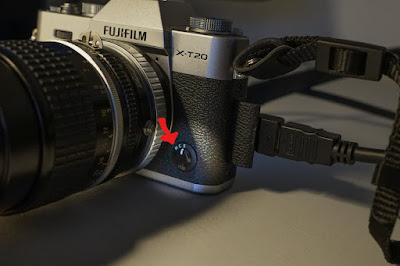
The solution to the problem is on the front left of the camera. Here you select drive mode by turning a little dial, i.e. if the camera is in (S)ingle frame mode, (C)ontinuous or (M)anual mode. Hence the letters S, C and M:

Dial on the front left of the camera

You need to turn this dial to “M” in order for the focus peak to start working. Then the high contrast areas area highlighted in the viewfinder and LCD screen. Enjoy! (Remember to flick the switch back to C or M when you mount a Fujinon lens – otherwise you will continue with manual focus…!)

Further aid

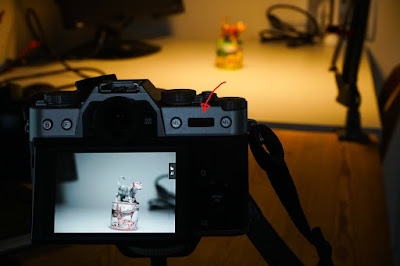
When you shoot, in addition to the focus peak, you have the focus magnification that helps you zoom in on details in the frame to see if they are sharp. Press the rear command dial (yes, it feels strange – you are used to turning it! But press as in push!):

Zooming in using the rear command dial

and the camera will show you a magnified area of the picture:

Zooming in using the rear command dial

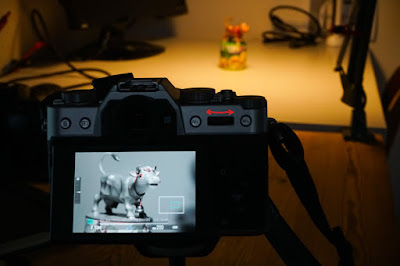
If you then turn the rear command dial, you will see that the camera flicks between two levels of magnification. In the first example you can see the entire cow, but if you turn the rear command dial the zoom gets extended:

Zooming in using the rear command dial

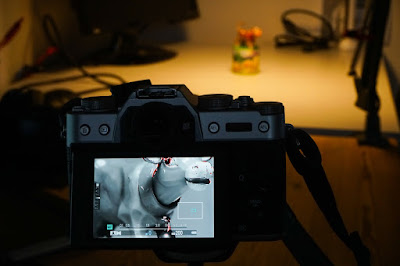
Now you can only see parts of the cows head! Notice how the graphics (the two boxes – one white and one green (blue?)) show you the zoom level. When you turn the command dial again, the camera jumps back to first level of zoom. So turn the rear command dial to select between the two zoom levels. Press (push) the rear command dial go leave zoom again. And press it once more to get back in, etc.

You will notice that with a long lens and the extended zoom peek switched on as shown above, the picture gets very nervous if the camera is hand held!  This is a good reminder to shot with a fast shutter speed to avoid camera shake and hence blurry pictures.

Finally

The Fuji X-T30 offers 3 different manual focus aids:

  • Standard (basically no aid!)
  • Digital split image
  • Focus peak highlight

In the examples in the previous sections, I have only used the focus peak highlight, as I find it to be the best aid for manual focus. However, some like no aid and some like digital split image (where you have to align two pictures so that the vertical lines in the intersection are exactly on top of each other).

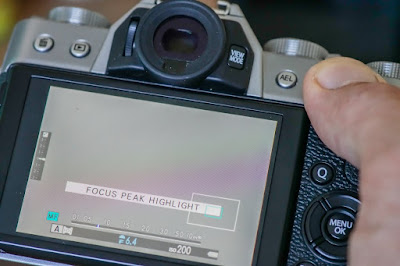
If you want to switch fast between the 3 modes mentioned above, you can push the rear command dial for a few seconds (not a brief push – you need to push the button in for a few seconds) to change to the next mode (the button is hiding behind my thumb top right):

Fast switch between focus modes.

When you have kept the button in for a few seconds, the mode the camera is about to switch to will be shown in a bar in the lower part of the screen. If the camera is in standard mode, it will switch to split, if in split then it will shift to focus peak, if in focus peak back to standard and so on. So it is like a wheel turning: standard -> split -> focus peak -> back to standard. Remember to keep the button pushed in until you see the bar on the screen.

Related reading

Review: Fuji X-T20

Charging the Fujifilm XT-3 vertical battery grip