Vary the focus
Focus shift shooting is not a new thing as such, but the automation of it is new to me, owning primarily DSLRs like the Nikon D4, D750 and D700. The Nikon Z6ii offers an automation of a series of shots where the focus is shifted a little bit for each – moving from near to far. When you do focus shift shooting, the Z6ii will produce a series of images to be merged in post processing.
It is a precondition that the camera is able to control the focus of the lens, so manual focus lenses of course cannot be used when shooting focus shift. As the Nikon ML cameras do not have mechanical AF motors built into them (nor does the FTZ adapter), this means that AF and AF-D lenses do not work, nor does AI and AIS lenses unfortunately.
Focus shift shooting enables you to have images where the depth of field is indefinite, as you in post processing combine the images into one image, picking the sharpest part from each. The only “price” you have to pay is that the shots need to be taken from the same viewpoint and angle (using a tripod) and that you cannot have any moving parts in the frame while the shots are taken. But both these are easy to fulfill as a landscape photographer.
Another thing to be aware of is the lens and if it suffers from focus breathing. If that is the case, then the images will be very difficult to merge in post processing, as you involuntarily will be zooming during the shots. Merging images with different angles of view is mission impossible. So make sure to use a lens that does not have focus breathing.
Best results are achieved shooting where the lens is the sharpest, typically around f/8 or f/5.6 – avoid very open apertures (e.g. f/1.8) and very closed apertures (e.g. f/22) as your lens most likely is not the sharpest in these extremes. Use a “middle of the road” aperture, where you know your lens is sharp.
Configuration
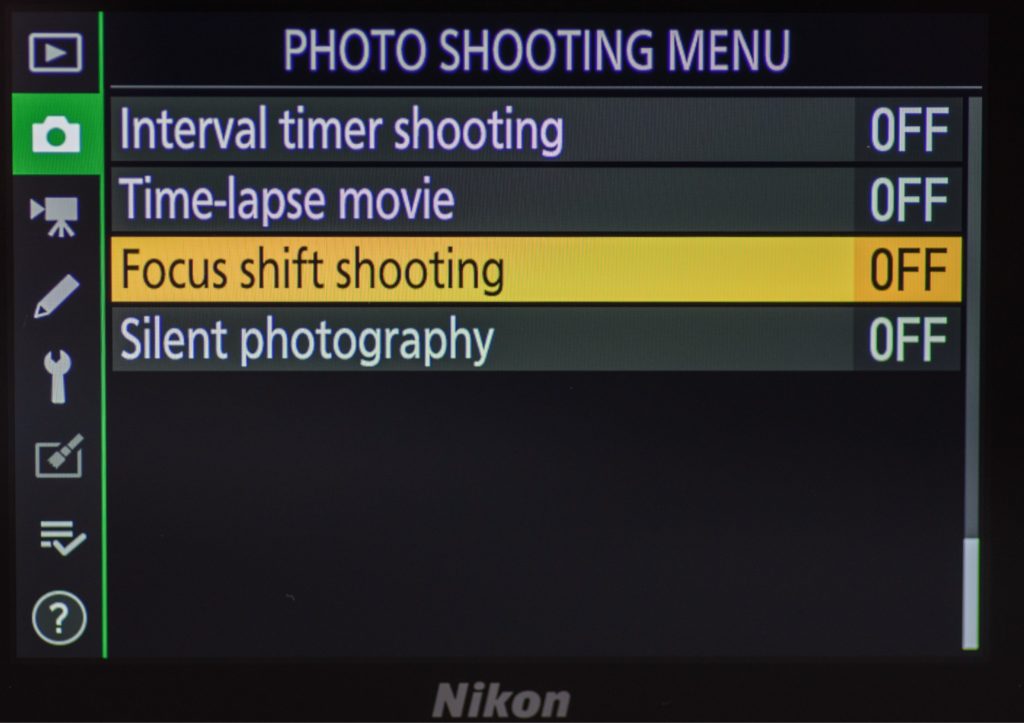
To initiate the shooting, you first have to find the “focus shift shooting” menu in the “photo shooting menu”. It is the second last item in a long list that spans across several pages.

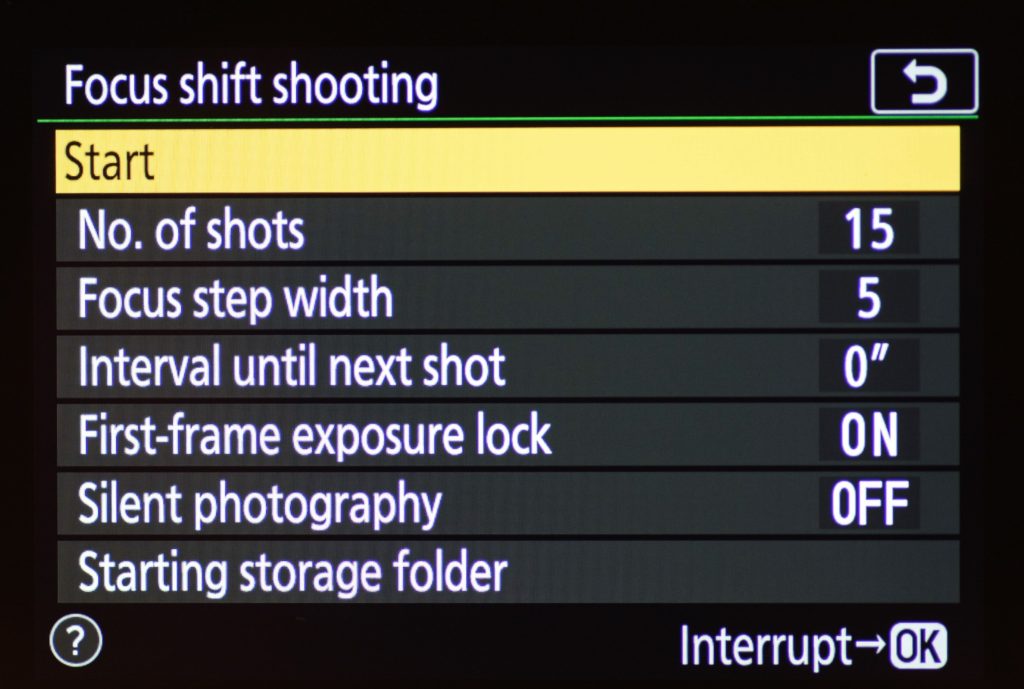
After selecting that one, the “focus shift shooting” menu appears. When you hit “start” (highlighted in yellow below) the camera starts shooting a series of images according to the parameters set below.

The menu above looks a bit long and intimidating at first, but don’t worry, it is relatively few parameters you will be changing after the initial setup.
The number of focus shots can be set to a very high value, like 100. The camera stops shooting new images when it reaches infinity, so for landscapes you cannot really set this value too high. I think the large possible number here is intended for macro photography. In my experience 5-6 images are more than plenty for a landscape shot.
The focus step width is not very well documented in the Nikon manual, but it has to do with how large steps the camera takes between shots. Values range from 1 to 10. You have to give it a try here. I have set mine to 5 and it works fine. In my experience, the chosen aperture has more influence on the number of shots than this parameter.
The interval to next shot is intended to give flashes time to recycle power and for landscapes I do not use flashes, so it is set to 0″ in my case.
The first frame exposure lock is important to have switched on. It secures that the exposure values are not changed throughout the shots. Provided that there are no changes in ambient light during the series, you should get consistent exposure results across the images in a series. You can of course fix this in post processing if you really know your software, but IMHO it is much easier to get right in camera.
The silent photography is switched on in my case. I like that I can hear what the camera is doing when it shoots the series. This tells me how many images are there and when the shooting is done. It is of course a matter of personal preference, so entirely up to you. But the camera is not very informative when it is done shooting, so I like to have some sound to relate to.
The starting storage folder can be handy for separating the images from others, as you will be generating quite a lot of images.
Shooting
Be fore you give the camera green lights to shoot a series, it is important that you initially have focused on the closest part that you want to be sharp in the frame. So if you have a stone or the like in the foreground that you want to be sharp, make sure to focus here before initiating the shot. Once the shot is done, the camera leaves the focus to infinity.
Other than keeping the camera still using a tripod, shooting at a middle aperture and selecting a scene with no moving parts, there is actually not much more to it than that. Only remember to focus near every time before the first shot. And then pray that the ambient light stays constant throughout the series.
Post processing
The first time I read about focus shift shooting, I was hoping that it would also do the post processing in camera, just like your smartphone effortlessly merges several images together when you instruct it to shoot HDR. Unfortunately that is not the case – we “only” get a series of images and have to do the post processing ourselves.
If you open the images as layers in Photoshop, the process is not complicated at all: first ask photoshop to align the images, then ask photoshop to merge the images and finally you may want to crop the image a bit as the edges may look funny after the alignment is done. You find the items you need in the edit menu. The first item is named Auto-Align layers… and the second one is named Auto-Blend images. When you select these a menu appears in both cases – I just say OK to the default values.

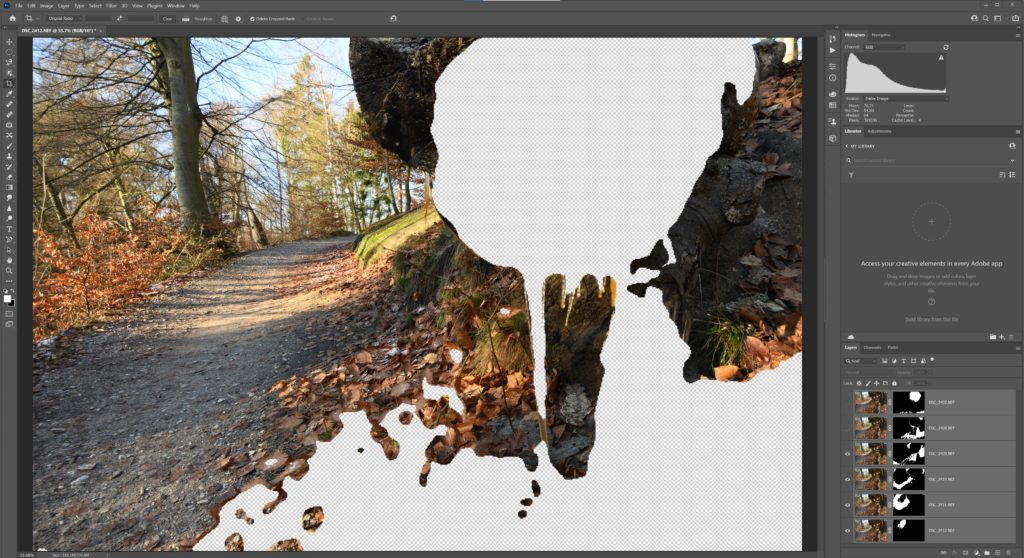
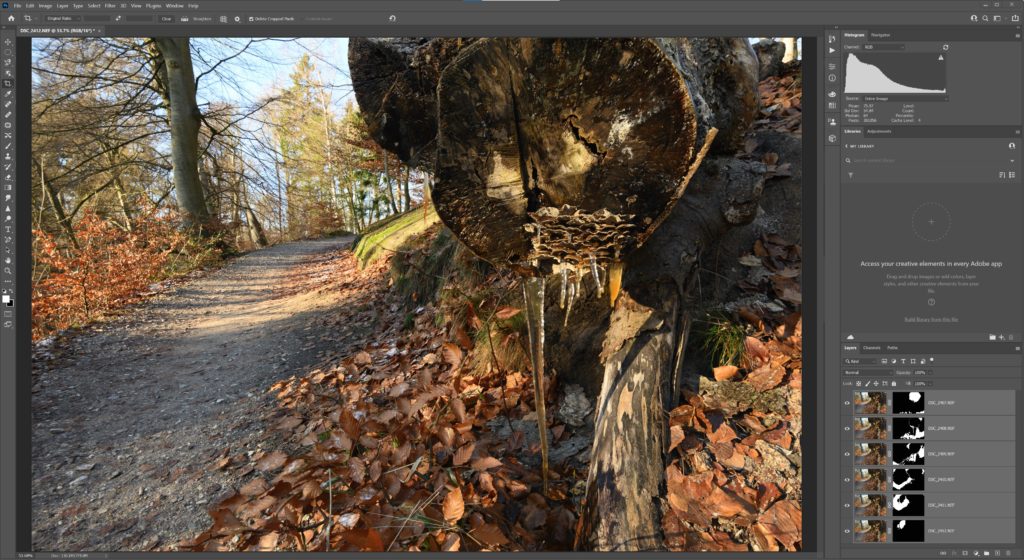
I recently shot a scene with a icicle in the foreground and a path in the woods leading to some trees in the background. When merging the series of images in Photoshop, you can see that photoshop uses masks to select the sharp parts from each image – black conceals, white reveals. In the example above I have deselected the two images that deliver the part closest to the camera (the white part).

So if you have managed to keep the camera still etc., the resulting image should be one with what appears to be infinite depth of field. Everything in the frame is sharp, from front to back.
If you like this kind of shooting is of course entirely up to you. Some think it looks a bit artificial, and prefer that sharpness is a function of the aperture and a single focus point. I have added it to my toolbox as an option that I sometimes use subject to – well – the subject. It is all up to you!
