Starters
Before diving into the details of the focus system on the Ricoh GR3x camera, I just want to make sure you do not have the camera in macro mode.
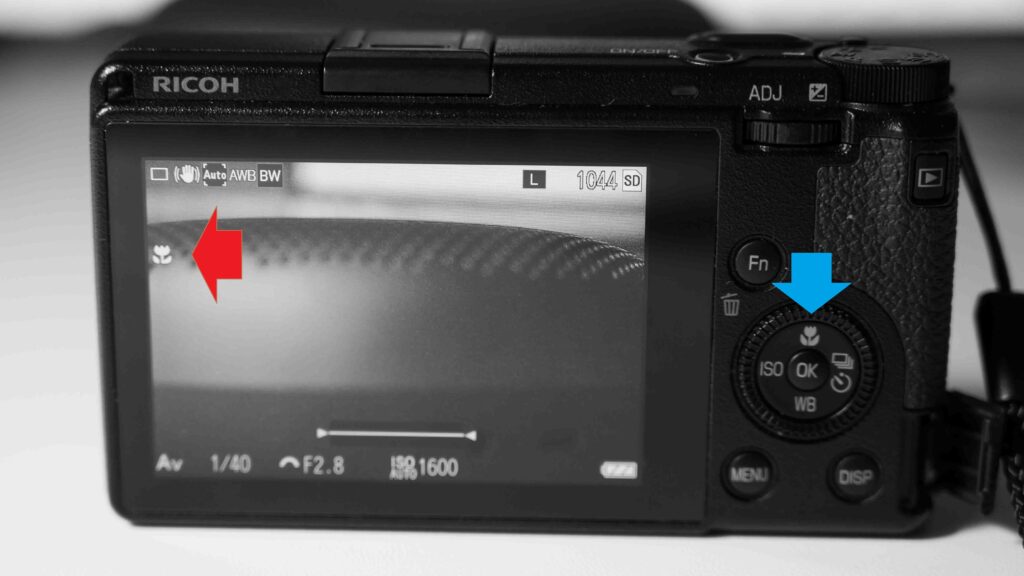
In the image above, push the button shown with the blue arrow to toggle the camera in and out of macro mode. In macro mode, the camera will not focus to infinity, but on the other hand it can focus very close to the subject. I have many times been struggling to understand why it would not focus, only to find that macro was engaged.
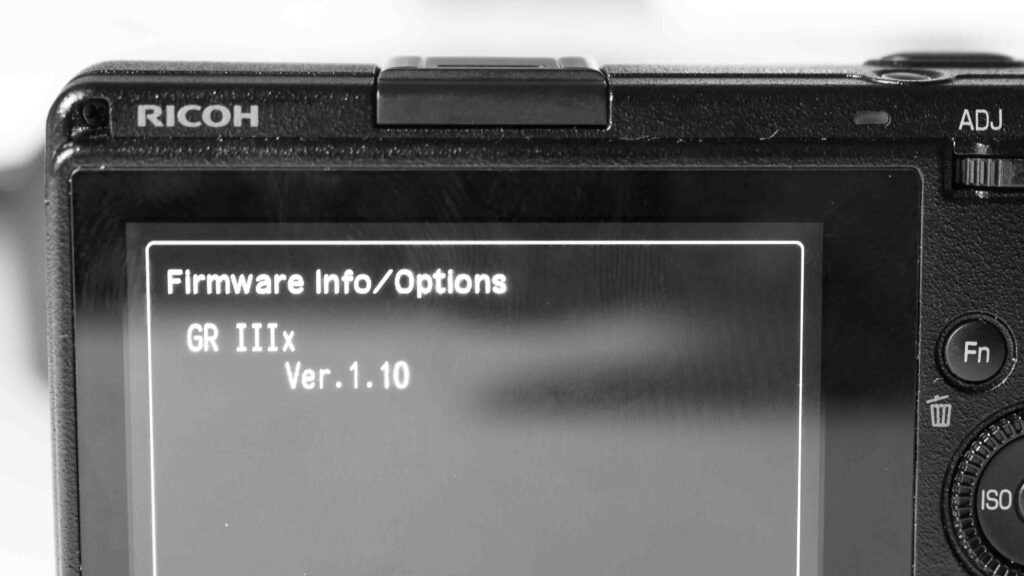
Another thing to check is the firmware version. My copy of the Ricoh GRIIIx was sent with version 1.1 of the firmware, so I have never tried version 1.0 but the word on the street is that version 1.1 is much better and hence upgrading the firmware is worth the while.
Basics
The Ricoh GRIIIx works like many other cameras when it comes to focus: if you half press the shutter the camera focuses, and full press takes the image. You can touch the screen to select the area for the camera to focus on and this presents a little box that frames what the camera will focus on.
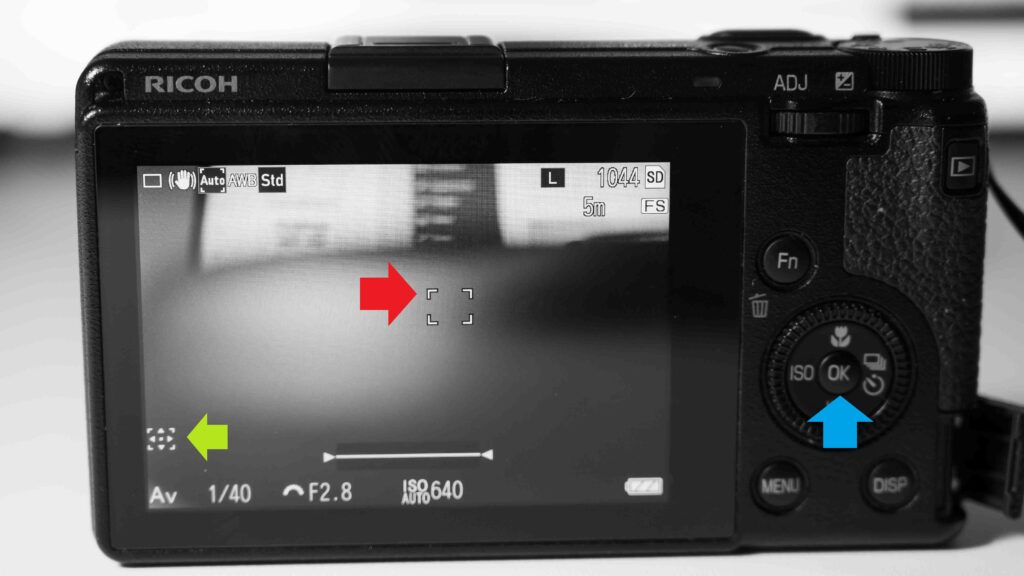
That little box can be moved around with the command wheel if you before that press the OK button.
If you long hold the “Disp” button bottom right on the rear of the camera, the LCD will zoom in, and again you can use the command wheel to select the area to view. Press “Disp” again to leave zoom mode.
Focus modes
The Ricoh GRIIIx comes with a series of focus modes that give different levels of control vs automation. You can go into the large menu system and select the focus mode, but I find that pushing the so called compensation lever top right on the rear of the camera is easier – it takes you into a smaller menu system where the image profile, focus, etc can be adjusted.
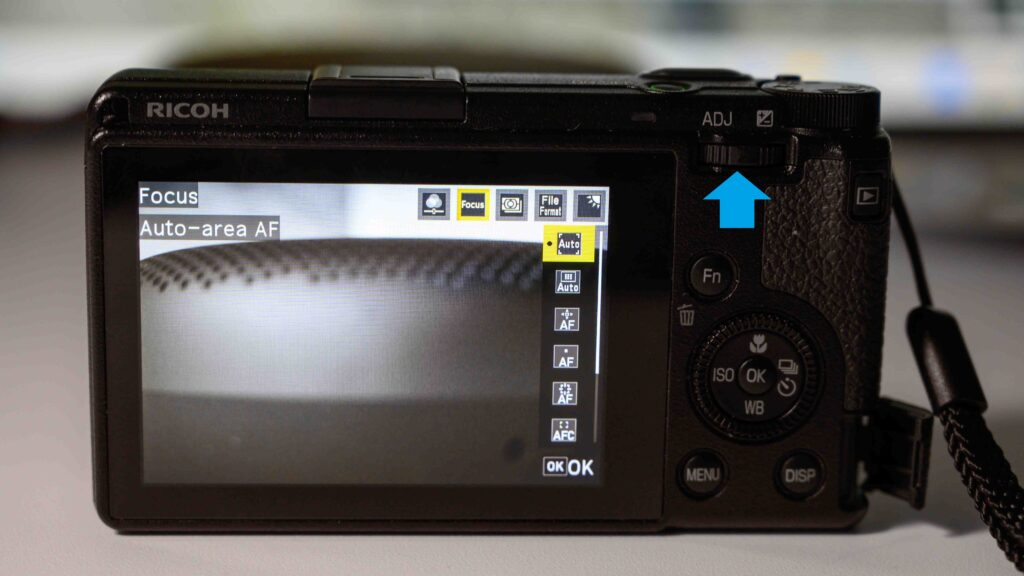
The focus menu is the second from the left, where the first one is image control. Use the control dial to move the cursor in the menu system – the selected value is highlighted in yellow. Push the OK button in the center of the control dial to select an option, and press the Menu button to leave the menu system.
There are a total of 9 (!) different focus modes:
- Auto-area AF is the most automated one and you have no control whatsoever. The camera chooses what to focus on. This is a good option if you want to use the camera in a “point and shoot” style. If you tab the LCD, a box will appear and the camera will focus here, but only for 1 image! After that, it is back to fully automated.
- Auto-area AF (centre) is like the first option, but it prioritizes the center of the frame when choosing what to focus on.
- Select AF gives you a little square on the LCD screen, and whatever is in that square is what the camera will focus on. You can move this square around with the control wheel as described above, or just tab the LCD to position the square where you have touched the LCD.
- Pinpoint AF is the same as the 3rd option, but the area is smaller. Good if you have something very small that you want to focus on hiding behind other objects that are closer.
- Tracing AF works like Select AF, but it keeps track of whatever you selected if either the subject moves or you move the camera – provided of course it stays within the frame. This is great if you have something moving within the frame or if you want to focus and then recompose. I use this option a lot.
- Continuous AF adjusts the focus as you half press the shutter. This is great if your subject moves closer to or away from you, as the camera will adjust focus accordingly. For example someone walking towards you.
- Manual Focus is where you select the position of the focal plane by turning the control wheel. I do not use this option a lot even though I usually like manual focus. The reason is that you have to turn the wheel a lot for the focal plane to move and this makes it very cumbersome to use.
- Snap is where the camera focuses on a pre-set focus distance. If you hold the macro button in and at the same time turn the front dial, the value can be changed. The options are 1m, 1.5m, 2m, 2.5m, 3m, 5m and infinity. Notice that if you press the shutter fast (i.e. no pause half pressed) the camera will focus using snap focus.
- Infinity is where the camera focuses to infinity and this can be useful if you don’t want the camera to “hunt” to find focus. But of course your subject then also has to be something where focus to infinity is meaningful.
Other options
If you hit the “Menu” button the full menu system of the Ricoh GRIIIx is displayed and in here many of the same options as in the control lever menu can be found.
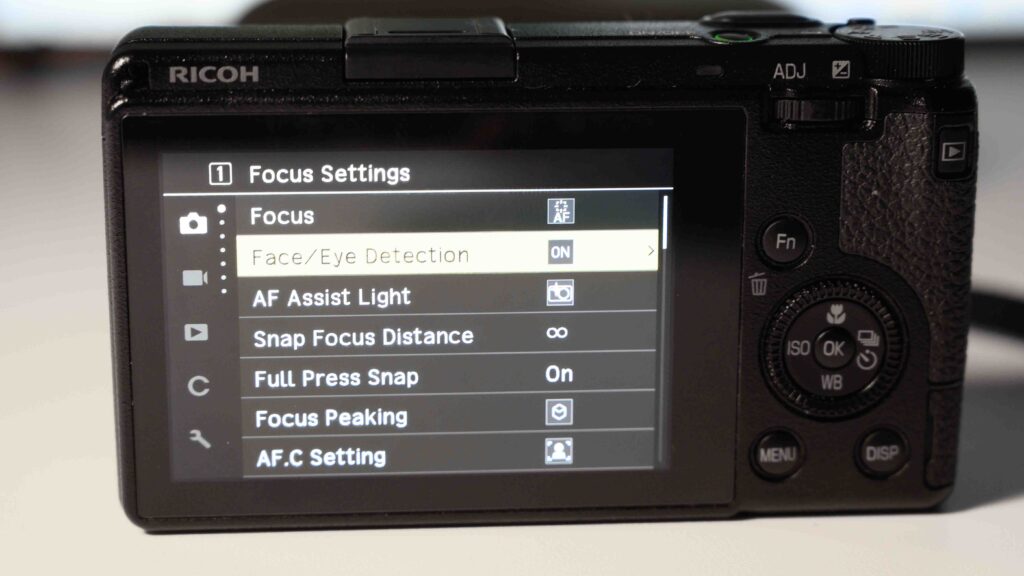
However, there are more options and details in the menu system. One useful option is to turn the face and eye detection on and off, you can control if the auto focus assist light is to turn on or not, if focus peaking is to be shown, etc.
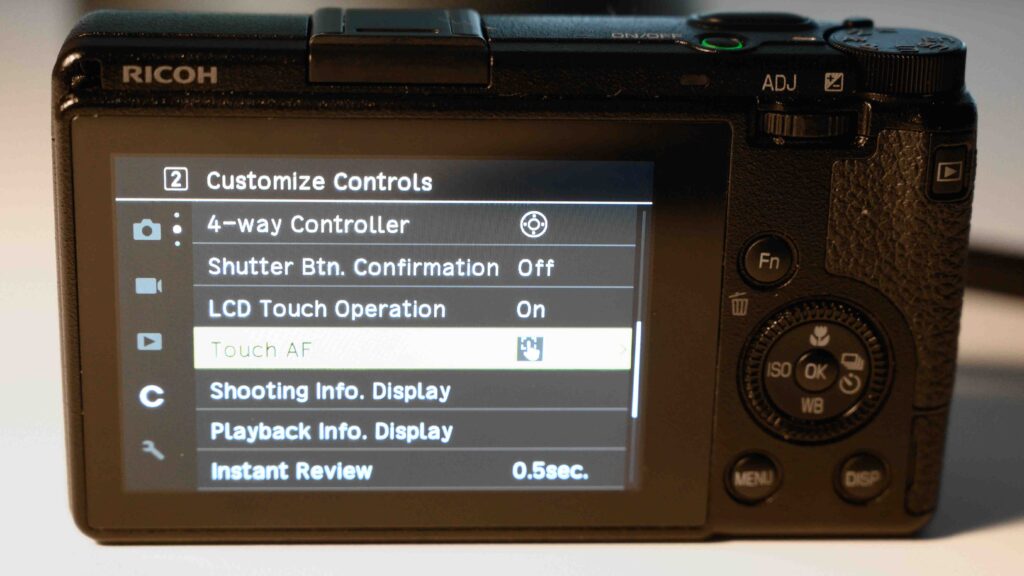
Also, if you scroll down to the customize controls menu, you can turn the touch sensitivity of the LCD on and off, and you can also control how much the camera does when the LCD is touched, and if you take the most elaborate option, the camera will both move the focus point to where you touch the screen, focus and shoot! Enjoy!
Related reading
Shopping link
Affiliate shopping link for the Ricoh GRIIIx (40mm FF equivalent).
Video link
