Manual focus
Manual focus may not be the first you think of when considering the Nikon Z6ii as your next camera. But in this post I ask you to reconsider, as manual focus can be very rewarding and bring you closer to the shooting experience.
Manual focus of course has its limitations. Unless you are a photographer with almost supernatural skills, manual focus is not relevant for shooting fast moving subjects like birds in flight, events or sports. But for landscapes, architecture, product shoots, portraits and the like, manual focus can work just as well as auto focus.
Further, the Nikon Z6ii like the other mirrorless cameras from Nikon has no auto focus motor built into the camera body. As a consequence, AF and AF-D glass with mechanical auto focus does not work on mirrorless cameras, and you are left with manual focus. So if you are heavily invested in AF or AF-D glass with no appetite for changing your glass, and you want to switch to mirrorless, then you are left with manual focus. This is a step down from the most Nikon DSLRs (the 3×00 and 5×00 excluded) that has a focus motor built into the camera body and hence offers mechanical auto focus for AF and AF-D glass.
Mirrorless cameras offers some options for determining if you have obtained focus that DSLRs do not offer. And it actually helps you when working for example with a vintage lens with no auto focus system built into it. This has led to a revival of vintage lenses from Nikon (AI and AIS), as there is a lot of good (“oldie but goldie”) glass to be found. Nikon has produced glass since the 1950’s, and there is lots of options to choose from.
Now, without further ado, lets look at 4 different ways of focusing manually, 3 of them that are exclusive to the mirrorless cameras.
Focus peaking highlights
Focus peaking highlights mark in the electronic viewfinder with a red, yellow, white or blue color which areas that are in focus.
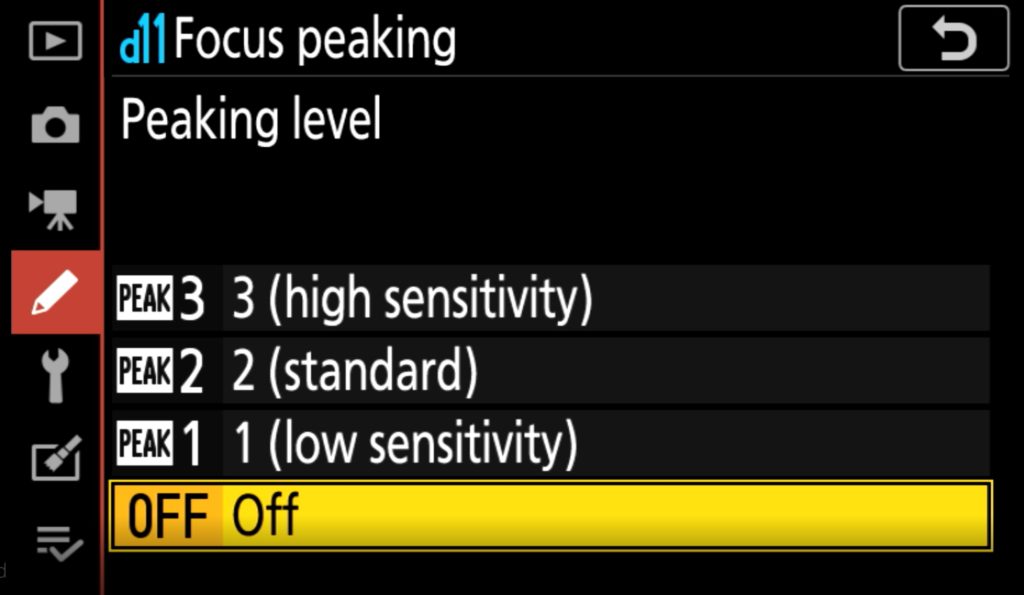
You will see this as coloring of your subject that is not there in real life, but is added to the image by the camera. You may know this from Live View on a DSLR, but here the great news is that it works both in the rear LCD (Live View) and in the electronic viewfinder.
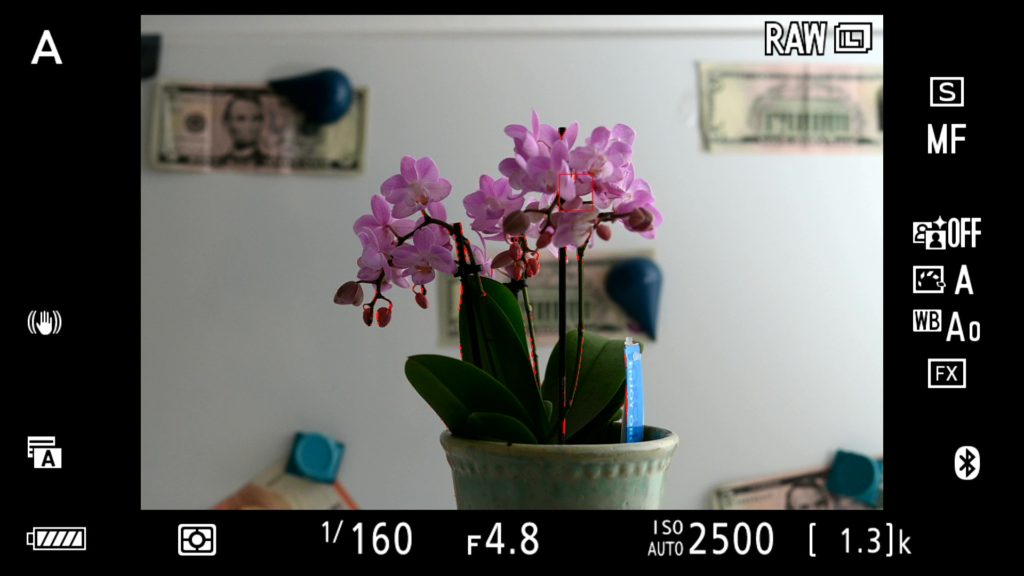
In the example above, you can see that there is a little bit of red around the both the petals and the stem of the flower . That’s the area in focus.
Zooming in
Another feature that you may know from Live View on a DSLR, is the ability to zoom in. The zoom function works both in Live View as you may know it from a DSLR, but also in the electronic viewfinder. I use this a lot, especially when shooting flowers or the like.
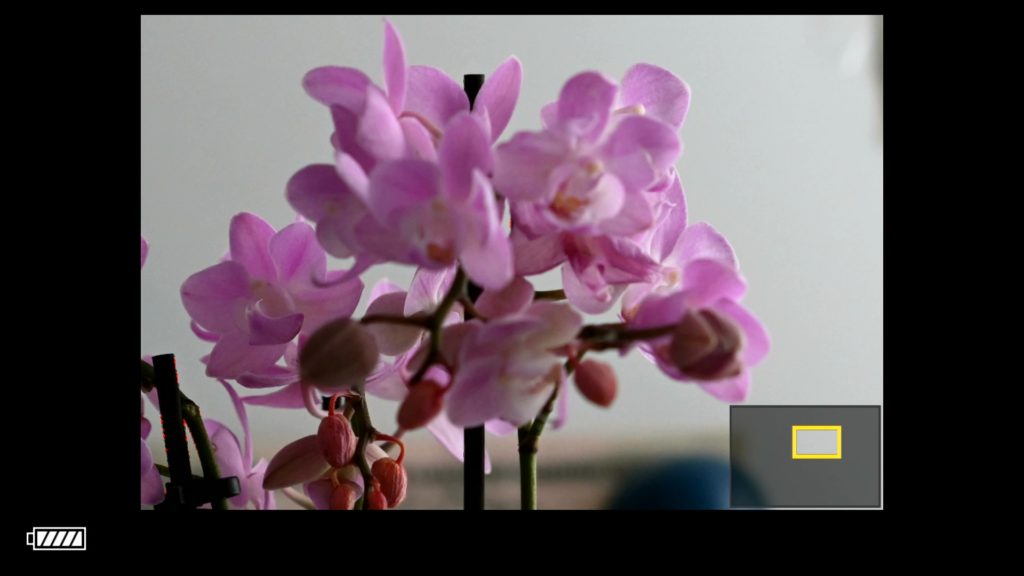
You can zoom in to varying degrees using the plus and minus buttons bottom right on the rear of the camera. The max zoom is 200% and that is a lot! The graphics bottom right shows the size of the zoomed in area (yellow) relative to the entire frame (the dark grey box).
Focus confirmation
You probably know the focus confirmation “dot” and the associated arrows that show if the focus plane is too close to you or to far away.
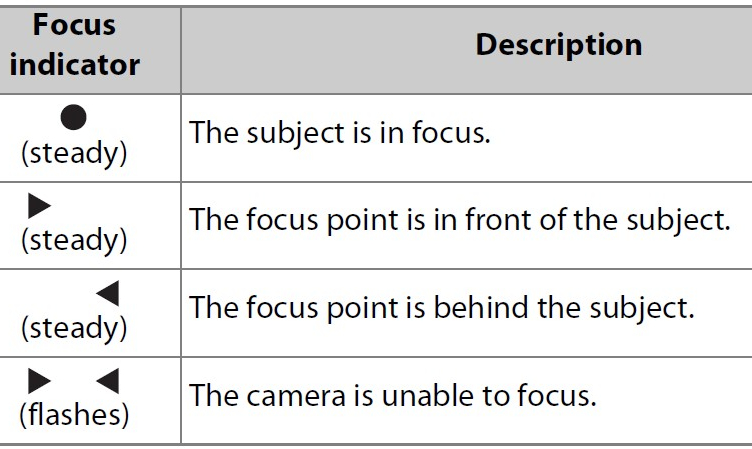
With a mirrorless, the focus confirmation is provided two ways. First in the shape of the graphics illustrated above. In the image below, the focus confirmation dot is bottom left, just to the right of the battery level indicator.
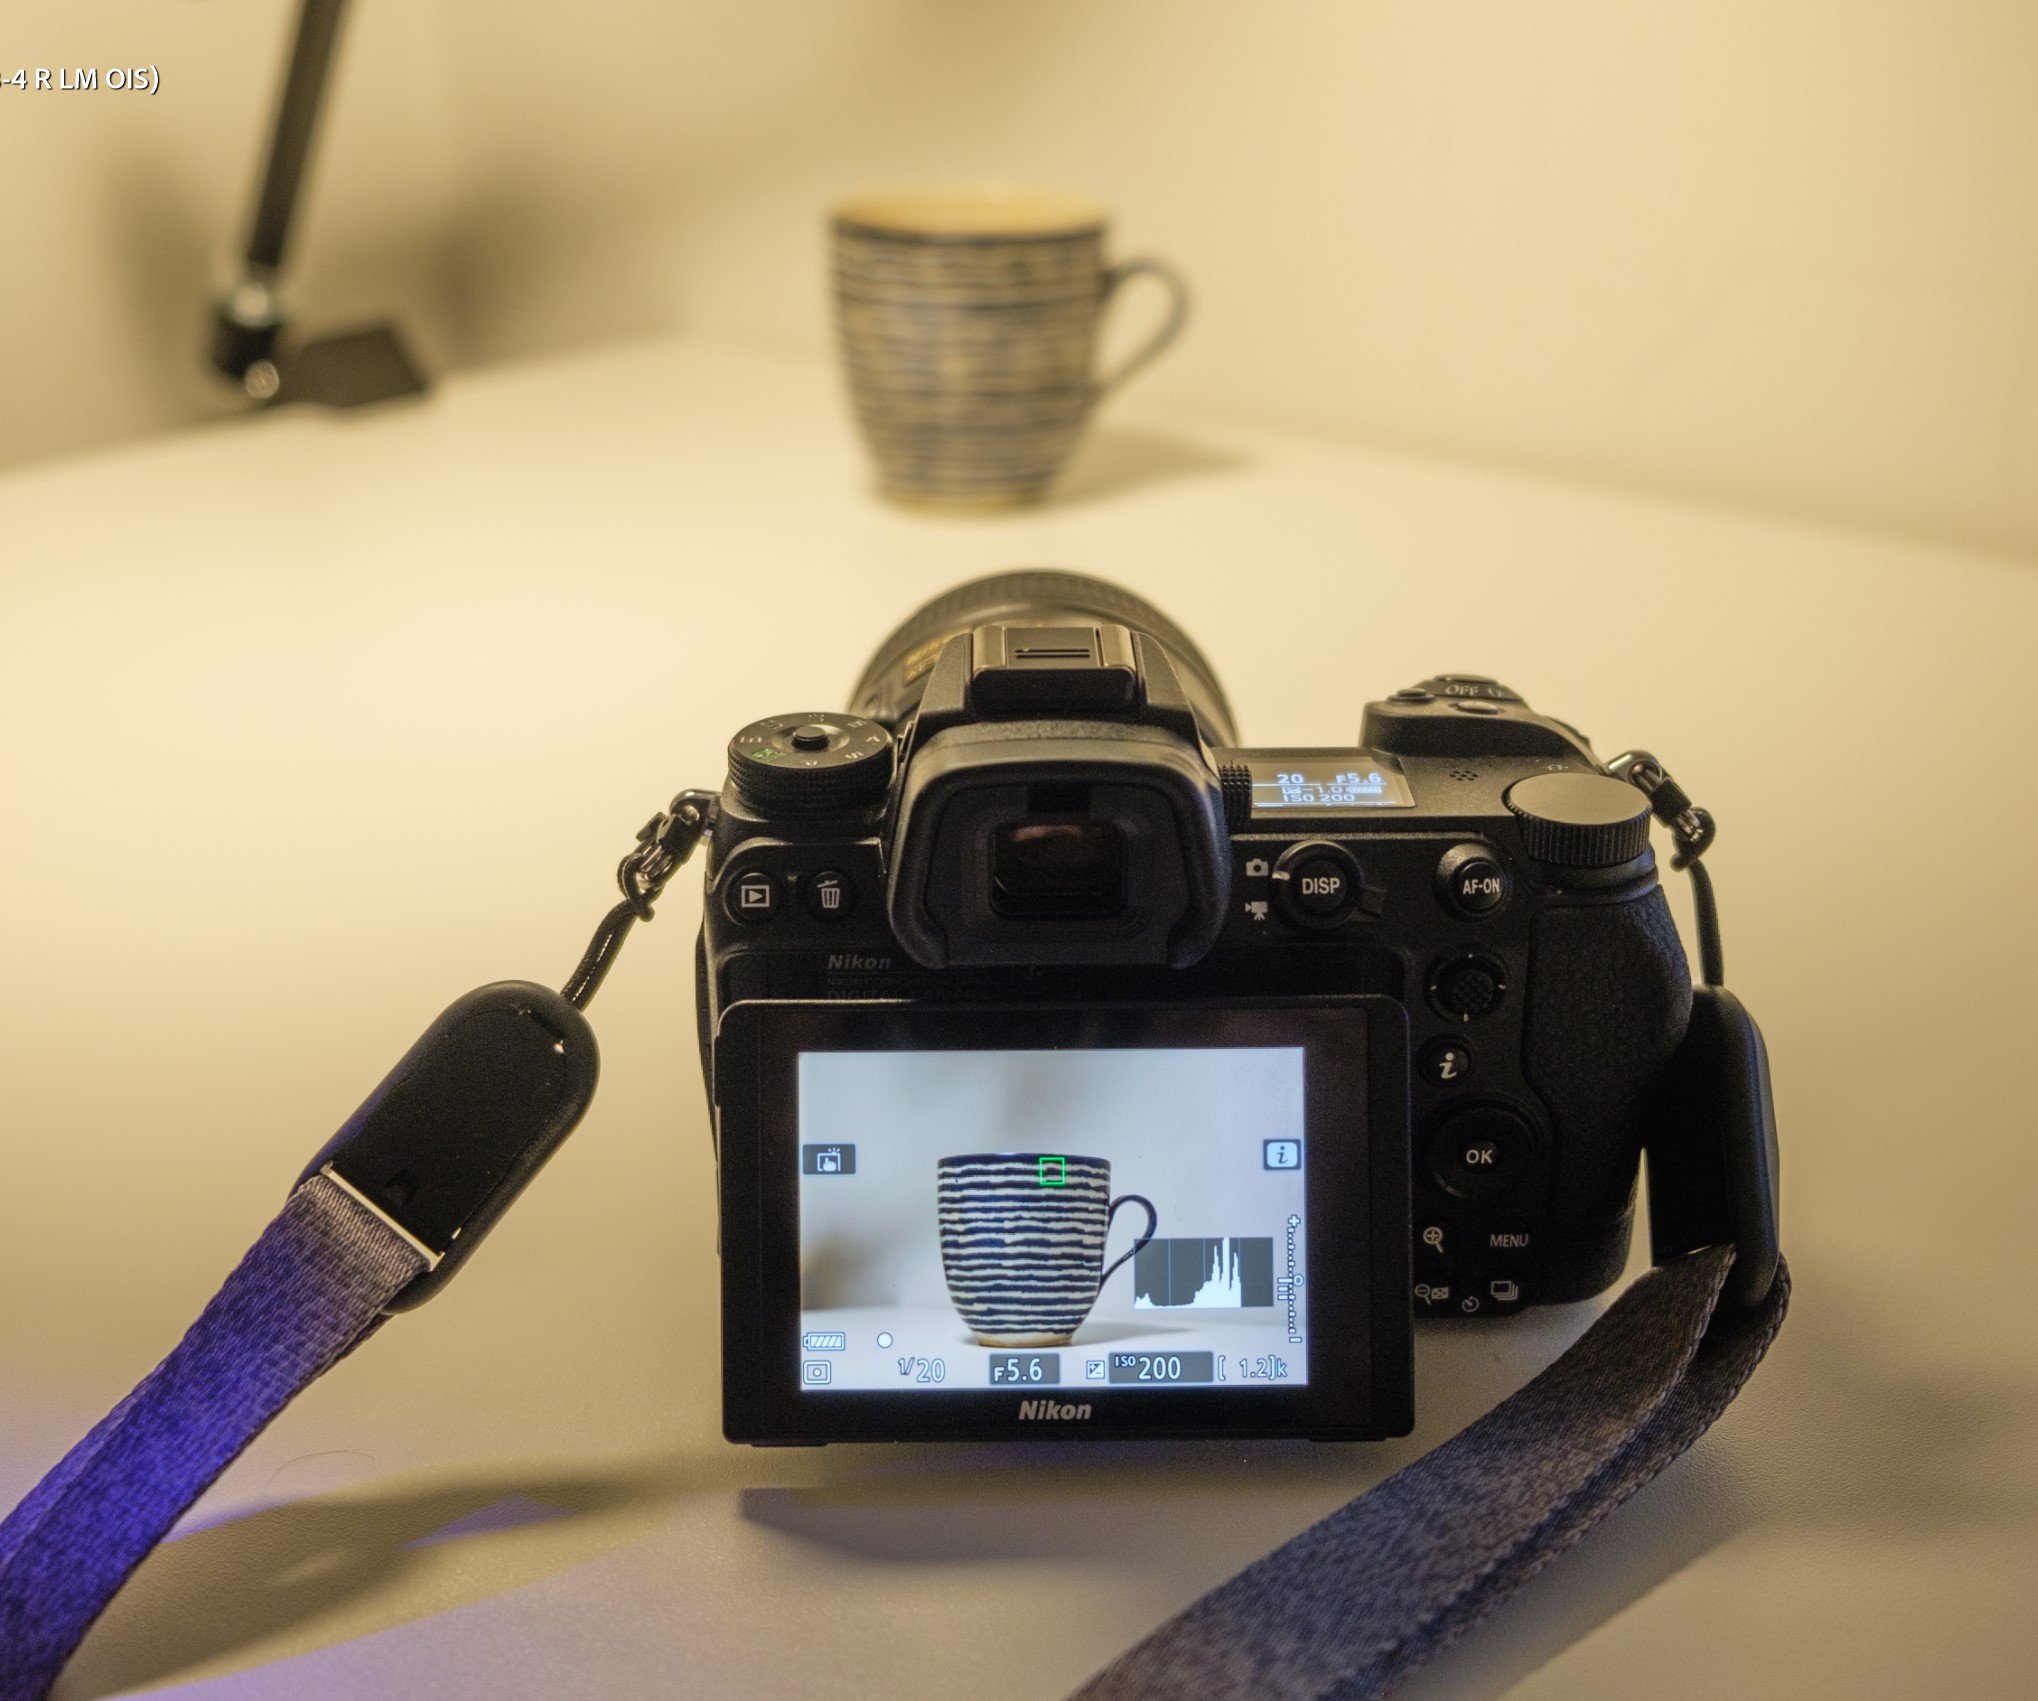
But also notice the green focus area selector in the center of the LCD. It can be moved around using the joystick. This box is red when the area in the box is out of focus, but turns green when focus is obtained. So you will see the dot appearing at the same time as the box turns green.
Availability
The focus peaking highlights works for all lenses, at least as far as I have been able to test, also AI and AIS lenses. However, mind you that if the subject is moving, for example waves on the ocean far away, the camera may have problems illustrating the peaking highlights as it cannot keep up with the movement. Also, when fully zoomed in, the peaking highlights do not work either.
Zooming in happens electronically, so this also works for all lenses.
The focus conformation dot requires distance information to work on a mirrorless, and this part only works for AF-D, AF-S and S-series lenses. It can seem a little strange as it works on ancient DSLRs with old lenses, but mind you that the focusing system of a mirrorless is very different from a DSLR.
Video link
Related reading

Hi, I have a z6ii and a voigtlander 40mm.
Is it not possible to find a setting that when the green box is there the z6ii automatically takes a picture? A week ago I was playing around with this z6 and the manual lens and I thought a certain moment it took a picture when the green box was there.
I think the zF and the new z6iii do work in this way ( take a picture when green box is there automatically) . Do you know?
I have asked ChatGPT and the answer is here:
Hi! Yes, the Z6ii does not have an automatic focus confirmation shutter release function like the Zf and likely the Z6iii. However, you might have experienced something close to that using focus peaking + electronic rangefinder.
Why It Might Have Seemed Automatic
When using a manual lens, the Z6ii provides a green focus confirmation box when you achieve focus.
If you were in Continuous Shooting (CL/CH) mode and lightly pressing the shutter, it might have fired exactly when the focus box appeared, making it seem automatic.
What the Zf and Z6iii Do Differently
The Zf has a setting where the shutter only fires when focus is confirmed with a manual lens (like your Voigtländer 40mm).
The Z6iii is rumored to have similar AI-driven autofocus enhancements, which may include this feature.
Workarounds on the Z6ii
You must manually press the shutter when the green box appears.
Using focus peaking in combination with the green box can help you time it better.
If you were in AF-S mode with a chipped lens adapter, it might have momentarily “locked” and allowed a shot, but this is not a feature of manual focus.
Hope this helps.