Review: Ulanzi G9-5 Metal Cage for GoPro 9 and GoPro 10

No nonsense

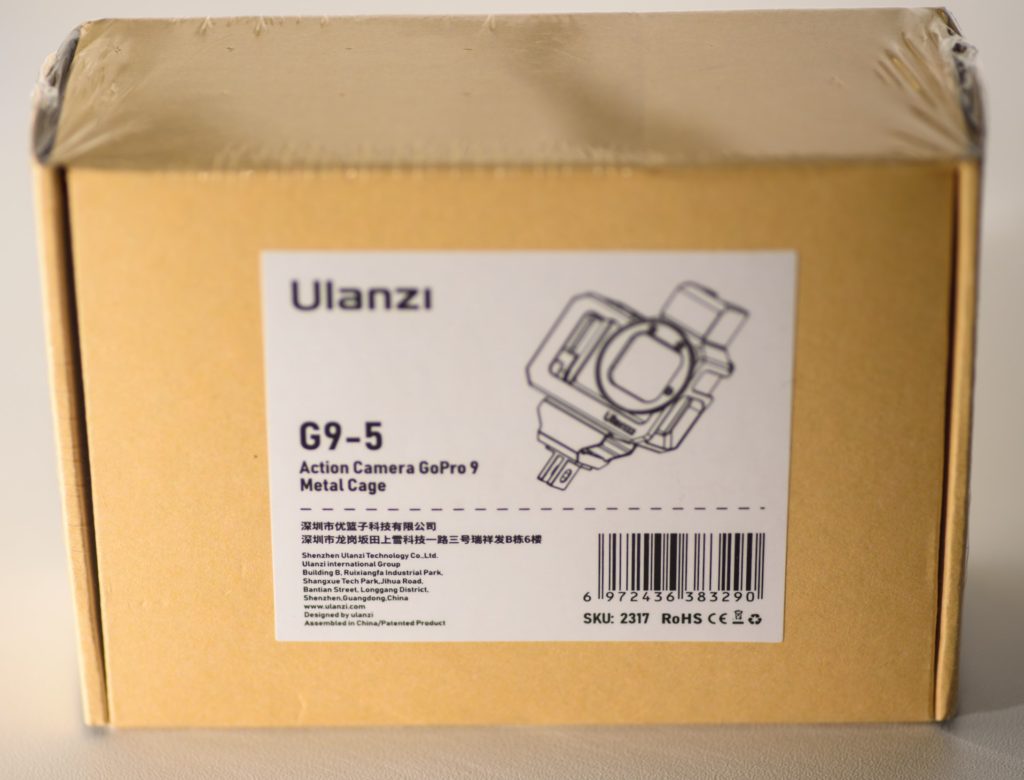
The Ulanzi G9-5 Metal Cage for GoPro 9 and GoPro 10 comes in a small  plastic wrapped cardboard box that certainly does not make a big fuzz with colorful images or the like. It signals an engineering no-nonsense approach from the very start.

Review: Ulanzi G9-5 Metal Cage for GoPro 9 and GoPro 10
The Ulanzi G9-5 comes with in a small box with no user guide.

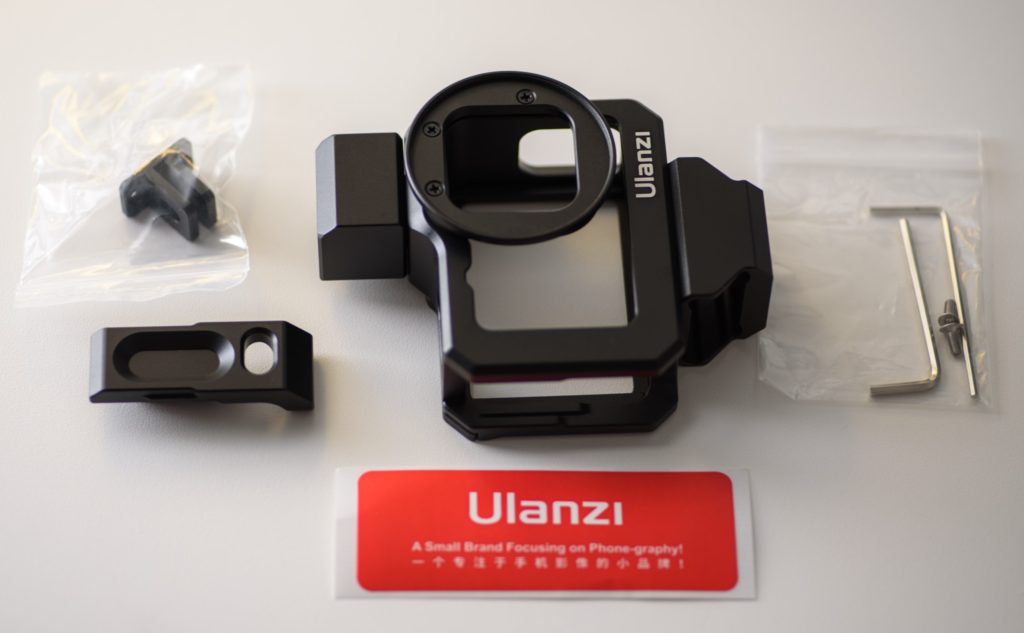
In the box you will find the cage itself, with a small cage for the sound adapter already mounted at the bottom.

Review: Ulanzi G9-5 Metal Cage for GoPro 9 and GoPro 10
The full content of the package. Cage in the middle with microphone adapter mounted to the right. The door bottom left is mounted on the right hand side of the cage and gives access to the USB-C connecter when closed.

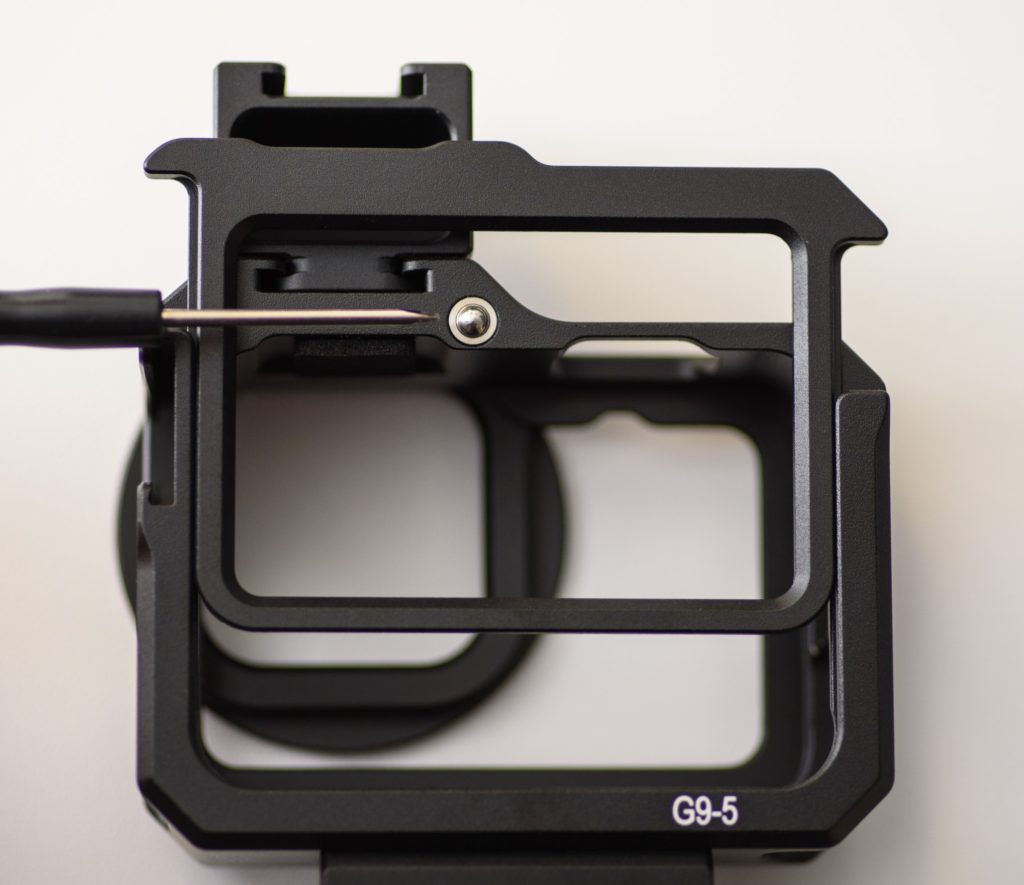
To fit the GoPro Hero 9 or 10 into the cage, the rear of the cage has a sliding door. The door is locked into position by a small spring laden ball that fits into a dent into the rear side of door. This works really well. The door on the side of the cage follow the same principle.

Review: Ulanzi G9-5 Metal Cage for GoPro 9 and GoPro 10
The screwdriver points to a small spring laden ball that looks like the ones you’ll find in ball bearings. It taps into a small dent in the rear frame of the cage, so that it is locked in position.

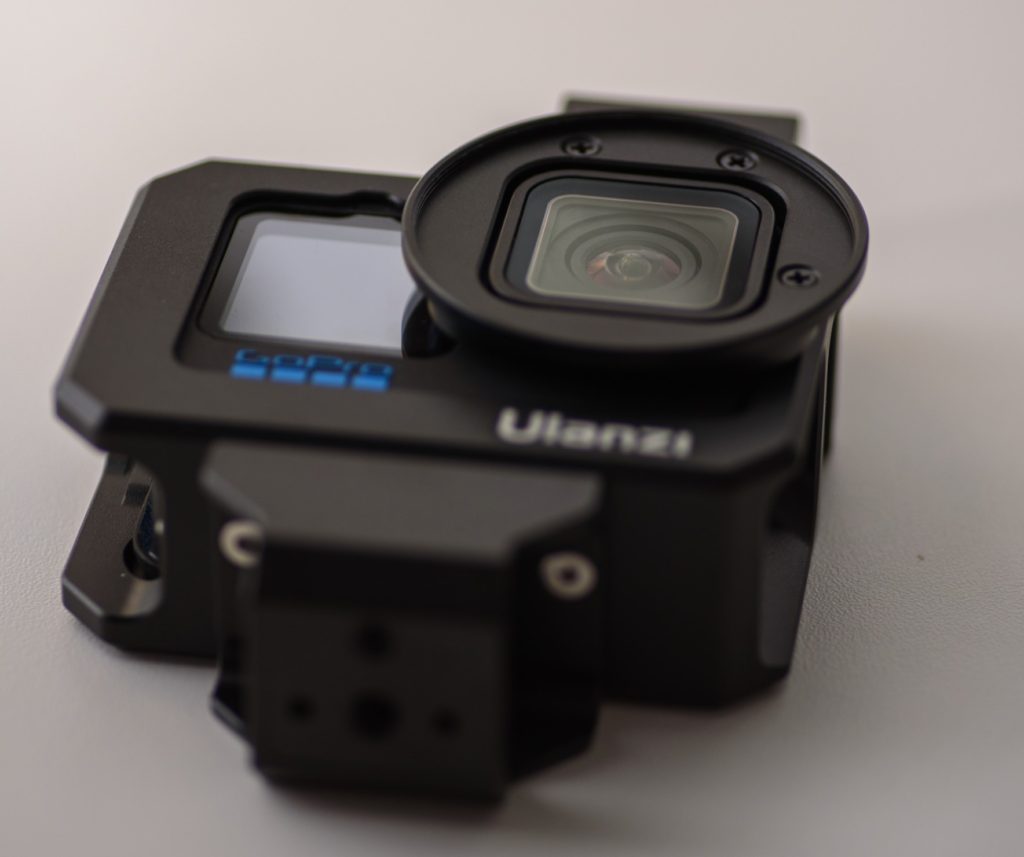
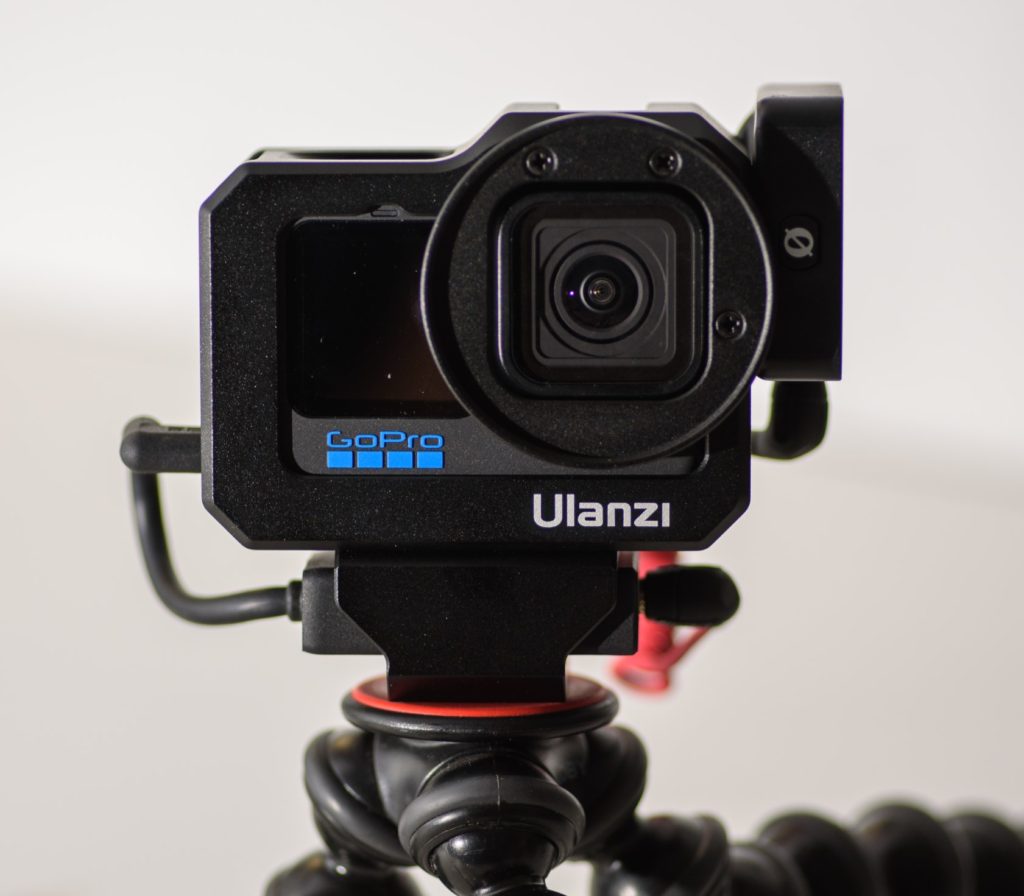
Mounting the GoPro in the cage is very easy and after closing the sliding door on the rear, the GoPro is well protected. The lens is protected from the side by a metal ring, but unfortunately this metal ring also blocks a little of the view to the front LCD, which is a bit annoying, but not a showstopper in any way. The metal ring around the lens has a thread to mount filters in front of the lens.

Review: Ulanzi G9-5 Metal Cage for GoPro 9 and GoPro 10
The cage protects the lens very well, but unfortunately also steals a bit of the view to the front LCD.

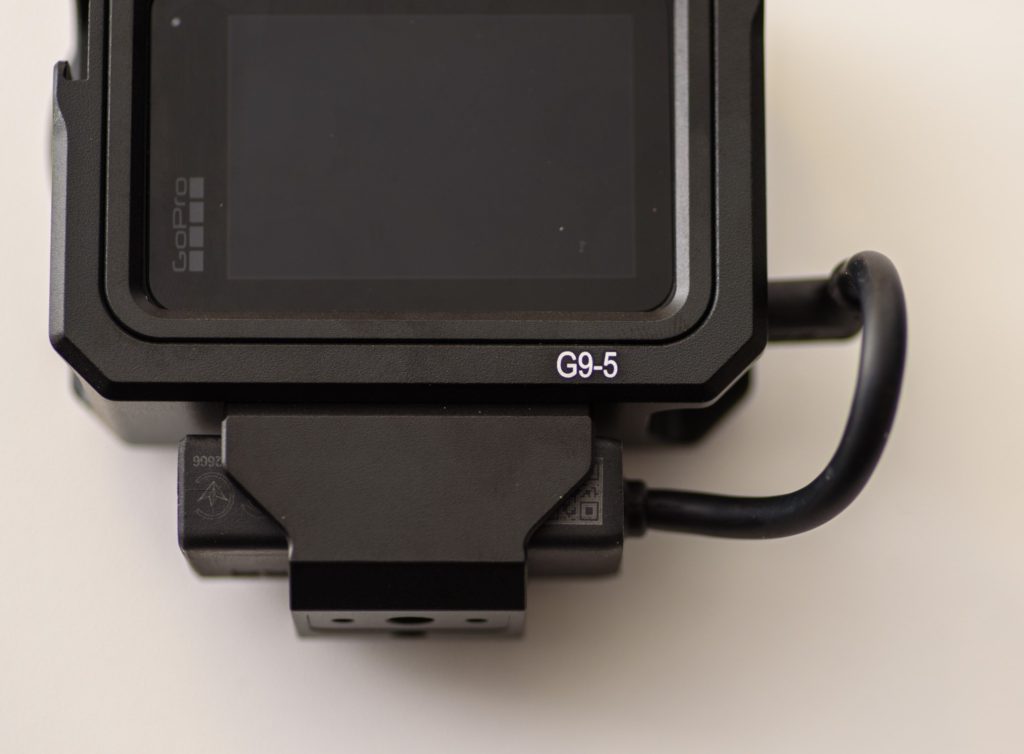
One very important feature of the Ulanzi cage is that it holds the sound adapter for the GoPro, that would otherwise be dangling down the side of the GoPro, at risk of being accidentally pulled out. The adapter simply slides sideways into position as in kept there by a little bit of friction – this also works well and I think there is little risk that the adapter by accident will be pushed sideways out of the cage.

Review: Ulanzi G9-5 Metal Cage for GoPro 9 and GoPro 10
The holder for the sound adapter is mounted at the bottom of the cage from the factory. The adapter simply slides sideways into position as in kept there by a little bit of friction.

The cage comes with a metal door that has a small hole to give access to the USB-C connector on the side of the GoPro. This door cannot be mounted together with the GoPro door, so you have to choose between GoPro door (waterproof) or the cage door (access to the USB-C connector).

If you choose the GoPro door, then be aware that it cannot be opened while mounted in the cage – you have to take it out of the cage to get access to the battery, SD-card and USB-C connector.

As I am very dependent on access to the USB-C connector, the choice is easy, but I have to be careful with water and dust.

Review: Ulanzi G9-5 Metal Cage for GoPro 9 and GoPro 10
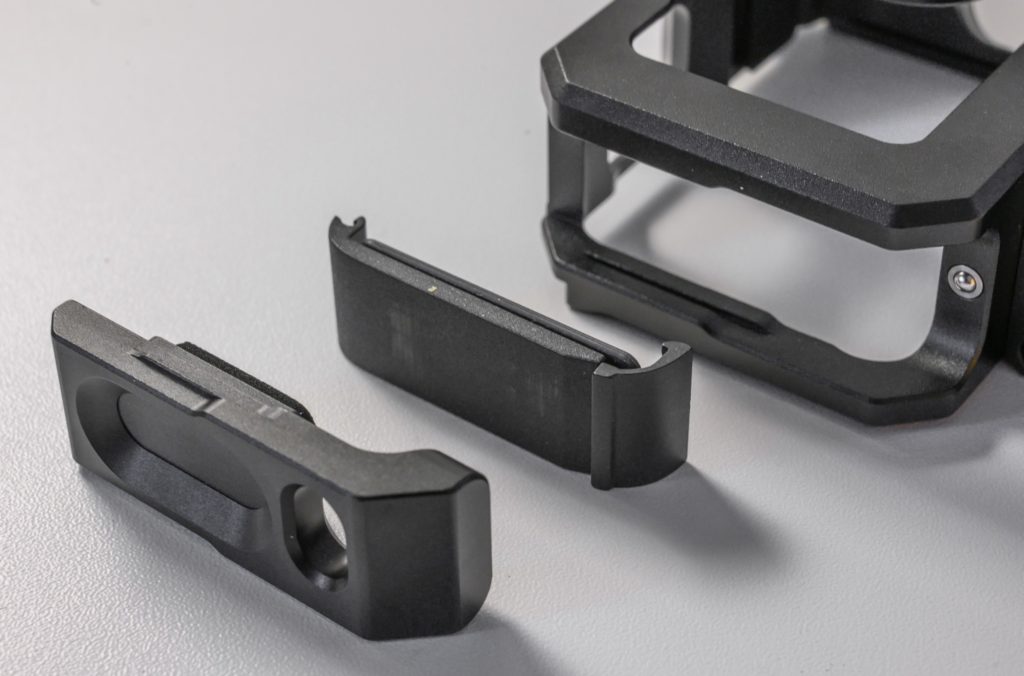
Cage right, cage side door left, GoPro door in the middle. You have to choose between these doors as only one of them can be mounted.

Another item that I am keen to keep track of is my Røde wireless recever (sound), that needs to connect to the adapter at the bottom of the cage. You can find a review of the Røde wireless Go here.

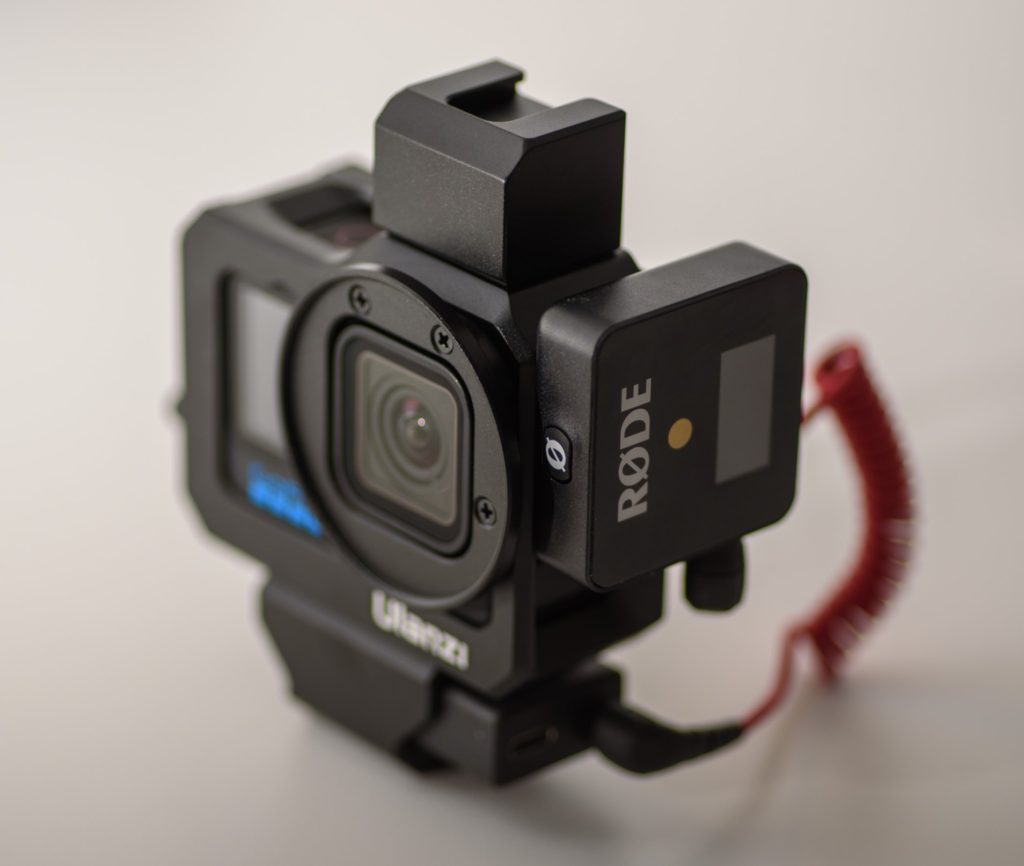
There are two cold shoes for mounting the Røde sender, either at the top or the side. If you mount it on the side, then access to the power button is blocked, so I prefer to have the Røde on top of the cage instead.

The black box on the top of the cage can easily be removed – I think it mainly serves to give some distance between the camera and the microphone, in case you want a microphone to be mounted on the top.

Review: Ulanzi G9-5 Metal Cage for GoPro 9 and GoPro 10
When you mount the Røde sender on the side of the cage, the power button on the left side of the GoPro cannot be accessed. I prefer to mount the Røde at the top of the cage instead.

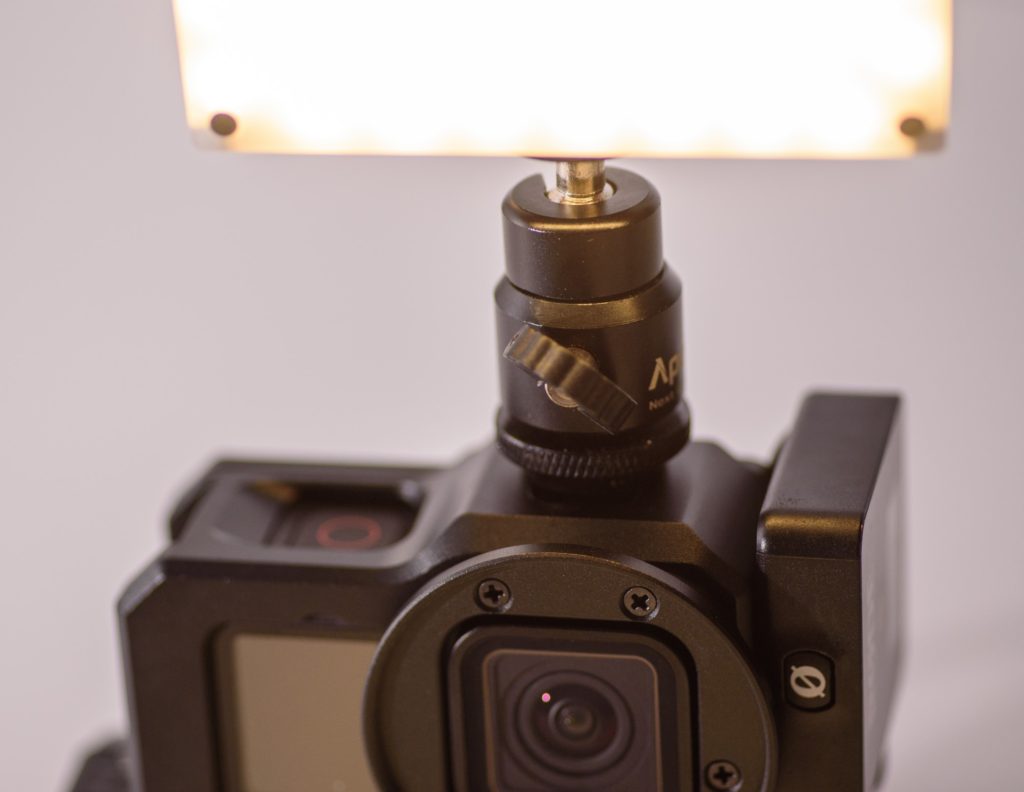
I have not really used the 2nd cold shoe, but I would imagine that a small light could go here to help out in case the ambient light does not suffice.

Review: Ulanzi G9-5 Metal Cage for GoPro 9 and GoPro 10
If you vlog where the ambient light is sparse, adding light to the setup could be a way to compensate. Here mounted on the top of the cage, on the side where the Røde sender sits is an alternative.

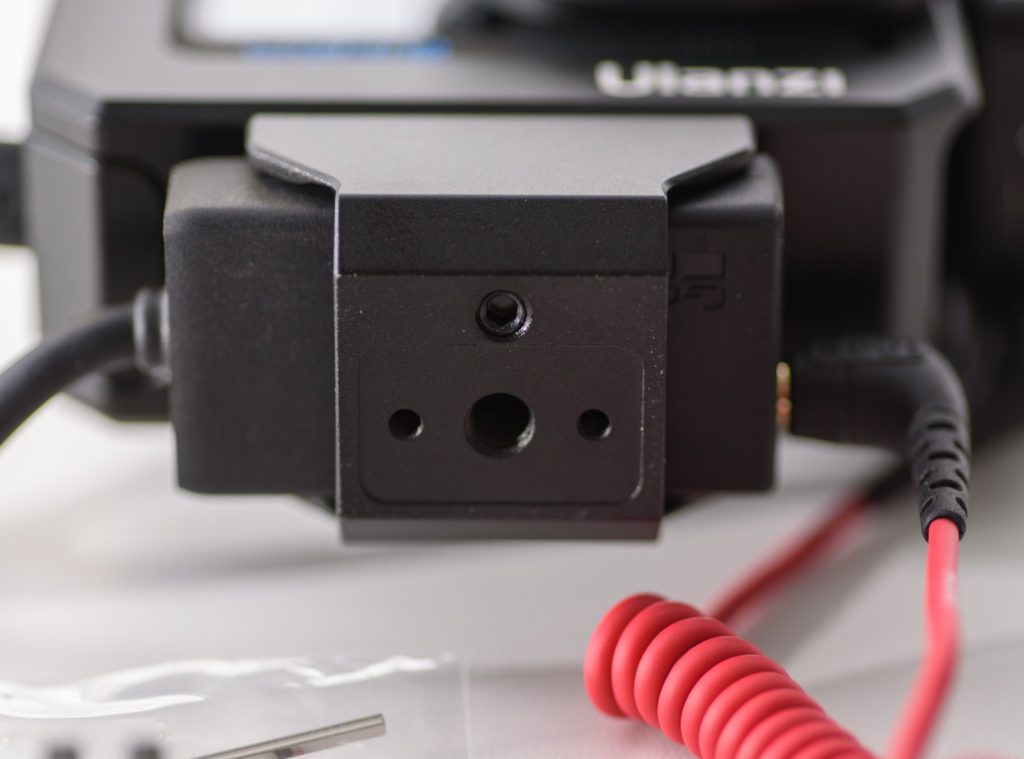
The final thing to do is mount the cage on a tripod or the like, and for this purpose there is a thread at the bottom of the cage, or more precisely at the bottom of the holder for the sound adapter.

Review: Ulanzi G9-5 Metal Cage for GoPro 9 and GoPro 10
At the bottom of the cage is a thread for mounting the cage on a tripod or the like. The two smaller threads on each side of the center thread is for fastening the traditional GoPro mount.

So with both the Røde and the sound adapter mounted on the cage, and the cage on a tripod or the like, you are ready for vlogging with all your bits and bobs well under control and your GoPro well protected.

Review: Ulanzi G9-5 Metal Cage for GoPro 9 and GoPro 10
The GoPro Hero 10 mounted in the cage and on a gorilla tripod ready for vlogging!

Conclusion

I really like this little no-nonsense product. It does exactly what I had expected it to. It protects the GoPro well, it gives access to vital buttons and contacts and it keeps track of the additional items that I need for sound and light. And then it enables you to mount filters in front of the lens and put the GoPro on a tripod out of the box.

The only problems that I see with this product is that it partly blocks the view to the front for LCD for vloggers that need to frame what they shoot while in front of the camera. And then the cage is not water or dust proof when you want to have access to the USB-C connector like me. But in all fairness, this is more due to GoPro that insist both an adapter and a connector is necessary to get the sound into the GoPro.

Price wise I find this product to be a bit on the steep side, but it is very well made and keeps a much more valuable product well protected. So I guess it is ok, but a bargain it is certainly not.

Shopping link

Buy the cage on Amazon here.

Related reading

Røde Wireless Go review

XTAR Camera Battery Charger Review


Review: Røde Wireless Go

Easy to use

It is seldom that I praise a product for being easy to use. Somehow, when everybody tells me a product is easy to use, I manage to find the wrong way to go about things, and a well designed easy to use product suddenly becomes complicated. Not so with the Røde wireless go. It is just plug and play – no need to pray!

Røde Wireless Go review
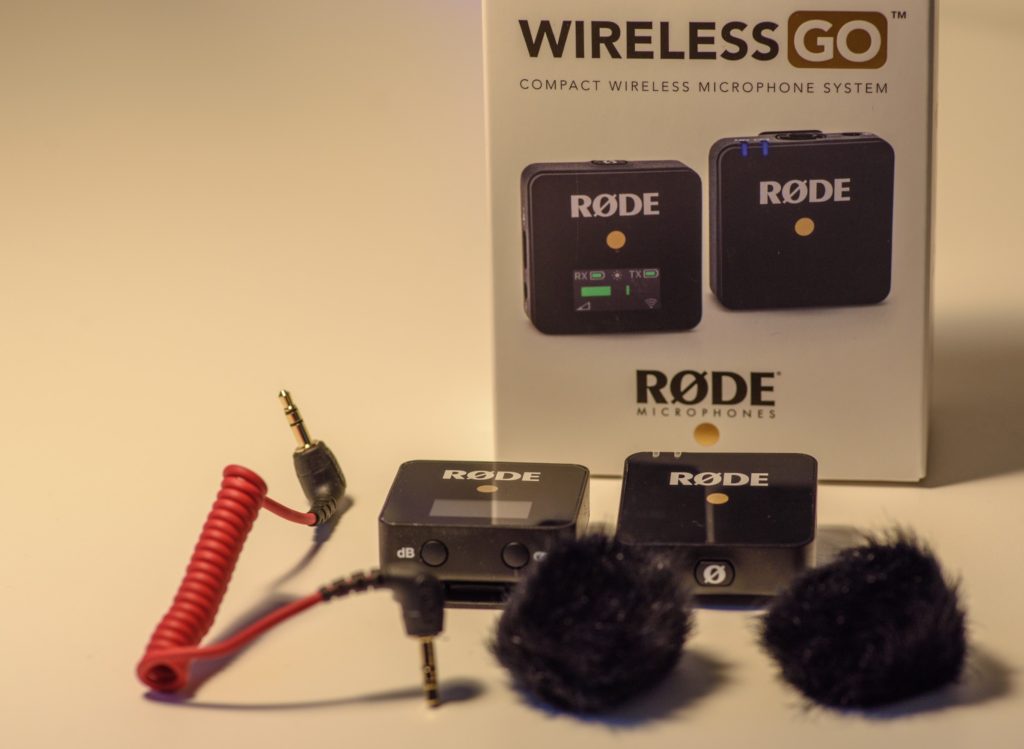
The essentials: A sender, a receiver, two dead cats and a connector cable from receiver to camera (red).

It consists of a sender unit, a receiver unit and a cable to go between the receiver and the camera. In addition there are two “dead cats” to mount on top of the sender, to reduce noise from wind and the like. The sound is then wirelessly transmitted in real time from the sender (with the mike) to the receiver. No cable to be tangled up with or other cumbersome things. A simple solution to getting the sound from a microphone in front of the camera, to the camera’s mike input connector.

Røde Wireless Go review
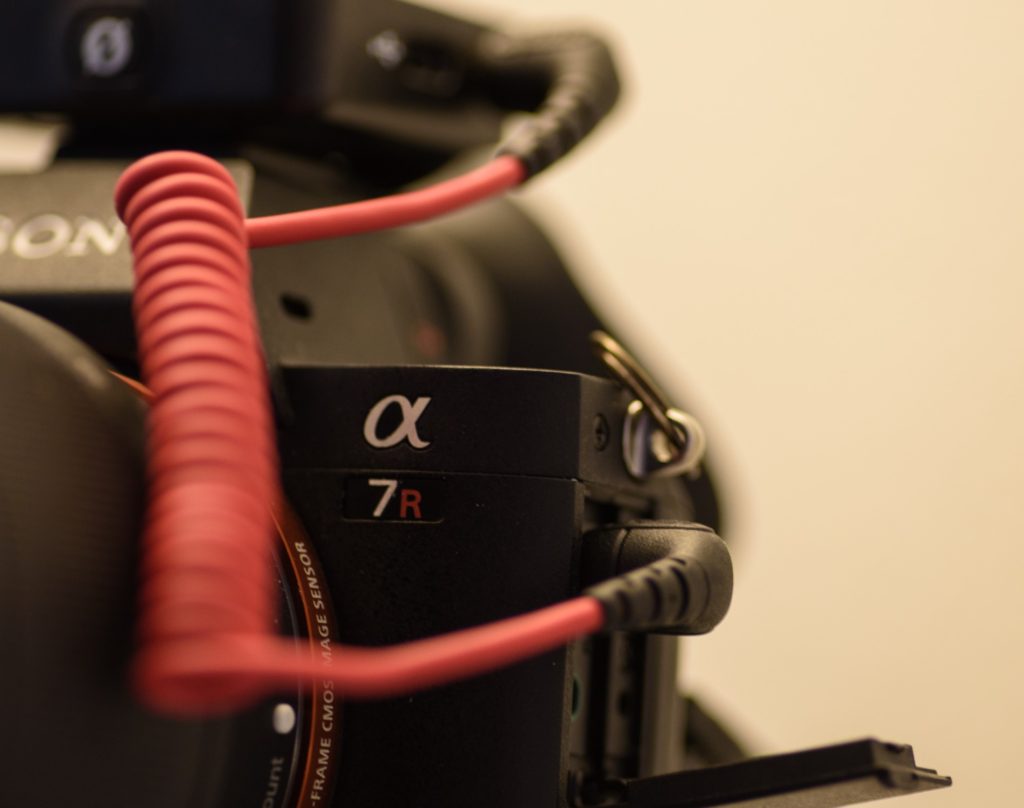
Here the red connector is applied between camera and Røde receiver. The receiver fits into the hot shoe of the camera. On my Sony A7Rii the receiver is not visually dominating at all.

The tin promises that this is an ultra compact wireless solution with digital transmission and a built in microphone. All this is true. The marketing department did not exaggerate at all.

Røde Wireless Go review
The tin promises digital transmission, built in microphone and a ultra-compact wireless setup. I tend to agree….

To activate the system, you hold in the button marked “ø” for a few seconds, and the units turn on. The sender and receiver connected the first time I turned them on. No need to pair them or the like. Brilliant!

Røde Wireless Go review
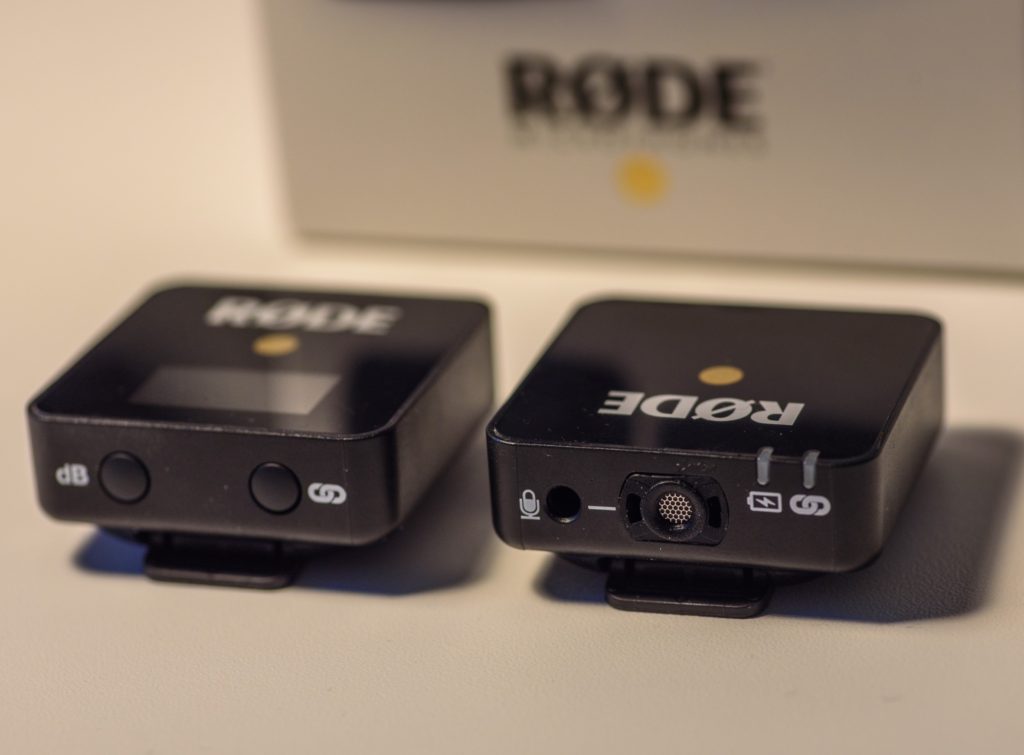
A microphone is built in. It does a good job, but if you want a more discrete microphone, use a small cabled microphone and hide the receiver in a pocket. The connector is left to the microphone on the right hand unit. The units measures approx. 4,3cm x 4,3cm x 1,3cm and seem really small.

The sender has a built in microphone, but I prefer not to use this one. The sound is great, but it requires that you have the unit close to the one speaking and hence very visible. The unit is small, but not very discrete when recording a video close up!

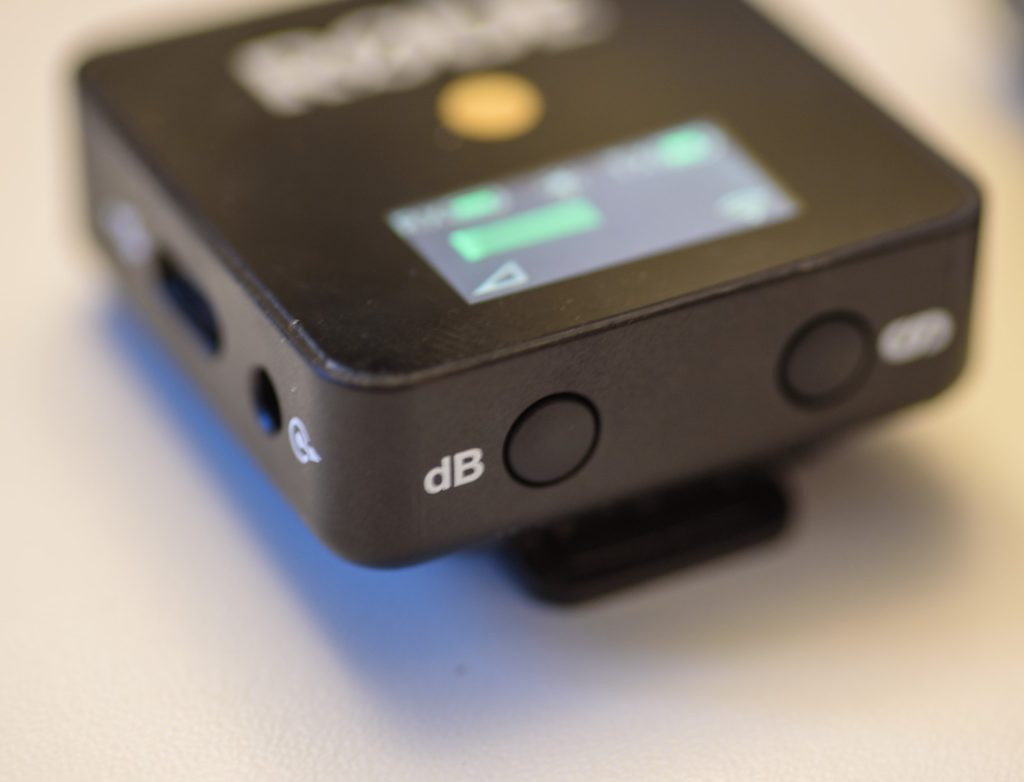
The DB button changes mike sensitivity. Toggle between high, medium and low. I always use medium.

You can regulate the sound level hitting the “dB” button. It circles between high, medium and low. I have only used the medium setting – it works fine and further adjustments can be made in post to fit your needs.

Røde Wireless Go review
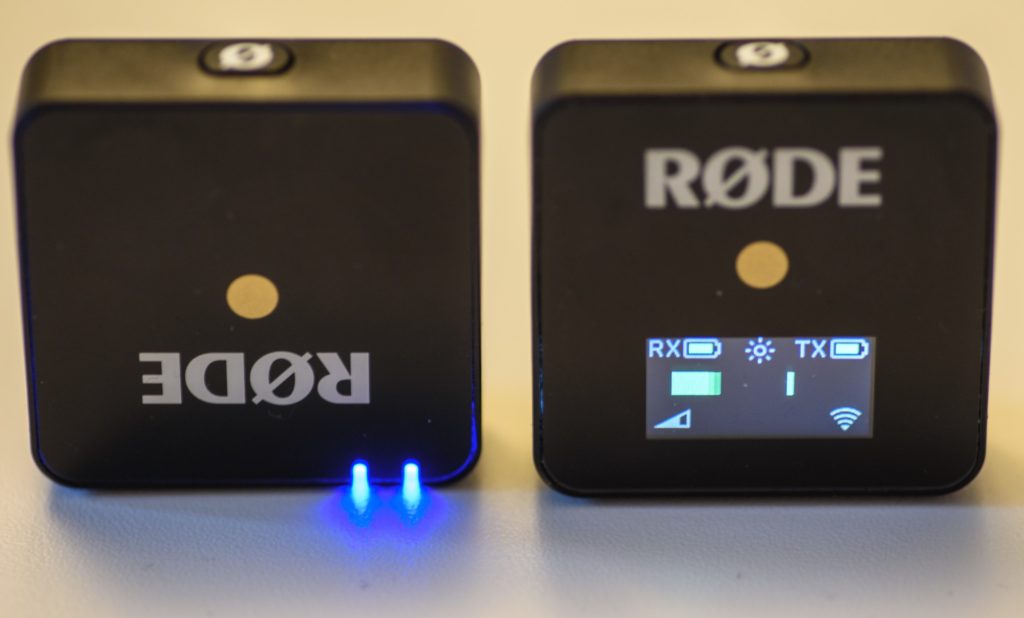
The receiver has a battery indicator display for both the sender and the receiver. The green bar in the middle is the sound level. Triangle bottom left shows the mike sensitivity and bottom right is the strength of the wireless communication.

The receiver unit has battery indicators for both the sender and the receiver, so there is no display on the sender. I seldom record for more than an hour at a time, and for my needs there has always been plenty of battery power on both sender and receiver, so for my needs battery power is more than sufficient.

Røde Wireless Go review
If you care to download the user guide (PDF) from the Røde homepage, you will find that it is short and informative. Here the description of buttons and display on the receiver unit. Credit: Røde.

Two blue diodes on the sender indicate if the sender is connected to the receiver and if it has sufficient battery. If you need more details, you need to consult the receiver.

In terms of connectivity I have not stress tested the connection, but recording a video recently where I was out and about with perhaps 10 meters distance between sender and receiver, I experienced no issues with the connectivity. Clear and crisp sound all the way with no dropouts or similar issues. It just works.

Røde Wireless Go review
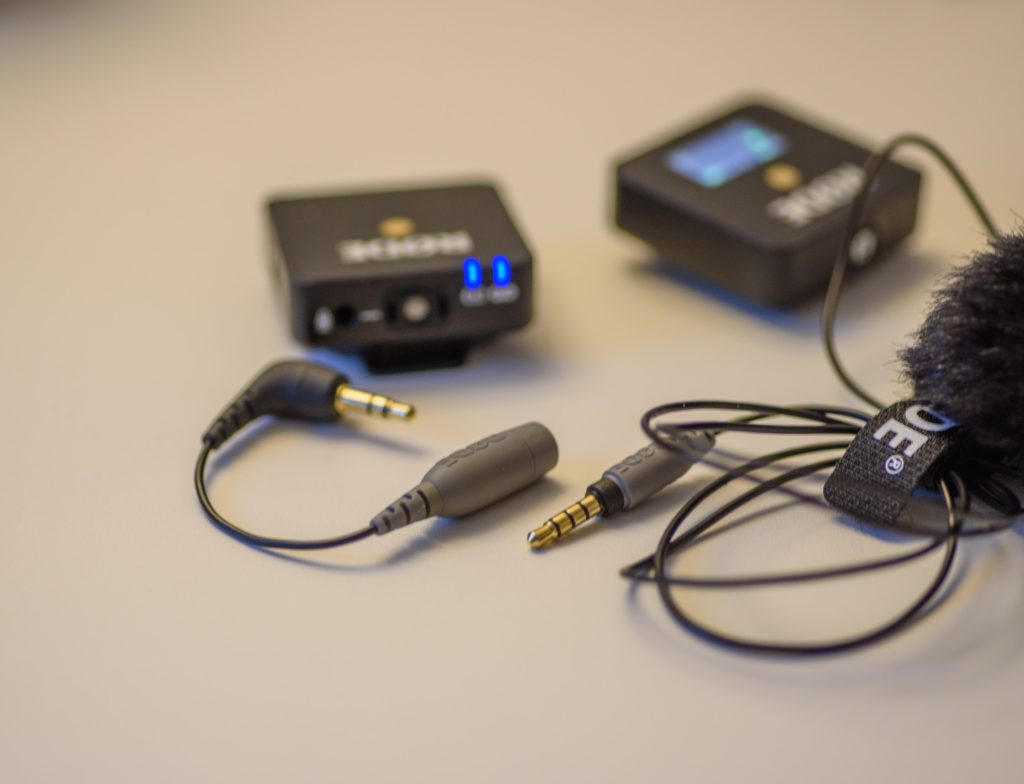
If you have a microphone with a TRRS connector (4 rings), it will not work with the sender. You need an adapter to take you from TRRS to TRS (3 rings).

The only thing that may be a bit tricky is the connector when you want to use your own microphone. The Røde Go system requires a TRS connector, and your microphone may have a TRRS connector. In that case, you need an adapter as shown in the image above. So count the number of rings on your connector, and if it is 4, then make sure to get an adapter when you order your copy of the Røde Go.

Røde Wireless Go review
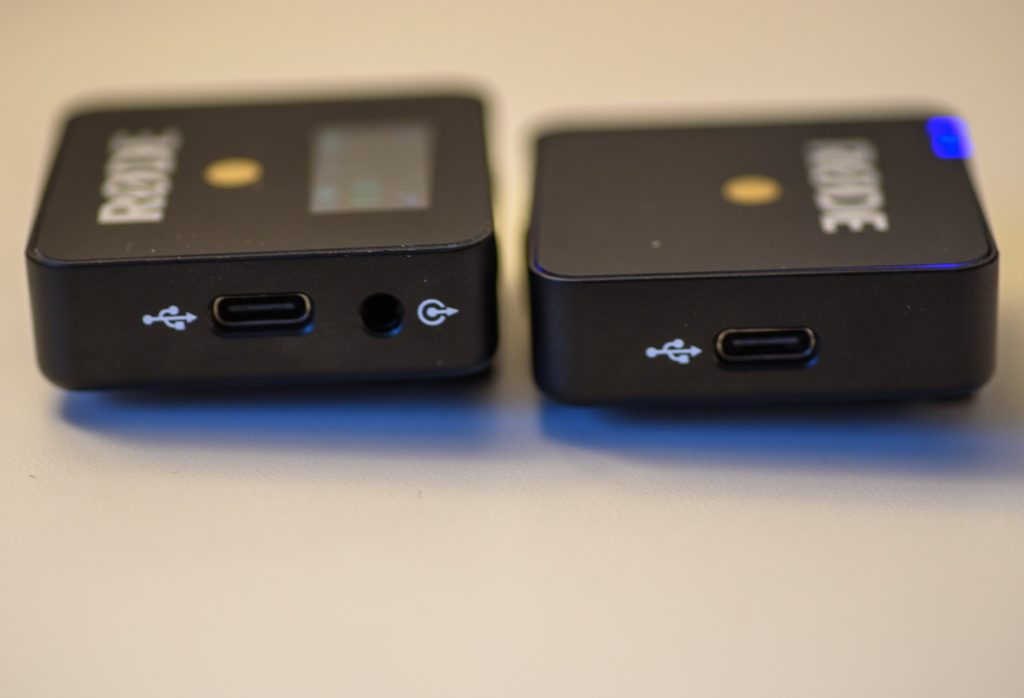
Both sender and receiver charge via USB-C. Brilliant!

A final thing that I want to bring up is the fact that both units charge via USB-C. I cannot underline the importance of industry standards and USB-C is exactly such one. I am so glad the Wireless Go comes with no chargers at all! Wonderful! If you knew how many chargers I have on stock for my cameras and flashes…. I welcome USB-C so very much. And of course also the USB to USB-C cables that came along with the Wireless Go system.

Conclusion

If you want a simple cable-free solution to transmit sound from a microphone in front of your camera to your cameras input port, this is a really easy to use and stable solution for exactly that need. Just make sure you have an adapter if your microphone has a TRRS connector.

The solution reviewed here is not applicable if you want to record an interview or other situations where several channels need to be recorded in parallel. I believe Røde also has a more advanced solution for such situations, but that is not the product reviewed here.

I have used this solution for my YouTube videos and for my needs (walking and talking in front of a camera), this solution fits my needs spot on. It is simple to use, stable and with good connectivity. Exactly what I need, for less than 100 EUR. Highly recommended.

Related reading

XTAR Camera Battery Charger Review

COLBOR CL100 Video light review

Review: XTAR Camera Battery Charger

I must admit that I did not know of the company XTAR until they reached out to me and asked me to review the XTAR Camera Battery Charger. Apparently XTAR was Founded in 2006 as an electronic technology company in Shenzhen that specializes in development and manufacture of Li-ion batteries, smart chargers, and LED flashlights. Always good to have a product from a true specialist, so I happily accepted to review the product.

I did not know the city Shenzhen either, but apparently the city is located in the Guangdong Province, China, and according to google is a modern metropolis that links Hong Kong to China’s mainland. The 600m tall skyscraper Ping An certainly gives the city skyline a distinctive look.

Chargers, chargers and chargers

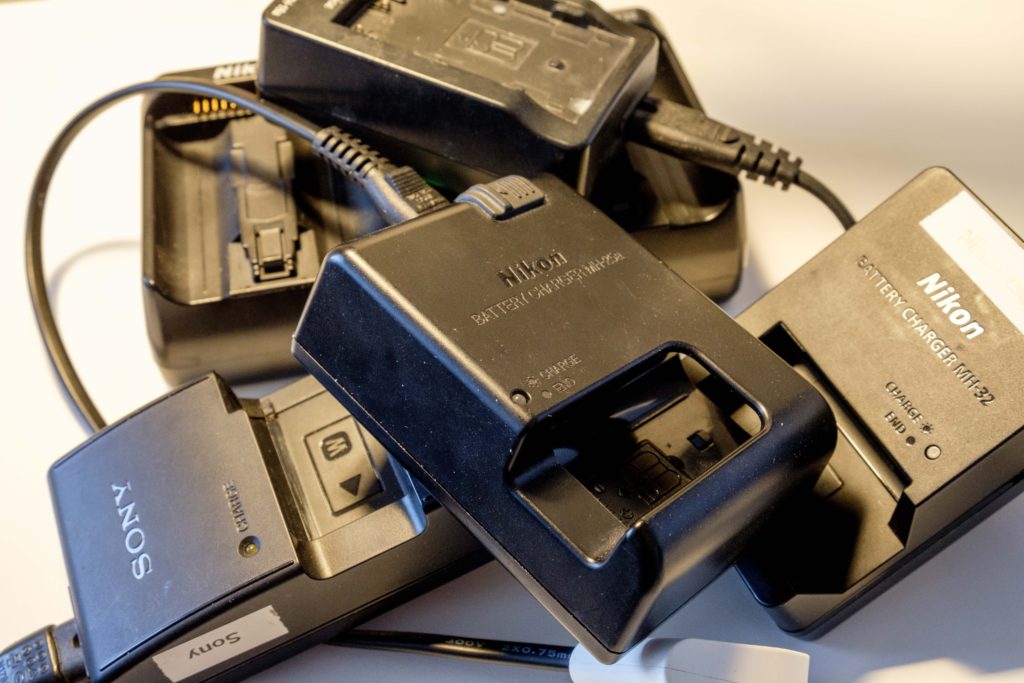
Some of the chargers that came with my cameras… All different in size, shape and how they work…

If you like me have a few cameras, then you also know that each of them comes with a separate charger, and even if you stay with the same camera brand, they tend to change the battery type and format over time, as the batteries get more and more powerful (and the cameras more and more power demanding). So it is a mess. And you have to remember the right charger(s) for your camera(s) when you travel and it all takes up space in your backpack.

I believe EU is working on legislation to make USB-C the common standard for chargers, and I really welcome this initiative, but when you like to buy cameras that are a bit dated (like the Nikon D750), then short term this is not much help. This is where the charger from XTAR can help you out.

XTAR solution

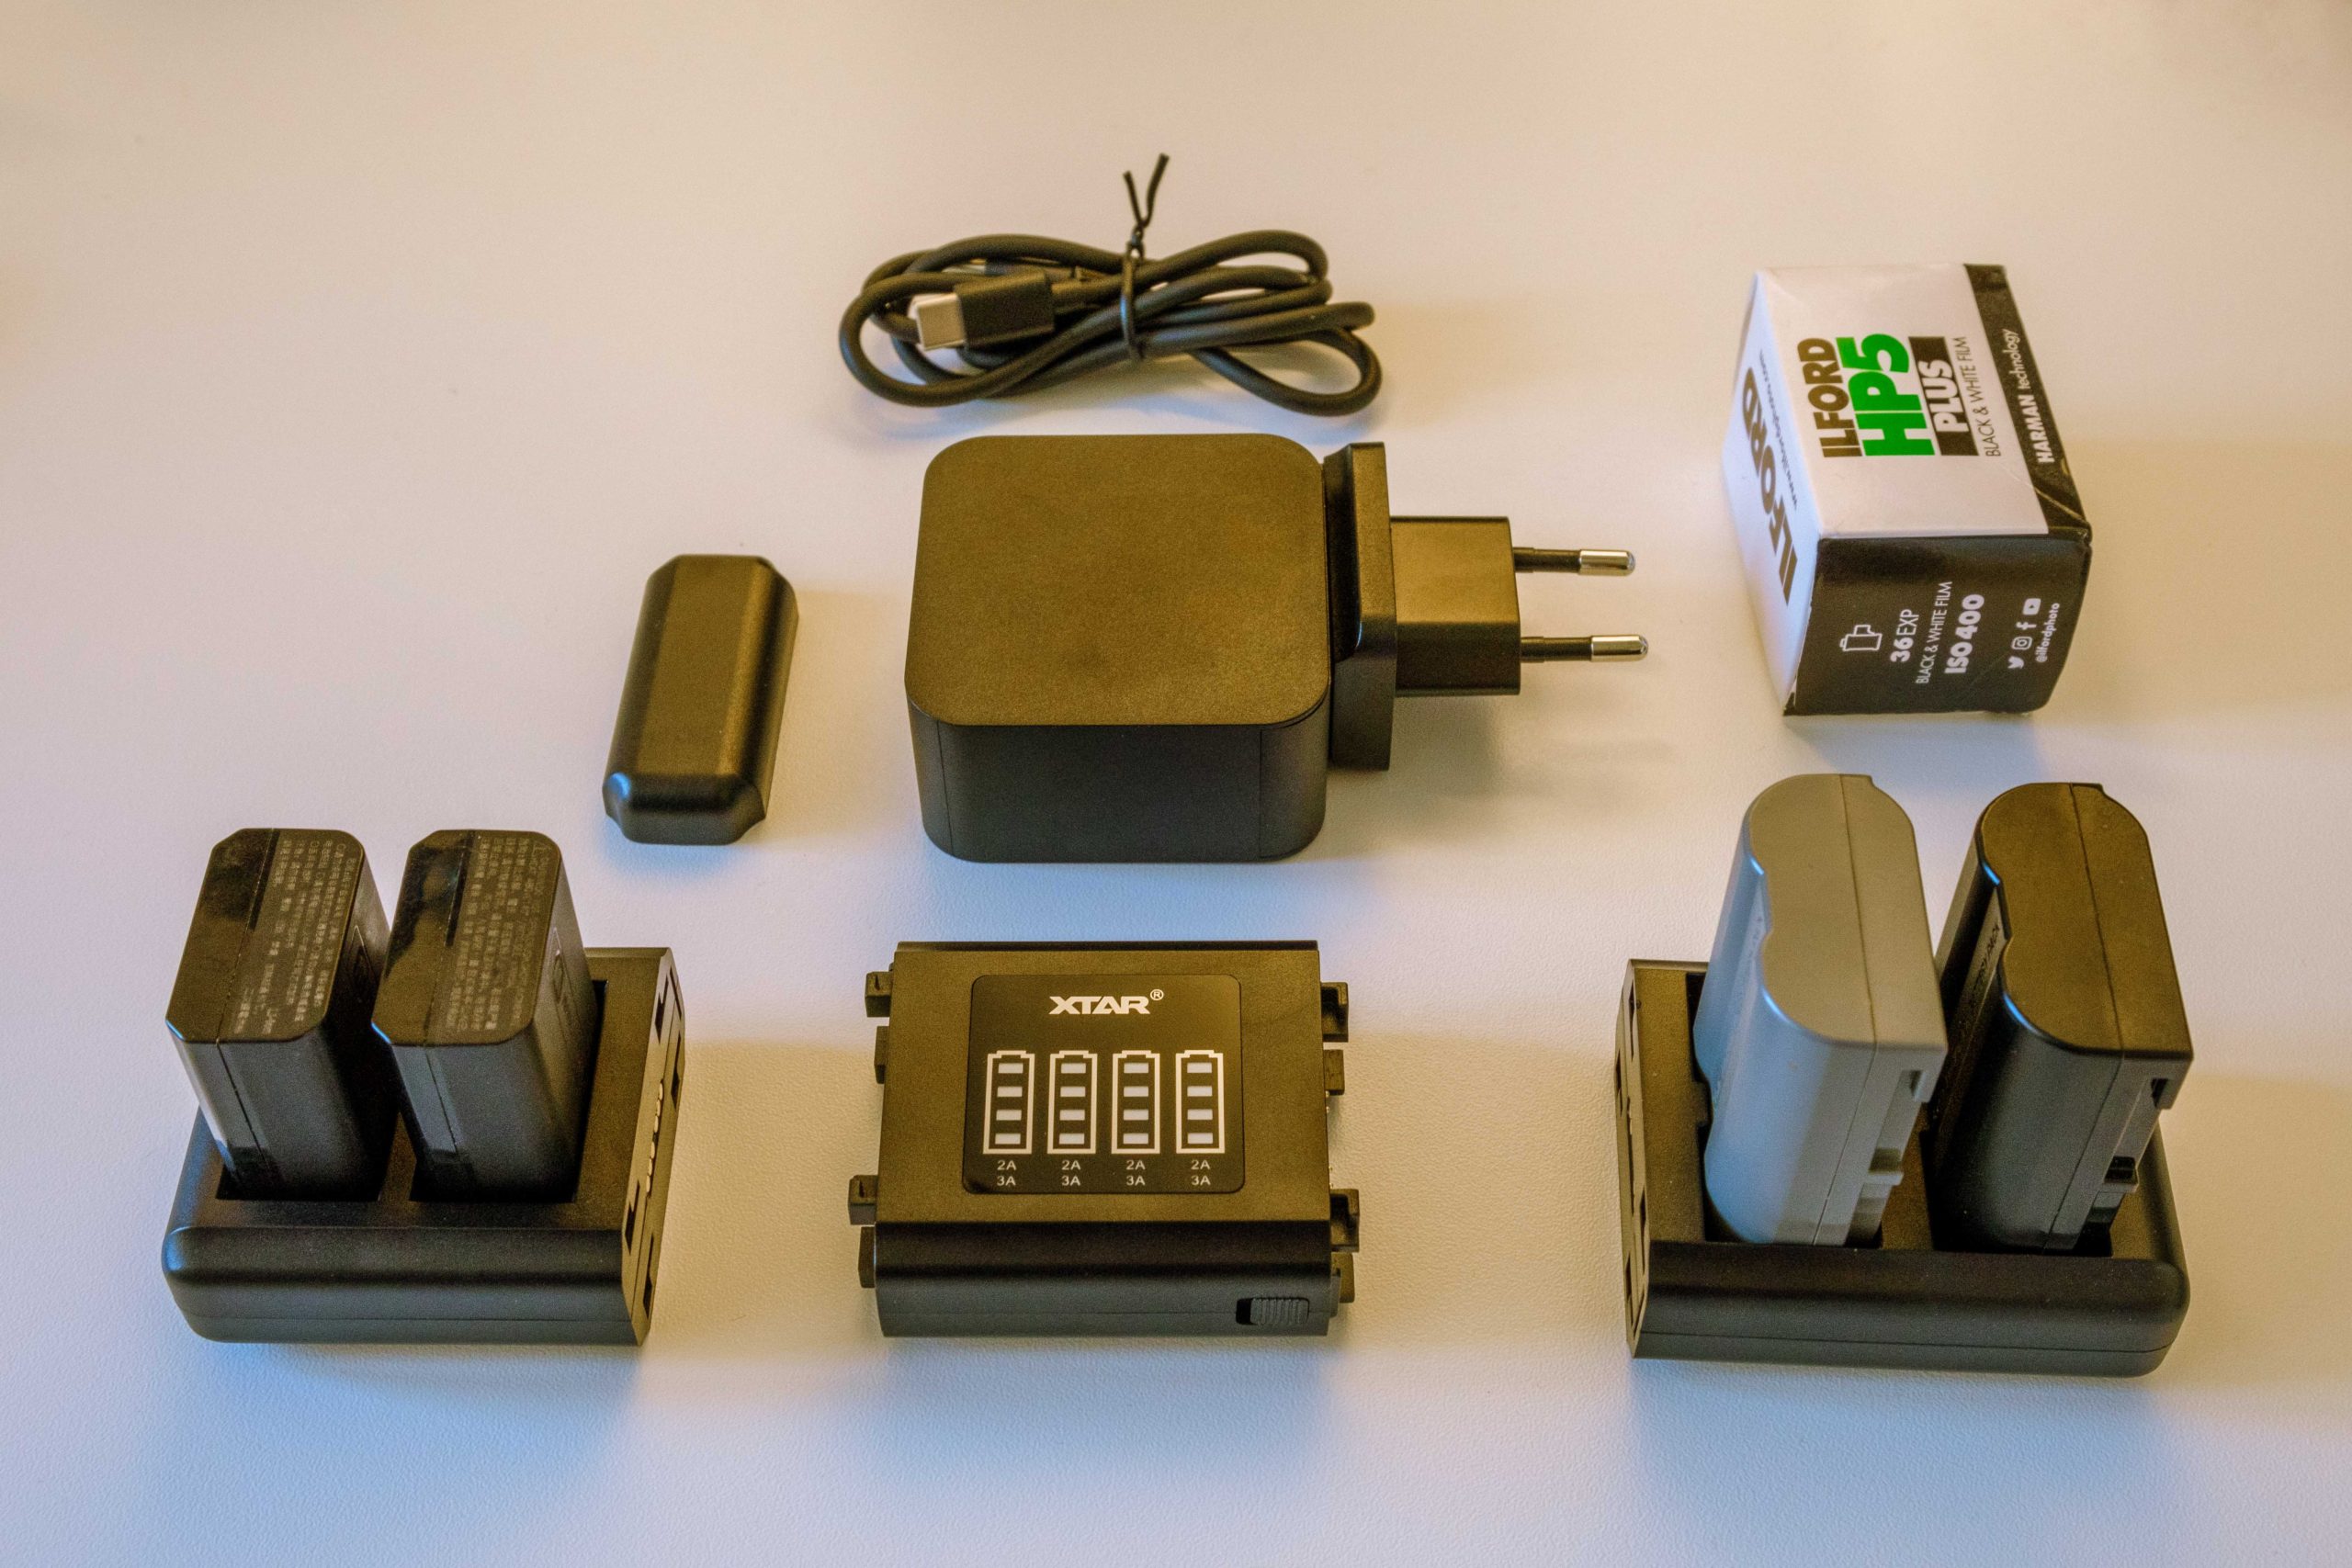
The XTAR charger is named SN4 and is in the bottom center of the image below. This is the backbone in the solution. A bit like Lego, you can click different types of so called charger plates onto the SN4. Each charger plate takes 2 batteries of the same kind, and the SN4 can take either 1 or 2 charger plates.

In the example below I have disassembled the SN4 from the charger plates, so you have a charger plate that fits Sony batteries (NP-FW50) bottom left, and a charger plate for Nikon batteries (EN-EL15) bottom right.

The XTAR SN4 is in the center bottom. The 35mm film top right (Ilford) is just to give you a feel for the size of the charger.

The SN4 takes a USB-C cable as input (yay!) and can be charged via the power supply from XTAR, named C45IC. It will give you a whopping 45 watts (!). In the image above it is show in the middle, just below the USB cable in the top.

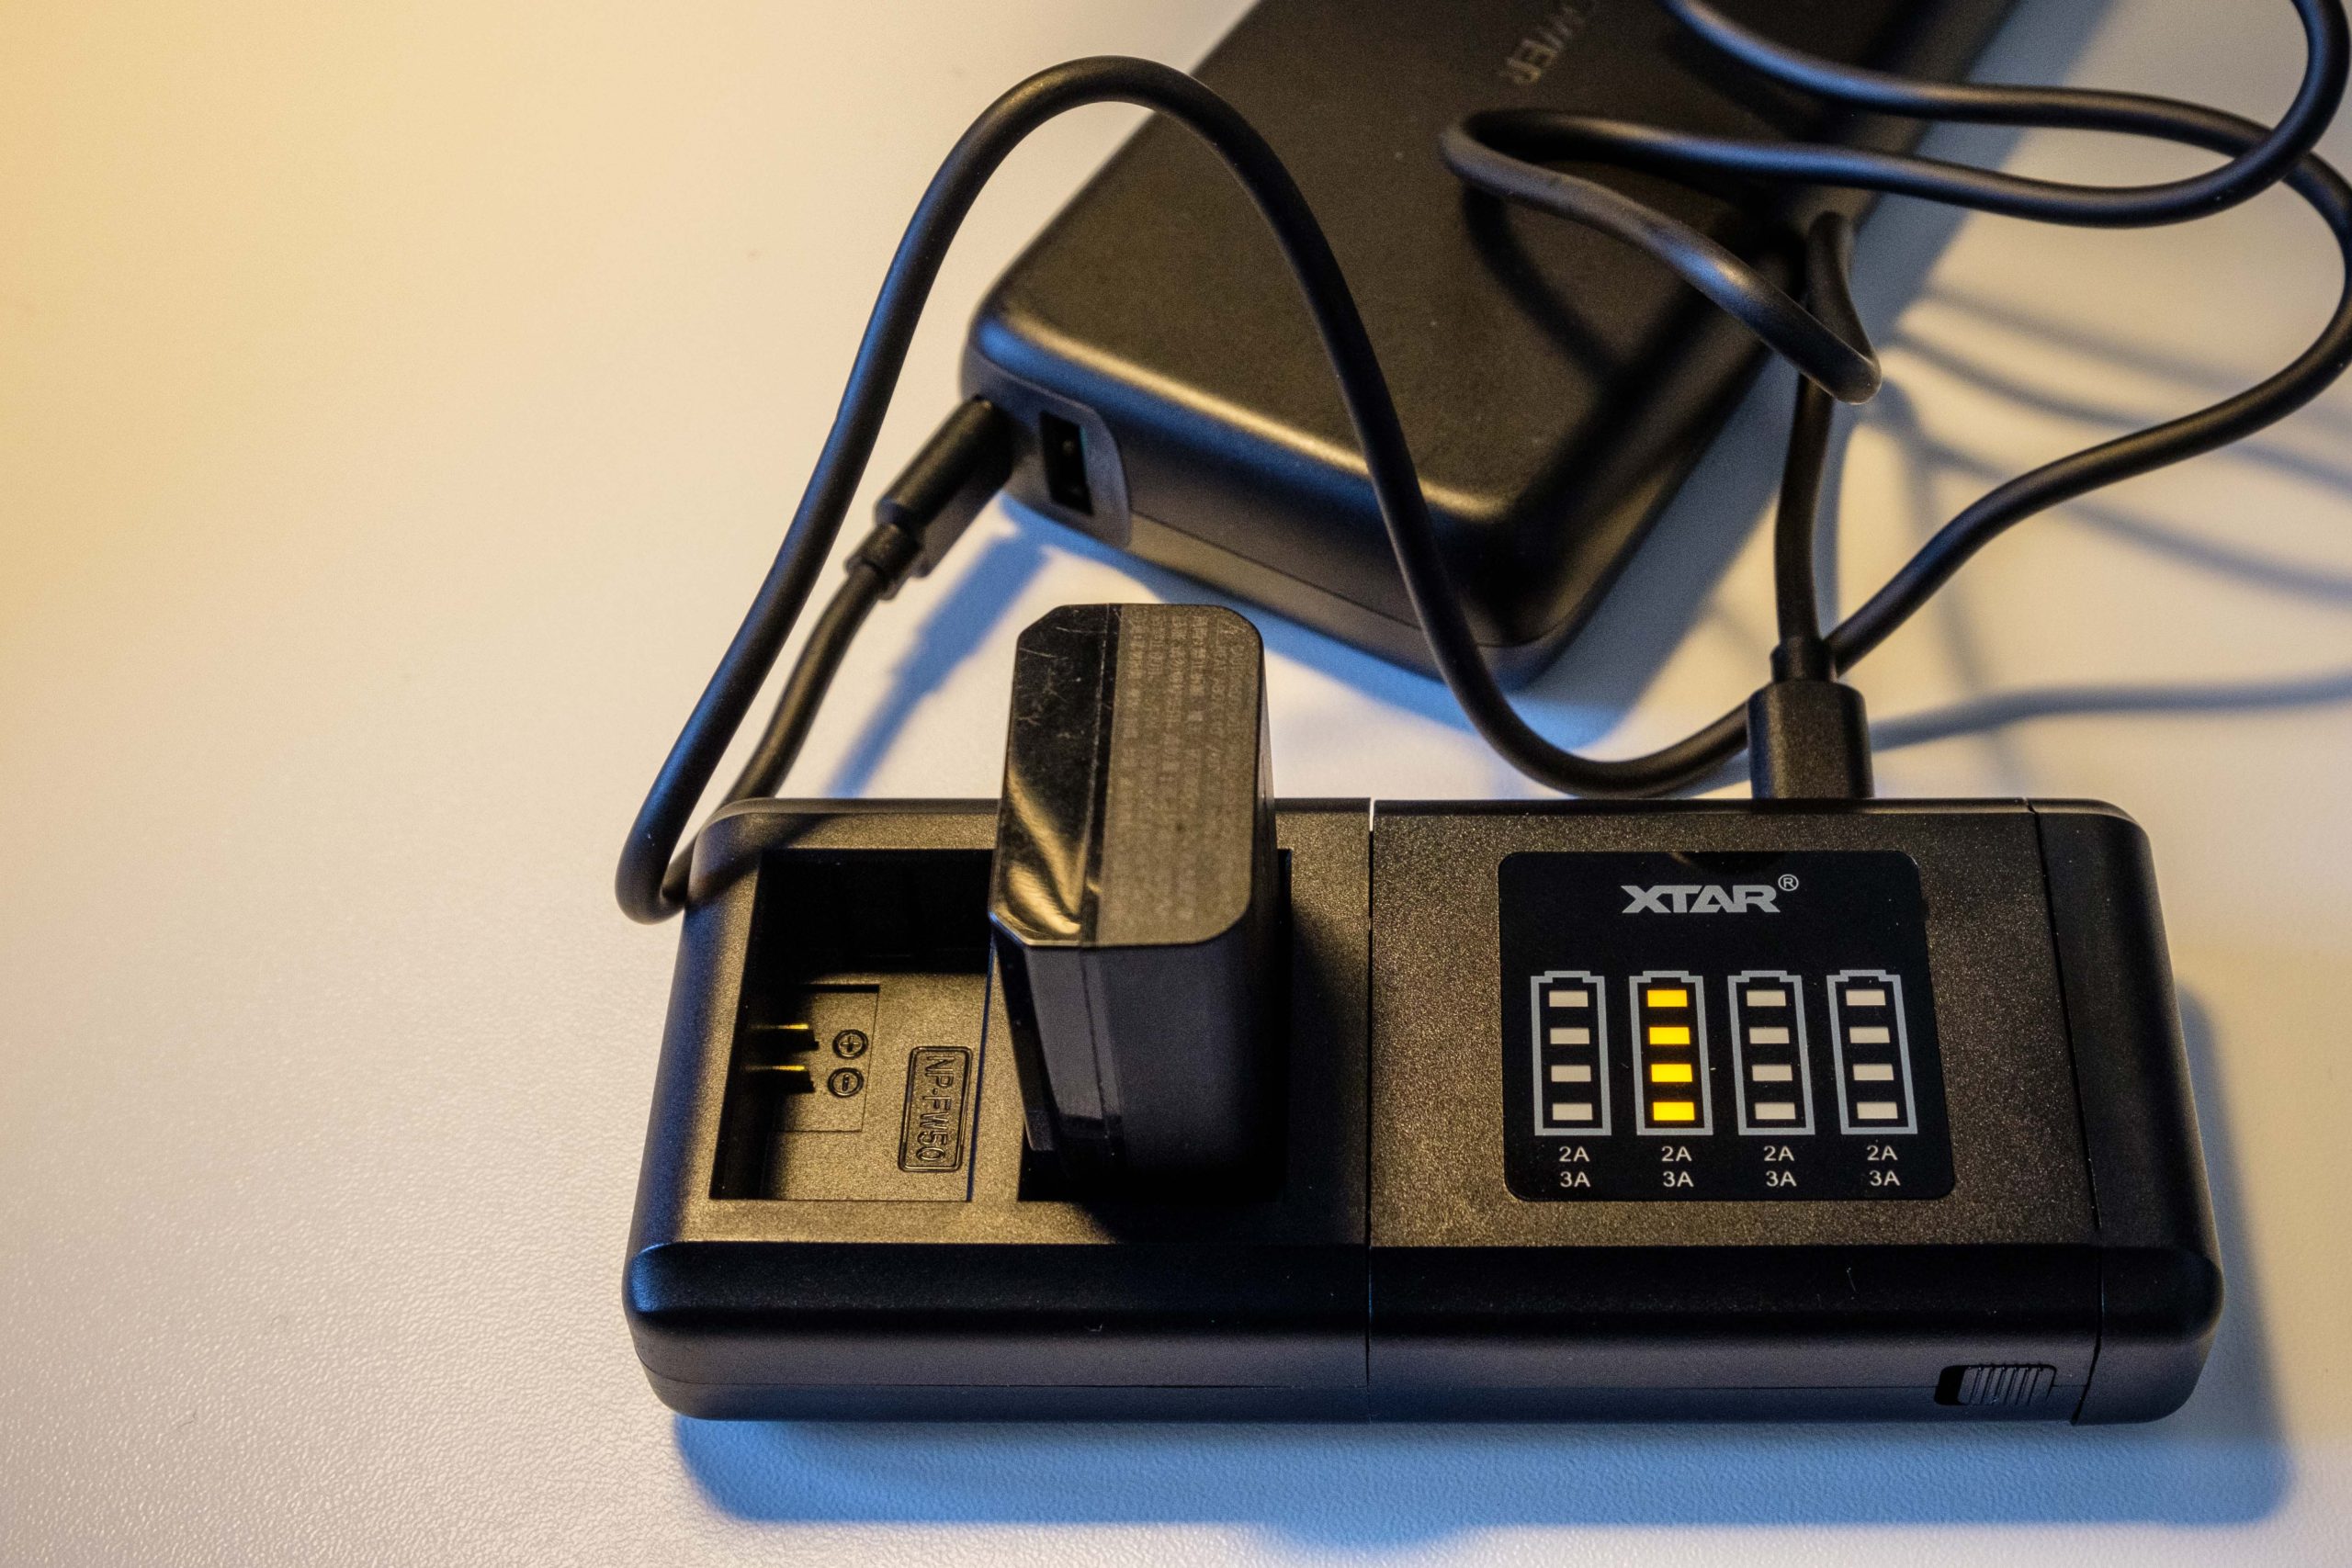
Charging using a power bank as power source.

You don’t necessarily need the charger – you can use any USB-C capable power supply to feed the charger, but be aware that it may not give it all the juice it needs to charge the batteries as fast as it would with the XTAR power supply. In the image above I use a power bank to feed the charger.

If you look carefully, you can see the words NP-FW50 in the empty battery dock, so this one takes batteries for Sony cameras (I have the A7Rii). Also notice that I have only used half of the SN4 potential, as the right hand side has the plastic blind mounted.

When charger plates are mounted on both sides, it looks like the image below. Here I have Sony batteries left and Nikon right.

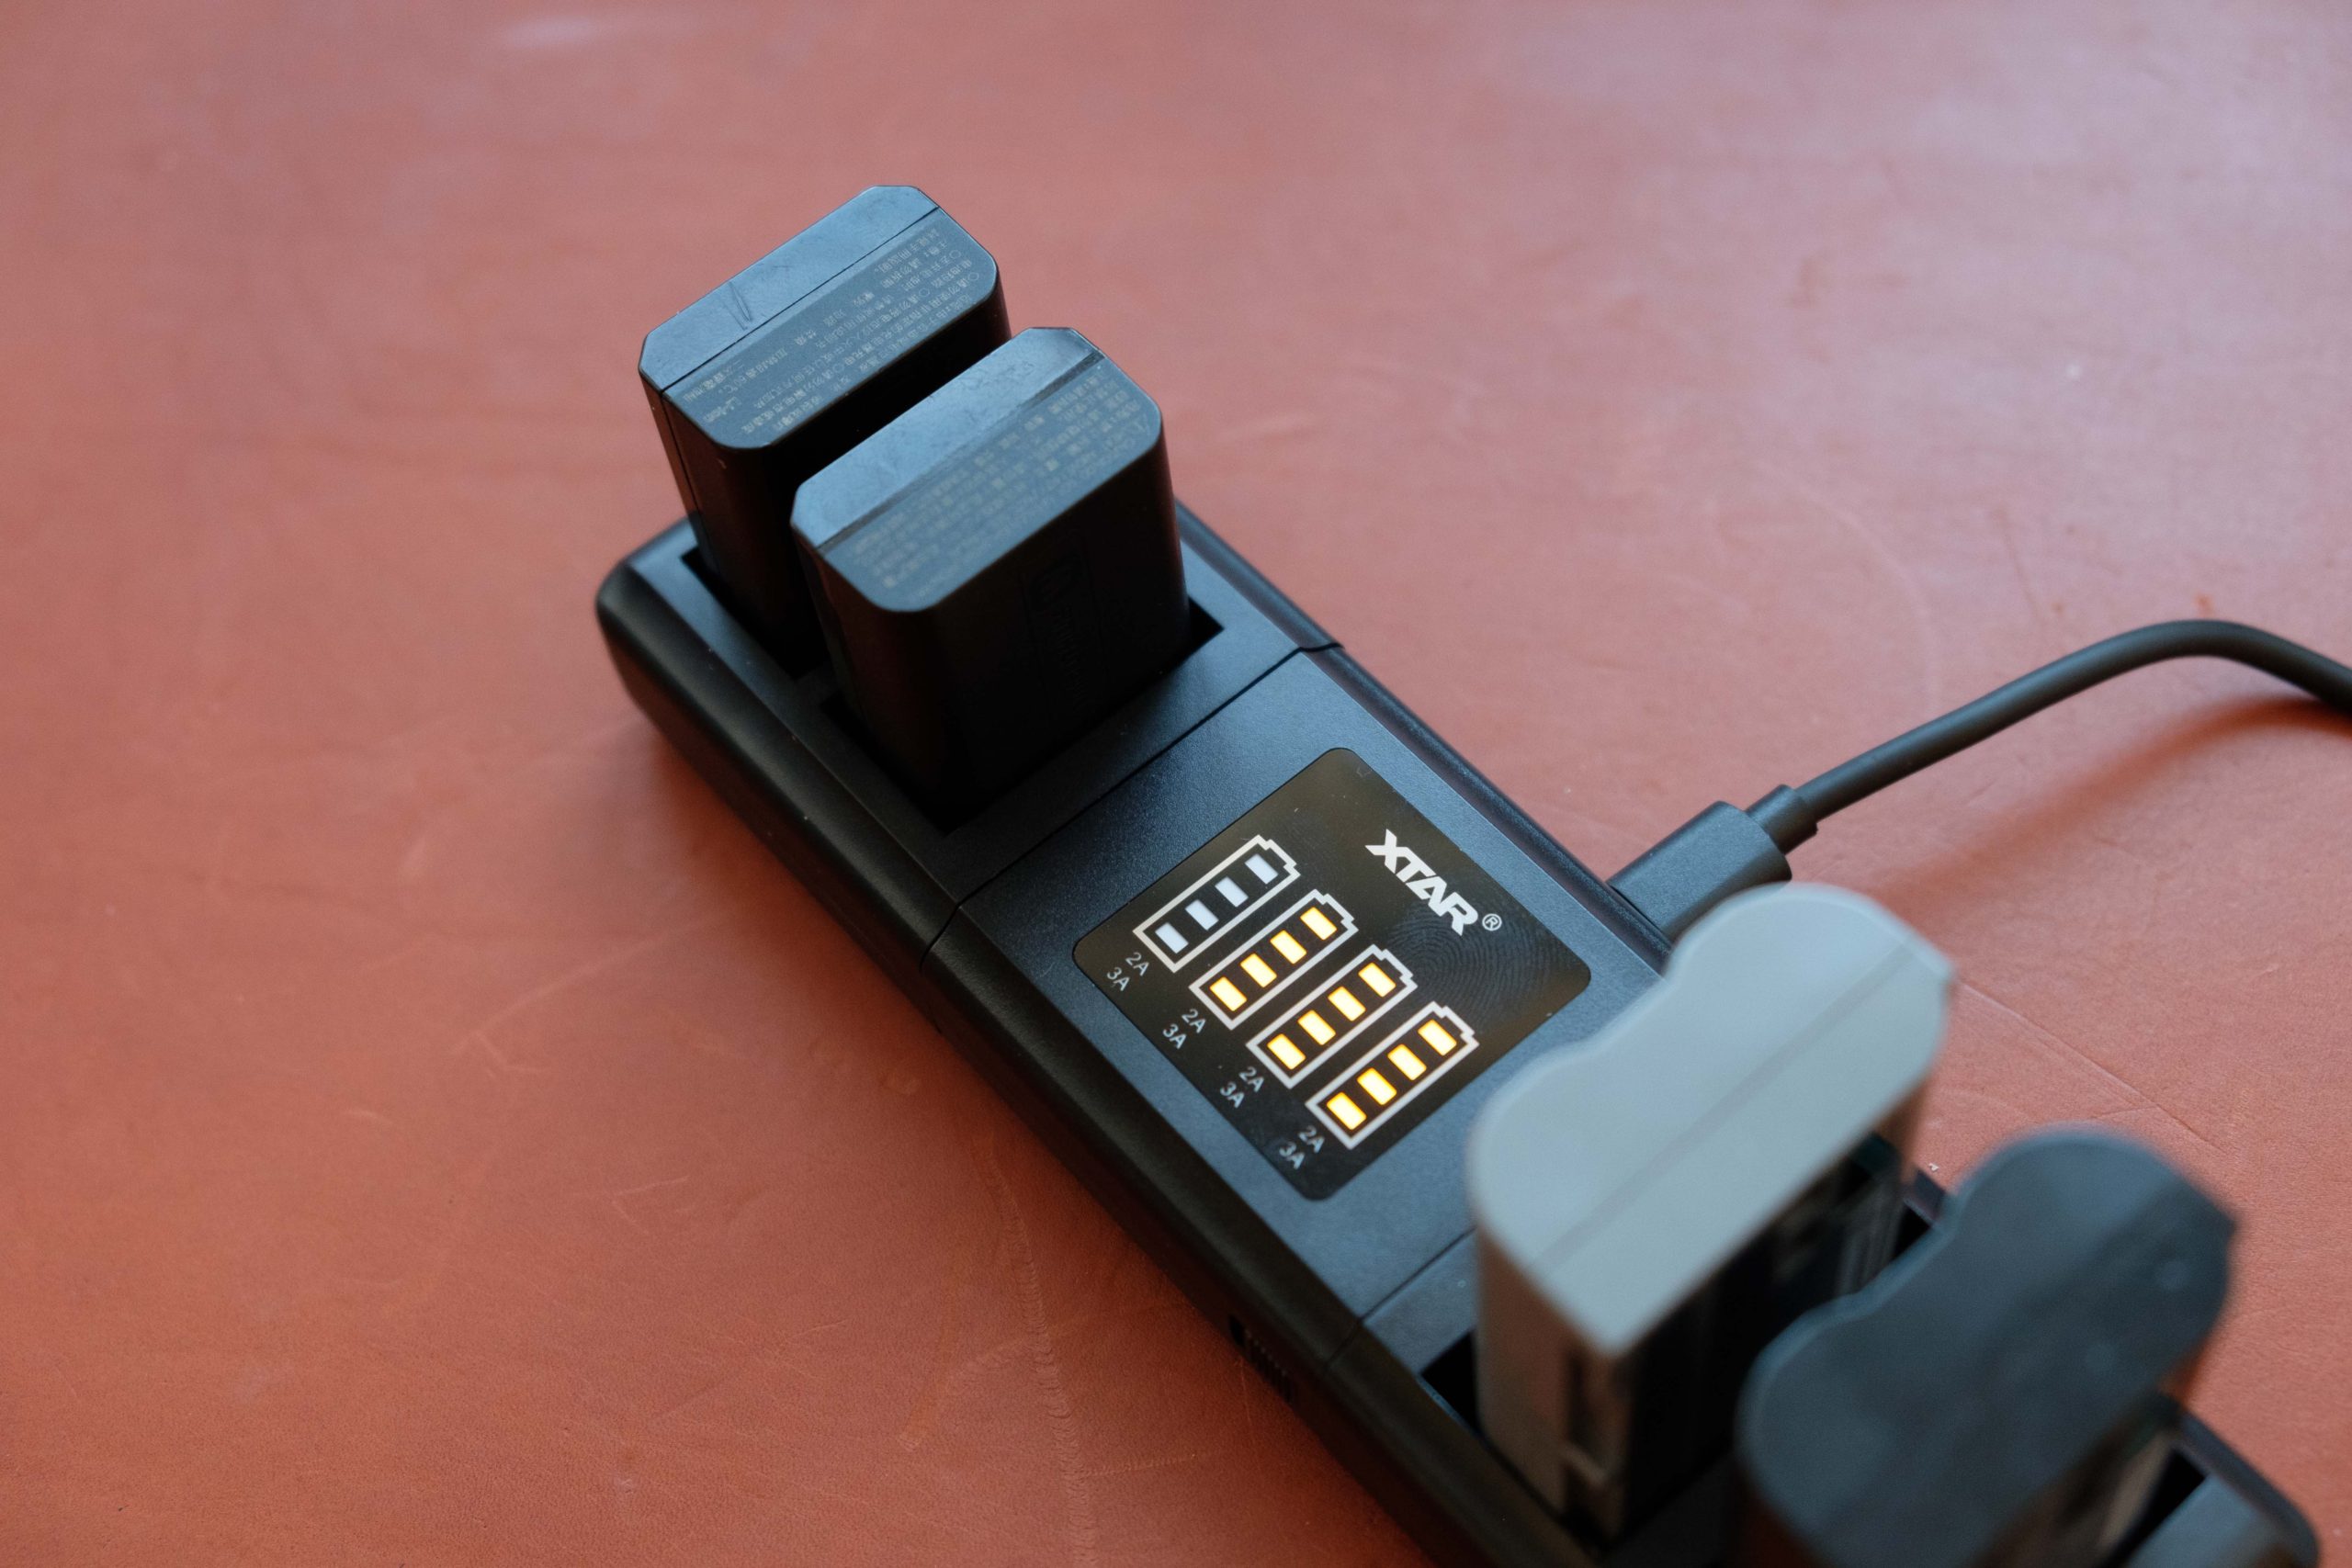
3 batteries almost fully charged. The fourth one is filled up (lights out).

Most of my chargers simply has a single LED that tells me if the charging is ongoing or complete. The XTAR is more advanced to say the least. For each of the 4 batteries there are 4 bars showing how the charging progresses. A solid light means the level is done, a flashing light means work in progress. When the battery is almost charged all 4 bars light up as in the image above, and once the charge is complete, all bars are turned of as shown leftmost.

In addition there is indicators below the bars showing how much current the battery gets (2A and 3A), albeit turned off when current is low.

XTAR claims that their charger is both faster and more gentle to the batteries relative to the chargers that comes with the batteries. This should give you less wait time and prolong the battery life time. I have not tested this as I normally put my batteries to charge over the night and hence the speed is of less importance to me. What is much more important to me is the ability to charge several batteries in parallel, and here I can charge 4 Sony batteries at the same time, provided I have the right charger plates.

Charger plates

XTAR currently deliver charger plates for Sony, Nikon and Canon.  You can find the full list of available options here if you scroll down to the bottom of the page to see if your specific battery is supported.

There are plans to develop charger plates for Fuji, GoPro, Olympus, Panasonic and more. I will be waiting for the Fuji charger plates, as my beloved X-T20 is very happy to consume batteries at a fast pace!

Prices

You can find the current prices available directly from XTAR here. Here in October 2021 you can get the SN4 plus 1 charger plates (2 battery slots) and a USB cable for 39 USD. If you add a charger plate, it is an addition 10 USD, but then you have 2 charger plates (4 battery slots for 2 different batteries). If you want the power supply on top, it is an additional 20 USD.

If you want to go all in and have both a carry bag, SN4, power supply, 3 charger plates and a Sony charger plate F970, then the total will set you back 89 USD.

You can buy directly from XTAR as per the link above, but there are also many retailers that sell the XTAR products if that is to your liking.

Conclusion

While we wait for USB-C to become the standard way to charge a battery or charge a camera, the solution from XTAR certainly takes a good step in the right direction. It is a very compact and flexible solution, that will enable you to travel with a much smaller setup when it comes to chargers. And then it gives you better information as the charging progresses, plus you can charge up to 4 batteries in parallel.

In addition you can do without the power supply, as XTAR gave the SN4 a USB-C interface. This is where I find the solution changes from good to great. Provided you have a power bank or any other device that yields power via a USB-C interface, you can leave the power supply at home as well.

Prices seems fair. You are up and running for less than 50 USD with a 4 battery charge solution. I will happily pay that for a solution that makes my photography life more simple. And this one does. My only gripe is that I really hope XTAR come with a solution for Fuji batteries very soon! Other than that, I can recommend this solution if your pile of chargers is a nuisance to you.


Related reading

RAVPower PD Pioneer Power Bank Review

COLBOR CL100 Video light review


Review: COLBOR CL100 Video light

Review of the video light COLBOR CL100.

Price

At 199 USD this is certainly one of the more affordable video lights. I do have to admit that COLBOR sent me this product for review, but they did not put any constraints on me or what I write in this review!

The build quality is not up there with the high end models, but as long as it gets the job done, I have no complaints. The buttons and dials actually feels ok.

Use

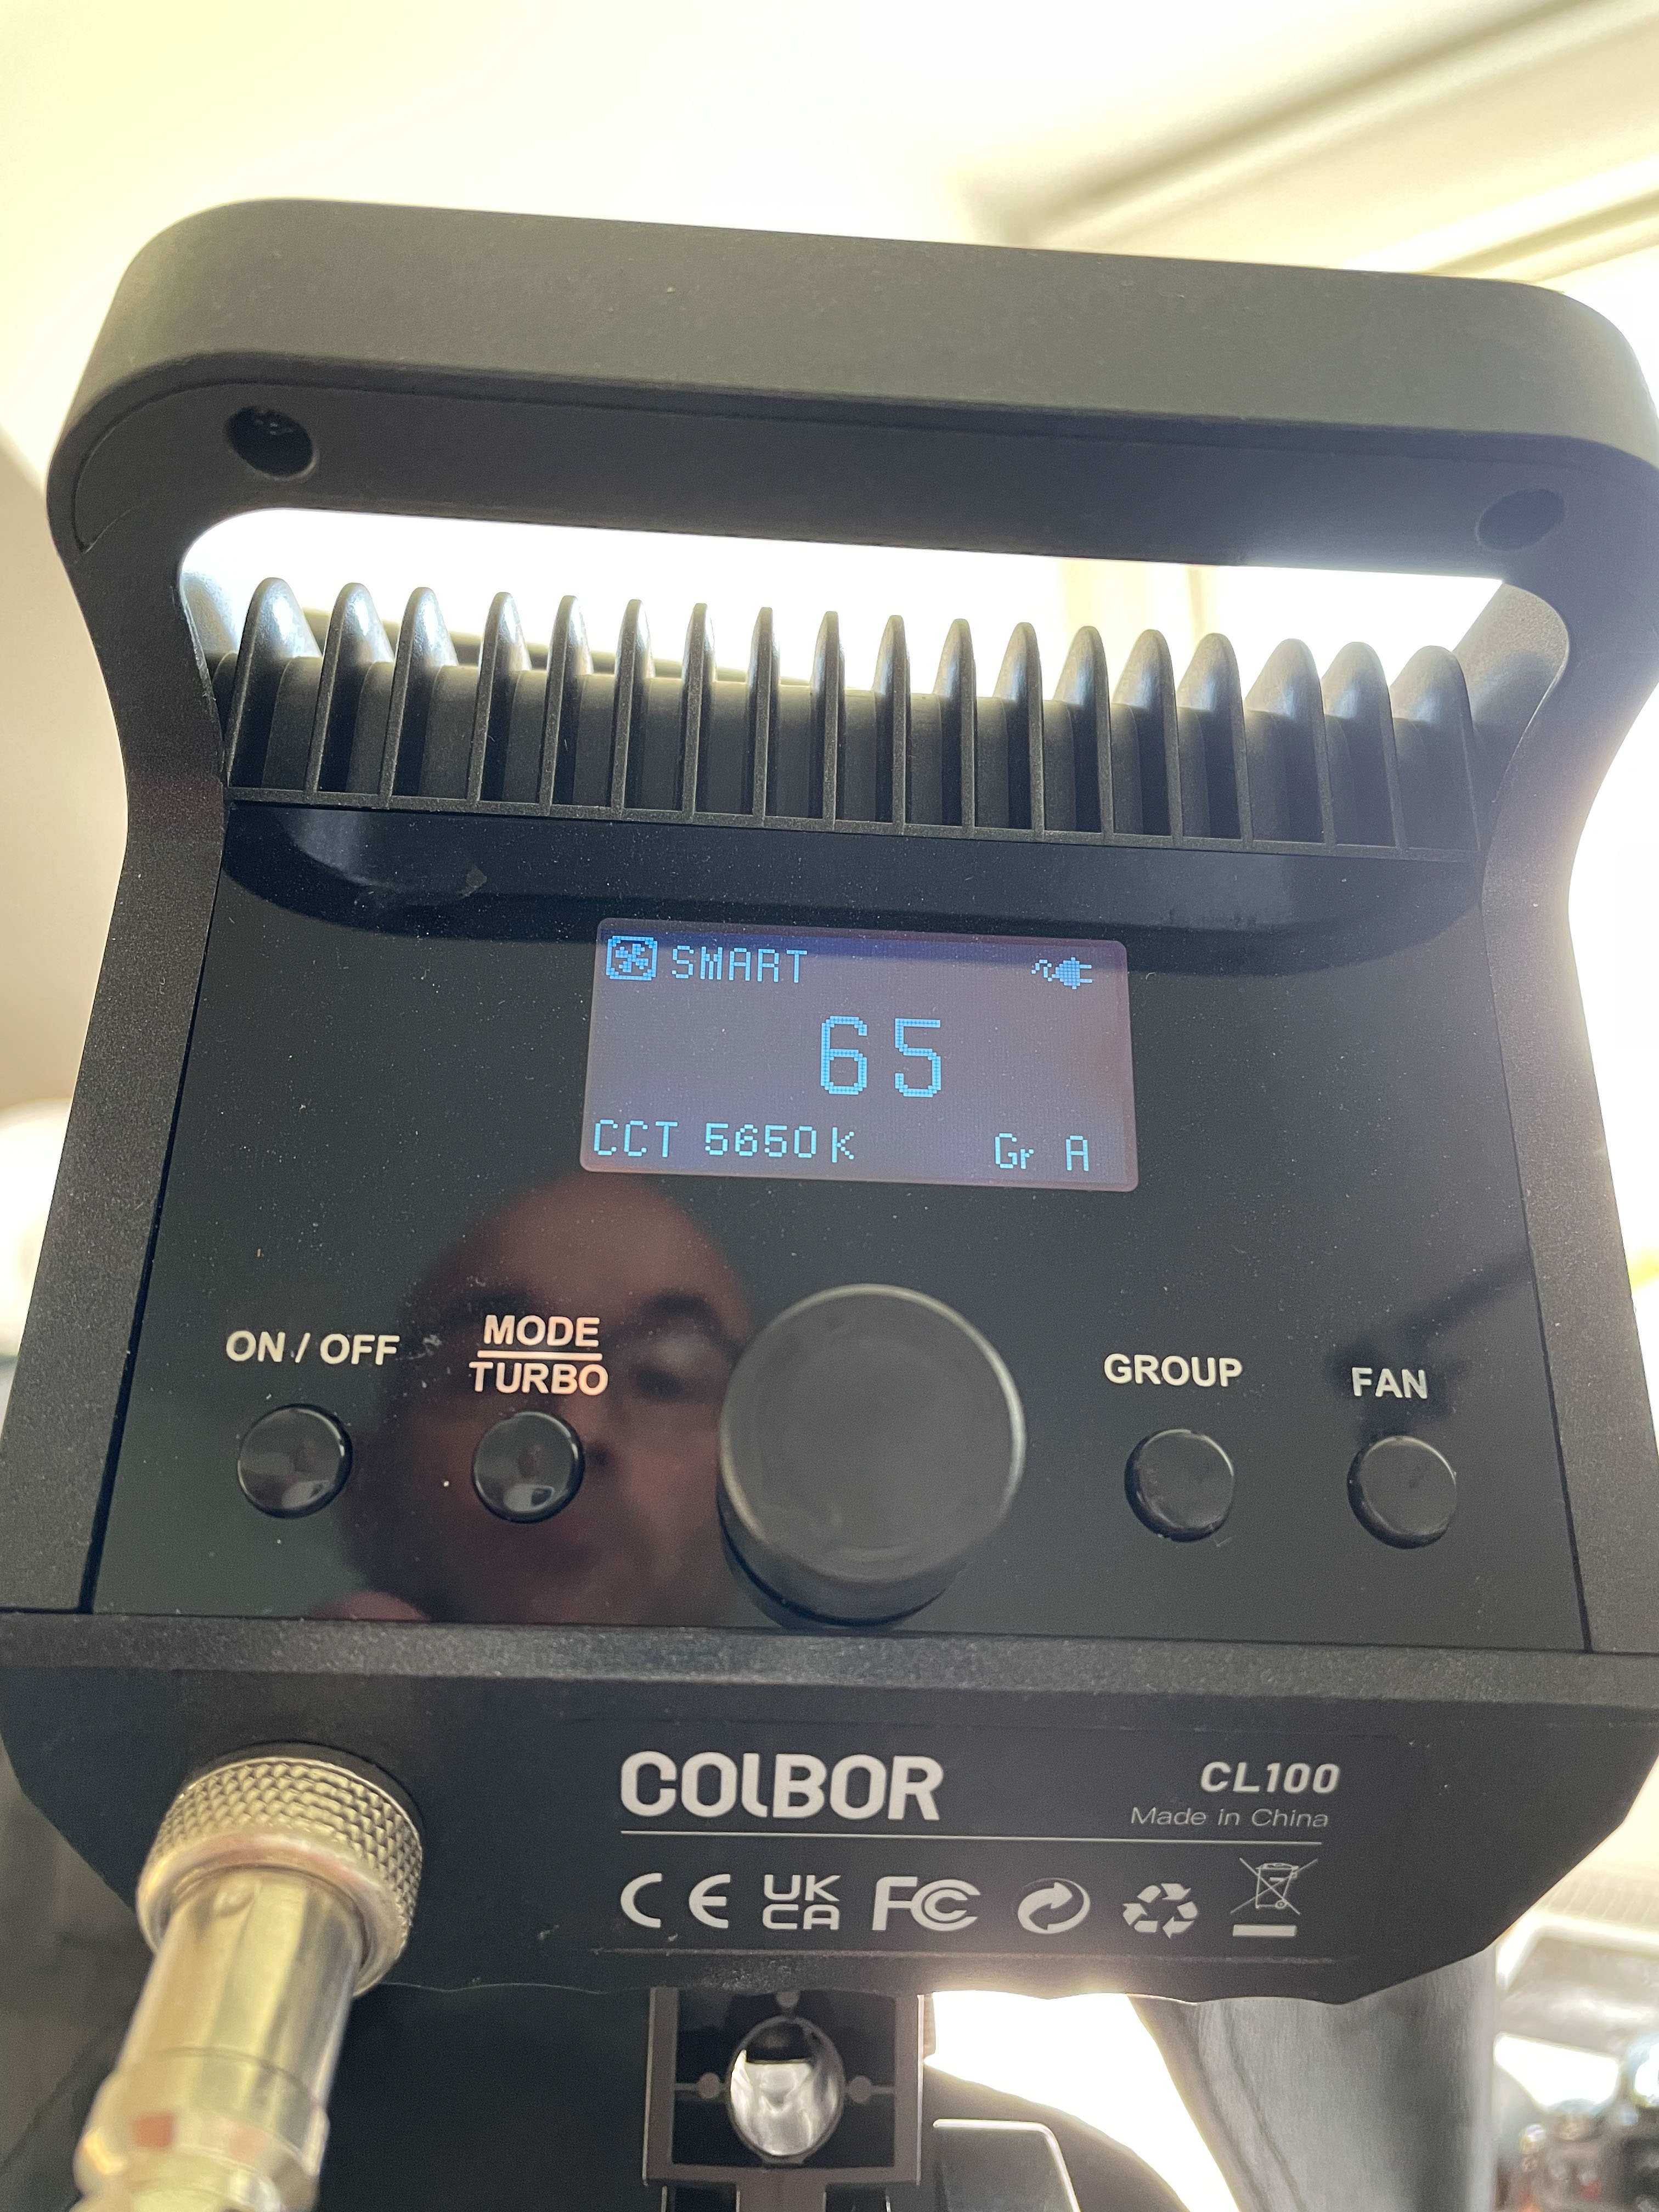
In terms of ease of use a video light is not that complicated – the COLBOR comes with a large centered dial to control the strength of the light – push it inwards once and it now controls the lights Kelvin value (warm vs cold), hit it again and you are back to controlling the strength of the light. The Kelvin  steps are 10 and the power % steps are 5. You have a to turn a lot to go from one end of the Kelvin scale to the other, but I seldom do that, so steps of 10 is just fine for me.

In addition to the center dial, there is the on/off button, a mode selector, a group selector and a fan option.

COLBOR CL100 Video light
The rear controls on the COLBOR CL100 Video light.

The dials on the back of the COLBOR CL100If you hold the mode selector for 3 seconds the COLBOR will enter boost mode, and for 60 seconds give you more light (120%) at the expense of running the fan at full throttle. Push the mode selector briefly and it toggles between different effects: candle, bonfire, blinking, faulty bulb, flashing and lightning. I never use any of these effect modes – if I would, I think the lightning mode is probably the most relevant as a “party trick” light.

The group selector toggles from A to E and is probably only relevant if you have more lights than one. I did not use it. And then you have the fan options to the very right – either SMART or QUIET. Strangely, I found the smart one to be the most quiet one. In general, and this is super important to me, the fan of the COLBOR is very quiet. I cannot count how many times the fan has been picked up by the microphones and I have had to edit that out in post. Not with the COLOB and that is a huge plus if you ask me!

COLBOR CL100 Video light
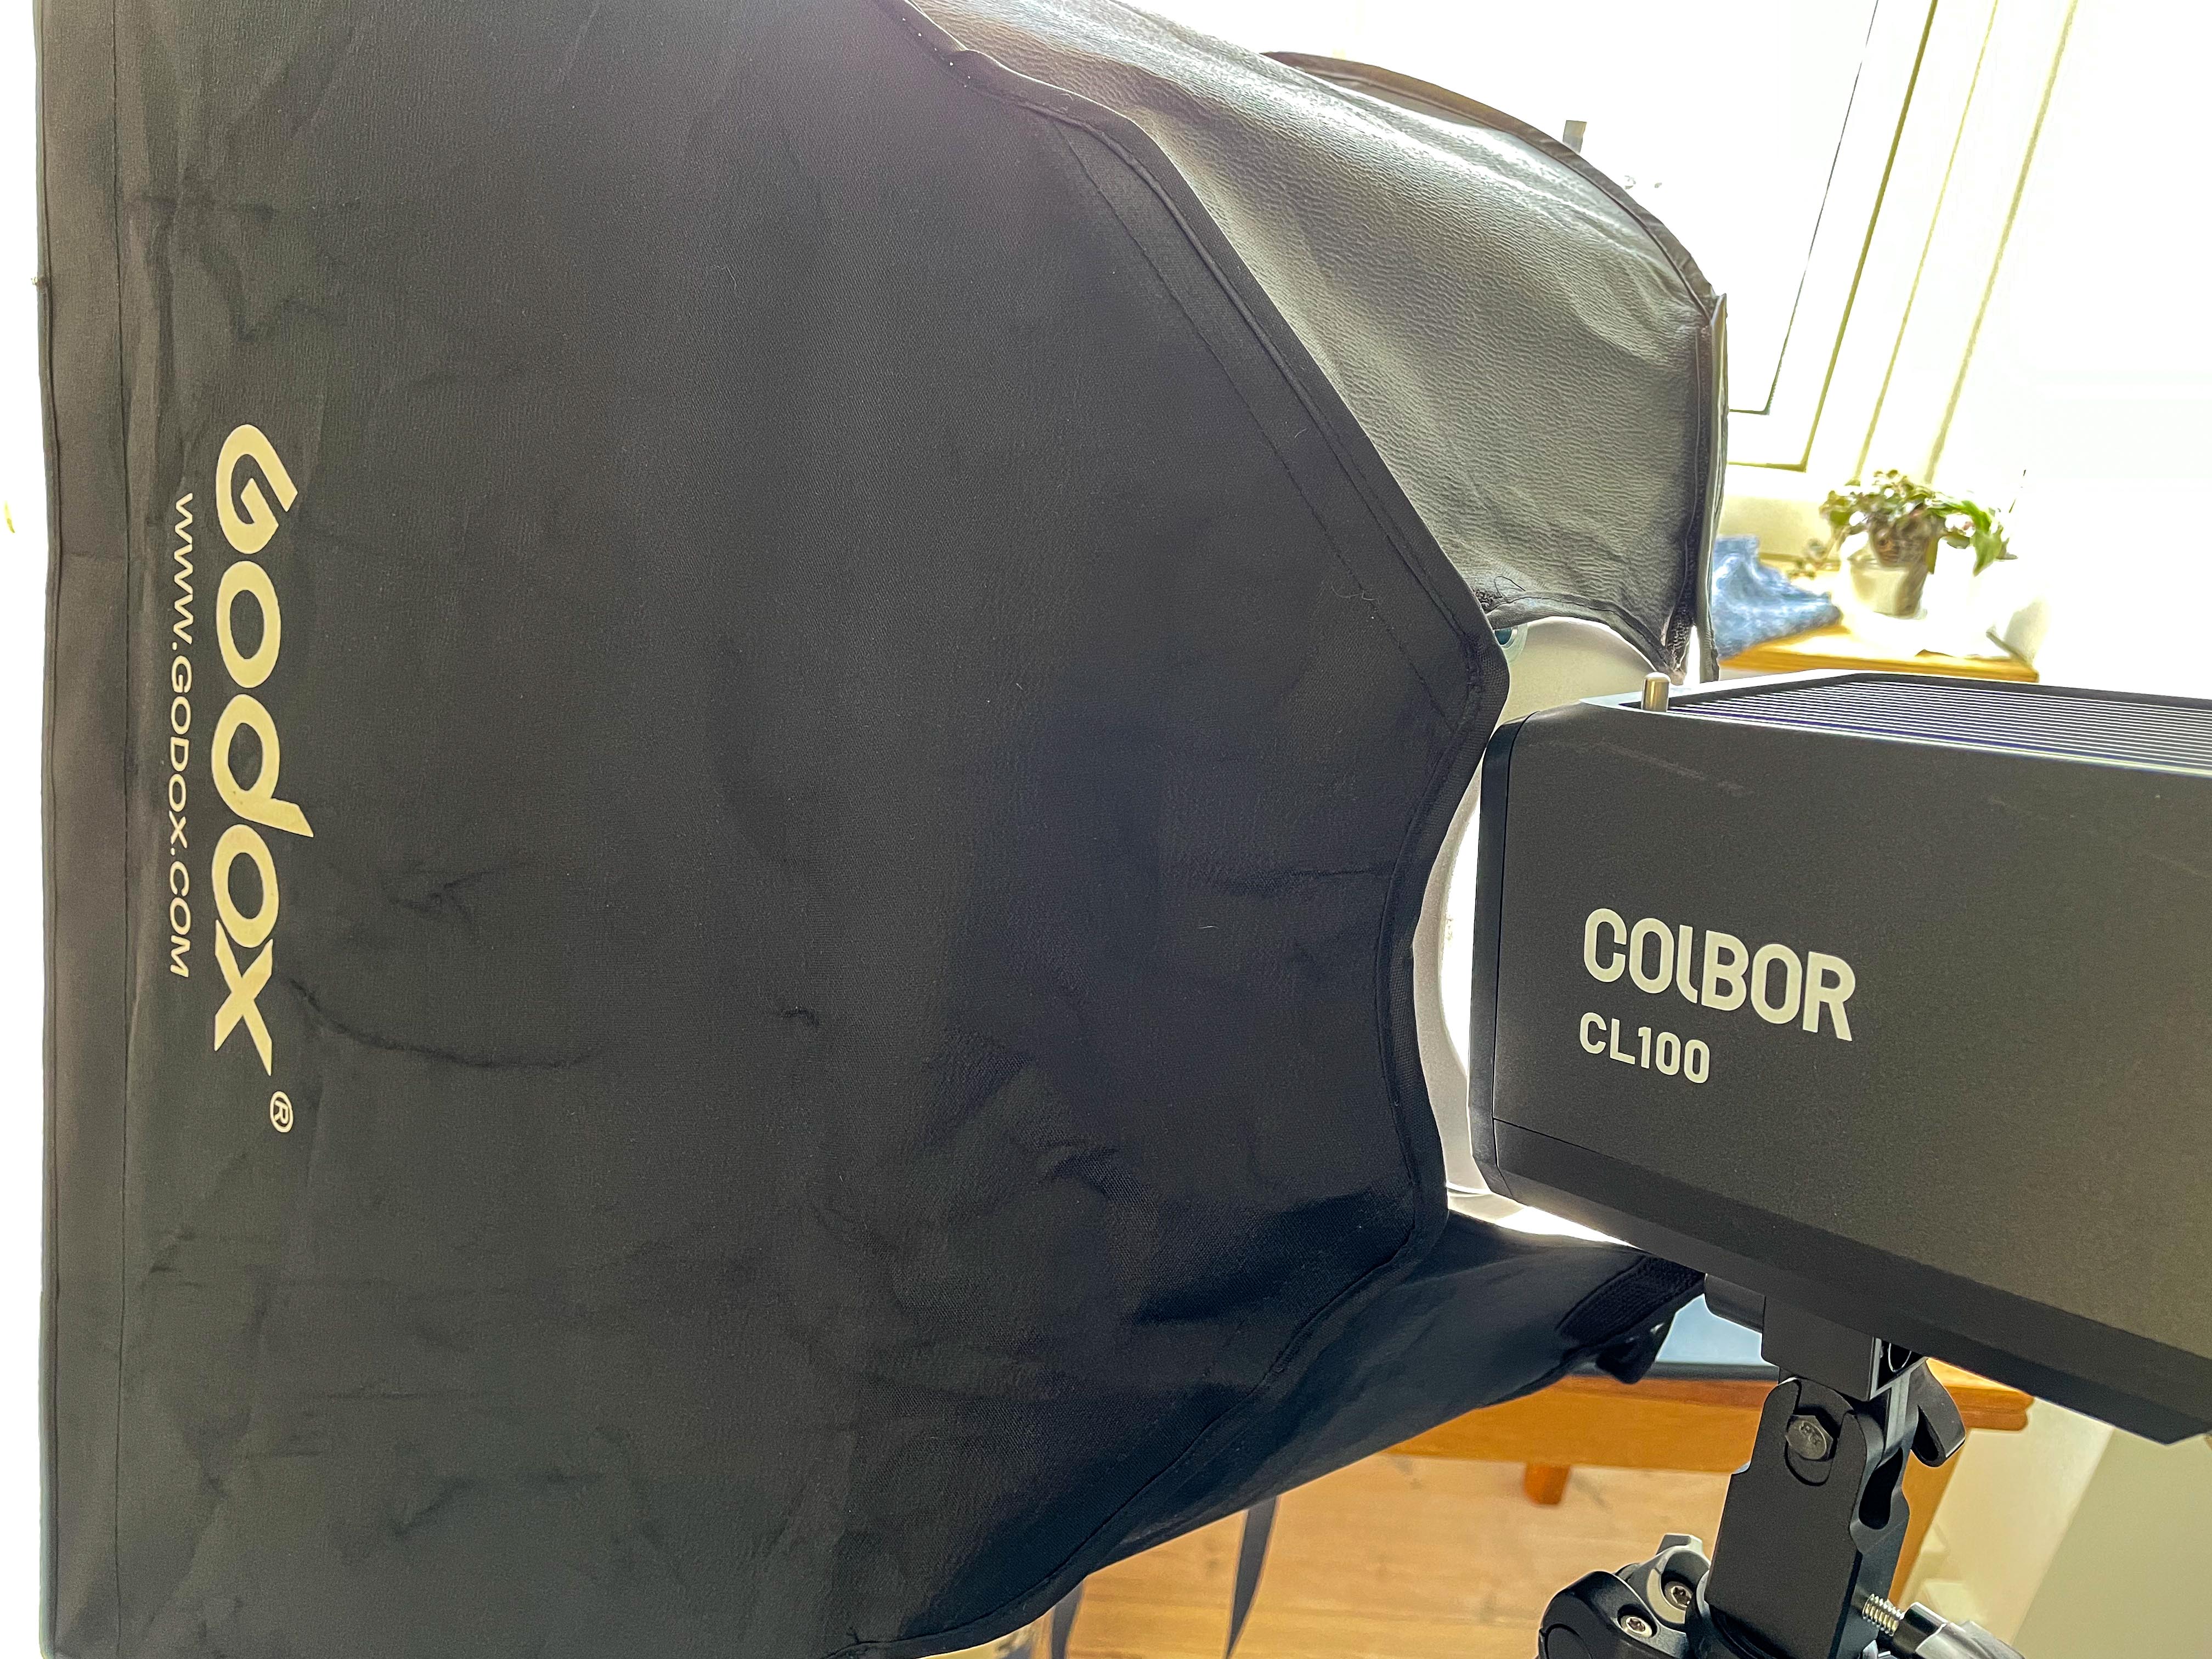
The COLBOR mounted with my trusty soft box from Godox

I was happy to see that the COLBOR comes with a standard reflector mounted with Bowens mount. This enables me to re-use all the light modifiers I have on stock, as Bowens for me is the standard interface for light modifiers.

COLBOR CL100 Video light
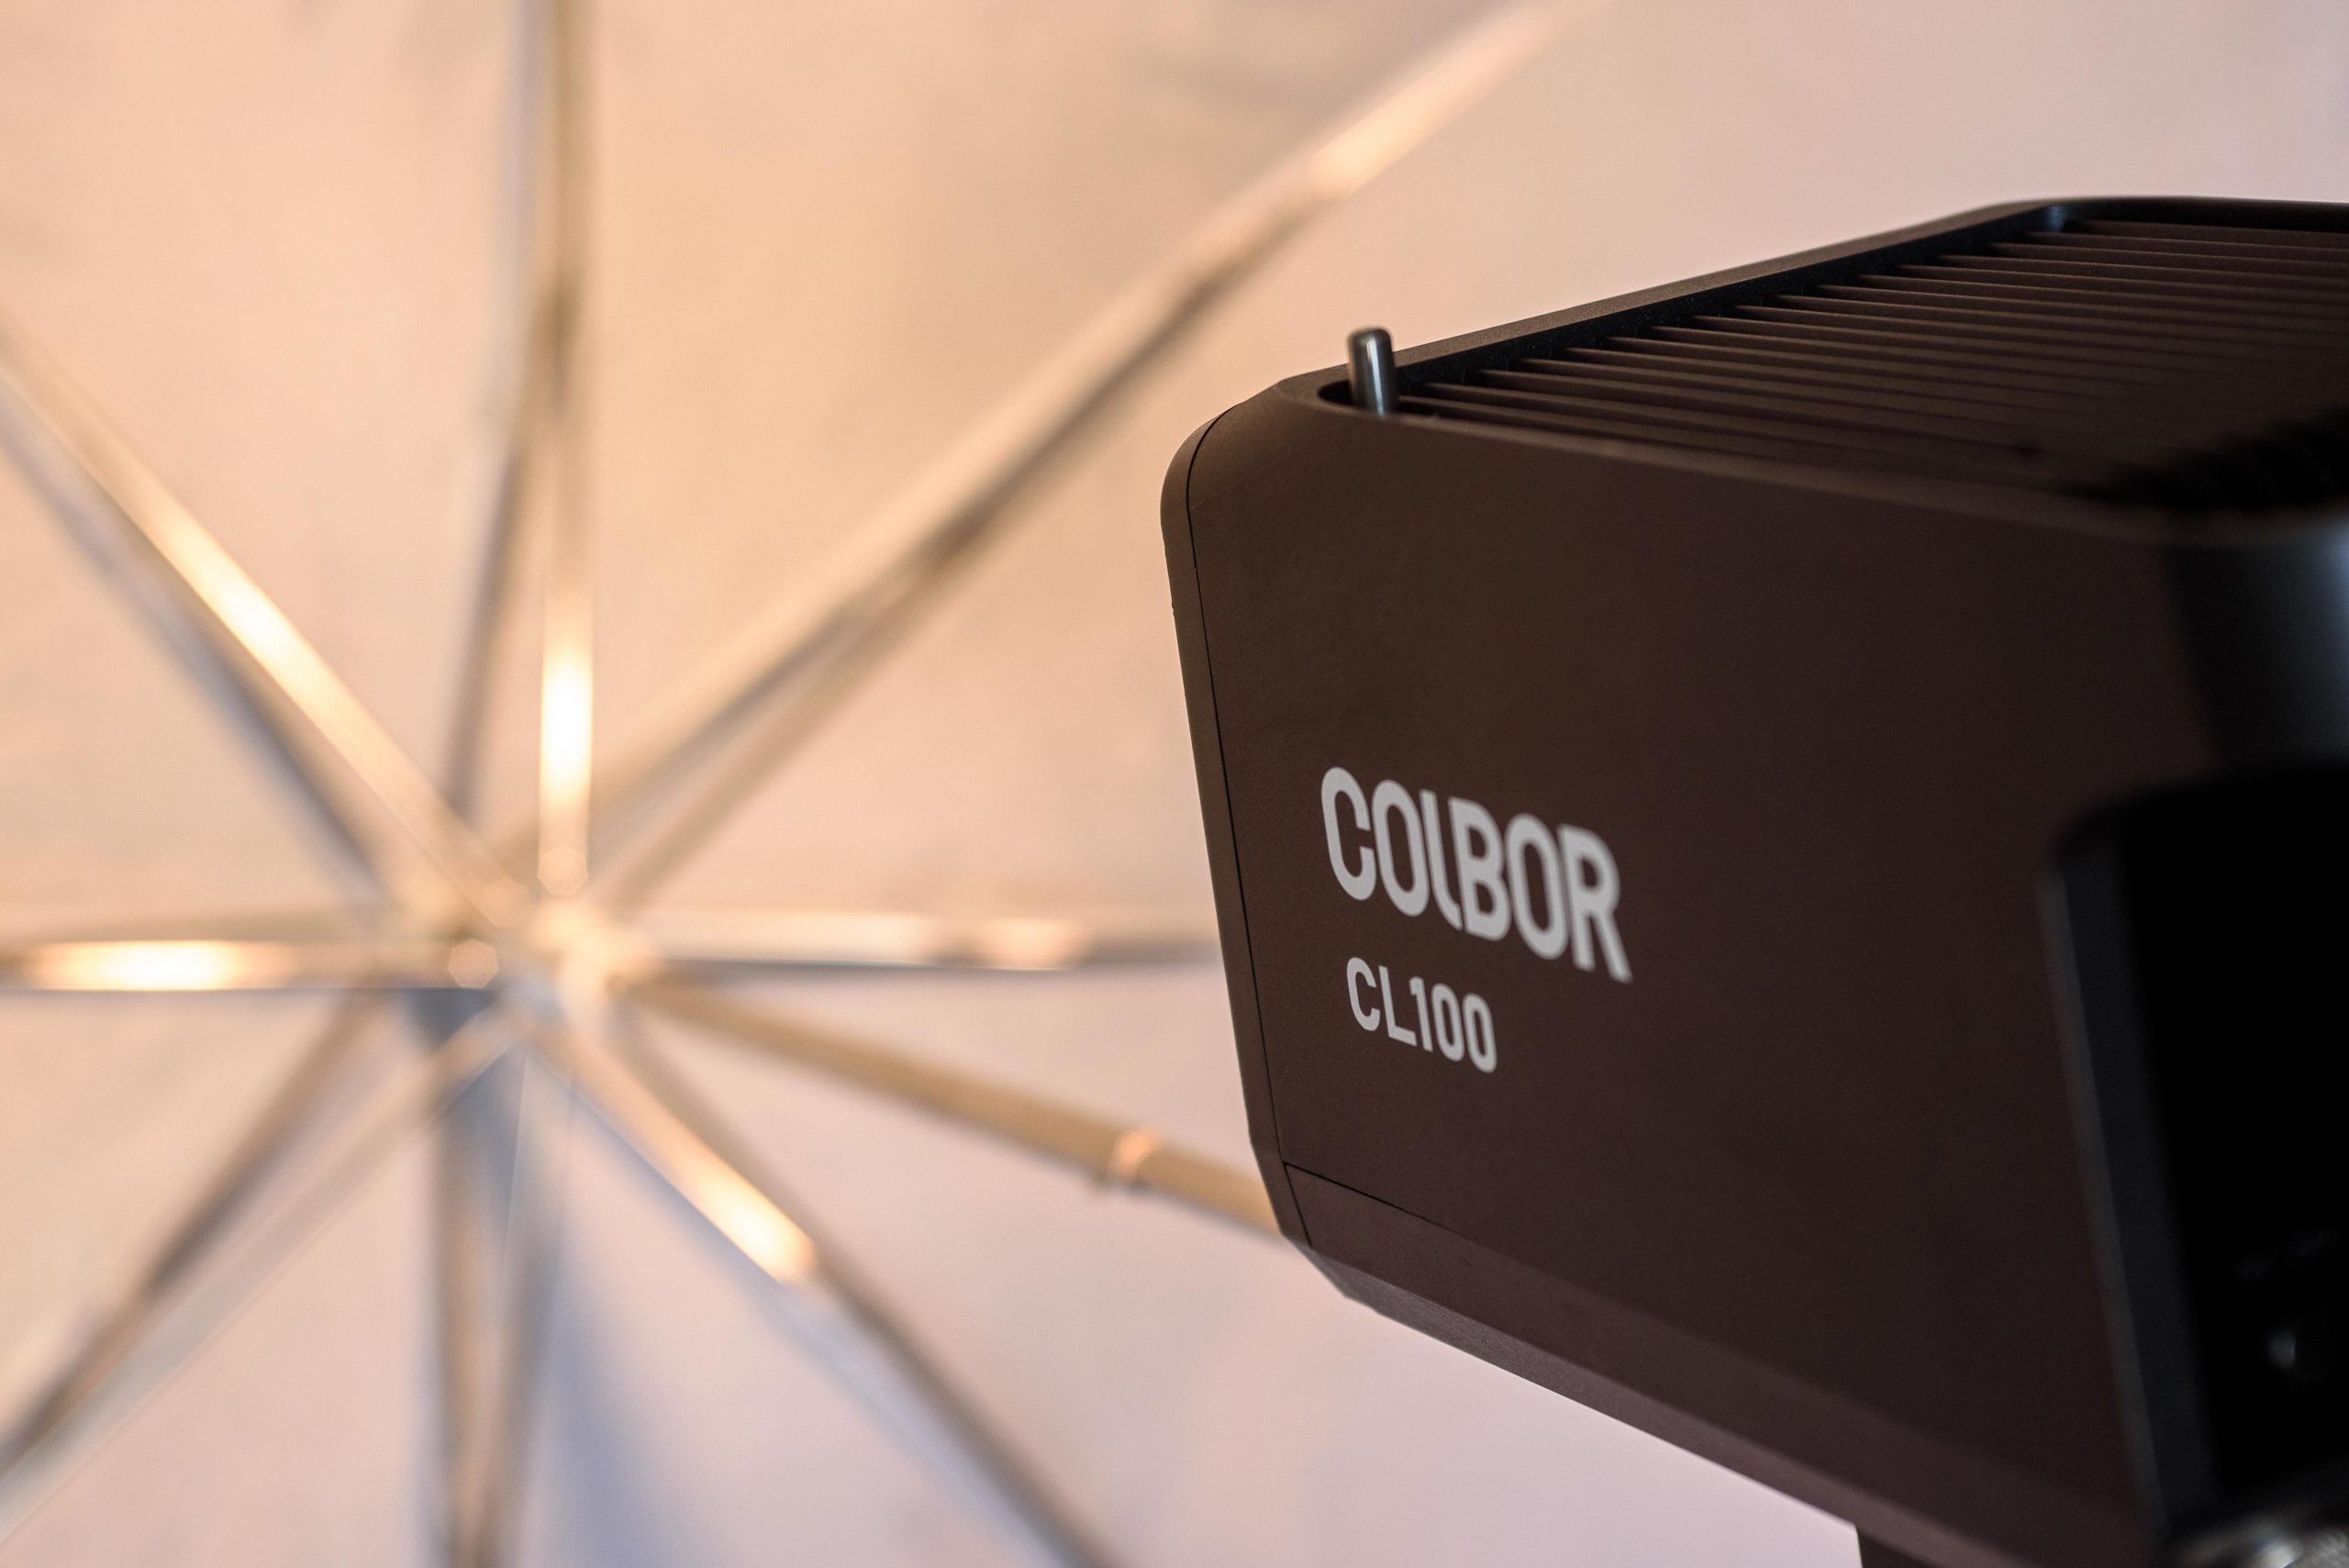
A shoot through umbrella.

Also, there is the option to mount an umbrella on the COLBOR as an alternative light modifier. It all works very well.

COLBOR CL100 Video light
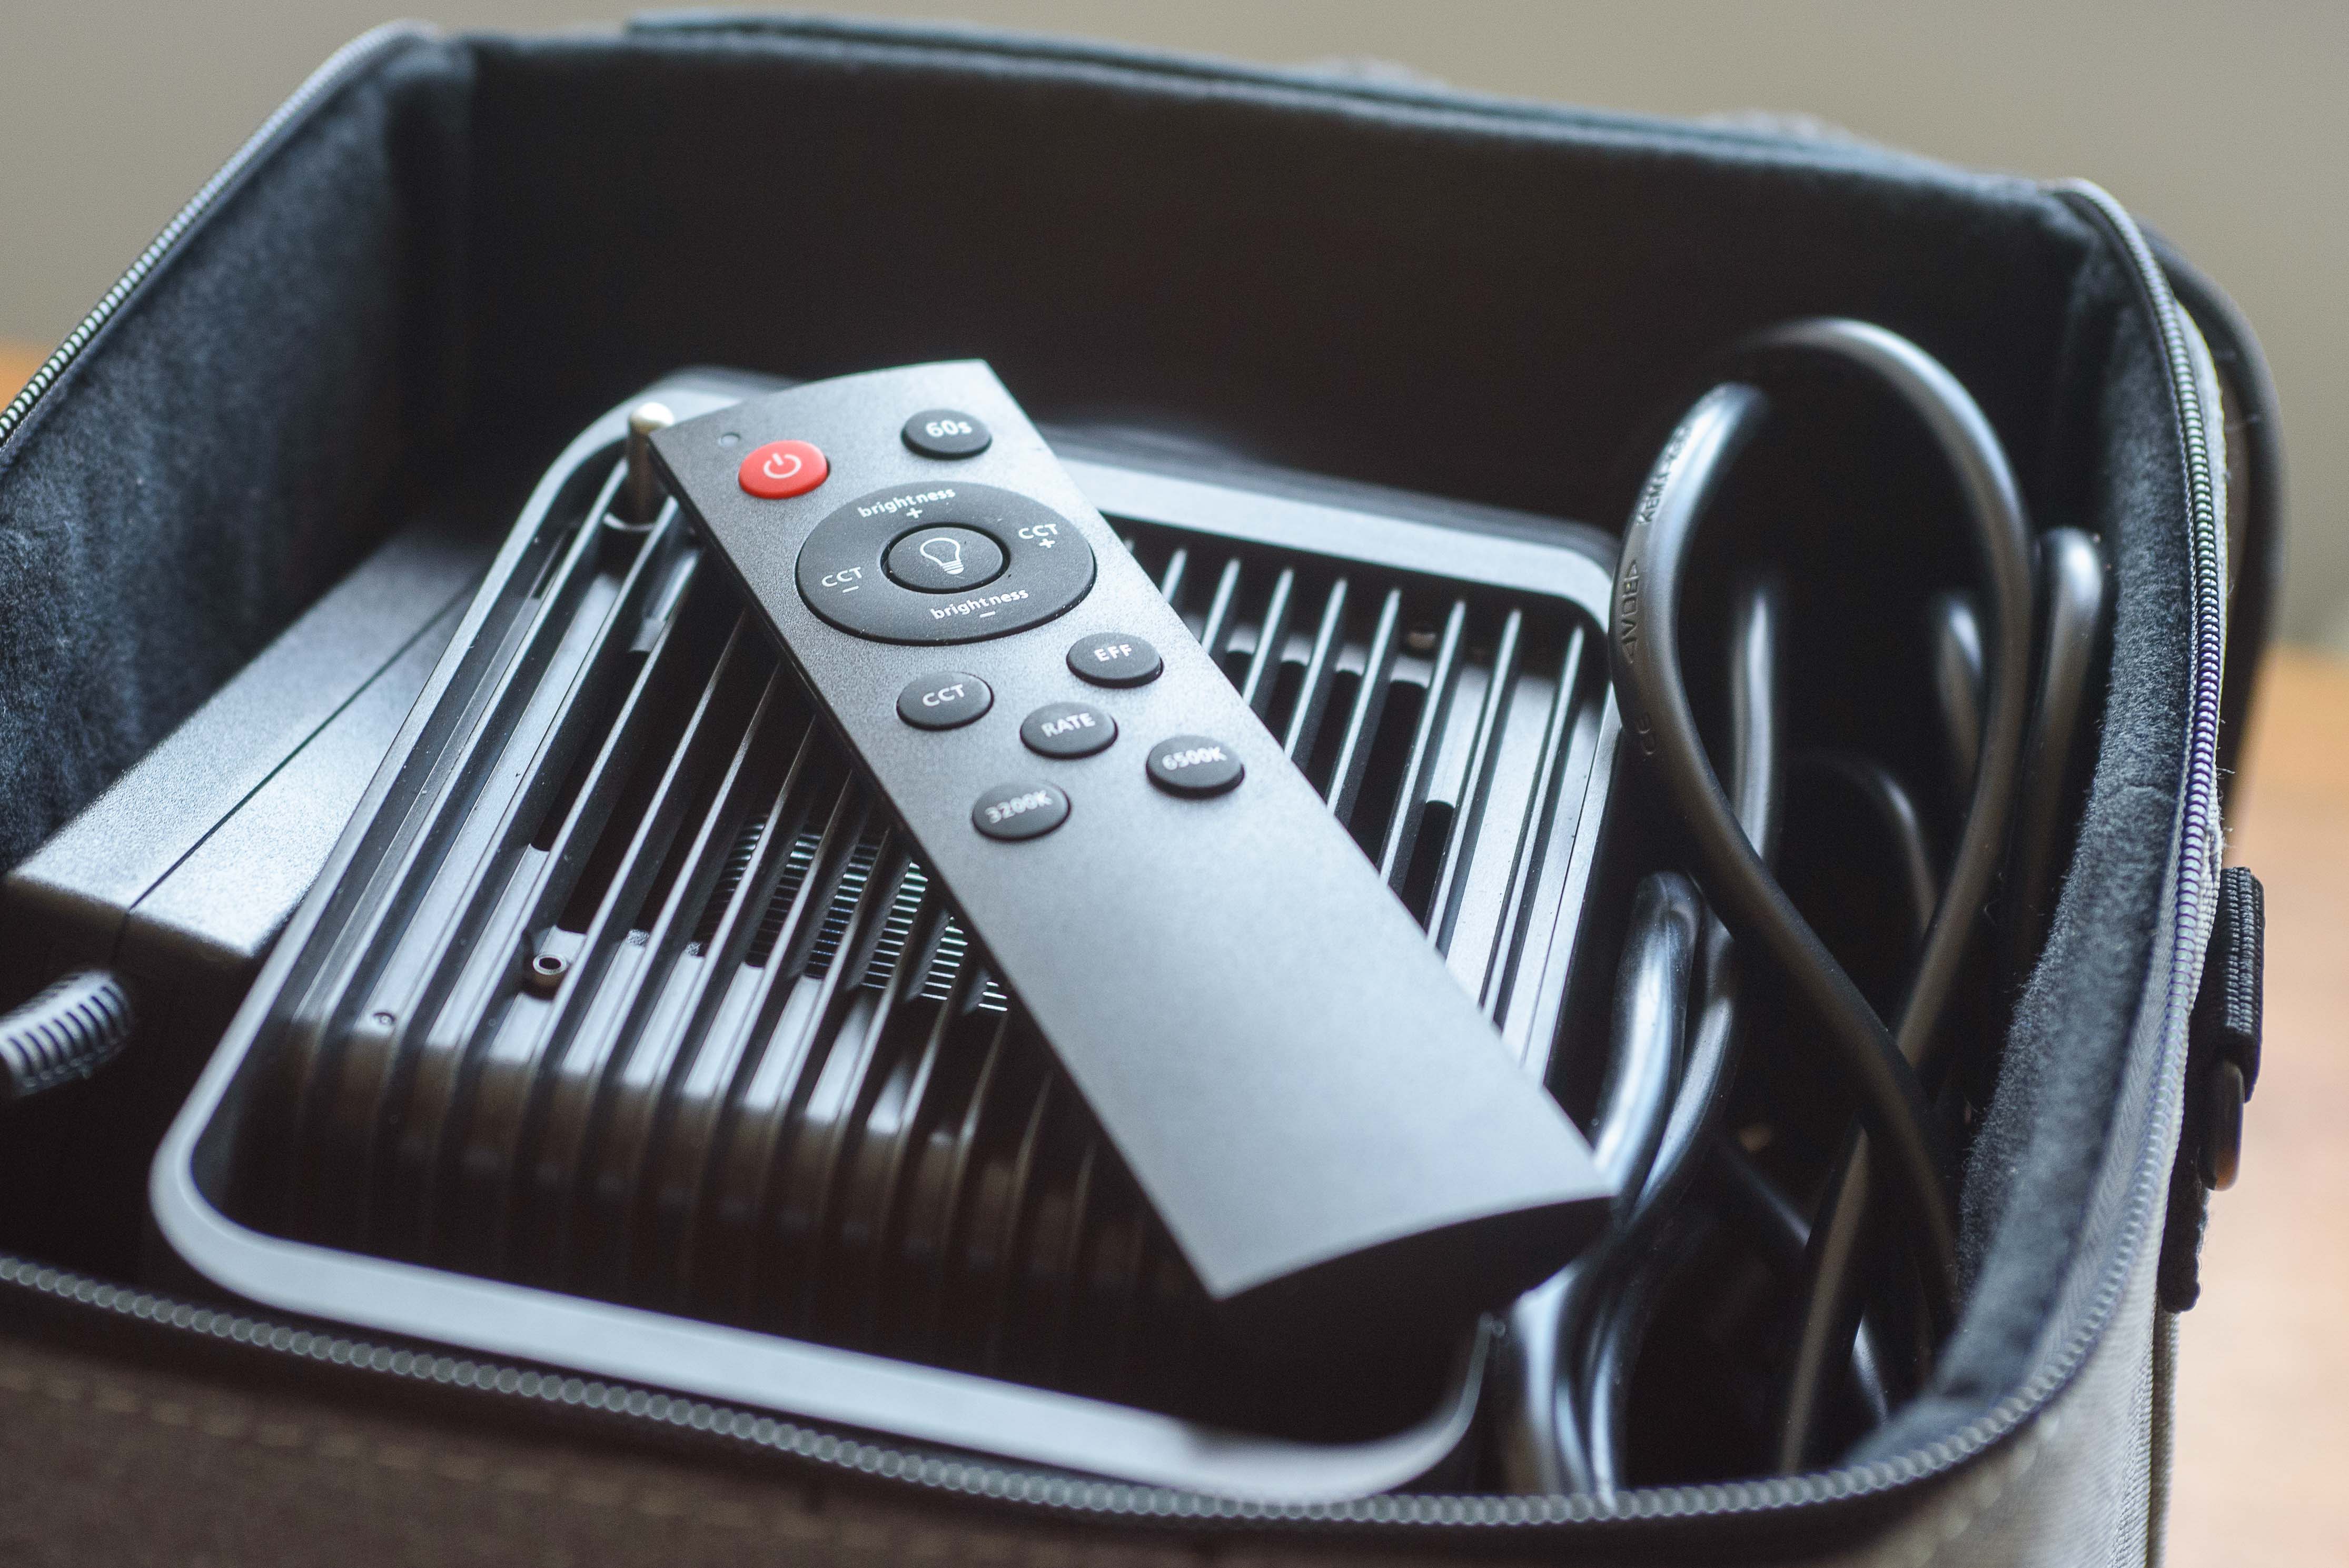
COLBOR CL100 remote control.

Currently the COLBOR comes with a remote control, and I find that it works really well. An app to replace the remote control is work in progress at the time of writing this review, so you may find that the remote is no longer supplied when you decide to order. I did tell myself that I would not be too lazy to get up and go over and adjust the light, but alas! I ended up using the remote anyway – it is very convenient, and then you just have to be a bit more active in the Gym to compensate.

Some may miss batteries if you plan to go outside for a shoot. I don’t – I stay indoor when it comes to video with light! You can get the COLBOR in an alternative version with batteries, so check that one out if batteries is important to you.

Power and warmth

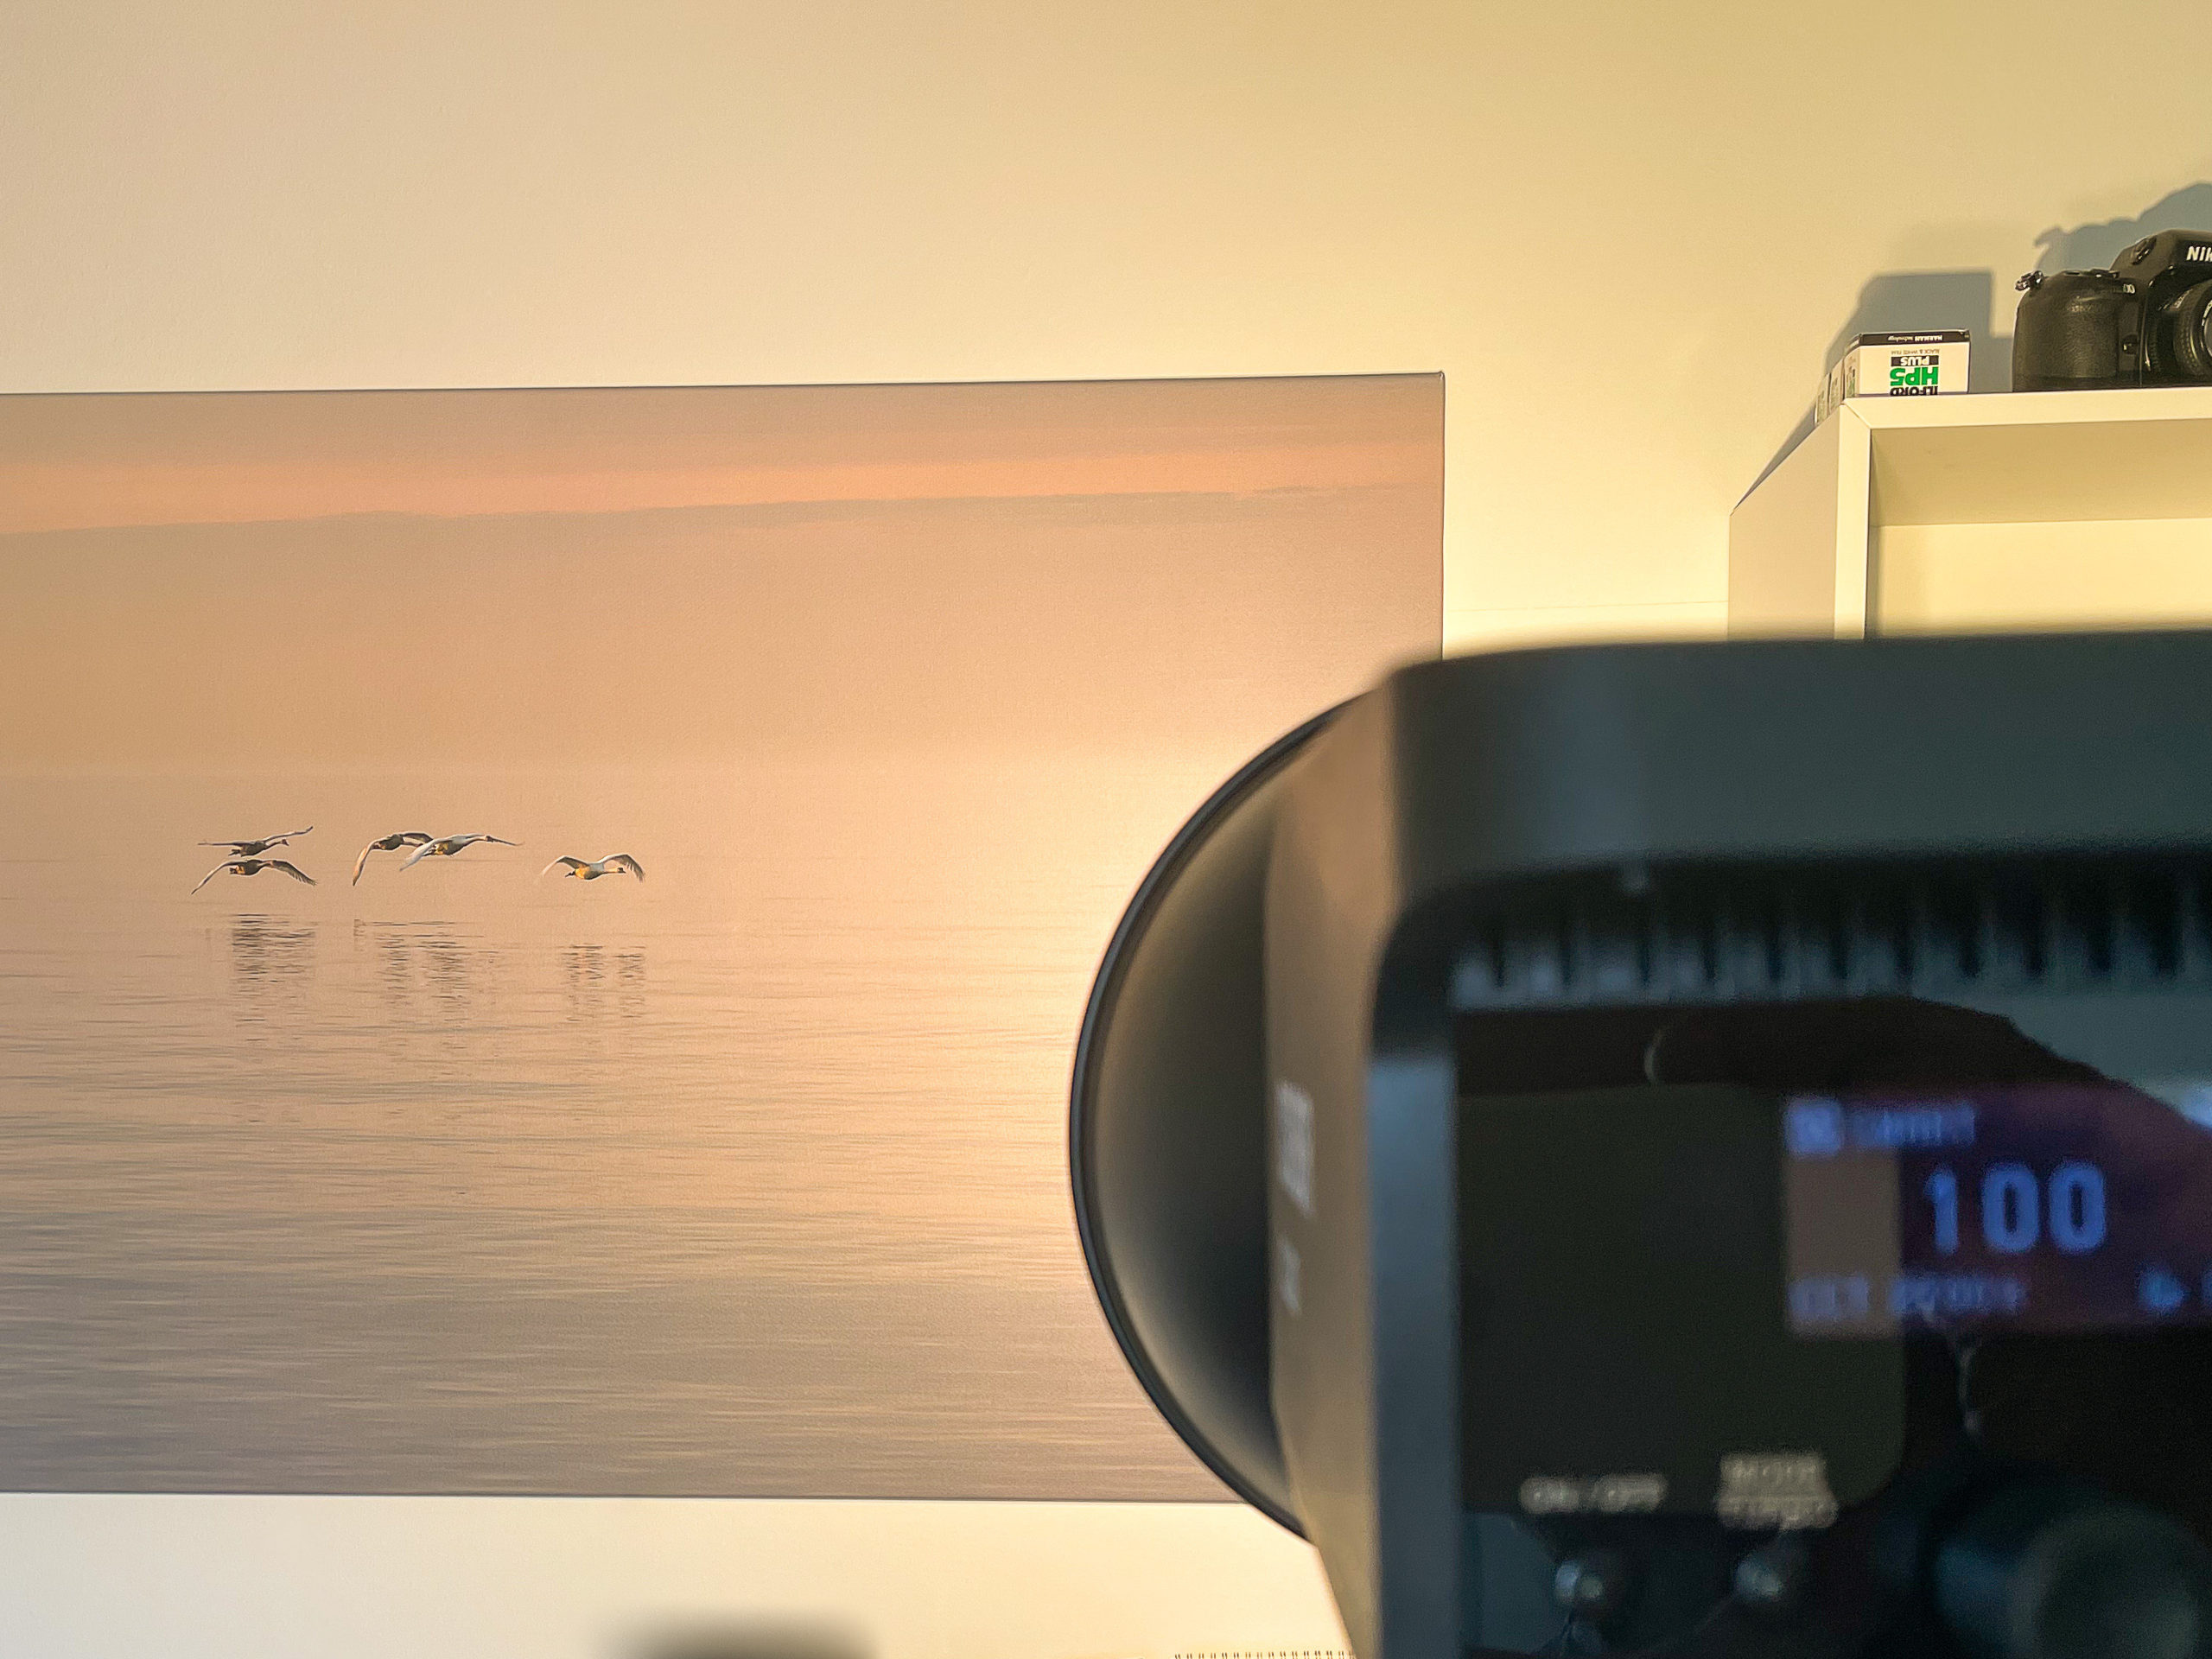
I have a small studio that measures 3×4 meters and I find the COLBOR delivers sufficiently light for my purpose. My only wish is that I could have more lights to make cross light effects…

COLBOR CL100 Video light
Sufficient power for my needs – here at 100%

In terms of Kelvin values, the COLBOR gives full range from 2700K to 6500K and does so with same light intensity. I have some LED panels that can only give full throttle when in the middle of the Kelvin scale; whereas the end of the spectrum they only yield half of that. Not with the COLBOR – same power irrespective of the Kelvin value – great!

Conclusion

What I like

  • The price
  • Sufficient power output
  • Constant power throughout the Kelvin range
  • The quiet fan
  • The Bowens interface + the umbrella mount
  • The convenience of the remote
  • That I did not pay for batteries

What I did not like

  • The effect modes – I have no use for these
  • The build quality (but factor in the price here!)

I have only had the product for a few weeks so I do not know if it will stand the test of time. So far it appears to me to be a durable product.

Video link

Related reading

Review: Viltrox Ninja 10B LED light