Better sound with Dynamite DM1 inline microphone preamp

Better sound quality?

I once heard an experienced YouTuber say that if your video quality sucks, then viewers may still enjoy your videos in full, as long as the content is relevant and the storyline interesting. But if you have poor sound, people will drop off instantly! I took note of that when I started my YouTube channel and have tried my best to produce decent sound ever since. Maybe not perfect sound, but for sure much better than without the wise words from said YouTuber.

Shure MV7
My beloved Shure MV7.

My hunt for good sound has taken me through a lot of different gear that I have tried and tested, but without finding it to be at the level I try to hit. I eventually came across the Shure MV7 microphone, a budget friendly alternative to the Shure SM7. I found the Shure MV7 to be excellent at providing a neutral sound to voice recording (all of my work is voice recording).

XLR and pre-amp

In the beginning of recording with the Shure MV7 I used the USB connection and the Shure software suite. This produced great results, but the sound was not as neutral as what I had hoped for. I read somewhere that using the XLR connection instead of the USB would yield more neutral results. There was only one problem: it requires a pre-amplifier in order to work.

Focusrite Scarlett Solo
Focusrite Scarlett Solo – the pre-amp that I hoped would lift the XLR based signal to the needed level.

My hunt for a pre-amp quickly led me to the Focusrite Scarlett Solo, which seemed to be a budget friendly solid performer without too many buttons and dials to confuse me. And hurray! The sound with the Shure MV7, an XLR cable and the Focusrite Scarlett Solo now gave the result I was hoping for.

Gain hungry?

Now there was only one problem left: The signal was very weak. I had to turn up the volume on the Focusrite to max and also lift the signal a lot in post in order for the sound level to be right. The reason is that the Shure MV7 operates as a passive dynamic microphone and apparently the signal needs even more amplification than what the Scarlett can provide.

Dynamite DM1
Dynamite DM1 – tin at the top, product at the bottom.

So once again I had to find a fix for the problem, and it turned out to be a pre-amp for the pre-amp, and I chose the Dynamite DM1 from sE Electronics. There are more expensive and advanced alternatives than this one, but I liked the slim design, good reviews and fair price at around 100 USD / EUR. You just put the DM1 between the Focusrite and the microphone and hit the 48V button on the Focusrite, and the amplification will kick in.

The Dynamite DM1 lifts the signal with 28dB and I find that to be more than sufficient to give me a strong clean signal that I can process in Adobe Audition. And as far as I can tell, the DM1 does not alter the sound at all so it is really a neutral amplification of the signal that will improve the signal to noise level in any setup IMHO.

Video

Shopping links

Affiliate link to the Shure MV7.

Affiliate link to the Focusrite Scarlett Solo.

Affiliate link to the DM1 Dynamite inline preamp.

Further reading

Review: Synco P1L Wireless Microphone

Review: Røde Wireless Go

Review: Synco P1L Wireless Microphone

Sounds like an improvement

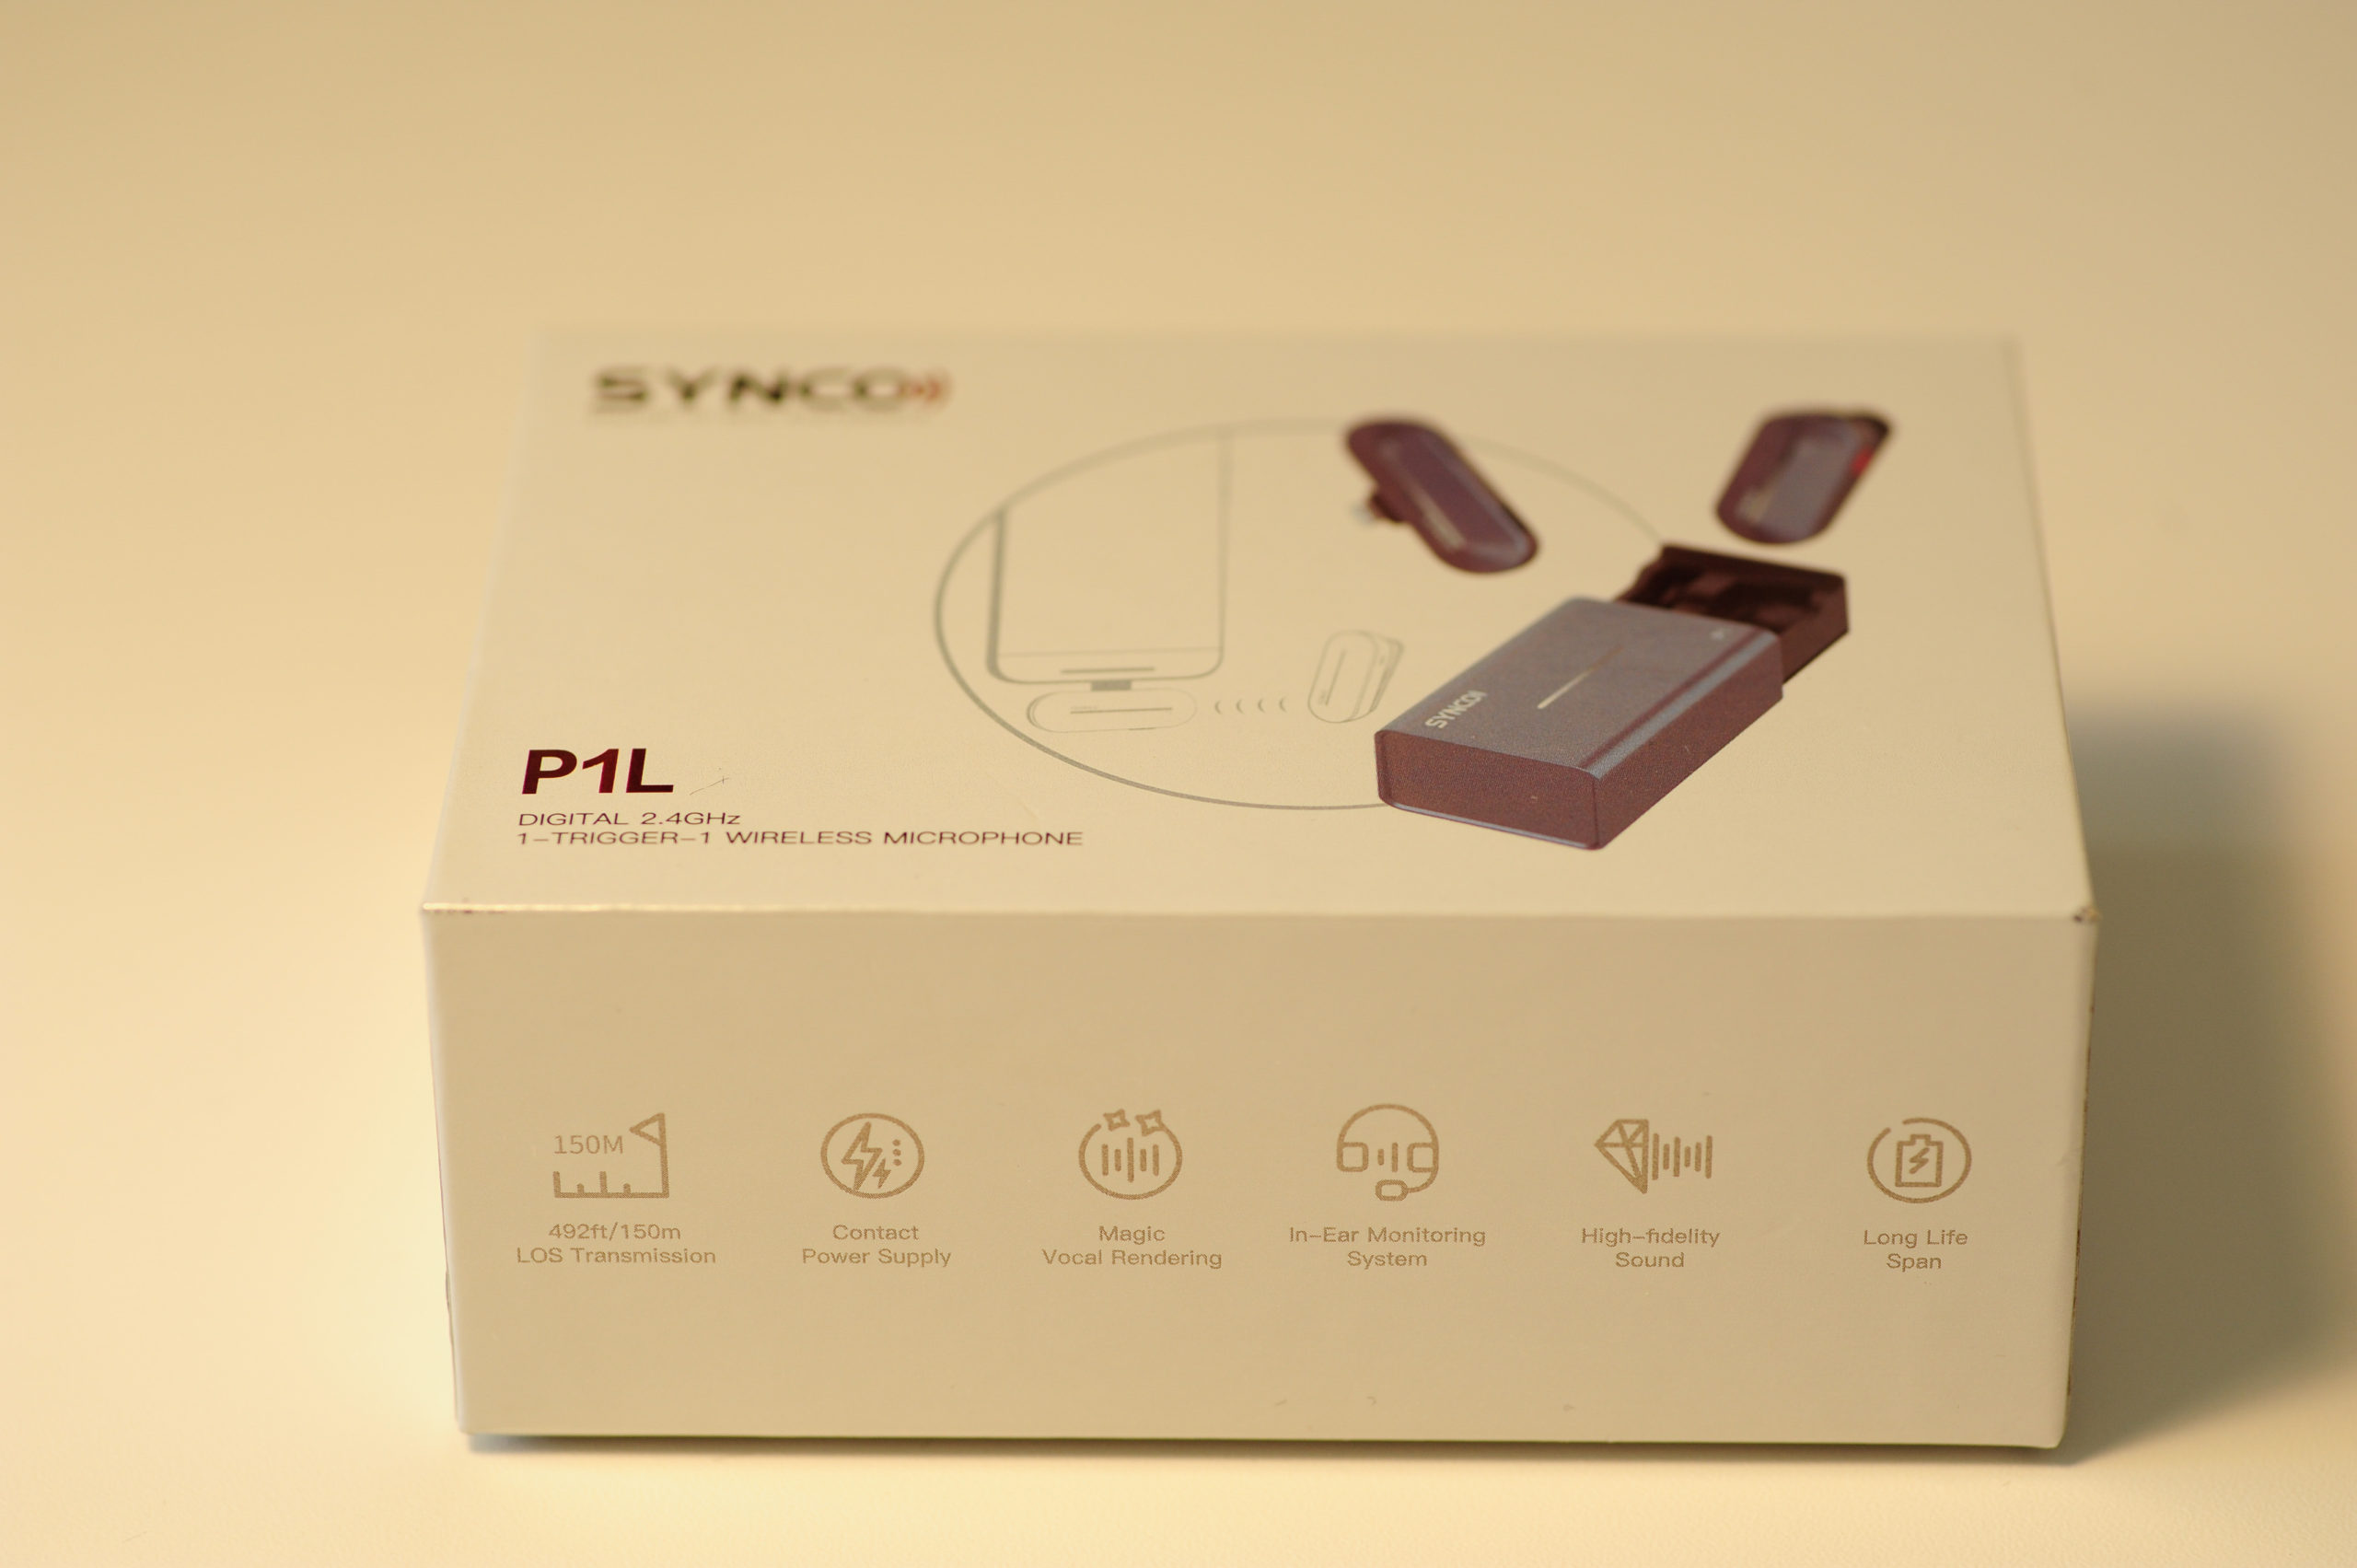
China based Synco kindly sent me a copy of their product P1L, a wireless microphone to be used with the Apple iPhone. It comes in other variants than this one, but as I have an iPhone 12, this is the version that I asked to have sent for review.

The price on B&H is 89 USD (April 2022), but be aware that taxes and transport costs may apply if you buy online, so make sure to check this before you buy.

If you don’t know why you should be interested in a product like this when you are producing videos, the answer is simple: sound is super important if you want people to watch your videos. It may sound counter intuitive, but the sound is more important than the visuals. If you don’t believe me, try watching an interview on CNN or the like where they are interviewing someone far away with poor sound – I bet that you will have trouble maintaining focus on what is being said. Good sound is vital.

And another point – good sound is often equal to almost no distance between microphone and sound source. The more distance – the more difficult it is to produce great sound. And this is why it makes a lot of sense to have a wireless transmission from your microphone to the receiver, so you can get the microphone as close to your mouth (or the sound source) as possible.

Light and simple

The microphone comes in a small box wrapped in thin plastic, so you know you are the first one to touch the product since it left the factory.

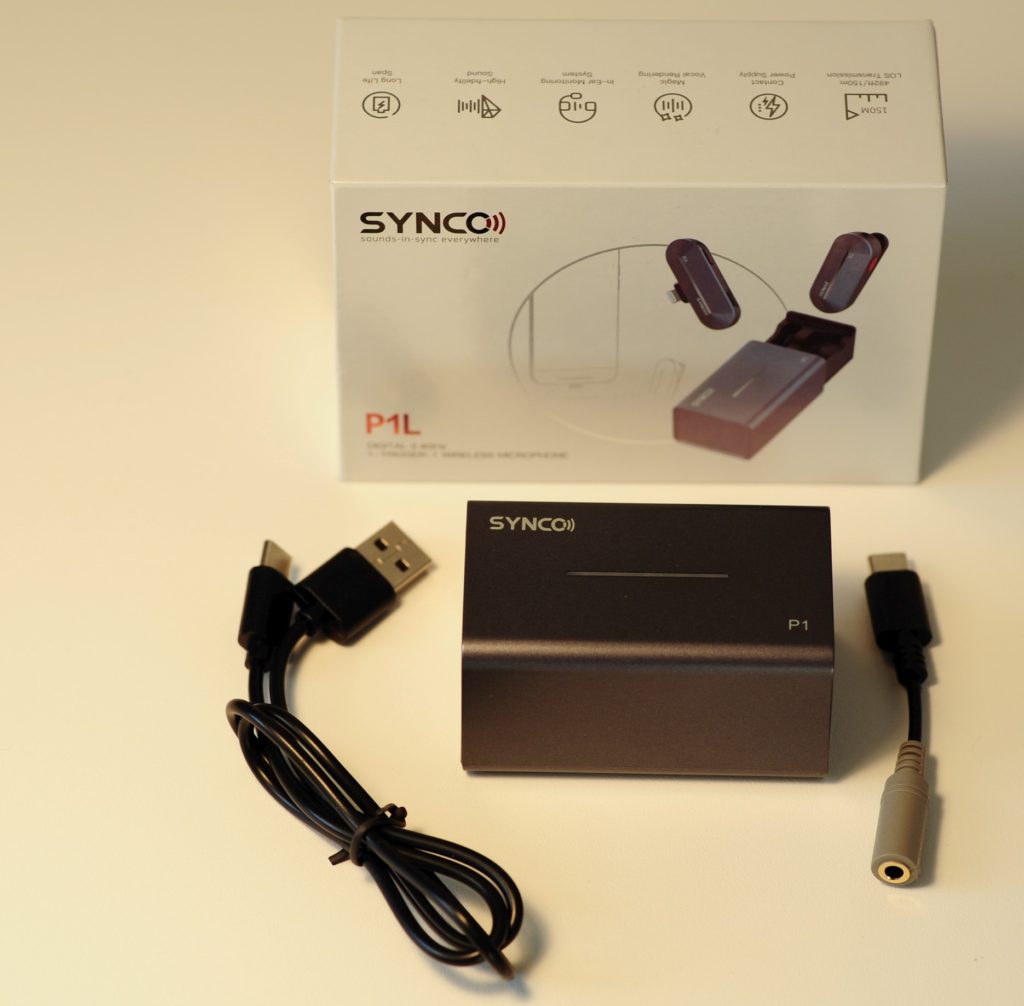
In the box you will find a USB to USB-C cable, a small cable to hook up a headphone to the receiving side and a power bank that both holds and charges the sender and the receiver.

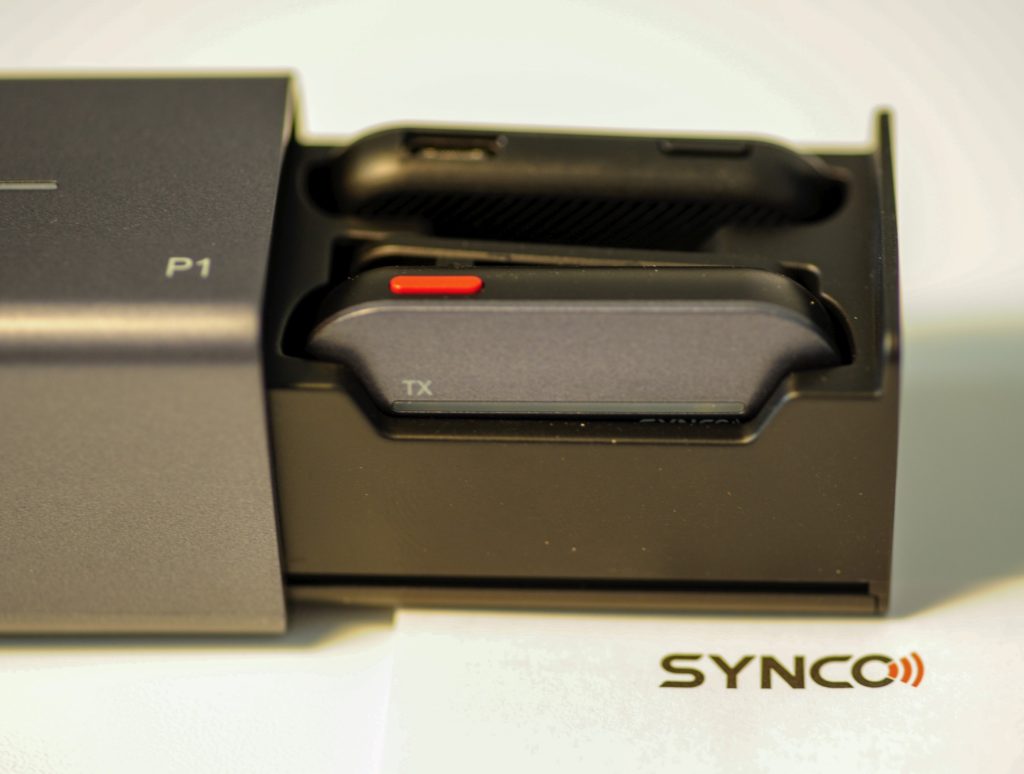
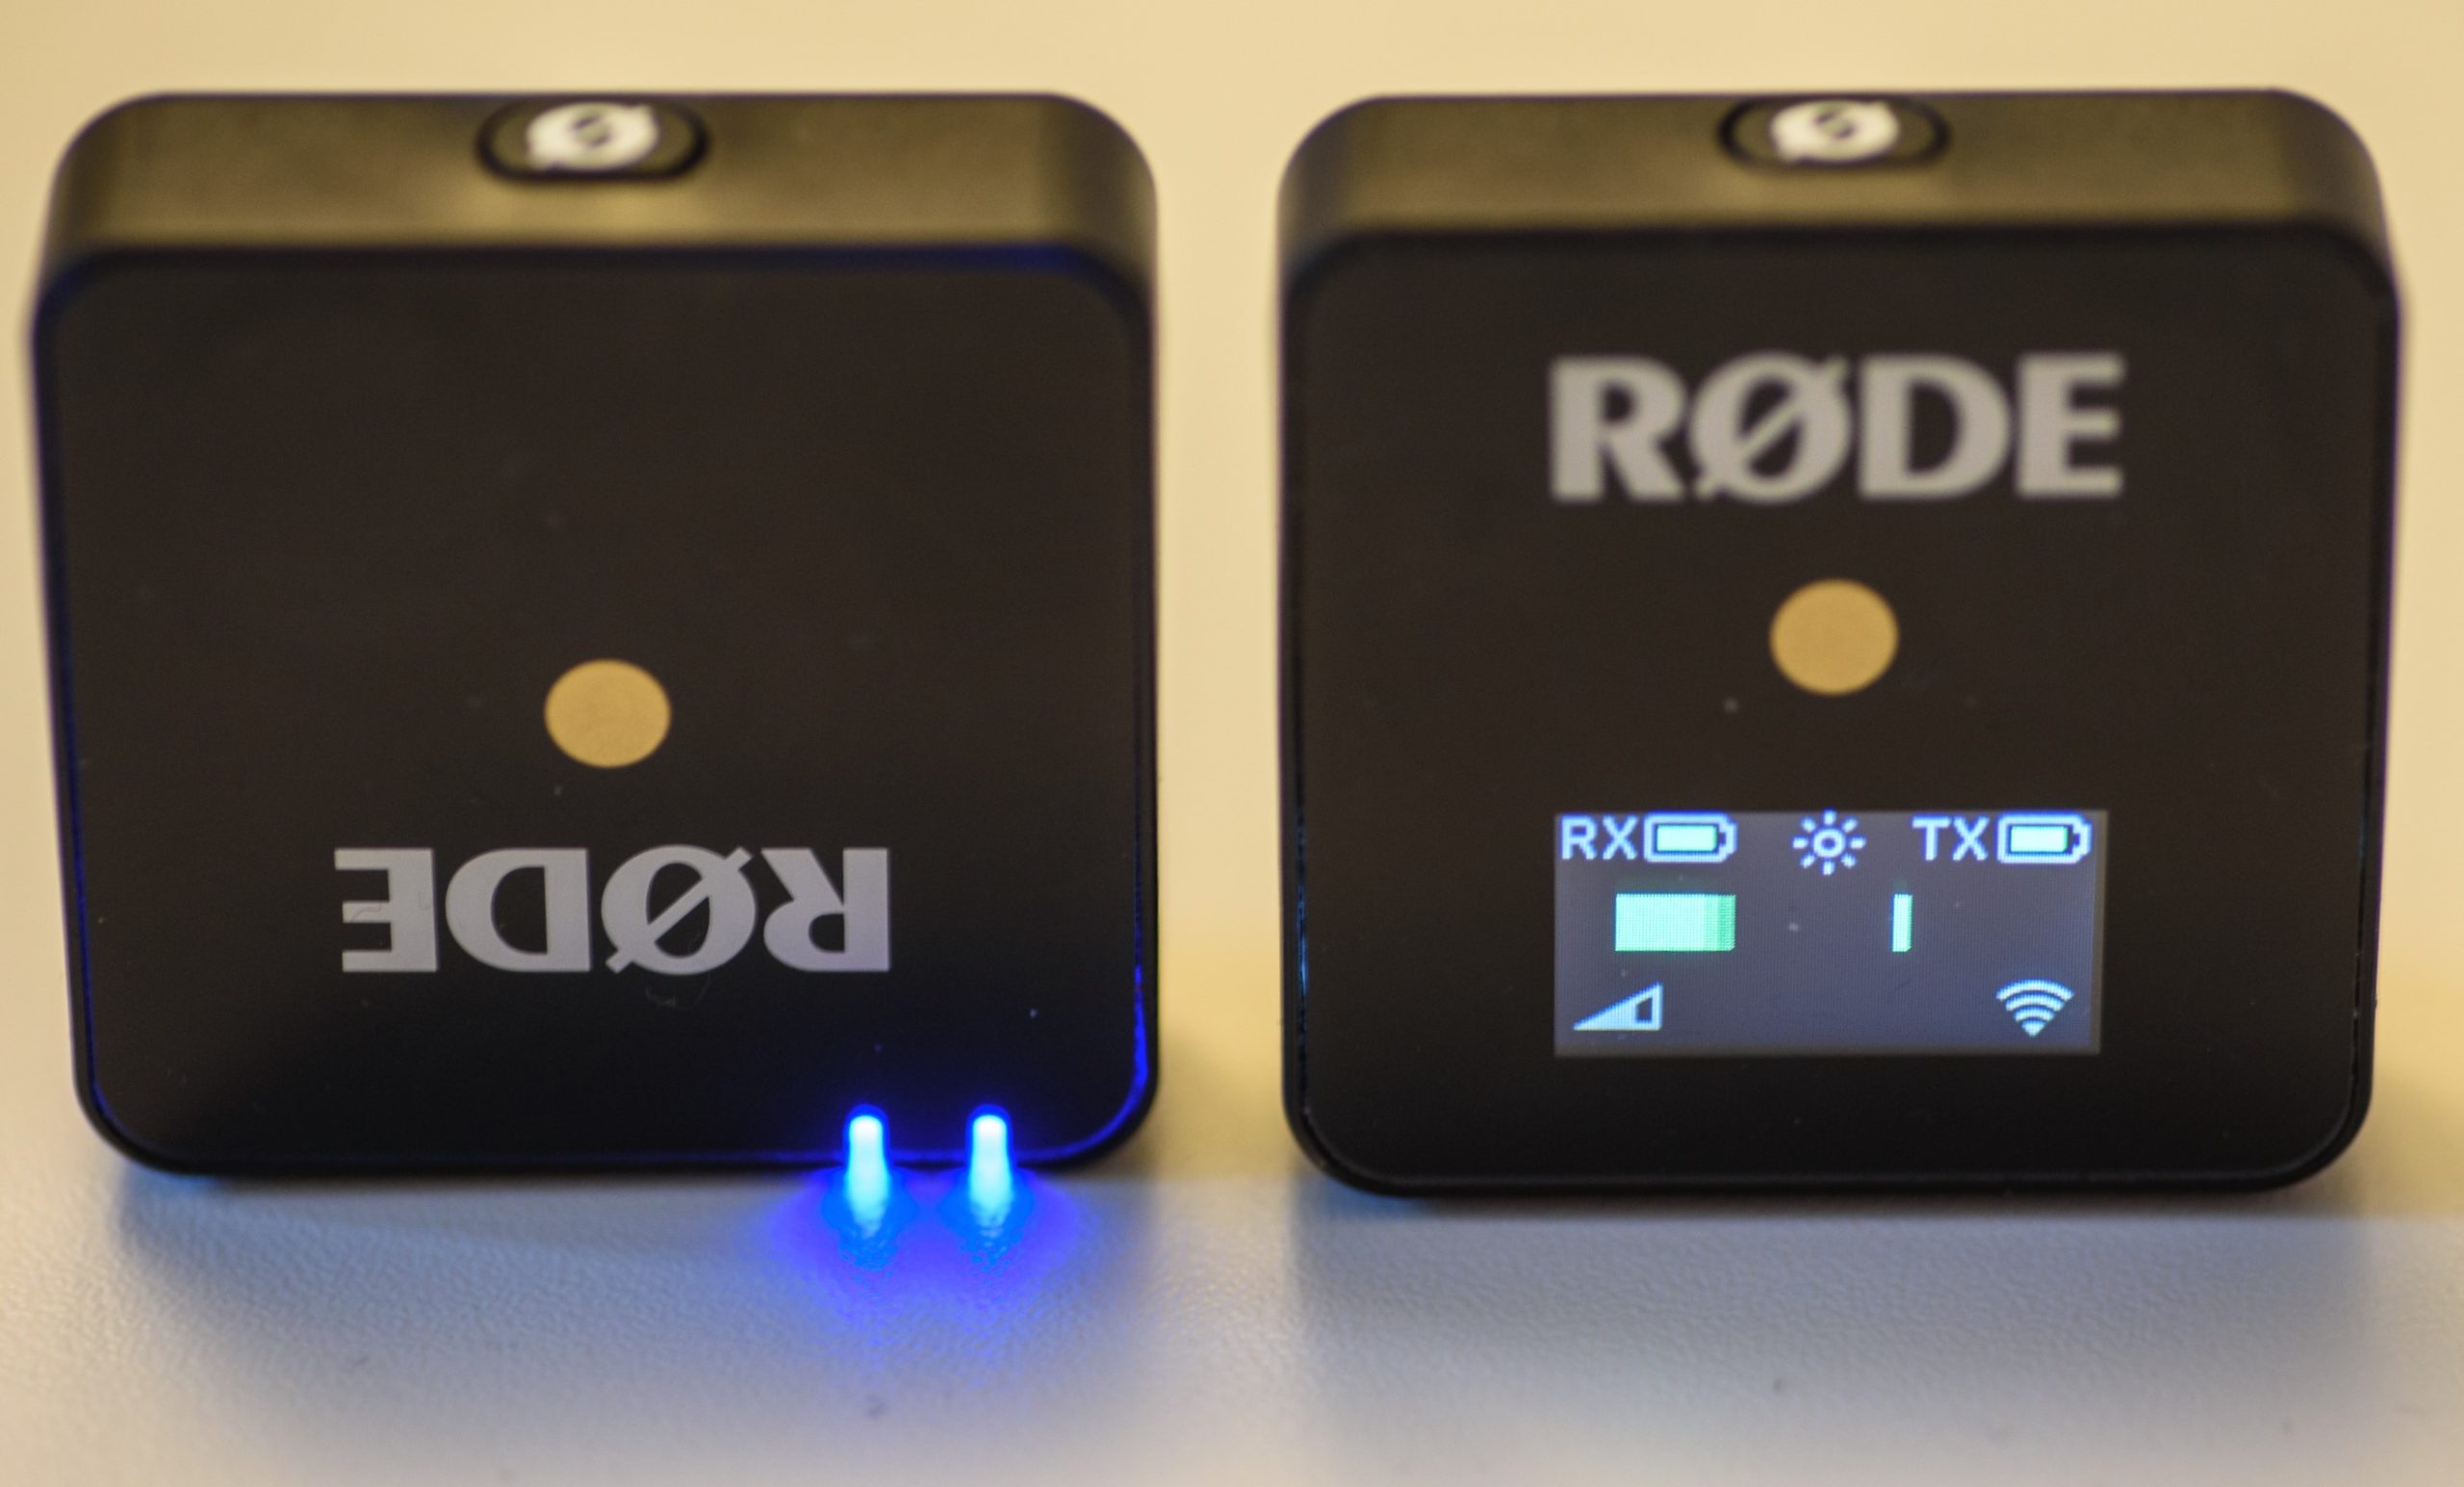
When you open the power bank, you will find the sender (tx) and the receiver (rx) sitting in the drawer.

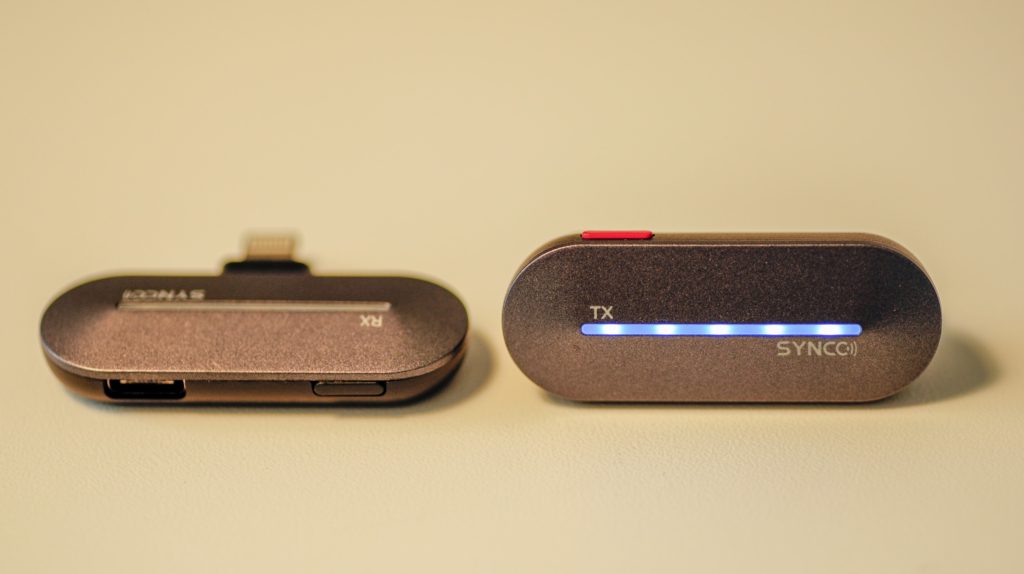
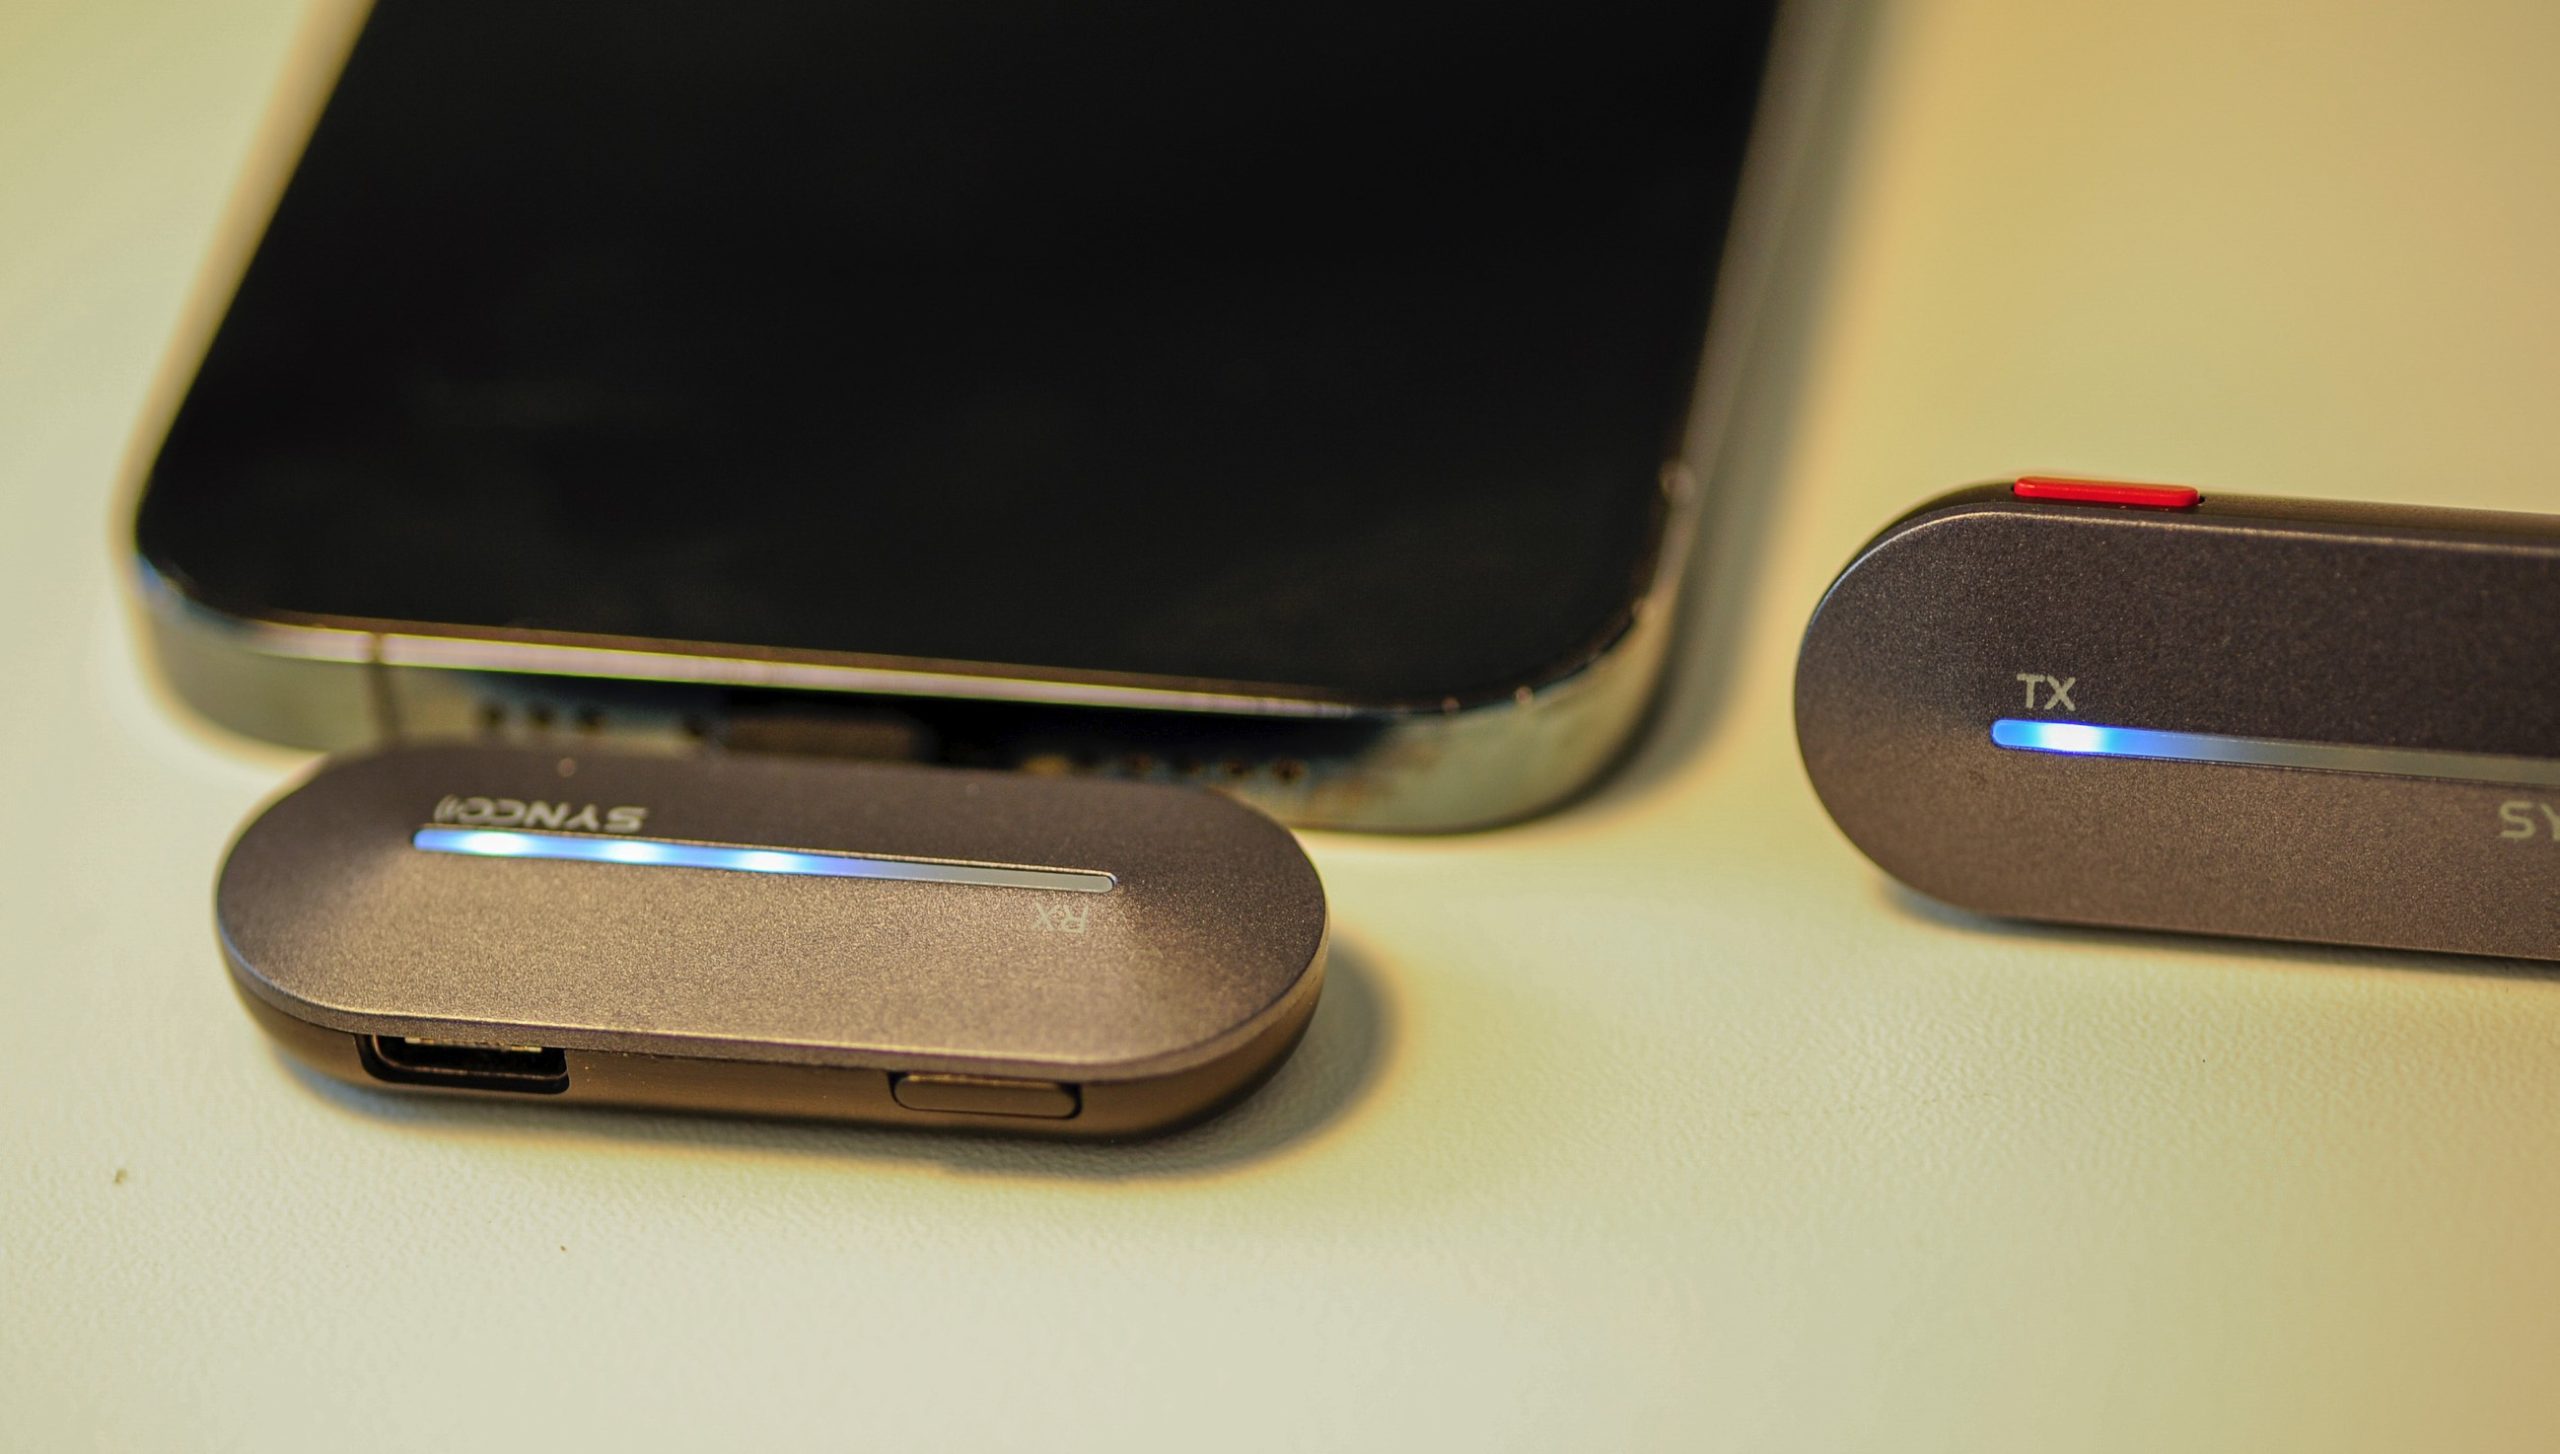
When you take the transmitter (tx) out of the cradle, it will automatically start up. The receiver (rx, to the left above) switches on as soon as it is inserted into your iPhone. The two combined, i.e. as shown in the picture above, is only 17 grams in total! This must be the lightest sound option out there available!

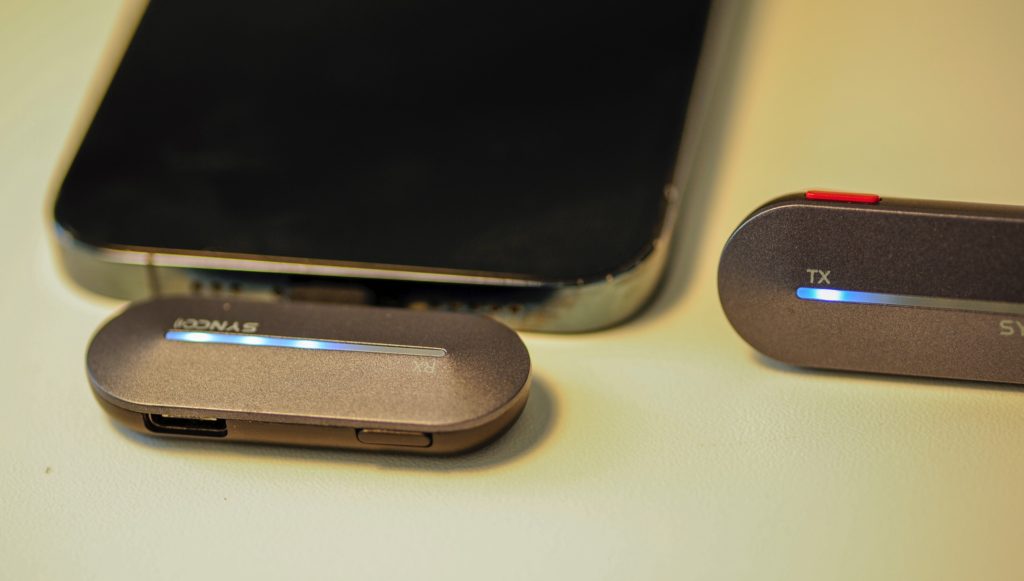
Above the receiver is inserted to the bottom of the iPhone. It is very important that the connectors on the iPhone a free from dust and dirt, as the receiver obviously needs good connection to the iPhone to work properly. The sender and receiver are paired from the factory side, and will connect super fast and show that they are connected by switching on the LEDs on both tx and rx in a “rolling” manner. If there is no connection, the LEDs will switch on and off at the same time, so you get a blinking bar instead of a rolling one.

All this worked out of the box and I had not problems making this work. There is no need for installing an app on the iPhone or the like.

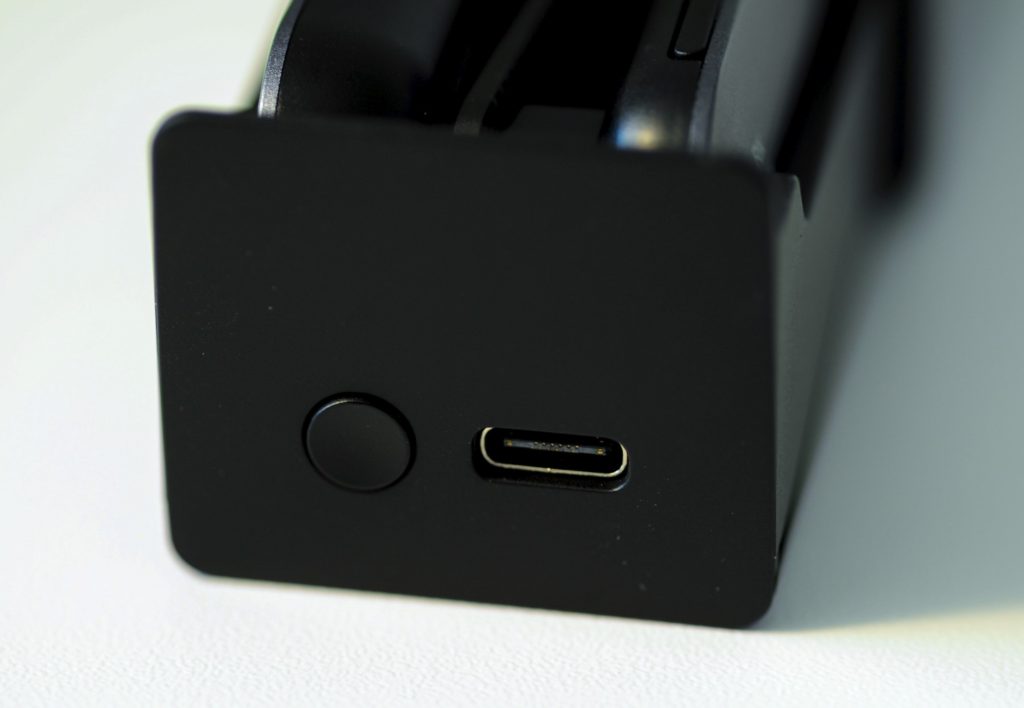
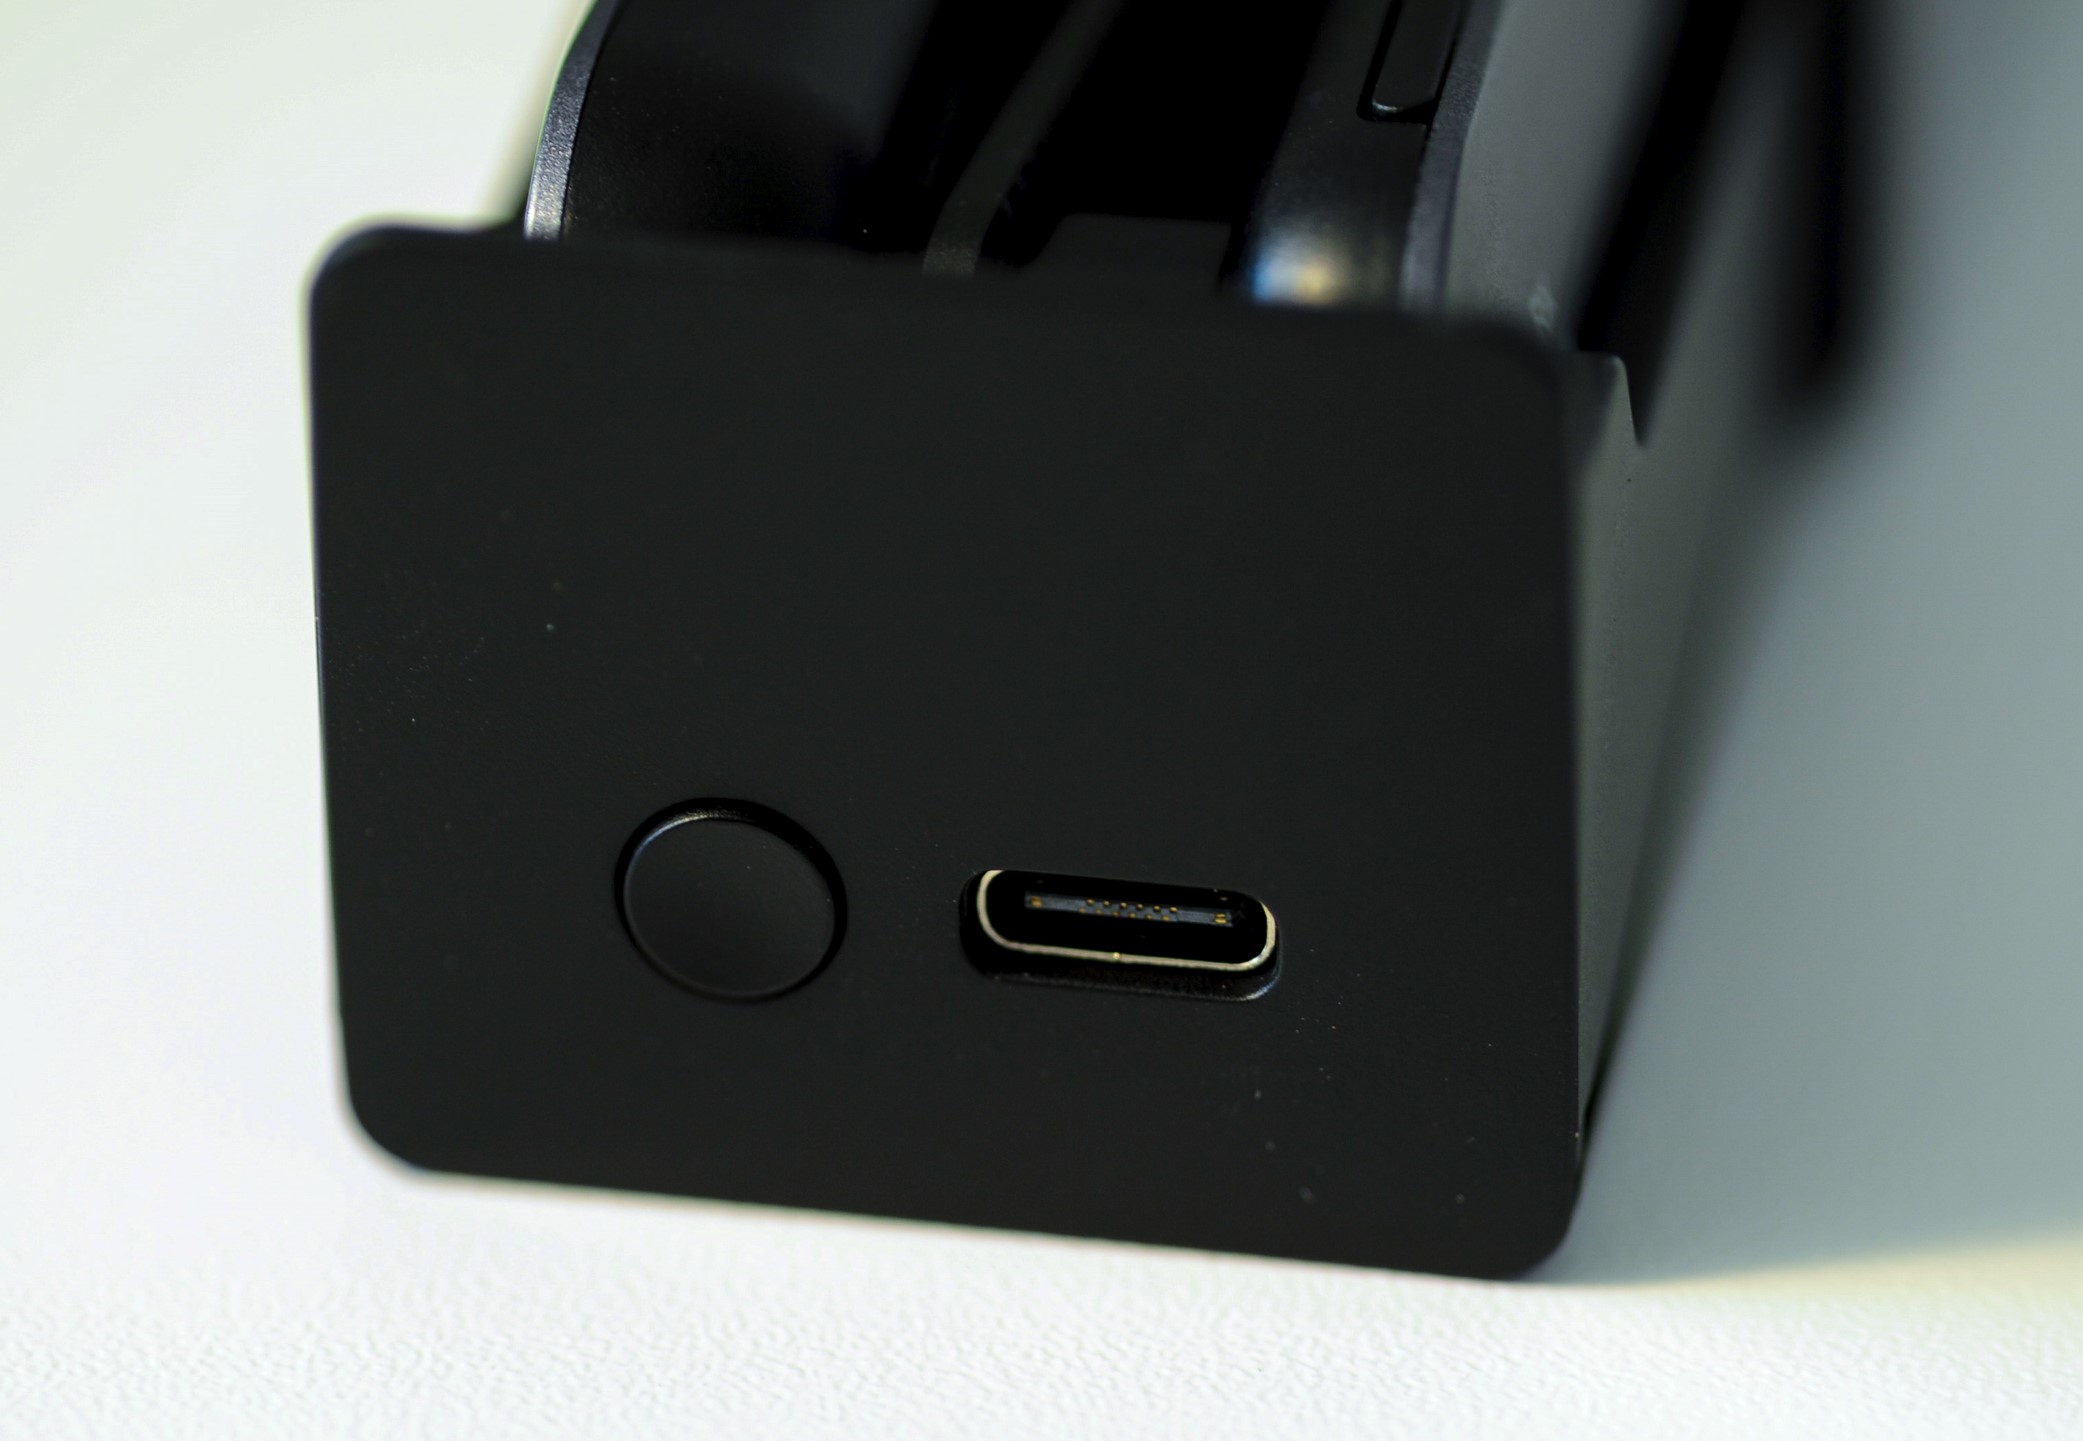
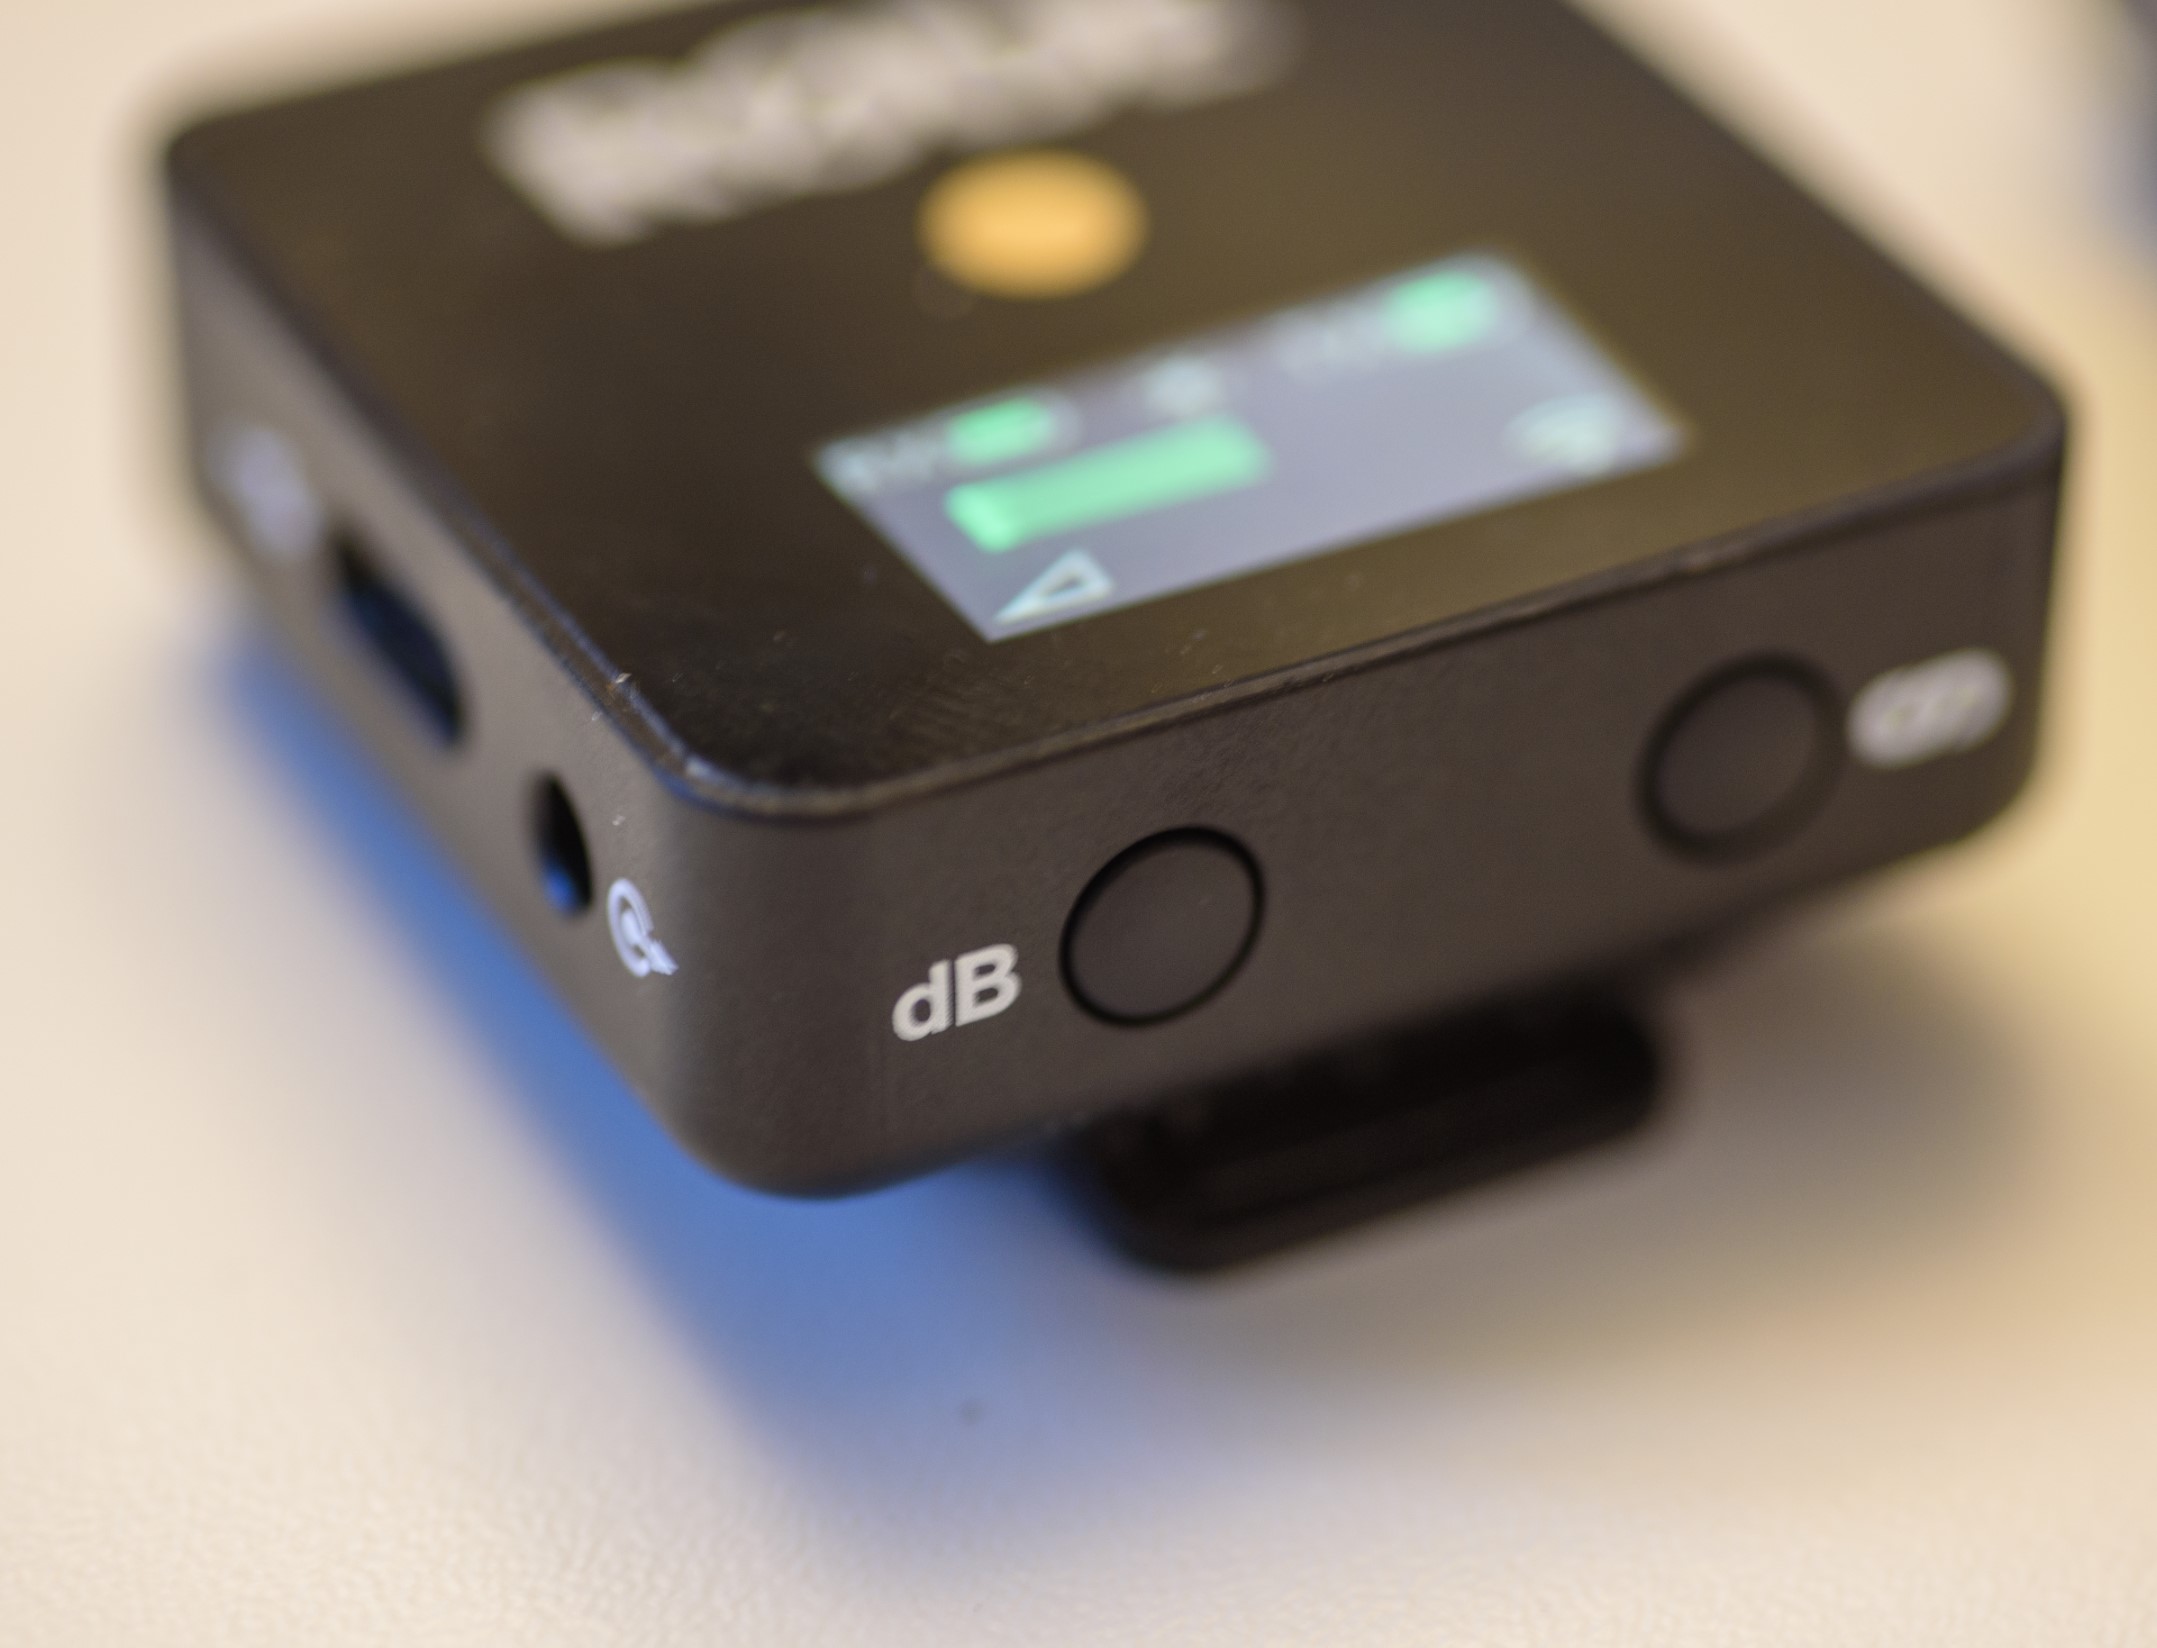
If it does not work and you need the tx and rx to re-connect, simply put both of them in the cradle, close it and hold the button at the end of the power bank in for 3 seconds and more, and the re-connection is made in a matter of seconds.  You can see the button to push for 3 seconds above, along with the USB-C connection to charge the power bank.

Charging the tx and rx? Happens automatically when you put them in position in the power bank.

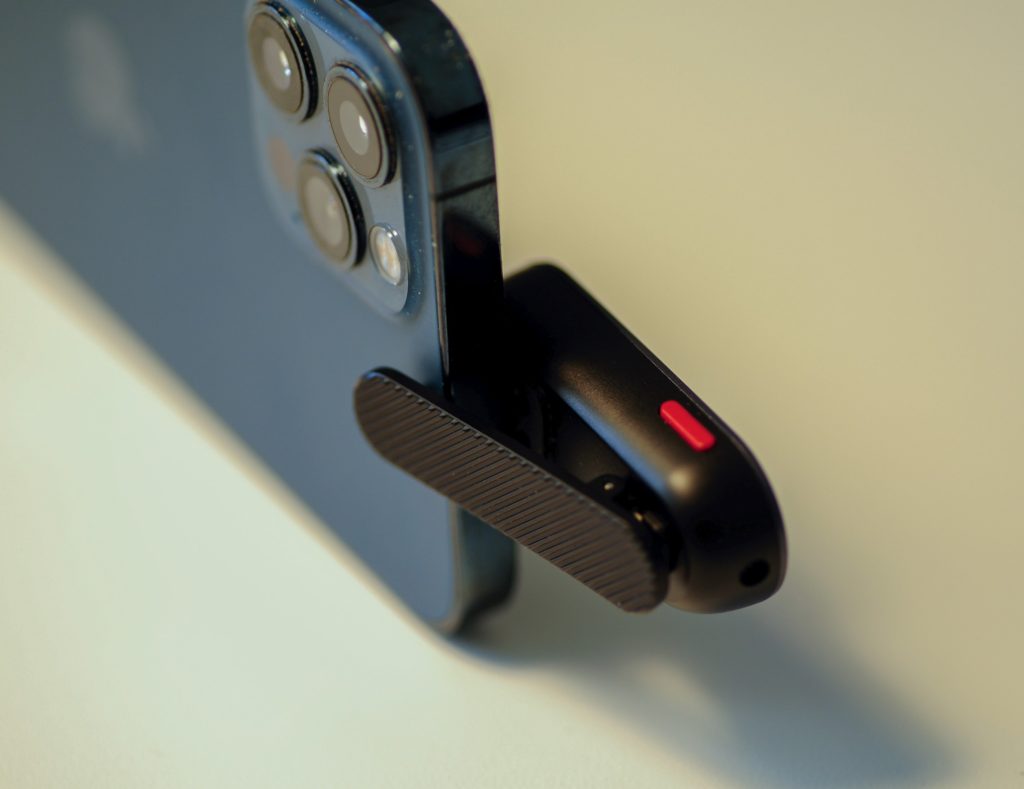
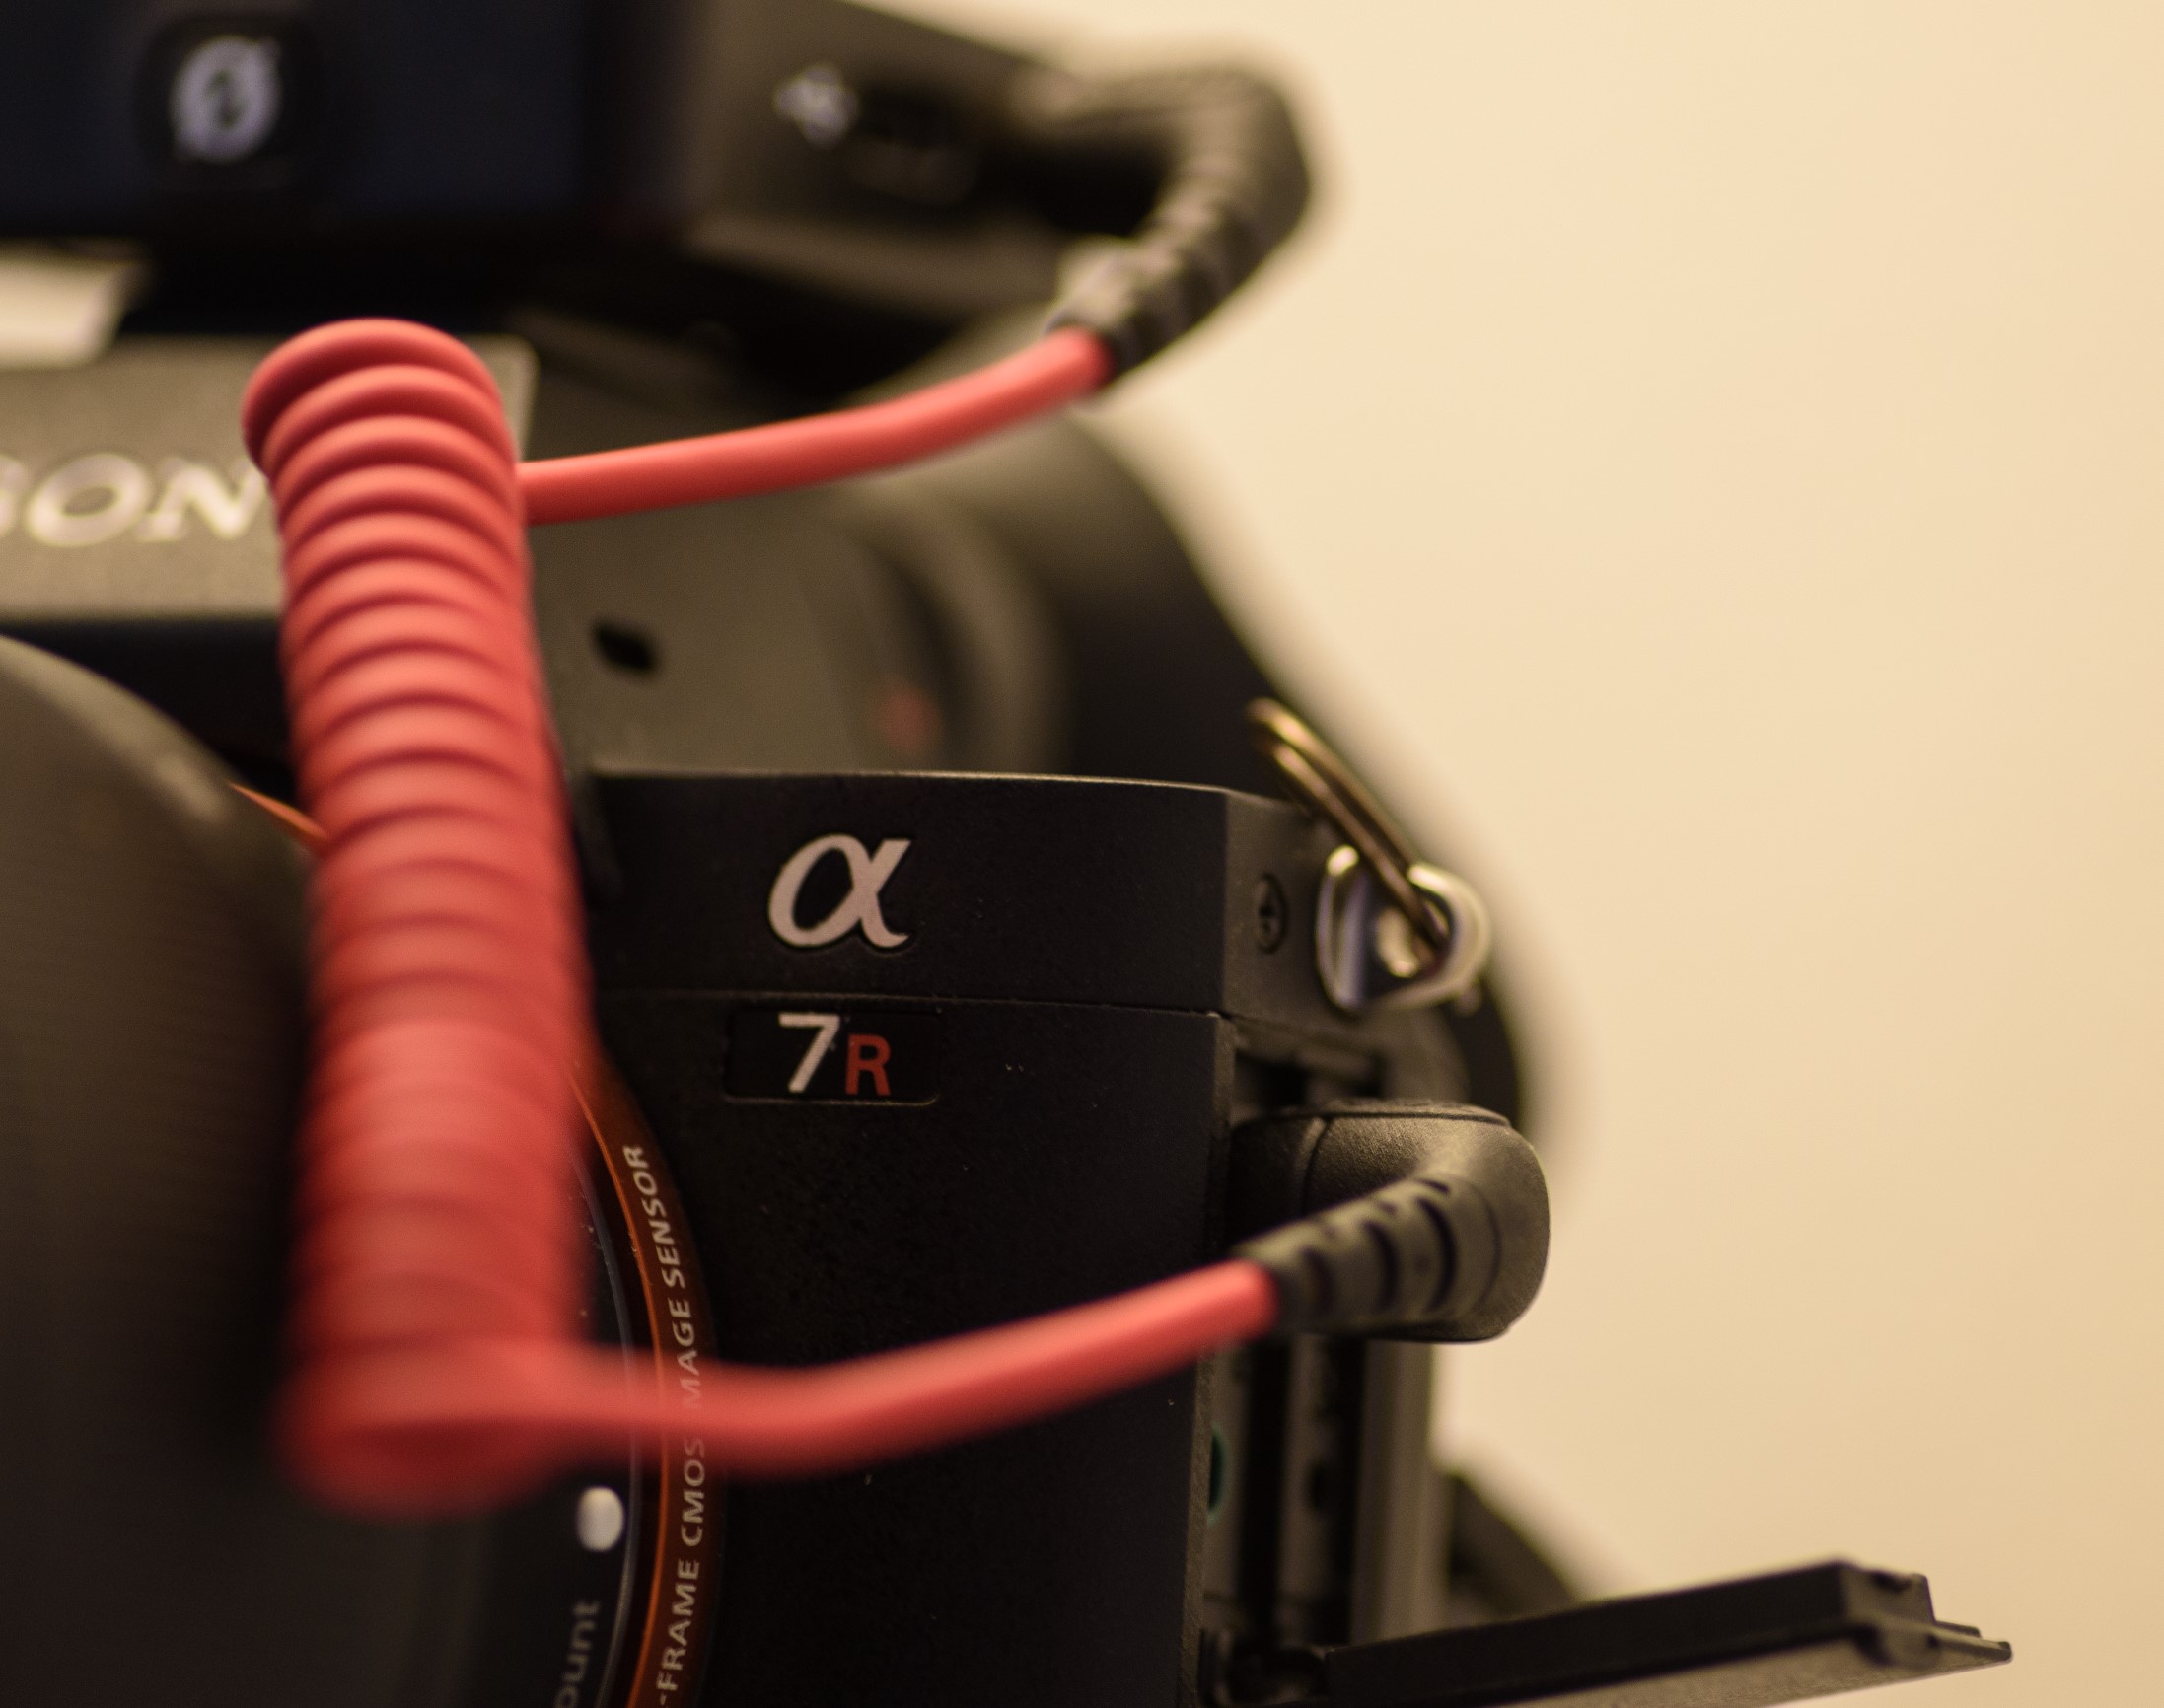
The microphone comes with a little spring laden clip that allow you to attach it easily to your clothing. In the image above I have attached it to my iPhone just to illustrate how it works. The microphone sits on top of the sender, i.e. to the rightmost above.

Above you see the transmitter with the hole into the microphone closest to the camera. The clip to attach it to clothing is now at the bottom of the image.

Once you have put the receiver into the iPhone and attached the sender to your clothing – you now have an operational wireless microphone! There is no option for adjusting the sound level, so you will have to do so in post processing if you desire, but I found that it does a good job selecting a good sound level, as long as there is around 15-20 centimeters between the microphone and your mouth.

The sound is really good and pleasing. You can hear very clearly what is being said and I like the result. I did however find that when on the beach or other windy places, I missed the option to mount a “dead cat” to reduce wind noise. Also, it would have been good if there had been a connector to allow me to use an alternative microphone, so I just used the sender/receiver setup, but maybe this is not a fair request for a product at this price point.

Synco promises up to 5 hours of operating time with the microphone on – I must admit that I have not tested this part, as it is much more than what I need. This also applies to the reach – Synco promises that the setup will work with 150 meters (!) between microphone and receiver if line of sight, and 50 meters otherwise. I have tested it and found that it delivers to promise. Just like with the battery, this is MUCH more than I will ever need.

There is an option to listen in to your own recording while recording and that is what the small adapter is for. However, it gives a cabled connection to the receiving side, and hence the whole point with the wireless setup is lost. I think this option is only relevant for studio usage.

Finally I have not tested the voice effect. I think it is a bit of a gimmick for a serious product, so I have simply ignored this feature. I prefer to do my post processing of sound in Premiere Pro and the like, and hence have no need for this feature.

Conclusion

Below my list of pros and cons. I really like this product for its ease of use, being super light, producing great sound and not breaking the bank. If you use your iPhone for video recording, this product could lift the quality of your sound to a new level. And for such use case, I can recommend this product.

Pros:

  • Price / value
  • Good sound
  • Light solution (17 grams)
  • Long reach (150 meters LOS, 50 meters NLOS)
  • Easy to use – starts and connects easily
  • Charging case included
  • USB-C for charging
  • Monitoring option (although only for studio use)

Cons:

  • No option for mounting noise reduction / dead cat
  • No option for using own microphone
  • Connection to iPhone seems fragile if dropped accidentally
  • Sound effects a bit unnecessary for my usage

More reading

Link to product page

Review: Røde Wireless Go

Easy to use

It is seldom that I praise a product for being easy to use. Somehow, when everybody tells me a product is easy to use, I manage to find the wrong way to go about things, and a well designed easy to use product suddenly becomes complicated. Not so with the Røde wireless go. It is just plug and play – no need to pray!

Røde Wireless Go review
The essentials: A sender, a receiver, two dead cats and a connector cable from receiver to camera (red).

It consists of a sender unit, a receiver unit and a cable to go between the receiver and the camera. In addition there are two “dead cats” to mount on top of the sender, to reduce noise from wind and the like. The sound is then wirelessly transmitted in real time from the sender (with the mike) to the receiver. No cable to be tangled up with or other cumbersome things. A simple solution to getting the sound from a microphone in front of the camera, to the camera’s mike input connector.

Røde Wireless Go review
Here the red connector is applied between camera and Røde receiver. The receiver fits into the hot shoe of the camera. On my Sony A7Rii the receiver is not visually dominating at all.

The tin promises that this is an ultra compact wireless solution with digital transmission and a built in microphone. All this is true. The marketing department did not exaggerate at all.

Røde Wireless Go review
The tin promises digital transmission, built in microphone and a ultra-compact wireless setup. I tend to agree….

To activate the system, you hold in the button marked “ø” for a few seconds, and the units turn on. The sender and receiver connected the first time I turned them on. No need to pair them or the like. Brilliant!

Røde Wireless Go review
A microphone is built in. It does a good job, but if you want a more discrete microphone, use a small cabled microphone and hide the receiver in a pocket. The connector is left to the microphone on the right hand unit. The units measures approx. 4,3cm x 4,3cm x 1,3cm and seem really small.

The sender has a built in microphone, but I prefer not to use this one. The sound is great, but it requires that you have the unit close to the one speaking and hence very visible. The unit is small, but not very discrete when recording a video close up!

The DB button changes mike sensitivity. Toggle between high, medium and low. I always use medium.

You can regulate the sound level hitting the “dB” button. It circles between high, medium and low. I have only used the medium setting – it works fine and further adjustments can be made in post to fit your needs.

Røde Wireless Go review
The receiver has a battery indicator display for both the sender and the receiver. The green bar in the middle is the sound level. Triangle bottom left shows the mike sensitivity and bottom right is the strength of the wireless communication.

The receiver unit has battery indicators for both the sender and the receiver, so there is no display on the sender. I seldom record for more than an hour at a time, and for my needs there has always been plenty of battery power on both sender and receiver, so for my needs battery power is more than sufficient.

Røde Wireless Go review
If you care to download the user guide (PDF) from the Røde homepage, you will find that it is short and informative. Here the description of buttons and display on the receiver unit. Credit: Røde.

Two blue diodes on the sender indicate if the sender is connected to the receiver and if it has sufficient battery. If you need more details, you need to consult the receiver.

In terms of connectivity I have not stress tested the connection, but recording a video recently where I was out and about with perhaps 10 meters distance between sender and receiver, I experienced no issues with the connectivity. Clear and crisp sound all the way with no dropouts or similar issues. It just works.

Røde Wireless Go review
If you have a microphone with a TRRS connector (4 rings), it will not work with the sender. You need an adapter to take you from TRRS to TRS (3 rings).

The only thing that may be a bit tricky is the connector when you want to use your own microphone. The Røde Go system requires a TRS connector, and your microphone may have a TRRS connector. In that case, you need an adapter as shown in the image above. So count the number of rings on your connector, and if it is 4, then make sure to get an adapter when you order your copy of the Røde Go.

Røde Wireless Go review
Both sender and receiver charge via USB-C. Brilliant!

A final thing that I want to bring up is the fact that both units charge via USB-C. I cannot underline the importance of industry standards and USB-C is exactly such one. I am so glad the Wireless Go comes with no chargers at all! Wonderful! If you knew how many chargers I have on stock for my cameras and flashes…. I welcome USB-C so very much. And of course also the USB to USB-C cables that came along with the Wireless Go system.

Conclusion

If you want a simple cable-free solution to transmit sound from a microphone in front of your camera to your cameras input port, this is a really easy to use and stable solution for exactly that need. Just make sure you have an adapter if your microphone has a TRRS connector.

The solution reviewed here is not applicable if you want to record an interview or other situations where several channels need to be recorded in parallel. I believe Røde also has a more advanced solution for such situations, but that is not the product reviewed here.

I have used this solution for my YouTube videos and for my needs (walking and talking in front of a camera), this solution fits my needs spot on. It is simple to use, stable and with good connectivity. Exactly what I need, for less than 100 EUR. Highly recommended.

Related reading

XTAR Camera Battery Charger Review

COLBOR CL100 Video light review