From Nikon D5600 to D7500 – is that a good move?

So over at my YouTube channel I got the following question from Arpski 2K, and I want to add it to my list of blog posts, as I find that many ask – if not the same question – then questions that circle around the same subject:

“Right now I have a dilemma what to get after my D5600, but I am still not sure. I think that right now my DSLR is limiting me, I like to photograph landscapes and wildlife, mainly birds but for landscape looks like crop sensor is the limit like i can’t zoom out the scene how I would like to do. And the AF for fast birds is sometimes slow and wrong as it pick up often wrong thing to focus on, idk, my lens is stock 18-140mm, also I love to travel with my camera so weight is a factor too. Maybe 7500 would be better option?”

Arpski gives us a number of hints regarding what is important: the weight of the gear, the ability to go wide in landscape photography and the ability to track fast moving birds fast with autofocus that locks on. And he has an idea that the APS-C sensor in the D5600 is limiting him.

Ok, let’s look at the individual parts:

Weight: If weight is important to you, my advice is to stay with APS-C or cropped sensor. Full frame glass is much heavier and also more expensive, and the bonus of the FF in terms of bokeh and low low light capabilities does not seem to be important here. I have seen landscape photographers working with APS-C cameras and getting beautiful results, so no need to go full frame if you ask me.

BIF:  Auto focus to track fast moving birds, i.e. birds in flight (BIF) is a challenge for many AF systems. Mind you that the AF speed is a cooperation between the lens and the camera, so it can sometime be a bit difficult to say of the camera is slow, or the lens is slow or the combo is slow. But before you go and invest in new gear, try this: Manual focus! Or rather, no focus at all. I do not know what distance you shoot birds at, but if they are say 100 meters away, focusing at 100m distance and leaving the lens in that position may just give you the results you are after! The depth of field here is 60 meters at f/4 on an APS-C camera when shooting at 140mm! So if you can figure out the distance to your subject, manual focus may be the answer to your problems. The depth of field – all things equal – grows to very forgiving sizes when the distance to your subject is large!

Shooting wide: In my book a 18mm lens is pretty wide. Yes, you can go wider! If you want to invest in a small prime that is wider than 18mm, then there are a number of options. But before you do that, you can try an alternative: shoot several overlapping images and stitch them together in post processing. That way you can go wider than the lens itself and as a bonus you will get an image with a lot more resolution. If you can stomach it, then try to shoot in manual exposure mode, as the exposure and depth of field needs to be constant across the images, otherwise merging them may give strange results.

Ok, so none of the issues reported cannot be addressed using the existing lens and the D5600. But then Arpski mentions that he feels the D5600 is a limitation to his photography. This is a feeling I think most photographers have tried: we constantly ping pong between upgrading our gear and upgrading our skills. And sometimes we just feel like our gear is the limiting factor and it is time to move on. That is as it should be.

The D7500 was a camera I unfortunately only enjoyed for a short while. I bought it after my D5600, but the D7500 was bricked in a salt water accident shortly after I got it and it could not be restored unfortunately. But I loved that camera: great ergonomics, fast FPS, excellent low light performance, etc. I had it with me on a trip to Dublin and I came home with a wonderful set of images.

Mind you that many photographers love to hate the D7500. The reason being that Nikon gave the D7500 a wrong name. The D7100 and D7200 are legends and loved by many Nikon enthusiasts, so when the D7500 came out, they thought the D7500 would be the successor to the D7200. But it was not, and the D7500 took a lot of beating from frustrated photographers. If Nikon had flipped to digits and called the D7500 for D5700, I think all would have been good and the camera would have been seen as what it is: a really good all round APS-C camera. So bear this in mind when you read blogs where people discuss the D7500 – people don’t like it, because the name stages the camera the wrong place.

So what to do? I have one principle that I pursue wholeheartedly, and that is ergonomics and weight. The best camera is the one that is with you, and if weight is important to you, choose a light camera. In other words, don’t go full frame – you will hate the weight penalty. And many APS-C cameras are absolutely wonderful cameras that often are at par with full frame if you do not have crazy demands in terms of shallow depth of field or low light capabilities.

The D7100 and D7200 may be what you should be looking at. They have legendary status and if you can find a good copy without too many clicks on the clock then I am sure that could be a good next step. I shop used over at mpb.com (no affiliate) and find that they give a fair trade in price for used gear and that what they sell is in the condition advertised.

The D7500 is also an option and I think it will be easier to find a good copy used as it is a younger camera. They even sell new copies (affiliate link). My only issue with the D7500 is that it had little “ears” to hold on to the camera strap and those ears were not good friends with my big hands. But that is the only negative that springs to my mind.

If you specifically try to choose between the D7500 and the D5600, my advice is to go with the D7500 if your budget allows. The D5600 is a good camera, but the D7500 is in many respects just better (FPS, dynamic range, etc). I shot with the D7500 in low light conditions and especially this image convinced me that the D7500 is a great camera.

Again, it is difficult to give a final and decisive advice, as you hold the list of personal preferences and what is important to you. And it is your money. And you have to live with the consequences of whatever you decide. My best advice is: consult many sources, read many reviews and don’t trust anyone fully, but make your own opinion based on many different sources. That way you can make an informed decision. I wish you the best of luck with your photography!

Related reading

Which enthusiast Nikon DSLR to choose?

Nikon D5600: Still a good entry level camera?


Nikon Z50: Manual exposure guide

Manual exposure

Many find manual exposure a bit intimidating and stay with the automated mode or one of the semi automated modes like aperture priority or shutter priority. Good news is that manual exposure is not complicated at all and that you have a lot of room for making exposure mistakes and still be able to fix it in post, provided you shoot RAW, which I highly recommend. And you will understand your camera a lot better when you know how to operate in manual exposure mode.

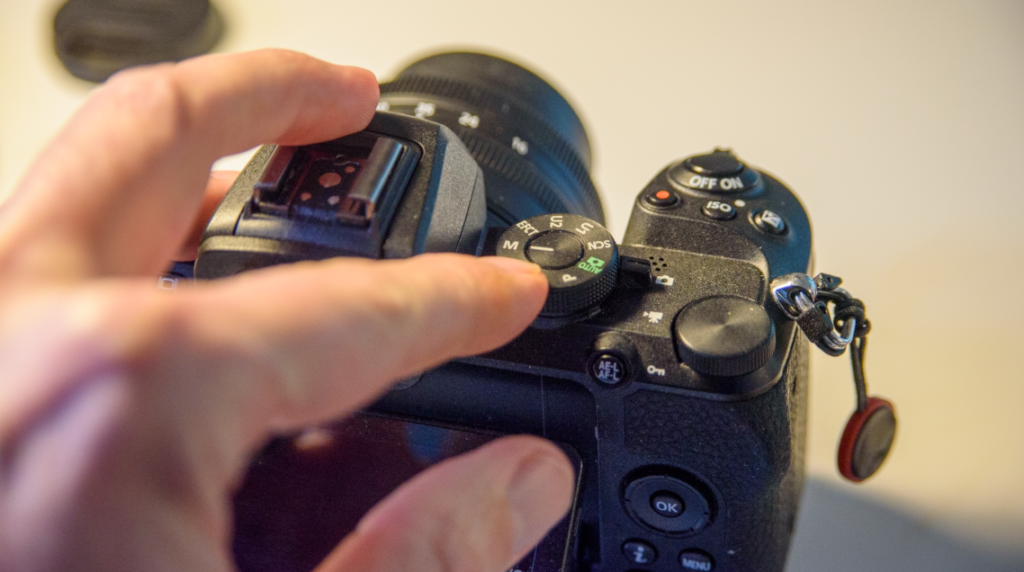
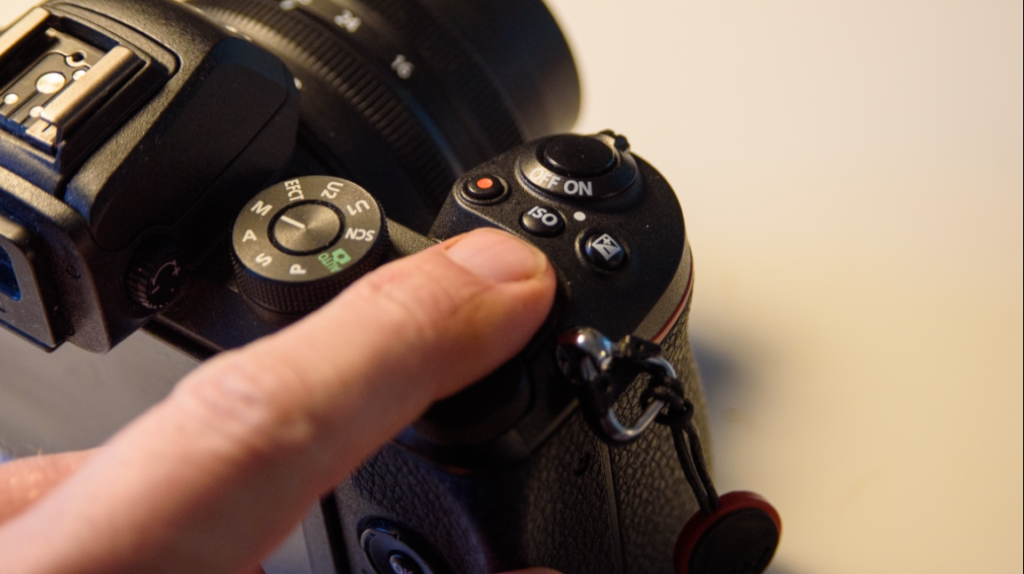
You camera has a built in metering system, that constantly measures the available light. This system continues to work also when you set the camera in manual mode. Select the manual mode on the PASM dial top right on the Nikon Z50.

Mode dial top right – here the mode “M” for manual is selected.

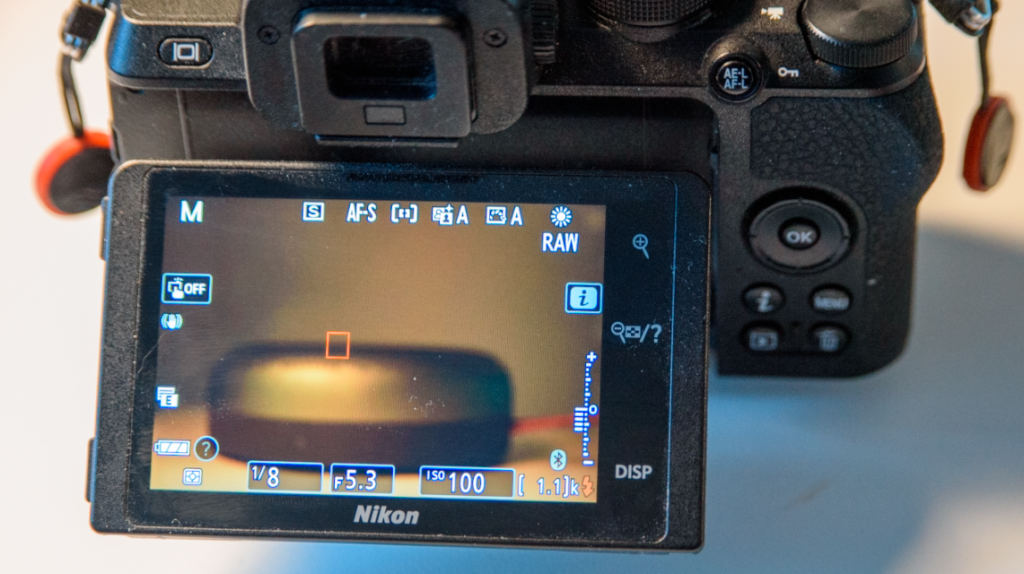
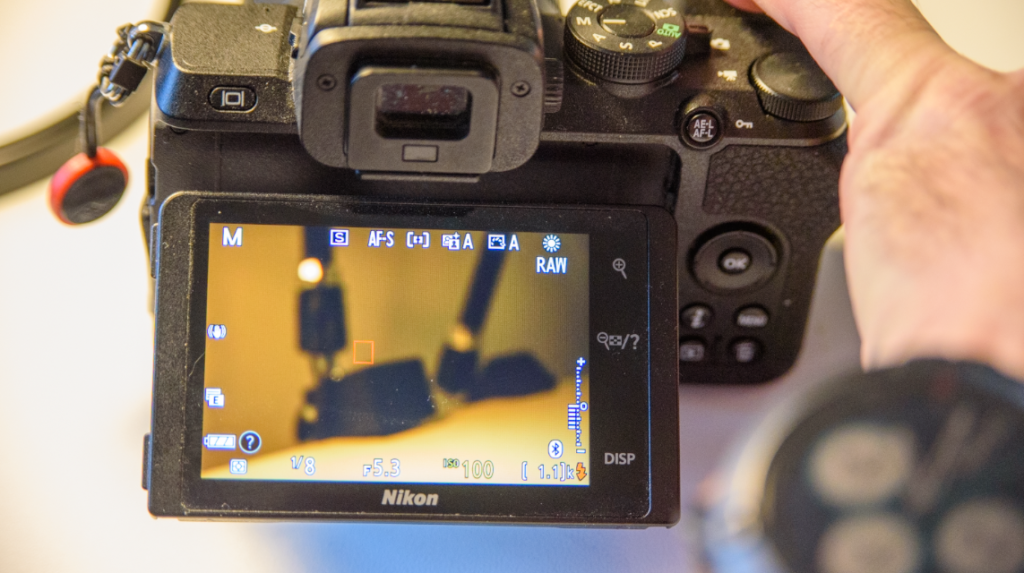
Once in manual mode, you will notice a little exposure indicator appearing, both in the viewfinder and in the rear LCD. This indicator will tell if the camera finds that the aperture, shutter speed and ISO settings will give a correctly exposed picture when you hit the shutter.

Nikon Z50
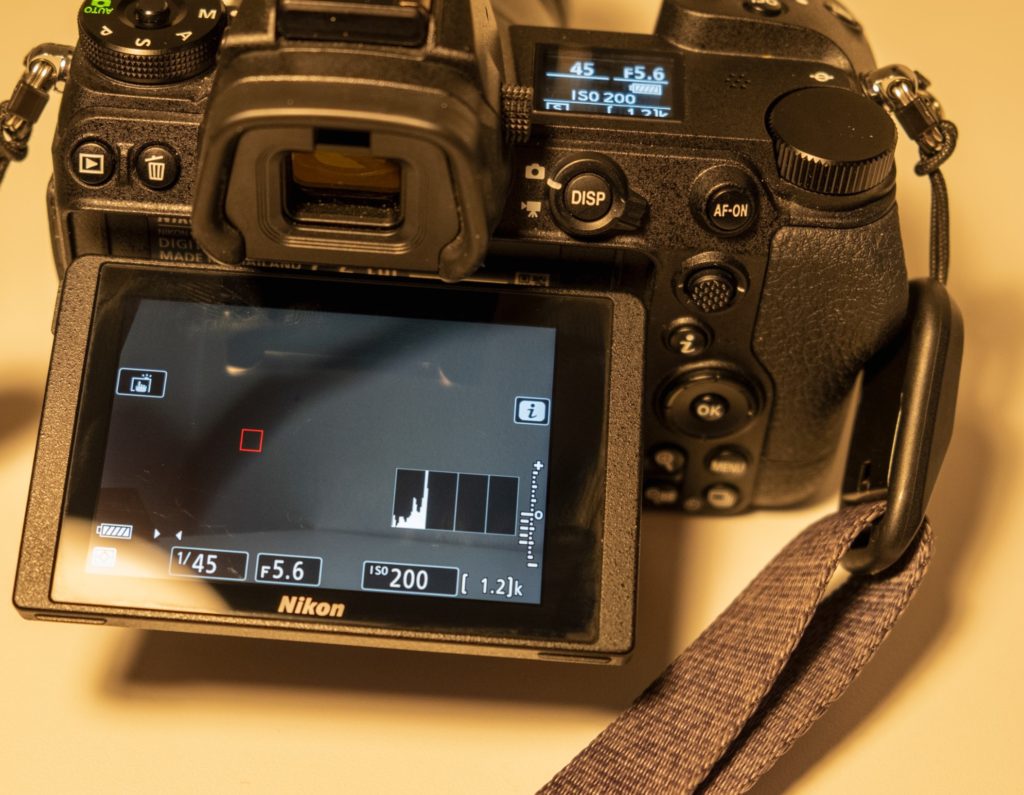
Notice the scale bottom right on the rear LCD. Here the metering system says the image will be underexposed.

It is a good thing to keep an eye on the exposure indicator to make sure you get the exposure you are after. Sometimes you want deliberately to over- or underexpose your picture, and the exposure indicator is a good tool to make sure you get what you want.

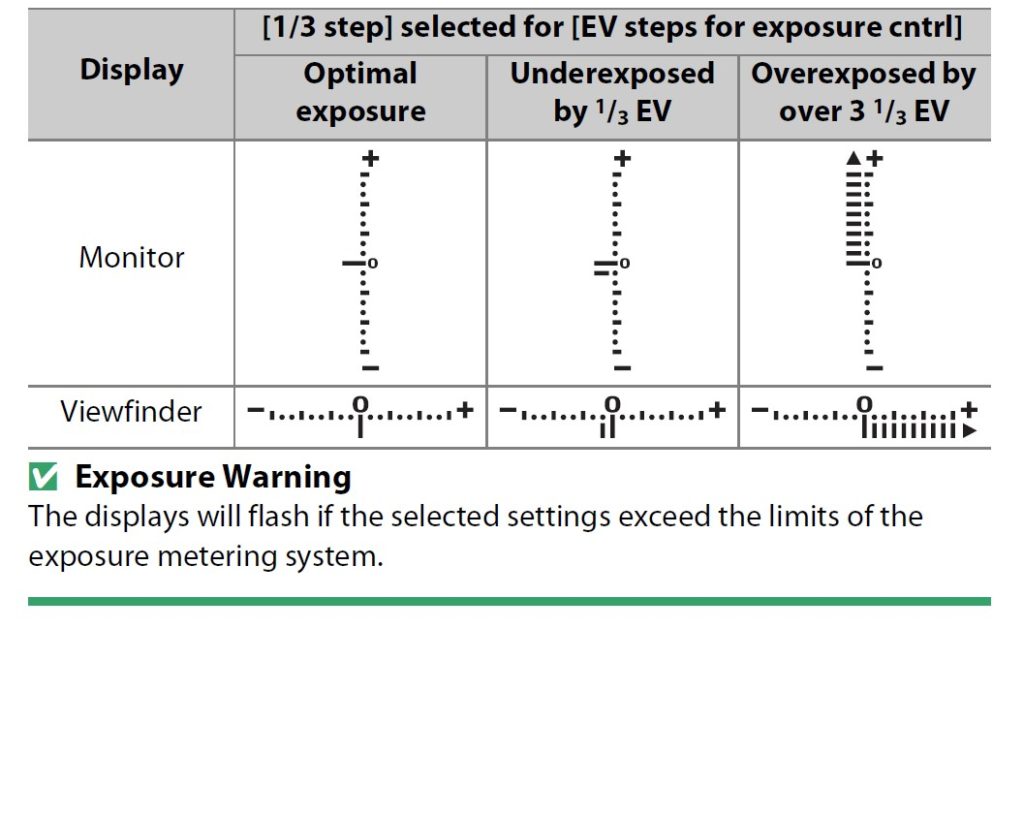
exposure indicator guide
The exposure indicator shows if the picture will be over- or underexposed or correct exposed. Notice the difference between the viewfinder orientation and the rear LCD ditto. Credit: Nikon manuals.

Another way to see the same information as the exposure indicator is to use the histogram – you can make it appear by hitting the “disp” button on the center top rear on the camera. Finally, as you have WYSIWYG, you can simply notice if the LCD or electronic viewfinder turns very dark or very bright – a good indication something is off relative to a technically correct exposed picture.

Aperture and shutter speed

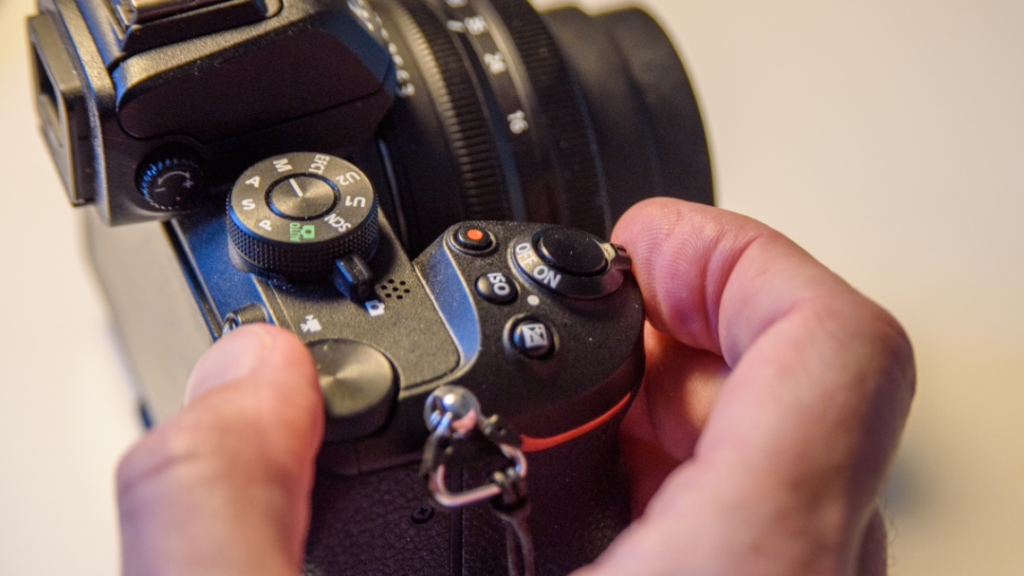
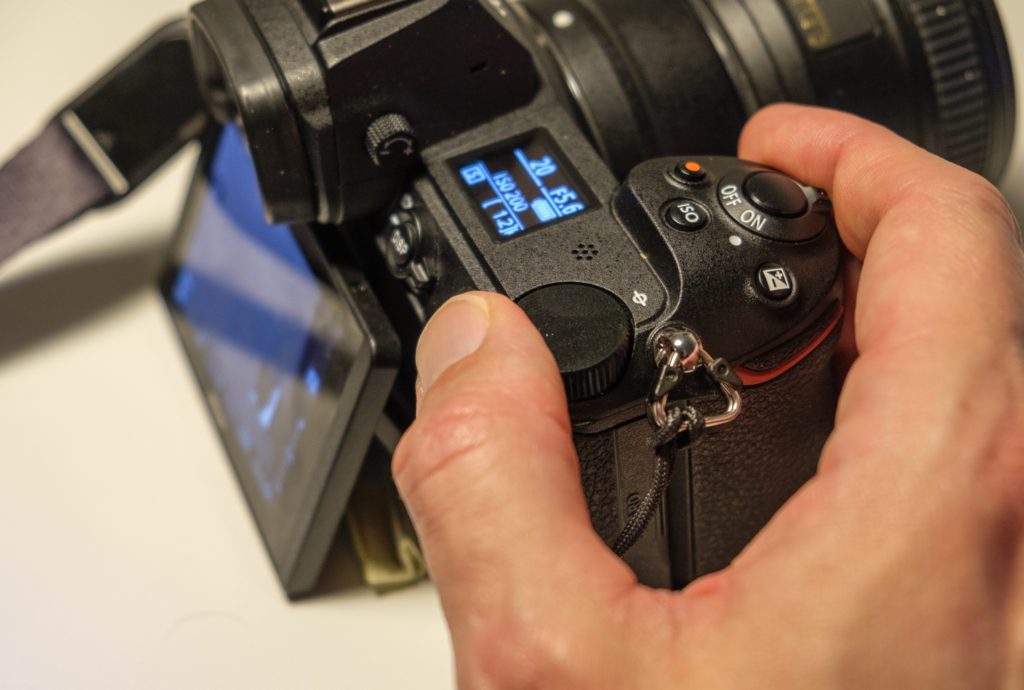
You control the aperture and the shutter speed by turning the front and rear command dials respectively.

Nikon Z50
Here the thumb controls the shutter speed. Index finger the aperture.
If the camera flashes “FEE” in the top LCD when you mount the lens, it is probably because you have not locked the aperture on the lens to the highest f-stop number possible – the camera needs this setting to be so, in order for it to control the position of the aperture blades when shooting with AF or AF-D lenses.

If your lens is an older model (say AI or AIS) where you have an aperture ring on the lens, it is not always possible to change the aperture with the front command dial – instead you will have to set the aperture on the lens. The top LCD will not show the aperture but just a “F–” to indicate it cannot “see” the chosen aperture. The metering indicator works fine still though.

ISO

On a digital camera, ISO is actually not part of the exposure. The sensor has the sensitivity it had when it left the factory and it cannot be changed.

By setting the ISO to other values than the base ISO 100, you apply a gain to the values read by the sensor. It is camera internal post processing that happens from the sensor has read the light and until the image sits on the memory card. Just like in the old days when you turned up the radio, you both amplified the signal and the noise – the original signal remains the same. ISO works the same way, so the price for turning up the ISO is more noise and grain.

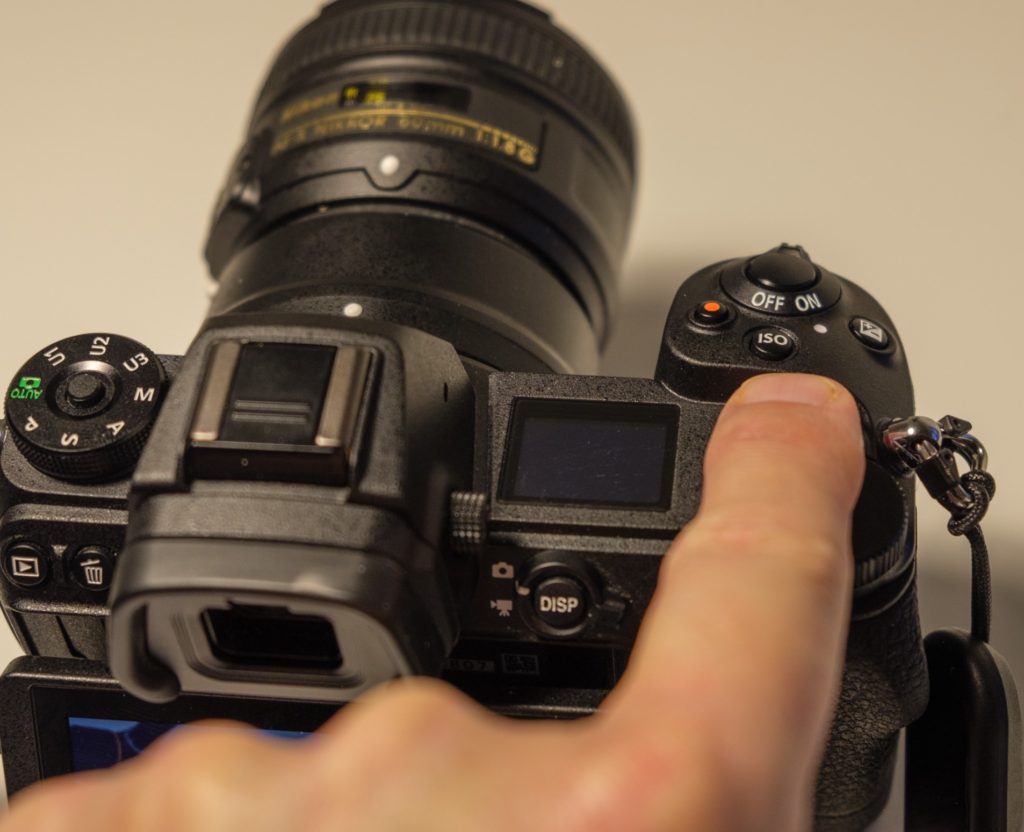
When you push the ISO button on top of the camera, you change the function of the front and rear command dial.

Nikon Z50
The ISO button is located on the top of the Nikon Z50.

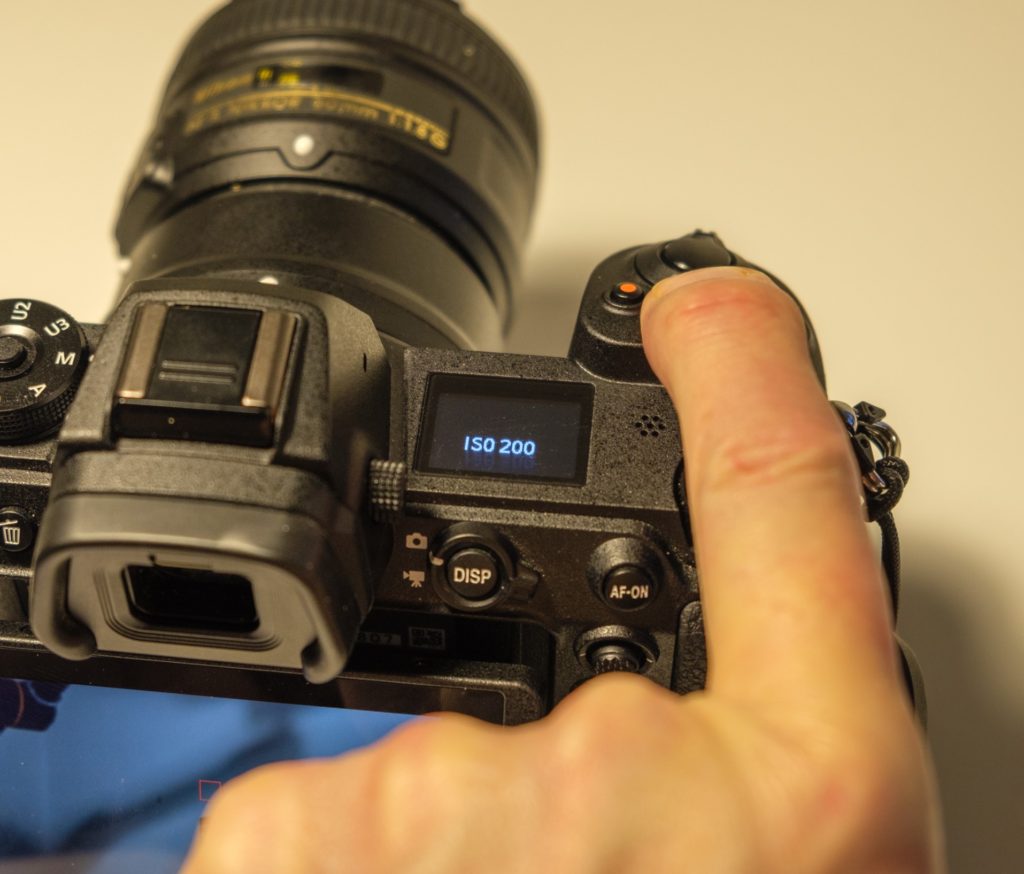
Pushing the ISO button and at the same time turning the front and rear command dial, changes the ISO values. The front command dial switches between ISO and auto-ISO and the rear command dial shifts between ISO values.

Here the ISO button is pushed. The ISO value in the bottom of the rear LCD turns yellow to show the value can now be changed using the command dials.

When you have auto-ISO switched on, the camera will be in a – if not semi automatic – then quarter automatic mode. In other words, the camera will try to make the picture correctly exposed ALONE changing the ISO. So if you have a dark scene where the aperture is closed down and the shutter speed is fast, the camera will have to go to very high ISO values to compensate.

You can use auto-ISO to make sure you come home with images that show at least something, but be aware that grain and noise may be the price you pay for switching auto-ISO on. For starters, I would recommend that you have auto-ISO off, and keep an eye on the exposure indicator or the histogram to make sure the exposure is roughly right. Later, when you have some experience, auto-ISO can make you work faster.

Metering modes

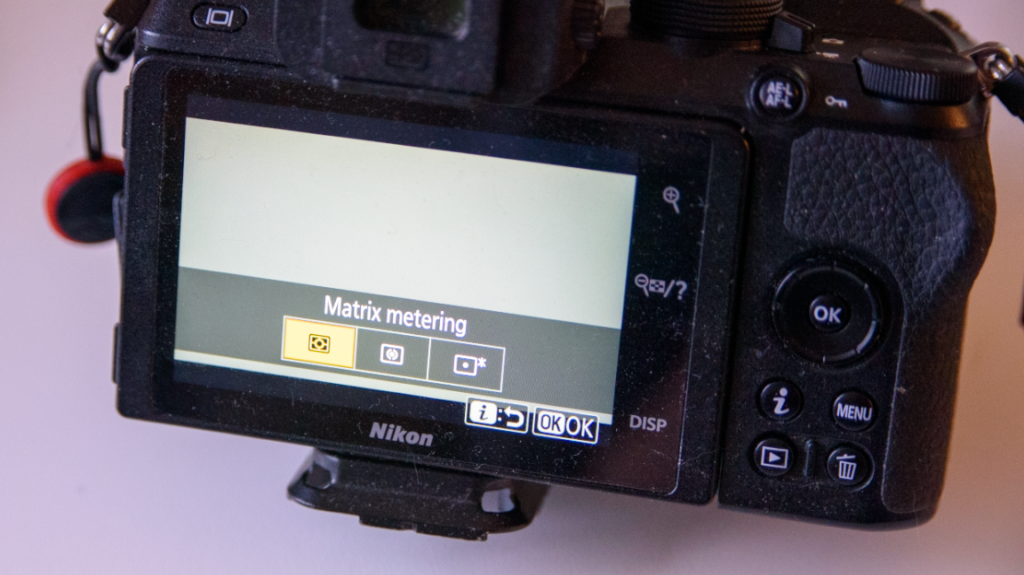
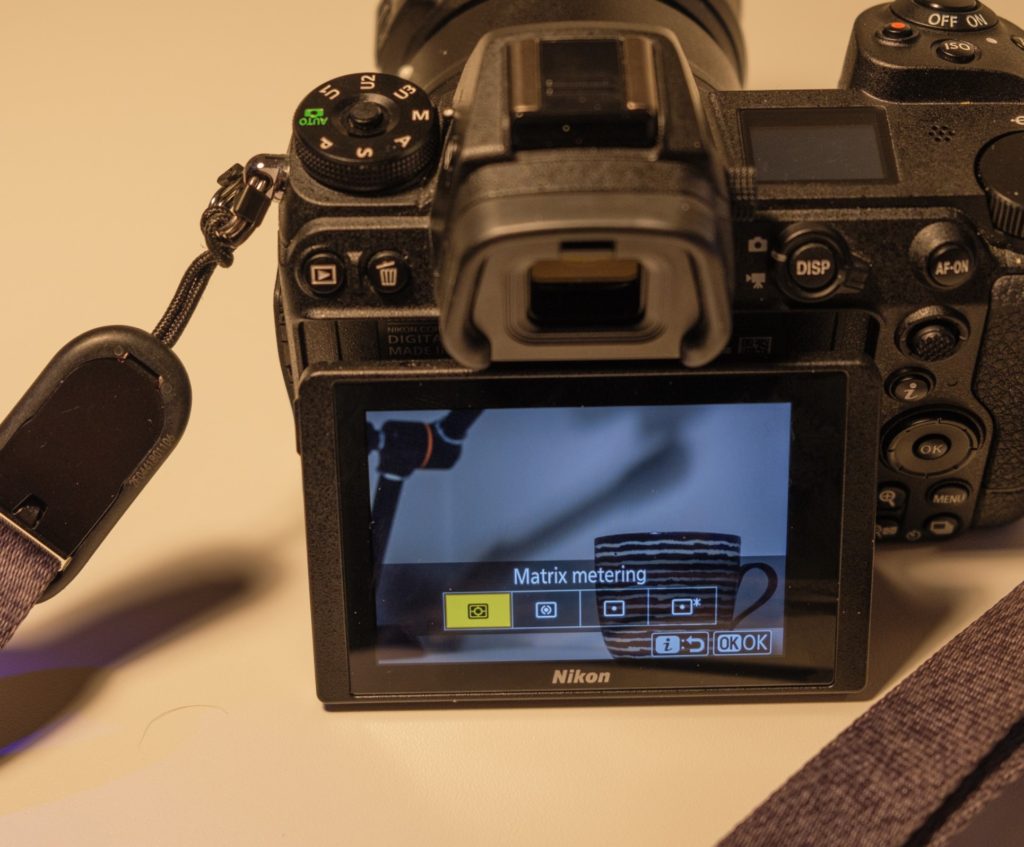
The Nikon Z50 has 3 metering modes. You can access these by pushing the little “i” in the rear of the camera (middle) and this shows a 6×2 menu where one option is “metering”. Selecting that one, brings a sub-menu with 3 options.

Nikon Z50.
The 3 metering options on the Nikon Z50.

The metering mode does NOT change the amount of available light, rather it changes how the camera meters the light that passes through the lens. I shoot almost entirely in the “matrix metering” mode as it is the most advanced one, that tries to take in the entire scene and find a good compromise.

Second option is center weighted metering. This one is good if you shoot portraits where you don’t really care of the corners are exposed correct – the important is that the person in the frame is exposed correct. The manual also mentions this as a good mode if you shoot with filters.

The final option is highlight-weighted metering. This one many street photographers use as they are not afraid of losing details in the shadows. I use it for shooting silhouette photography, where the details in the shadows are also less important.

All of these modes may seem confusing, so my advice is to use matrix metering. If you shoot RAW, then there are plenty of options for adjusting the exposure in post and hence I find that these 3 options are maybe more for backward compatibility with older DSLRs.

Final thoughts

I hope the above has given you some inspiration for shooting in manual exposure mode. With a mirrorless camera like the Nikon Z50, it IMHO has become much easier to see if the exposure is right or not: both the EVF and the rear LCD will show you a too bright or a too dark image if you got it wrong, the histogram will be “lefty” or the opposite and the metering indicator will do the same. So there is plenty of help to get the exposure right if you ask me. And then, if you shoot RAW and didn’t nail the exposure just right, there is lots of headroom to tweak the image in post so the exposure is spot on. I hope you will practice your new set of skills! I think you will find it rewarding!

Video link

Related reading

Review: TTArtisan 50mm f/1.2 lens for the Nikon APS-C Z-mount

Using a grey card and histogram to exposure correctly in Manual mode

Nikon D4: Why not the D4S?

Some years back when I bought my copy of the Nikon D4, I did consider the Nikon D4s, but decided to go with the D4. I have since then made a few videos over at my channel about my experience with the D4 and over there I have several times got the question: Frederik, why did you go with the Nikon D4 and not the D4S? Clearly, the D4S is a better camera, seems to be the thinking behind the question.

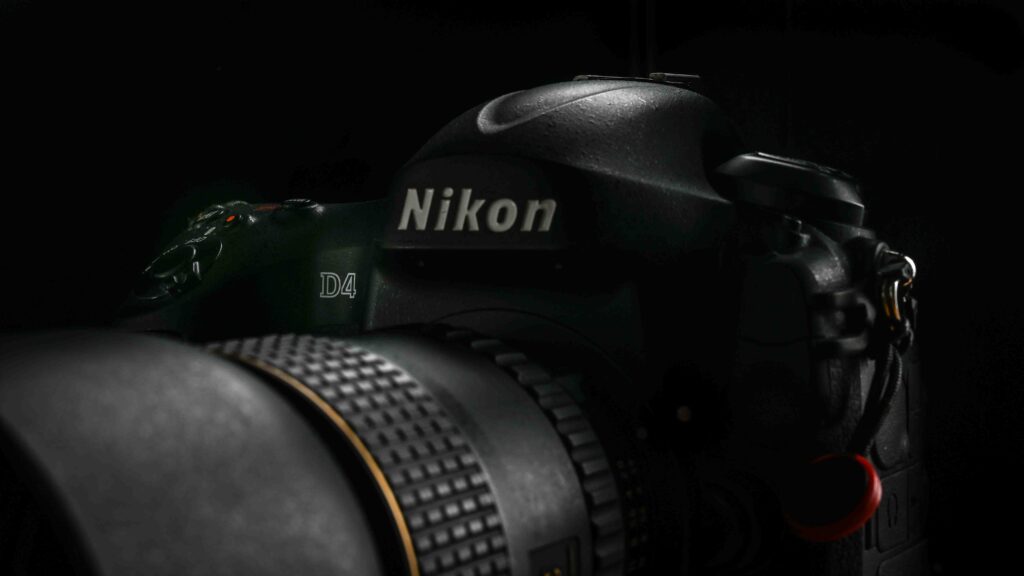
Image of the Nikon D4
My beloved Nikon D4.

Service

The D4S is a better camera than the Nikon D4, no doubt about it. It is also a younger camera, released in 2014 and produced all the way to 2016, when it was replaced by the D5. And this is probably one of the first differences between the cameras: because the D4S is younger, you can probably still get it serviced by Nikon. There is no official policy from Nikon on this matter, but word on the street is that Nikon will service and offer spare parts to cameras until they are 10 years old. And hence the D4S clearly has a better chance of being serviced today should something happen to it, rather than the D4.

The age is reflected in another difference: the price. At the introduction, the D4S was around 500 USD more expensive than the D4, but the relative difference now between the two is much bigger than that.  The D4S price for a used copy is significantly more expensive, and I cannot imagine it is all related to the technical improvements. It has to be because photographers also factor in that if the camera breaks down or needs service, then the D4 is a dead end whereas the D4S still is “live”.

That said, with an expected shutter count around 400.000 and the knowledge that Nikon cameras often go way beyond the expected shutter count, I doubt that I will ever see the end of my D4. But it is of course a risk that I cannot get it serviced or repaired, if need be.

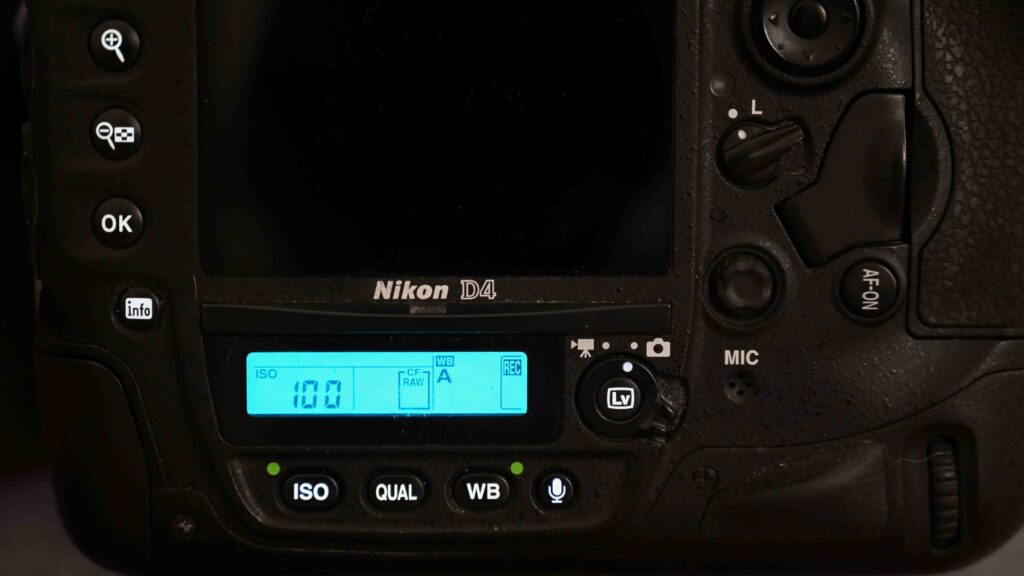
The Nikon D4 rear with backlit buttons.
If you shoot a lot in low light, you’ll love the fact that the buttons are backlit. And the small LCD enables you to see and set the ISO, white balance and image quality easily.

EXPEED

One of the major upgrades from the D4 to the D4S is the processor capacity, and the EXPEED 3 is replaced by the EXPEED 4 – about 1/3rd more computing capacity in the D4S.

I think this is one of the reasons why the D4S spec sheet wise is better when it comes to FPS and a more advanced auto focus system. The increased computing power simply gave the engineers at Nikon more headroom to develop the software in the AF system. And this could be important to you, but it is not important to me, as I am mainly an outdoor photographer. If portraiture or street photography is you line of business, then the improvements in the AF system could be vital for you.

There are other updates like a wider ISO range, a stronger battery and slightly redesigned joysticks for better comfort. But again, I think I’ll be fine without these improvements.

Conclusion

There are other differences between the D4 and the D4S and the intention was not to list them all. If you want to see a full spec compare, it is right here.

The D4 was one of the very best cameras the camera industry could offer approx. 10 years ago, and to me choosing between the D4 and the D4S is a bit like choosing between Bentley and Rolls Royce. Both are amazing!

The point is that the improvements made going from the D4 to the D4S simply was not important to me, and with the (in relative terms) significant price difference between the two cameras, my choice was easy.

But this shoe fits my foot. That does not mean it will fit yours. Your criteria are probably different and hence you will need to make your own assessment when choosing between the D4 and the D4S. But I hope my story here has helped you get a little closer to making the decision that is right for you.

Video link

Related reading

Nikon D700 vs Nikon D4

Which enthusiast Nikon DSLR to choose?


Ricoh GRIIIx: Focus modes explained

Starters

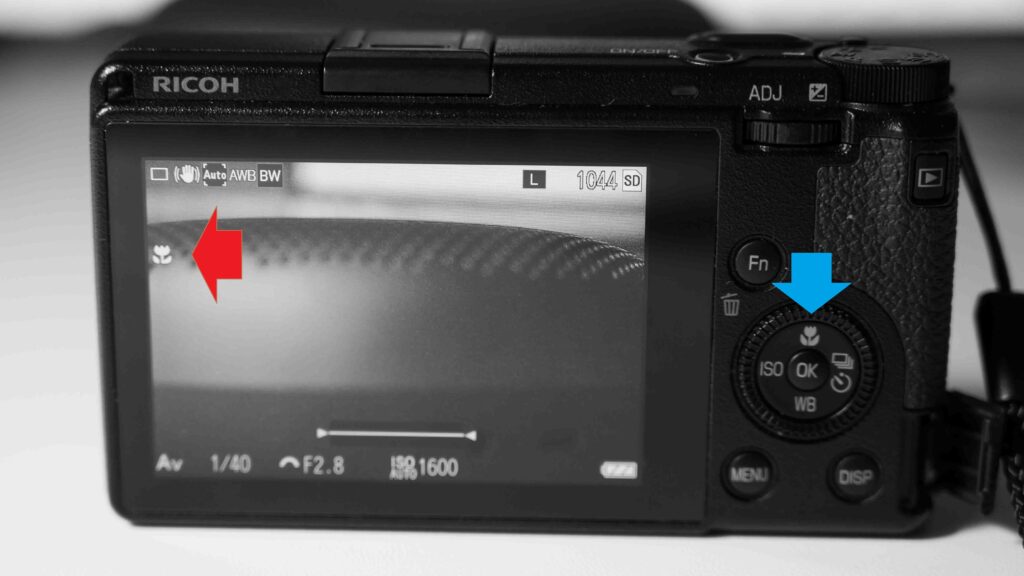
Before diving into the details of the focus system on the Ricoh GR3x camera, I just want to make sure you do not have the camera in macro mode.

Ricoh GRIIIx: Focus modes explained
The little flower on the screen (red arrow) tells that the camera is in macro mode. Push the button at the blue arrow to toggle in and out of macro mode.

In the image above, push the button shown with the blue arrow to toggle the camera in and out of macro mode. In macro mode, the camera will not focus to infinity, but on the other hand it can focus very close to the subject. I have many times been struggling to understand why it would not focus, only to find that macro was engaged.

Ricoh GRIIIx: Focus modes explained
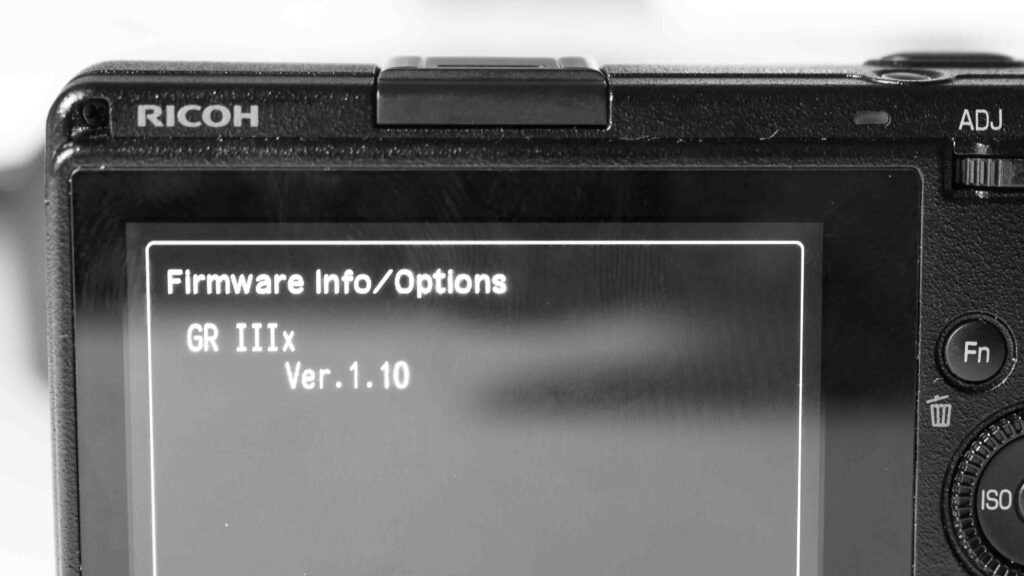
Version 1.1 of the firmware.

Another thing to check is the firmware version. My copy of the Ricoh GRIIIx was sent with version 1.1 of the firmware, so I have never tried version 1.0 but the word on the street is that version 1.1 is much better and hence upgrading the firmware is worth the while.

Basics

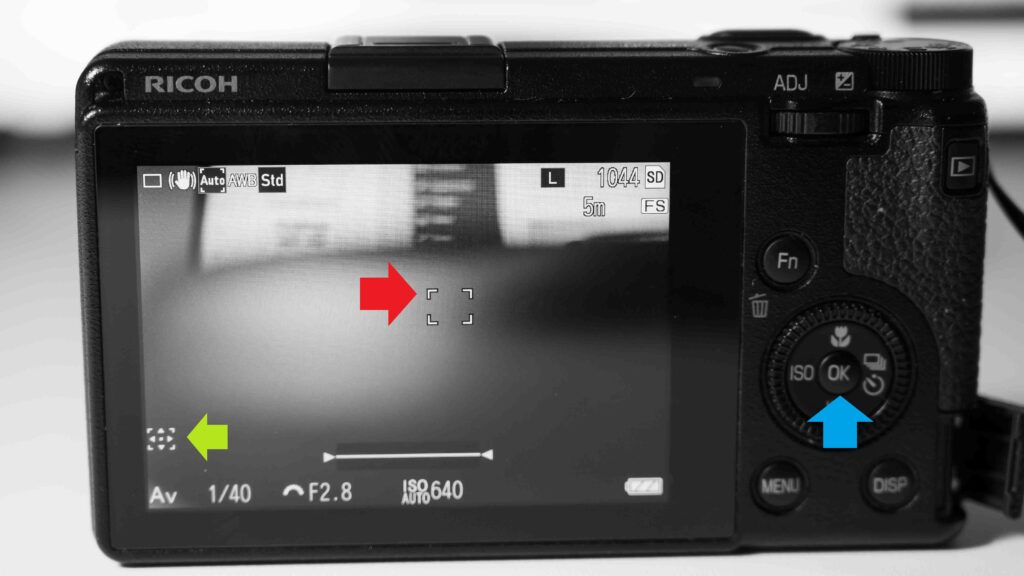
The Ricoh GRIIIx works like many other cameras when it comes to focus: if you half press the shutter the camera focuses, and full press takes the image. You can touch the screen to select the area for the camera to focus on and this presents a little box that frames what the camera will focus on.

Ricoh GRIIIx: Focus modes explained
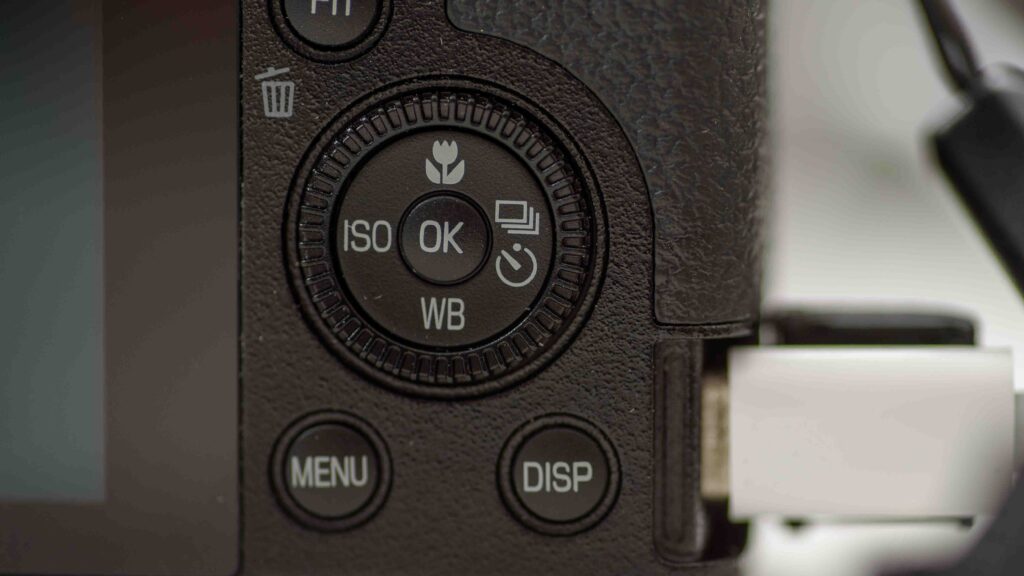
The square (red arrow) can be moved with the control wheel if the OK button (blue arrow) has been pushed and the little symbol at the green arrow is visible. Press OK to toggle in and out of this mode.

That little box can be moved around with the command wheel if you before that press the OK button.

If you long hold the “Disp” button bottom right on the rear of the camera, the LCD will zoom in, and again you can use the command wheel to select the area to view. Press “Disp” again to leave zoom mode.

Focus modes

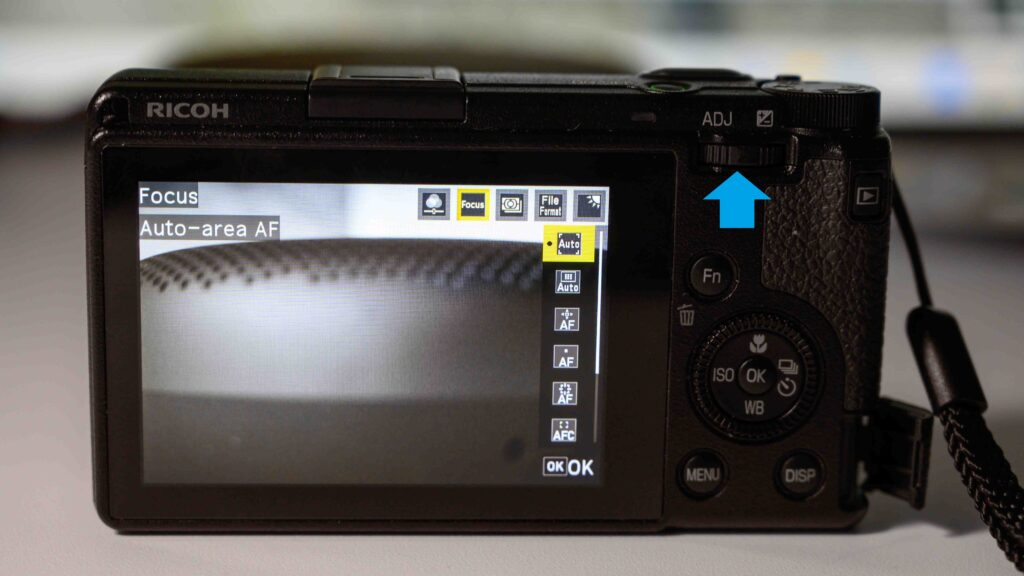
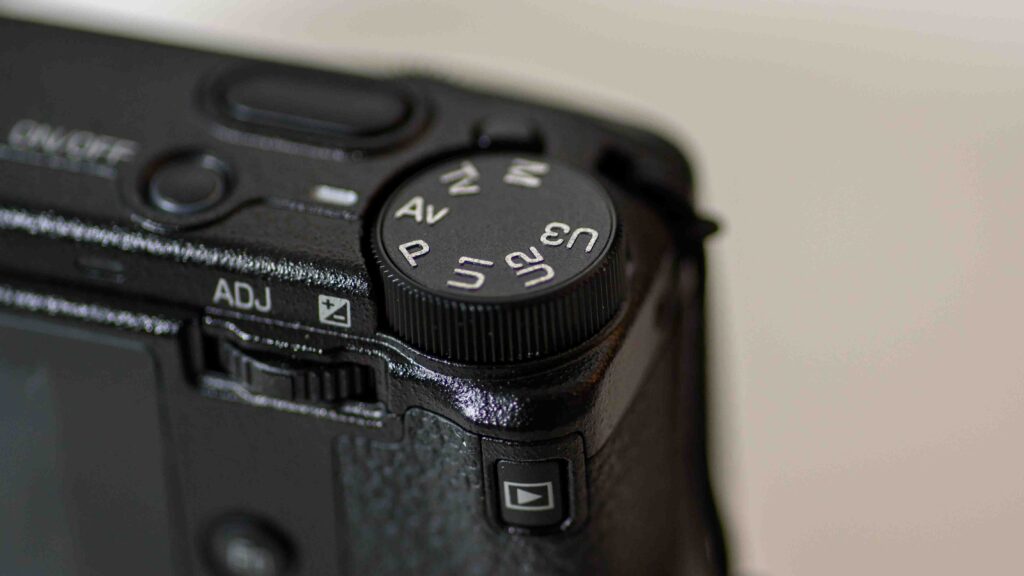
The Ricoh GRIIIx comes with a series of focus modes that give different levels of control vs automation. You can go into the large menu system and select the focus mode, but I find that pushing the so called compensation lever top right on the rear of the camera is easier – it takes you into a smaller menu system where the image profile, focus, etc can be adjusted.

Ricoh GRIIIx: Focus modes explained
Push the compensation lever (blue arrow) to enter the menu where the focus options is the second item from the left. Here the auto-area autofocus option is selected.

The focus menu is the second from the left, where the first one is image control. Use the control dial to move the cursor in the menu system – the selected value is highlighted in yellow. Push the OK button in the center of the control dial to select an option, and press the Menu button to leave the menu system.

There are a total of 9 (!) different focus modes:

  1. Auto-area AF is the most automated one and you have no control whatsoever. The camera chooses what to focus on. This is a good option if you want to use the camera in a “point and shoot” style. If you tab the LCD, a box will appear and the camera will focus here, but only for 1 image! After that, it is back to fully automated.
  2. Auto-area AF (centre) is like the first option, but it prioritizes the center of the frame when choosing what to focus on.
  3. Select AF gives you a little square on the LCD screen, and whatever is in that square is what the camera will focus on. You can move this square around with the control wheel as described above, or just tab the LCD to position the square where you have touched the LCD.
  4. Pinpoint AF is the same as the 3rd option, but the area is smaller. Good if you have something very small that you want to focus on hiding behind other objects that are closer.
  5. Tracing AF works like Select AF, but it keeps track of whatever you selected if either the subject moves or you move the camera – provided of course it stays within the frame. This is great if you have something moving within the frame or if you want to focus and then recompose. I use this option a lot.
  6. Continuous AF adjusts the focus as you half press the shutter. This is great if your subject moves closer to or away from you, as the camera will adjust focus accordingly. For example someone walking towards you.
  7. Manual Focus is where you select the position of the focal plane by turning the control wheel. I do not use this option a lot even though I usually like manual focus. The reason is that you have to turn the wheel a lot for the focal plane to move and this makes it very cumbersome to use.
  8. Snap is where the camera focuses on a pre-set focus distance. If you hold the macro button in and at the same time turn the front dial, the value can be changed. The options are 1m, 1.5m, 2m, 2.5m, 3m, 5m and infinity. Notice that if you press the shutter fast (i.e. no pause half pressed) the camera will focus using snap focus.
  9. Infinity is where the camera focuses to infinity  and this can be useful if you don’t want the camera to “hunt” to find focus. But of course your subject then also has to be something where focus to infinity is meaningful.

Other options

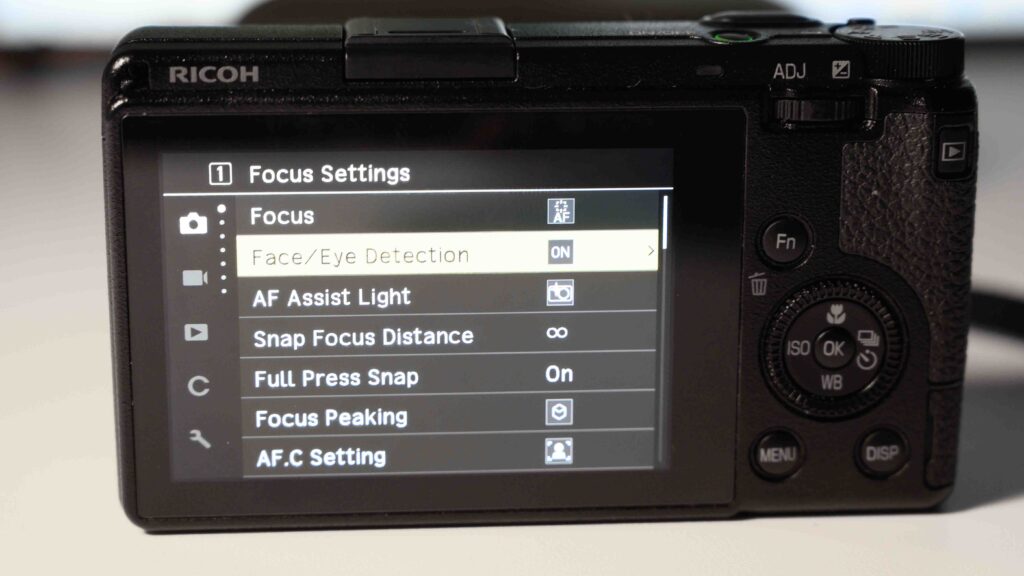
If you hit the “Menu” button the full menu system of the Ricoh GRIIIx is displayed and in here many of the same options as in the control lever menu can be found.

Ricoh GRIIIx: Focus modes explained
In the menu system many of the same parameters as the ADJ lever menu can be found.

However, there are more options and details in the menu system. One useful option is to turn the face and eye detection on and off, you can control if the auto focus assist light is to turn on or not, if focus peaking is to be shown, etc.

Ricoh GRIIIx: Focus modes explained
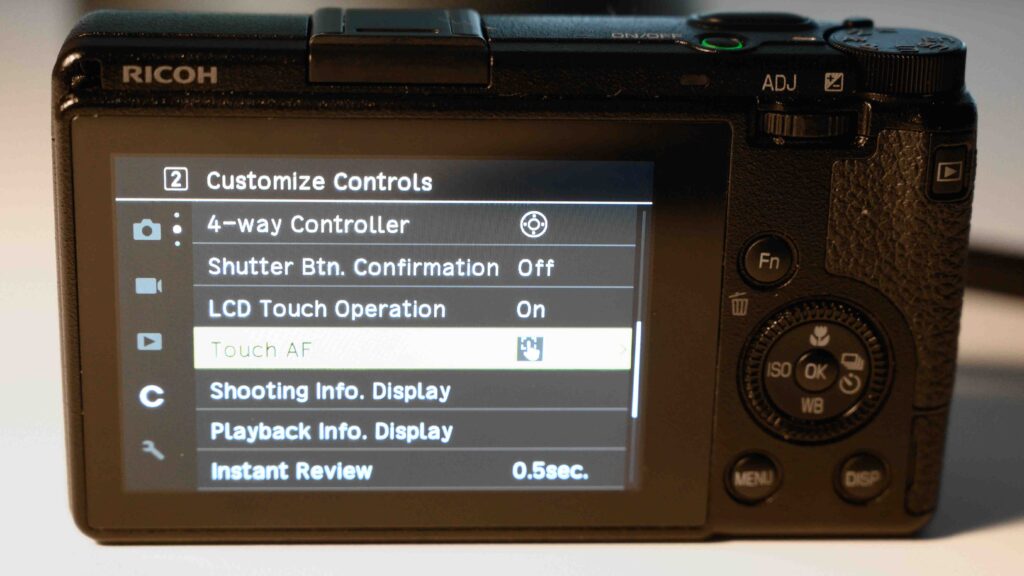
Options in the customize control menu.

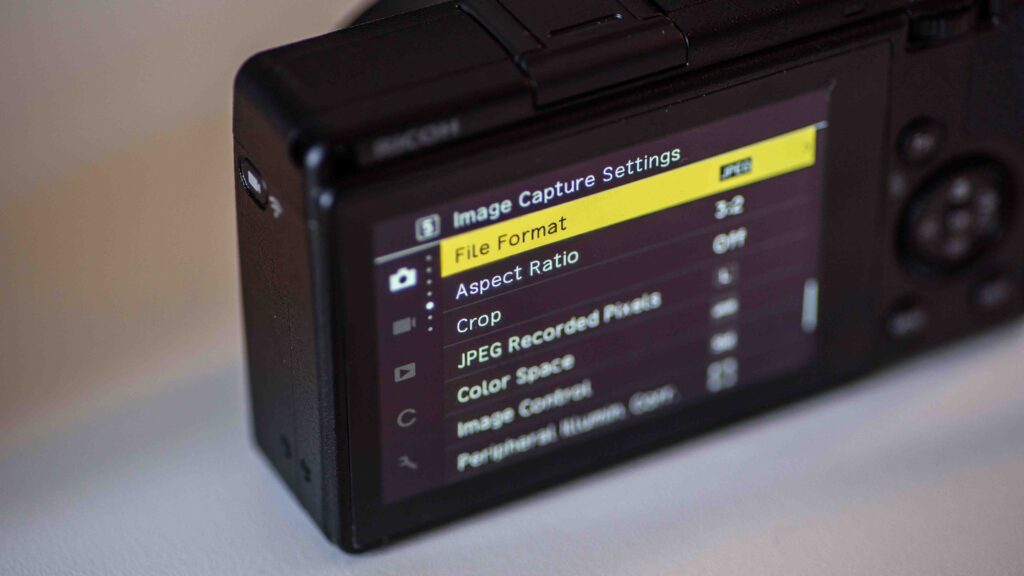
Also, if you scroll down to the customize controls menu, you can turn the touch sensitivity of the LCD on and off, and you can also control how much the camera does when the LCD is touched, and if you take the most elaborate option, the camera will both move the focus point to where you touch the screen, focus and shoot! Enjoy!

Related reading

Review: Ricoh GRIIIx camera

Shopping link

Affiliate shopping link for the Ricoh GRIIIx (40mm FF equivalent).

Video link


Review: Ricoh GRIIIx camera

A change

I love my Sony RX 100 M3. But it is a tired old friend. It has been on the floor a few times – the control ring is more oval than round, the LCD flip out only hinges in the left side and for the EVF to work I have to make a little rain dance and send a prayer to Sony! So I need a change – a new camera!

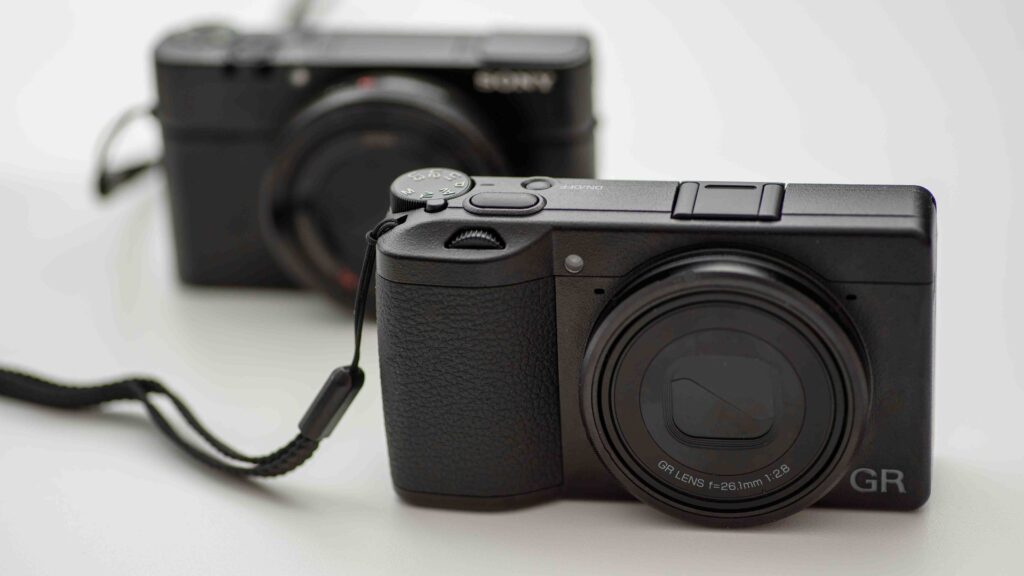
The new Ricoh GRIIIx in front of the Sony RX100 M3. The latter is a tired old friend, that has served me really well over the years.

So although I am not a street photographer, the Ricoh camera GRIII and all the hype and attention it gets has certainly not passed unnoticed. And then my local camera pusher had a black Friday deal with a good price (1000 EUR) and a SmallRig video light added to the package, and I decided to go for the Ricoh pocket camera.

The GX3x is the newest camera from Ricoh and it stands on the shoulders of the GX3, where the older version is a wider lens of 28mm full frame equivalent, where the one I decided to go for had the additional ‘x’ which signifies a 40mm full frame equivalent lens, i.e. a more narrow field of view for the x version. In any case, it will be a change from my Sony RX100M3 that provided a zoom lens.

Speed

The first thing I noticed when starting to use the camera is the start up time. Relative to my Sony RX100M3 the startup time is super fast! This camera is really fast and does all it can to help you not miss that scene or situation that suddenly is worthy of a shot!

The menus are well structured and the camera responds super quick to scrolling and zoom/pinch. Super responsive.

Speed is also what comes to mind when using the menu system and in general working with the camera – it is super responsive! Pitching and zooming happens super fast on the touch sensitive rear LCD  and it is simply a pleasure to work with.

You can use the touch screen to control the menus or the nice control wheel here. Your call!

And in addition the menus are well structured. As a Nikonian I find the structure is similar to Nikon and I feel at home right away. You can use both the excellen touch screen or the good command dial to control the menu system.

The PASM dial works well. The other buttons and dials feels a bit “plastic like” but they get the job done.

The buttons and dials are a blit light or “plasticky” when I compare to the Sony RX100M3, but they get the job done and as such I can forgive the lack of an up-market feel to the controls, despite the price tag around 1000 EUR.  The play button to review the images sit right where it should, but I had to get used to pressing it again to move out of review mode (on a Nikon you just half press the shutter, and it understand you want to move on).

Viewfinder

There is no viewfinder! You see the scene you are about to shoot using the rear LCD! That is intimidating at first, especially when you come from a camera with viewfinder – EVF or OVF.

I felt like an old man that forgot his reading glasses! You walk around with the camera in arms length to look at the rear LCD and frame your shots! But to my surprise, you quickly get used to it. And I really like the touch to focus feature: Tap to select what it is in the frame your want the camera to focus on and your wish is it’s command!

Focus options

The Ricoh GRIIIx comes with no less than 9 different focus options out of the box! I have in this post explained them all and most of them work really well and it is nice that there are so many options to choose from. And the macro function enables you to get really close to the subject (12 cm).

My only complaint when it comes to the focus system is the implementation of manual focus, where you have to turn the command wheel a lot in order to move the focal plan. It would have been nice with a ring around the lens to control the focus manually.

Charging

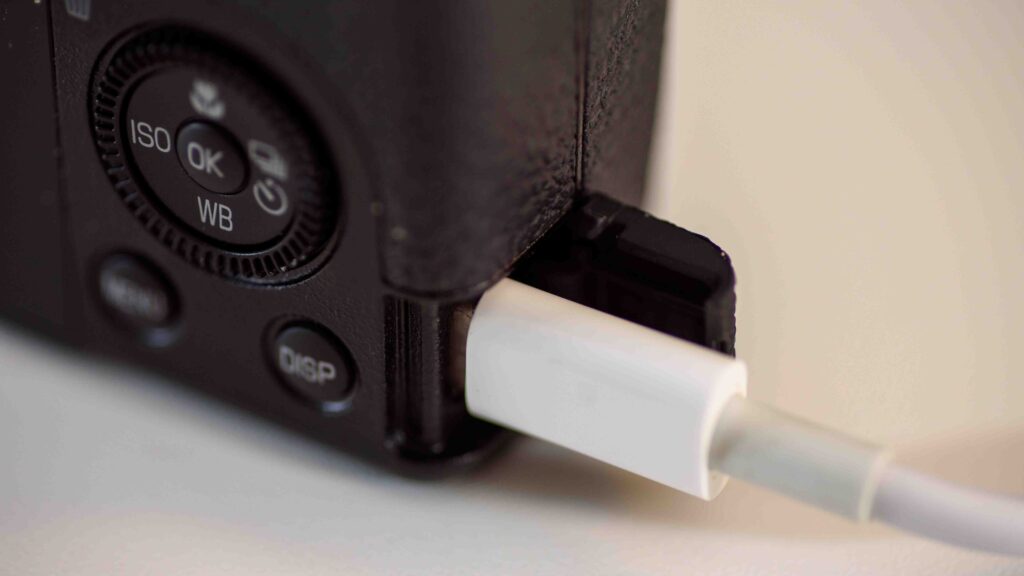
There is one thing that I don’t need: one more charger! And unfortunately the GRIIIx brings a charger for the battery! However, I was REALLY happy to see that it is possible to charge the battery via USB-C without taking it out of the camera. This means a lot to me, as I have a good set of USB-C charger and it also means I can use a powerbank on the go to charge the camera.

Thank you for USB-C! I have too many chargers. The Ricoh GRIIIx charges the battery in camera. You can use powerful chargers and it is faaast charging!

Some devices with USB-C connectors cannot muster a high powered power supply like 65W, but the GRIIIx took the challenge happily. And the charging for that reason is fast. Good!

Maybe because of the need to keep the rear LCD powered at all times when shooting, the battery life is not impressive. The specs promises around 200 shots, but I would think it depends very much on the rear LCD and how you use it. If you on a sunny day turn up the brightness and in addition take a long time to frame each shot, then I think the number of shots will drop like a stone. On an overcast day with temperatures around zero degrees, I was able to get 100 shots out of a fully charged battery before it was depleted, so the temperature is also part of the mix. But in my book much is forgiven as it can be re-charged via USB-C and hence my power bank or the USB connector in my car can be used for re-charging when on the go.

Internal memory

I don’t know how many times I have pulled out my DSLR from my camera bag only to learn that I left my SD cards at home! If my SD cards could speak like the toys in Toystory, then they would scream “Remember me!” every time I head out without the cards!

So I was really happy to find that the Ricoh GR3x has internal memory, and if you shoot JPG files (which I often do, as they are excellent) then you can have lots of images without the SD card installed in the camera. This feature is a true life saver!

In the pocket

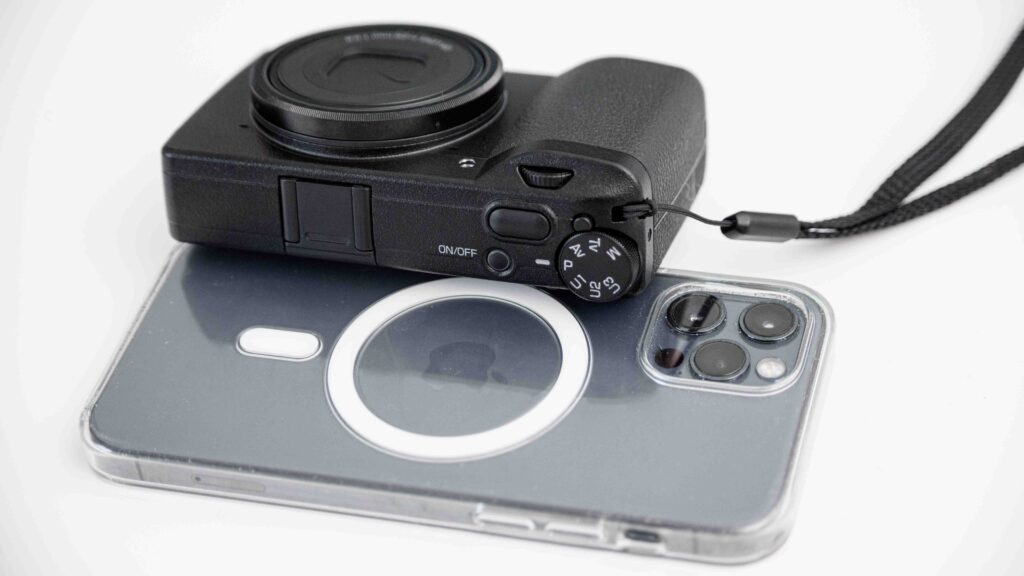
The Ricoh GR3x is a pocket friendly camera. At around 250 grams with battery and memory card, I sometime have to tap my pocket to make sure I have not dropped it! And relative to my iPhone, it does not take up much space in my pocket or backpack.

It is compact and light (250 grams approx). Here with my iPhone12.

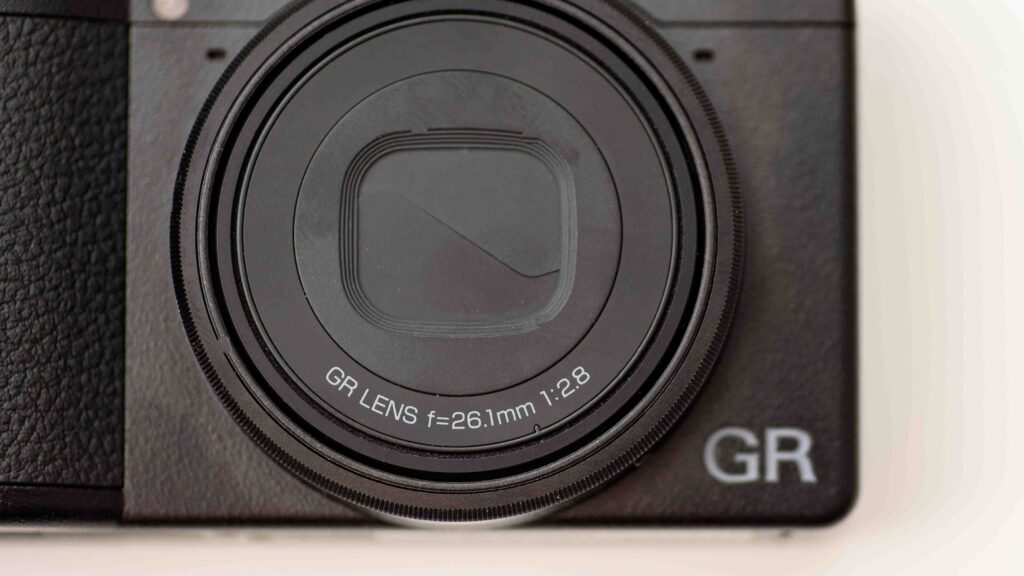
One thing the GR3x shares with my Sony RX100M3 is that the lens hood is built into the camera. When you turn off the camera, a set of small blinders move in to protect the front of the lens. Excellent! You can put the camera in your bag or pocket and not worry about a lens hood or the like. This small feature is really important to me and one of those things you will notice in the daily use of the camera.

Maybe a small think to you, but a big thing for me: the camera closes the front and protects the lens when turned off. Great feature for lazy photographers – no need to worry about a lens cap if you handle the camera with a bit of care!

However, the blinders are not designed to handle a lot of force, so if your camera needs to fit into a tight pocket or will bounce around in your bag, then a lens hood may be one of the first accessories you should get. Also, be aware that the camera is not weather sealed so make sure to protect it well from rain and moist.

Image quality

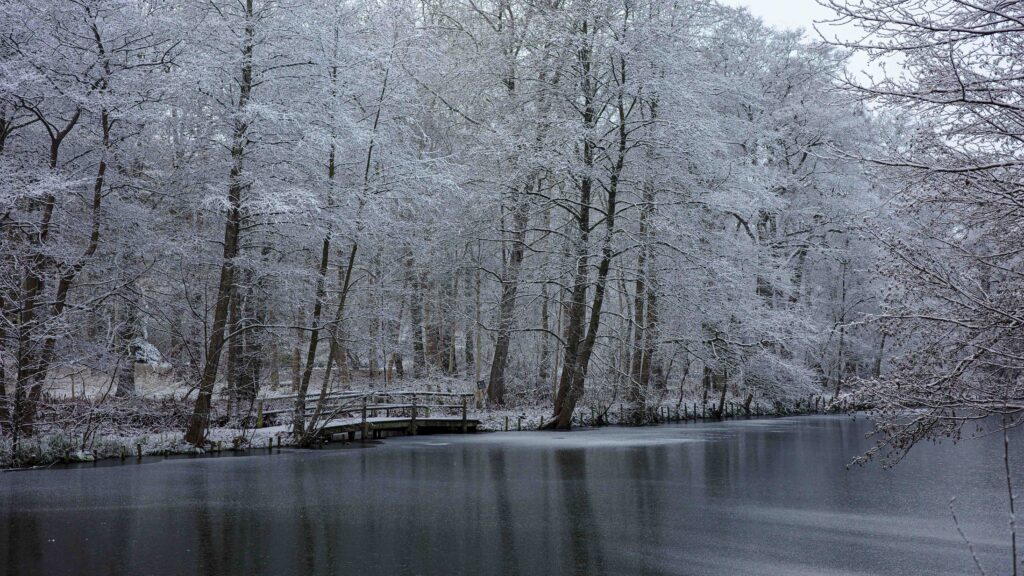
The image quality produced by the 24MP APS-C sensor in combination with the 40mm FF equivalent lens is really good.

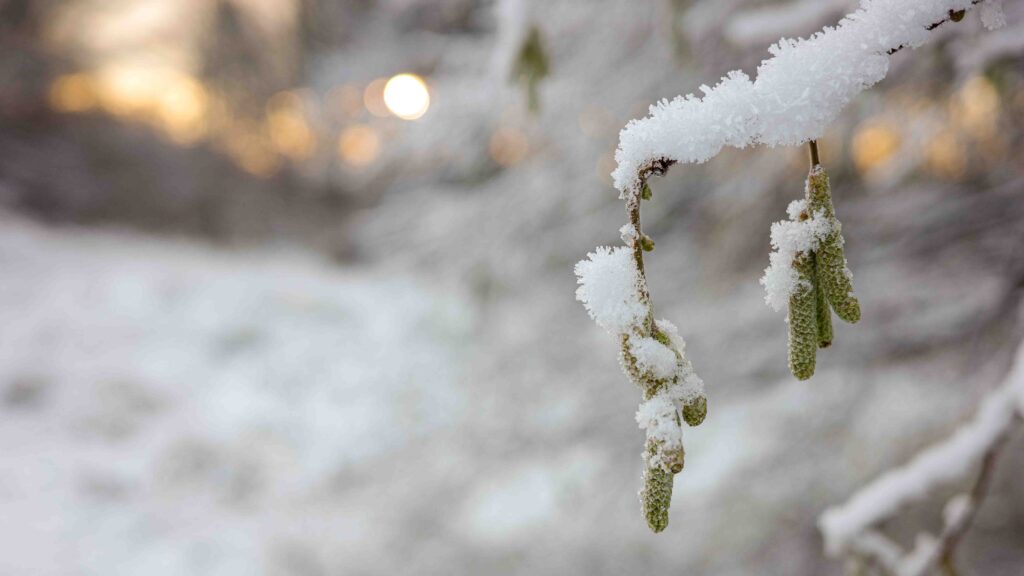
Image quality is more than approve – here a frosty day in December.
Image quality from the 24MP sensor is more than approved.

There is lots of detail, contrast and resolution. Of course you need to consider if you want to live with the restrictions imposed by a prime lens at 40mm, but if that is not an issue for you, I think you will love the image quality. Color rendition, contrast, resolution – all exams passed with flying colors.

Close up image using the macro function. It works really well.

There is a macro function you can engage to give you that extra focus on smaller things. It does not need to be bugs or insects, it can be nice little things like a snow covered leaf in the woods or the like. I found the macro function to work surprisingly well, even as the owner of a Nikkor 105mm S Macro lens!

Only thing to mention regarding image quality is the focus breathing. It is significant and videographers looking for a small camera will probably find this to be a showstopper.

Low light performance

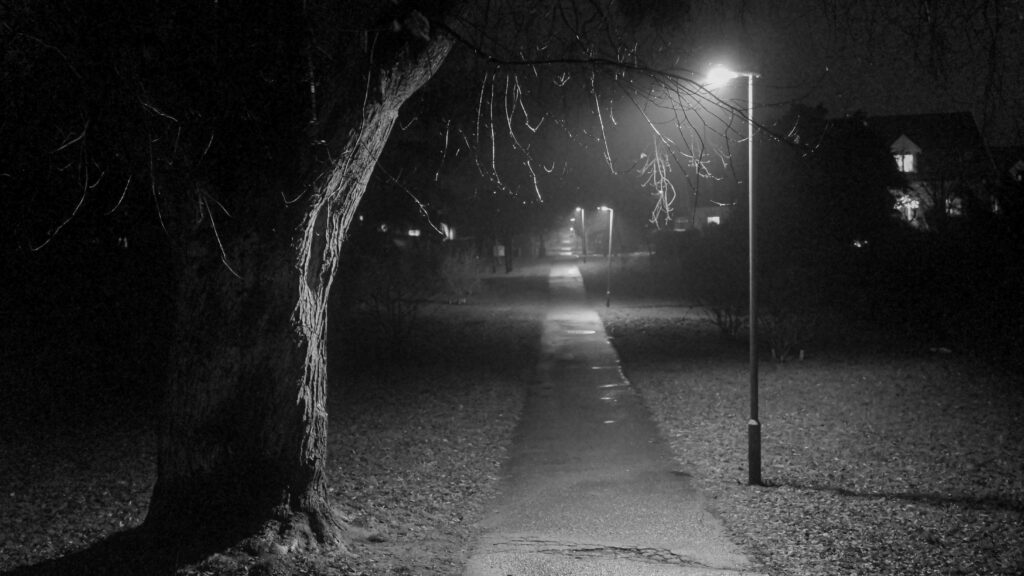
A rainy evening during winter time. Not much light here.

The low light performance of this little camera is impressive! I have come home with usable images shot at ISO 6400. It requires a little bit of post processing to remove the grain and noise that will show in the darker parts of the images, but to me this is a small price to pay when the reward is to come home with images where the camera almost “sees in the dark”.

A night out.

I think the built in image stabilisation really helps capturing images at night – I have (with a bit of luck) shoot handheld at speeds down to 1/10th of a second.

Technical image quality

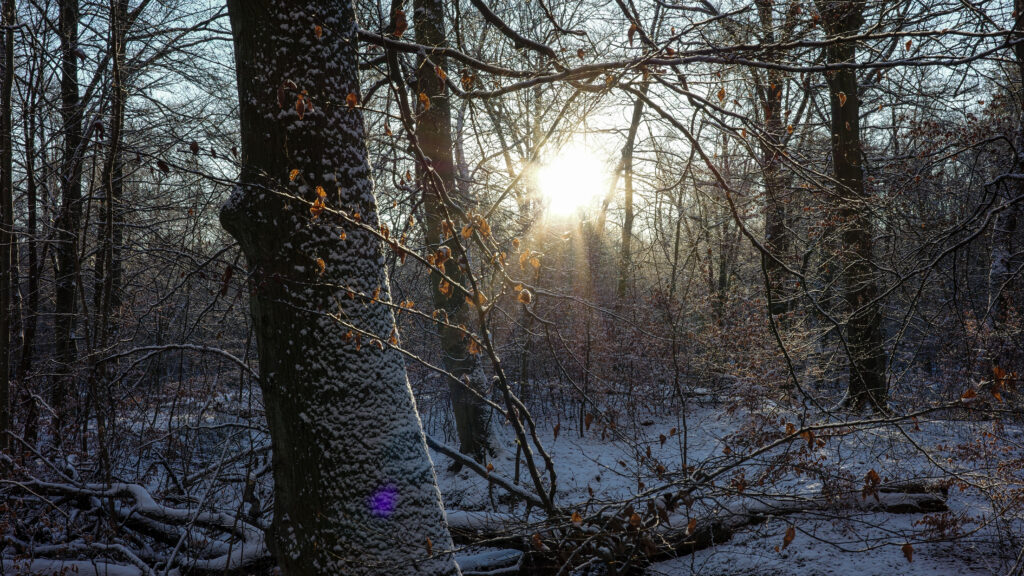
The purple dot on the stem of the tree is all the flare I could find in this image!

If we look at some more nerdy aspects of the image quality, one of the first things I notices was the outstanding control of flare. Videographers will probably want to stay clear of this lens for that reason! It dampens flare really well!

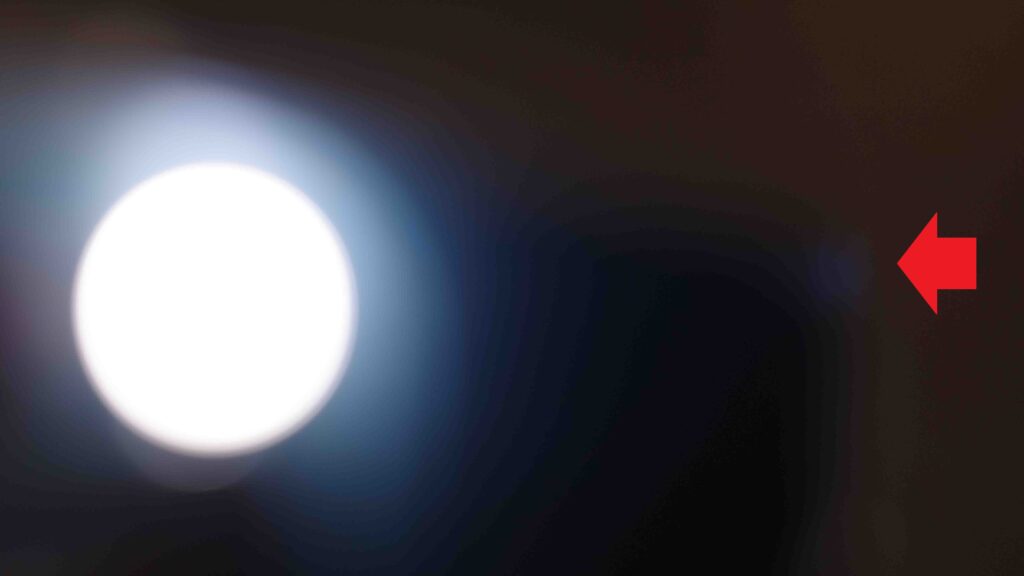
The flare control is outstanding. There is a little bit of purple where the red arrow is, but is is really well dampened. This is my “light from the iPhone” test that I usually do with lens reviews.

The sunstars are as most sunstars are on modern lenses: not that great. But it is because the rounded aperture blades are designed to give round bokeh balls and this comes at the expense of the sunstars. I would happily live with less attractive bokeh for beautiful sunstars, but I think I am alone with that point of view.

I have seen more beautiful sunstars than this, but this is a typical compromise when the bokeh is prioritized.
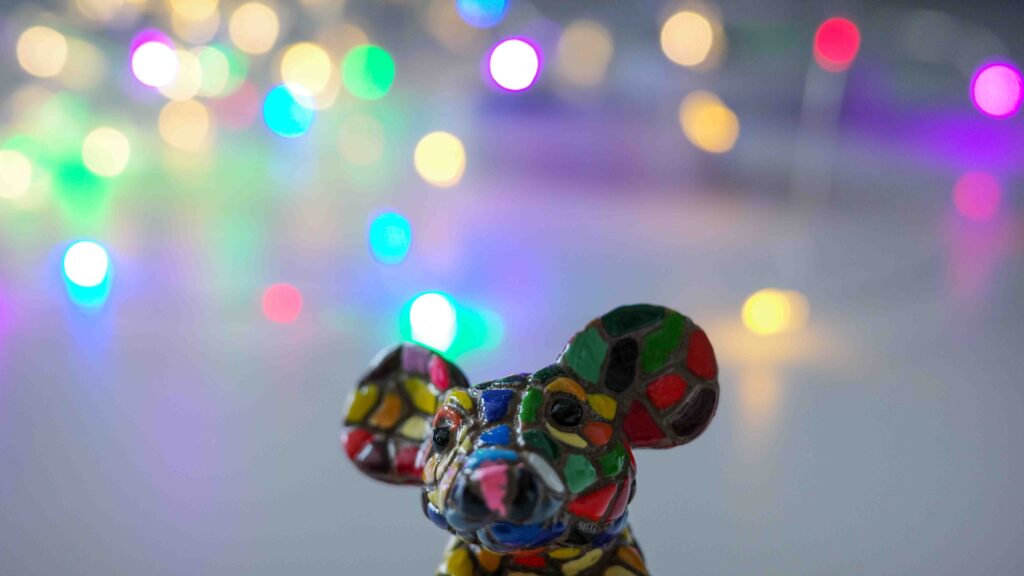
Bokeh is more than approved. Both wide open and stopped down, the results are beautiful.

The bokeh or out of focus areas are rendered beautifully. You can also see this in the macro shot earlier in this post. The GRIIIx performs well here!

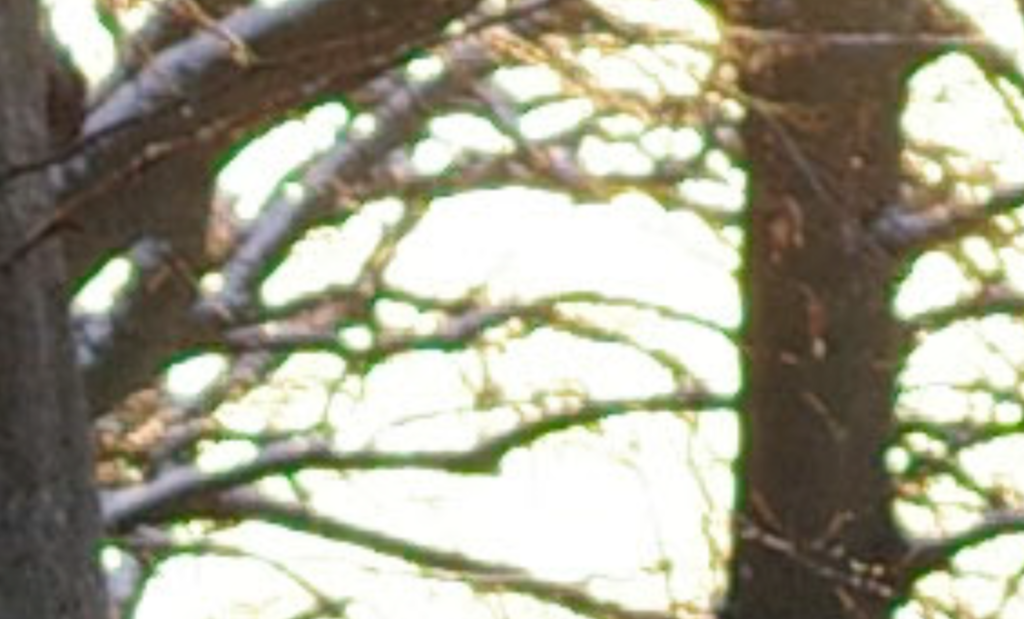
In high contrast areas there are lots of aberrations. This is zoomed in 400% so many will not notice, but I do!

If you want to pixel peep into an image shot in a high contrast scene, then you will find aberrations and plenty of them! In the example above I have zoomed in 400%, but then the aberrations are noticeable. I doubt that any non-photographer in real life would ever notice, but as an acid test of the lens performance, I think it is fair to mention the aberrations generated.

Conclusion

Can I recommend this camera? Yes! Indeed! Relative to my set of criterias for a small pocketable camera, this one checks all the boxes. But it may not check all your boxes, i.e. your preferences may be different than mine. It is very capable camera, but it is not cheap and it is not free of errors or bugs. But it won me over – maybe it will win you over as well?
Pros

  • Image quality
  • Bokeh
  • Flare control
  • Low light performance
  • Image stabilisation
  • Internal memory
  • Macro function
  • Good AF system with lots of options
  • Menu system and responsiveness
  • Start up time (fast!)
  • Weight (250 grams approx)
  • Size (pocket friendly)
  • USB-C charging
  • Lens front protected when turned off

Cons

  • Price (1000 EUR)
  • No viewfinder
  • Battery life
  • Not a flip / articulating screen (it is fixed)
  • Plastic feel to the build quality
  • Not weather sealed
  • Sunstars not that beautiful
  • Prime lens, not a zoom
  • No built in flash (a hot shoe is available though)
  • Manual focus is cumbersome
  • Focus peaking does not work with colors
  • Focus breathing

Video link

Shopping link

Affiliate shopping link to the Rico GRIIIx on Amazon.

Nikon D700: Image file formats explained

All about the data…

The options available for storing files on the Nikon D700 can be a bit overwhelming, so I try here to give a short overview, so you quickly get a “drivers license” to the options available. It is not intended to be a full blown engineer explanation of all the ins and outs of file formats and compression, but a drivers license to help you make some clever decisions without getting too bugged down by technical details.

Resolution and compression

Your Nikon D700 has a 12MP sensor. No matter which format or compression you choose, the source of the data is still the same. And the resolution of the sensor remains the same.  What your are changing is the format of the file, how much info is stored about each pixel and how the file is compressed. But not the number of pixels.

Note: You can change the cameras image area between FX and DX format, and within these choose between L, M and S. I will not cover this part here, but always recommend that you go for Large (L) FX format, to give you the most options in post processing. You can always crop the file, if that is to your liking.

RAW format

The D700 stores in RAW format named NEF – Nikon Electronic Format. It is just a format or a way to structure the file. Most software these days like Lightroom or Photoshop can read and work with these files. RAW is the “richest” format you can choose, i.e. all that is recorded by the sensor is also stored in the file. If you don’t like RAW format, then TIFF is an alternative, but if you don’t know what TIFF is or your printer doesn’t insist you send the files in TIFF format, then I would suggest you ignore this option.

You can compress the RAW file to varying degrees. The objective of compression is to save space. Lossless compression is  the “lightest” way of compressing that enables your computer to “reverse engineer” the compression back to the amount of information available when the image was taken. In other words, despite the compression, no information is lost. Hence the name. My recommended setting. Uncompressed has the same advantage – no data is lost, but mind you that it takes up a bit more space and that processing time is a bit longer simply because the file is larger.

Compressed RAW saves you around 40-45% of disk space, and you loose very little data. However, you do loose some data, and the original file cannot be recreated. It is in other words a non-reversible algorithm that is applied when the compression is done. If you struggle with card and disk space, i.e. you have too little of it, then this could be a really good option to use for mitigating your space headache. But mind you that the price for memory and disk has only gone one way for many years – down.

Another dimension to the RAW format is the bit depth. Again, it is not related to resolution, but how much information is stored for each pixel. You can choose between 12-bit and 14-bit. It may sound like a small difference, but the number of options explodes exponentially as you add positions for storing information, and hence going from 12 tp 14 bit enables your camera to store MUCH more information. If you in any way shape or form can handle the bigger files that 14 bit generates, then the 14 bit is my recommendation.

JPEG format

JPEG is a very different format from RAW, and the objective is first and foremost to save space and make the file significantly smaller. Not in terms of resolution, but in terms of how much info is stored per pixel. JPEGS were designed to share images via low bandwidth channels and hence compression and small files is the main objective here.

The D700 gives you 3 JPEG options: Fine, Normal and Basic. Basic is where the compression is the biggest and the file is the smallest. Fine is where the compression is the least and the file is the biggest. Normal is the middle of the road alternative sitting somewhere between Fine and Basic. The compression takes data out of the equation. To illustrate: Where a RAW file may store say  100 shades of grey, a JPEG file reduces these to 30 shades of grey in Fine mode and only 10 shades of grey in Basic mode. So the granularity of the shades and the colors will be reduced due to the compression made. JPEG files are rather small also in Fine mode, so if you want to use the JPEG format, I always recommend that you use the format with the least compression: Fine.

Combined formats

You can choose to combine formats, so that the camera records both a RAW and a JPEG file at the same time. I have used this in my post processing so that I load the JPEGs and do a review of the images, mark the ones that I like and then afterwards only import the ones that I like as RAW files. As this is an additional step in the work, I have dropped this way of working and now only shoot and import RAW files. It takes more space both on my camera and my computer, but it saves me for a lot of time, and hence it is to my preference. As they say, time is money.

Related reading

Is JPG a bad format for photography?

How many MP do you need in your camera?
Nikon Z6ii: Focus shift shooting for landscapes

Vary the focus

Focus shift shooting is not a new thing as such, but the automation of it is new to me, owning primarily DSLRs like the Nikon D4, D750 and D700. The Nikon Z6ii offers an automation of a series of shots where the focus is shifted a little bit for each – moving from near to far. When you do focus shift shooting, the Z6ii will produce a series of images to be merged in post processing.

It is a precondition that the camera is able to control the focus of the lens, so manual focus lenses of course cannot be used when shooting focus shift. As the Nikon ML cameras do not have mechanical AF motors built into them (nor does the FTZ adapter), this means that AF and AF-D lenses do not work, nor does AI and AIS lenses unfortunately.

Focus shift shooting enables you to have images where the depth of field is indefinite, as you in post processing combine the images into one image, picking the sharpest part from each. The only “price” you have to pay is that the shots need to be taken from the same viewpoint and angle (using a tripod) and that you cannot have any moving parts in the frame while the shots are taken. But both these are easy to fulfill as a landscape photographer.

Another thing to be aware of is the lens and if it suffers from focus breathing. If that is the case, then the images will be very difficult to merge in post processing, as you involuntarily will be zooming during the shots. Merging images with different angles of view is mission impossible. So make sure to use a lens that does not have focus breathing.

Best results are achieved shooting where the lens is the sharpest, typically around f/8 or f/5.6 – avoid very open apertures (e.g. f/1.8) and very closed apertures (e.g. f/22) as your lens most likely is not the sharpest in these extremes. Use a “middle of the road” aperture, where you know your lens is sharp.

Configuration

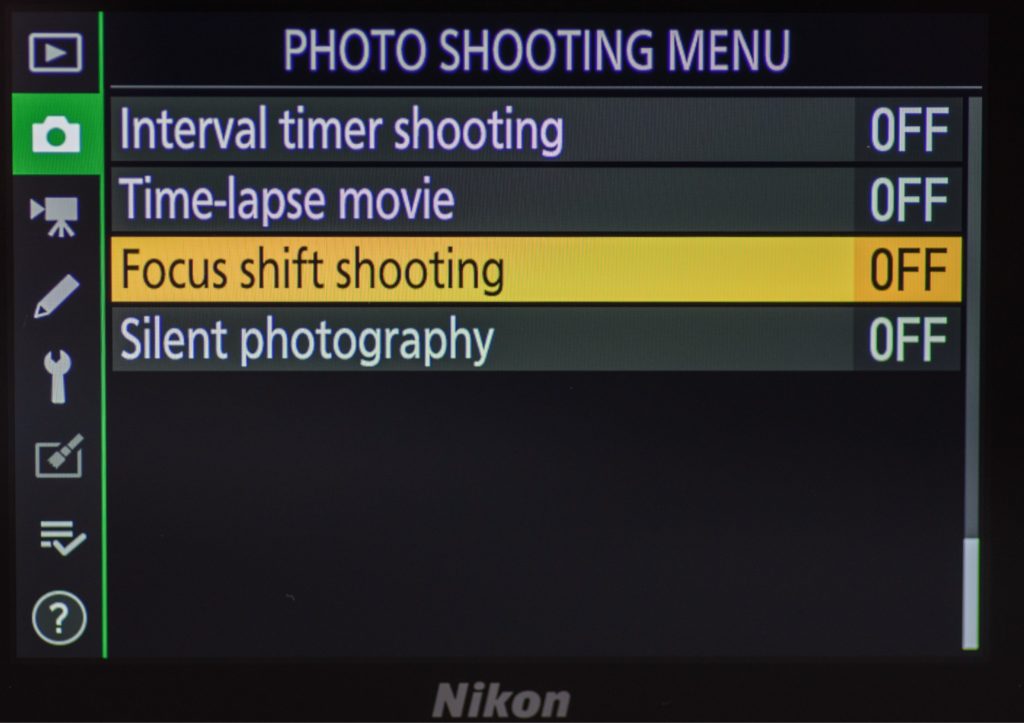
To initiate the shooting, you first have to find the “focus shift shooting” menu in the “photo shooting menu”. It is the second last item in a long list that spans across several pages.

focus shift shooting menu
You find the focus shift shooting menu item in the photo shooting menu, second last item.

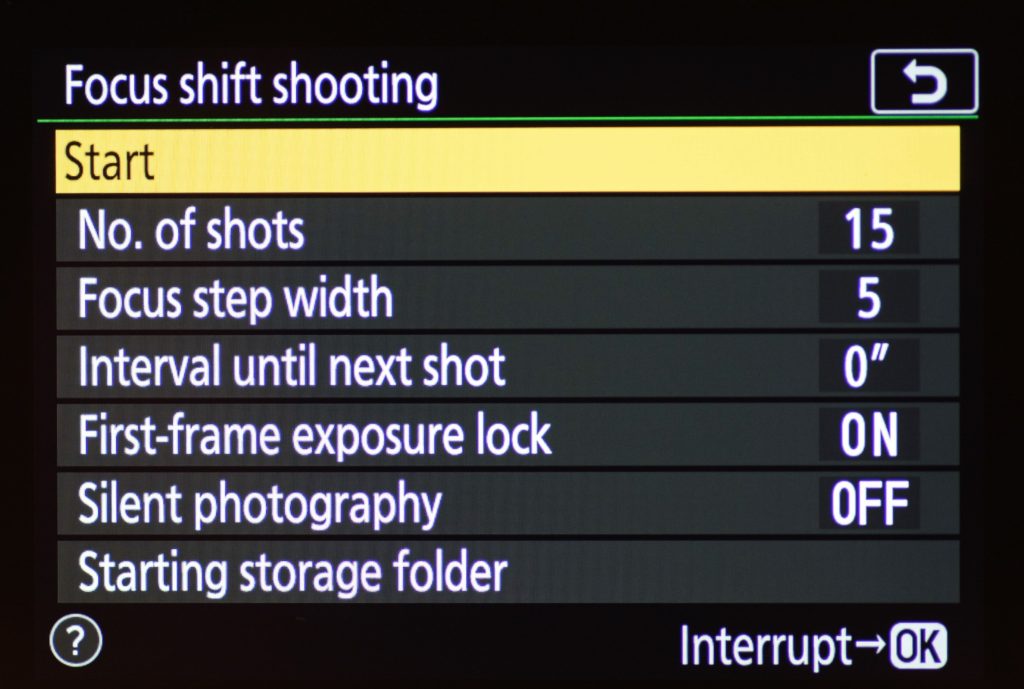
After selecting that one, the “focus shift shooting” menu appears. When you hit “start” (highlighted in yellow below) the camera starts shooting a series of images according to the parameters set below.

focus shift shooting menu
The focus shift shooting menu from the Nikon Z6ii, but I believe it is very similar to the Z7.

The menu above looks a bit long and intimidating at first, but don’t worry, it is relatively few parameters you will be changing after the initial setup.

The number of focus shots can be set to a very high value, like 100. The camera stops shooting new images when it reaches infinity, so for landscapes you cannot really set this value too high. I think the large possible number here is intended for macro photography. In my experience 5-6 images are more than plenty for a landscape shot.

The focus step width is not very well documented in the Nikon manual, but it has to do with how large steps the camera takes between shots. Values range from 1 to 10. You have to give  it a try here. I have set mine to 5 and it works fine. In my experience, the chosen aperture has more influence on the number of shots than this parameter.

The interval to next shot is intended to give flashes time to recycle power and for landscapes I do not use flashes, so it is set to 0″ in my case.

The first frame exposure lock is important to have switched on. It secures that the exposure values are not changed throughout the shots. Provided that there are no changes in ambient light during the series, you should get consistent exposure results across the images in a series. You can of course fix this in post processing if you really know your software, but IMHO it is much easier to get right in camera.

The silent photography is switched on in my case. I like that I can hear what the camera is doing when it shoots the series. This tells me how many images are there and when the shooting is done. It is of course a matter of personal preference, so entirely up to you. But the camera is not very informative when it is done shooting, so I like to have some sound to relate to.

The starting storage folder can be handy for separating the images from others, as you will be generating quite a lot of images.

Shooting

Be fore you give the camera green lights to shoot a series, it is important that you initially have focused on the closest part that you want to be sharp in the frame. So if you have a stone or the like in the foreground that you want to be sharp, make sure to focus here before initiating the shot. Once the shot is done, the camera leaves the focus to infinity.

Other than keeping the camera still using a tripod, shooting at a middle aperture and selecting a scene with no moving parts, there is actually not much more to it than that. Only remember to focus near every time before the first shot. And then pray that the ambient light stays constant throughout the series.

Post processing

The first time I read about focus shift shooting, I was hoping that it would also do the post processing in camera, just like your smartphone effortlessly merges several images together when you instruct it to shoot HDR. Unfortunately that is not the case – we “only” get a series of images and have to do the post processing ourselves.

If you open the images as layers in Photoshop, the process is not complicated at all: first ask photoshop to align the images, then ask photoshop to merge the images and finally you may want to crop the image a bit as the edges may look funny after the alignment is done. You find the items you need in the edit menu. The first item is named Auto-Align layers… and the second one is named Auto-Blend images. When you select these a menu appears in both cases – I just say OK to the default values.

Lightroom processing
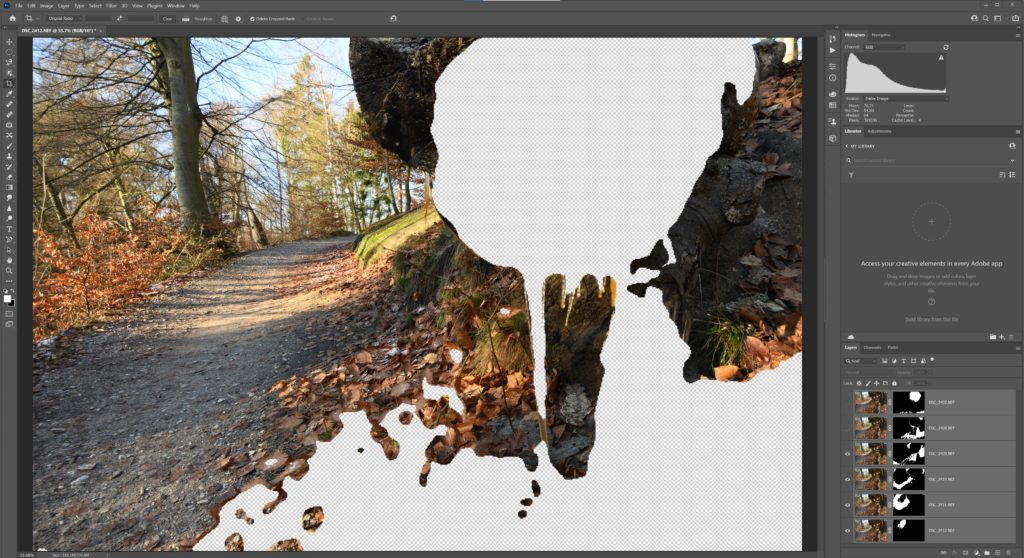
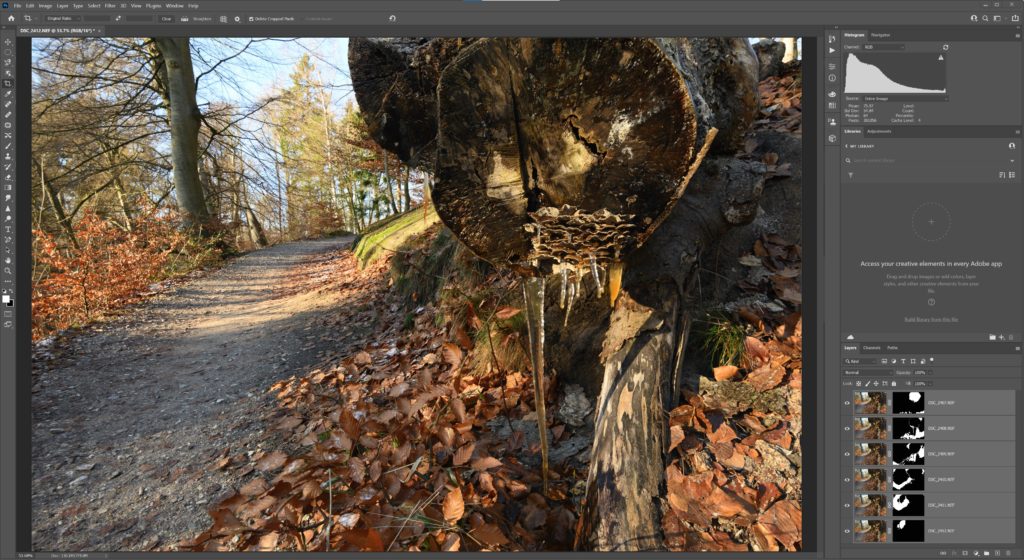
Here the 2 images in the top of the series have been taken out, and you can see how Photoshop via masks join the images into one. The two images removed (no “eye” bottom right) are the ones focusing on the near part in the picture.

I recently shot a scene with a icicle in the foreground and a path in the woods leading to some trees in the background. When merging the series of images in Photoshop, you can see that photoshop uses masks to select the sharp parts from each image – black conceals, white reveals. In the example above I have deselected the two images that deliver the part closest to the camera (the white part).

Lightroom processing
The image is sharp from the icicle in the foreground to the tree in the background. Bottom right you can see that Photoshop via masks has merged 6 pictures together to one.

So if you have managed to keep the camera still etc., the resulting image should be one with what appears to be infinite depth of field. Everything in the frame is sharp, from front to back.

If you like this kind of shooting is of course entirely up to you. Some think it looks a bit artificial, and prefer that sharpness is a function of the aperture and a single focus point. I have added it to my toolbox as an option that I sometimes use subject to – well – the subject. It is all up to you!

Video link

Related reading

Nikon Z6ii – How to work with manual exposure

Nikon Z6ii – any need for the Preview button?
Nikon FTZ adapter: Is it waterproof?

When it rains, it pours…

The other day I was out shooting, a happy camper that did not consult the weather forecast. I paid the price for my ignorance, and was soon caught in a heavy downpour in January. The problem with January in Denmark in combination with rain is that there are no leaves on the trees, and hence nowhere to seek shelter.

The Nikon FTZ adapter
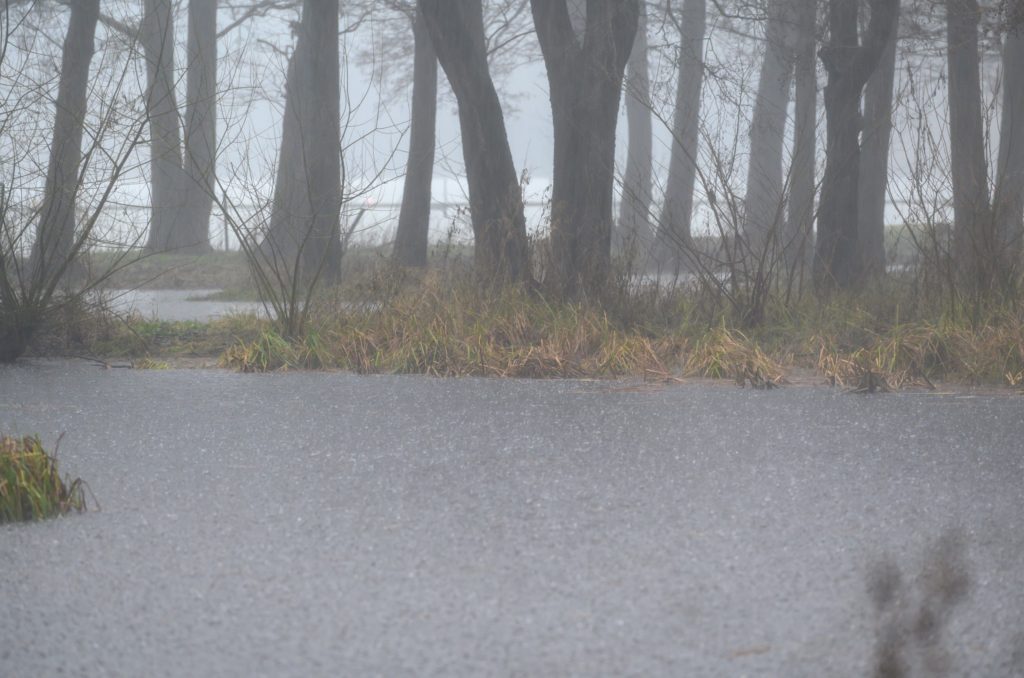
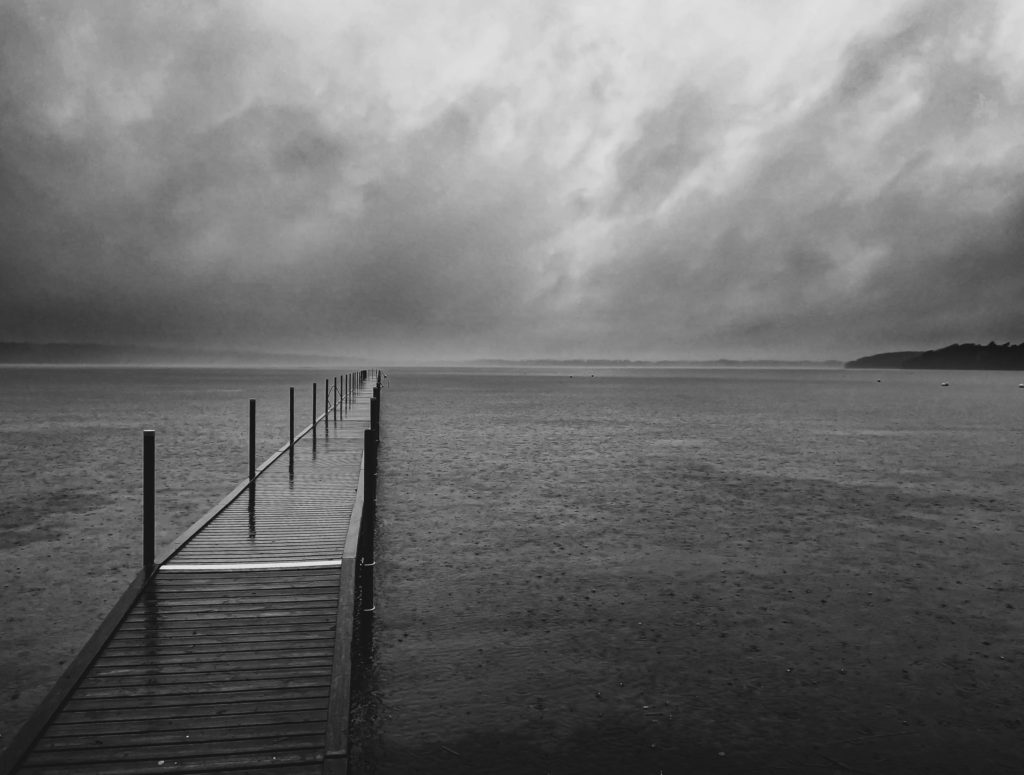
I hope you can see here how heavy the rain came down. This is actually a quiet lake on a windless day, but the hard rain makes all the difference!

Towards the end of the shoot I arrived at a big lake where the rain came down as if I had stepped into my morning shower wearing all my clothes! I was wearing proper clothing for the weather fortunately, but my camera gave up just when I was about to take a shot of the dramatic lake.

The Nikon FTZ adapter
As you can see in the surface of the lake, the rain was pouring down. This was shot on my iPhone, as my camera had stopped working.

Lucky for me, I was able to use my iPhone to take a shot. The iPhone was difficult to operate because there was so much water on the screen that the phone had difficulties figuring out what was rain and what was my fingers trying to give instructions! But I succeeded as you can see above. I am still today really annoyed that I was not able to take shots with the Nikon Z6ii that I had brought along with the Nikon AF-S 70-200mm VRii. But the camera had stopped working and the iPhone image is all I got.

The Nikon FTZ adapter
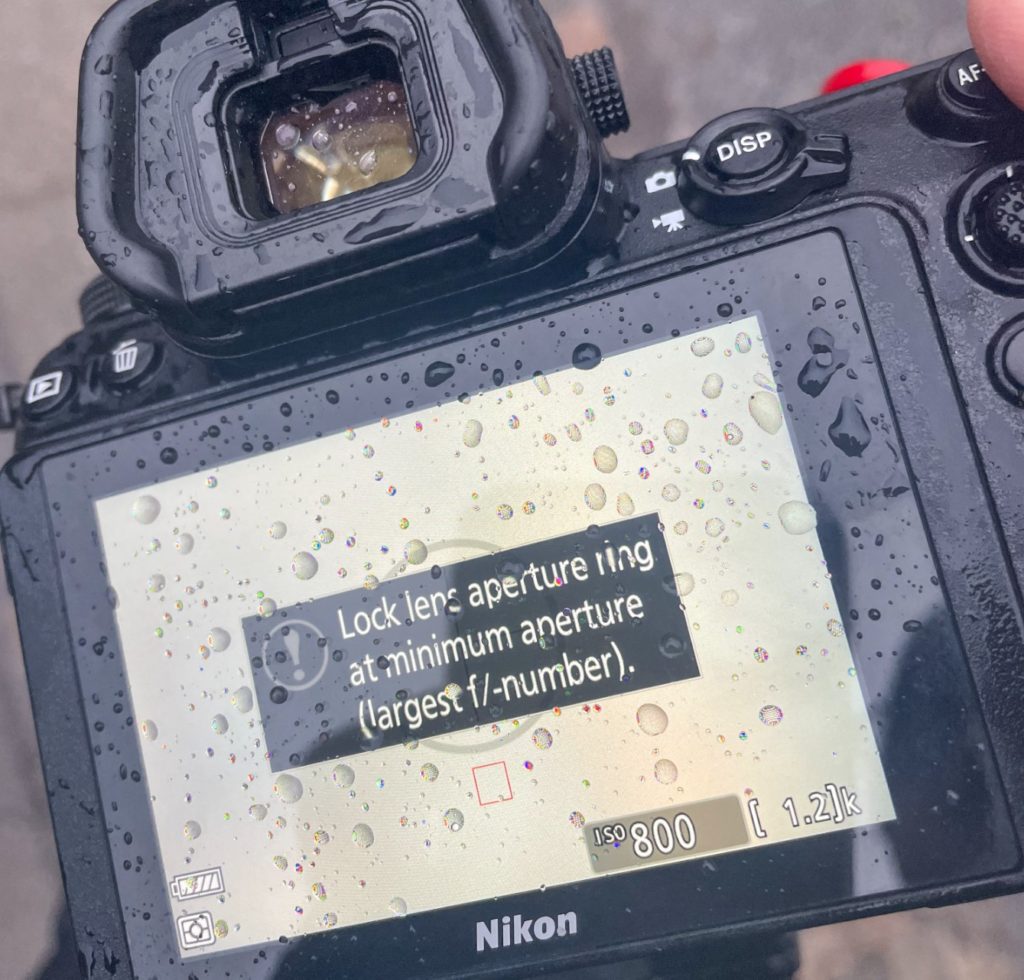
This is the error message I got from the camera. I figured that the camera and the lens did not communicate well anymore, as there was water shortcutting the CPU contacts, so I turned off the camera and walked home.

If you remember mounting a lens on a DSLR without setting the aperture locked at the minimum value (say f/32), then you probably also know the “FE” error, where the camera tells you that you need to change the aperture on the lens. This is exactly the message I got in the top LCD, and a more elaborate version in the rear LCD. The camera had stopped working, and there was nothing I could do out in the rain. It was clear to me that the CPU contacts had been short-circuited by rain getting into the camera somehow.

The Nikon FTZ adapter
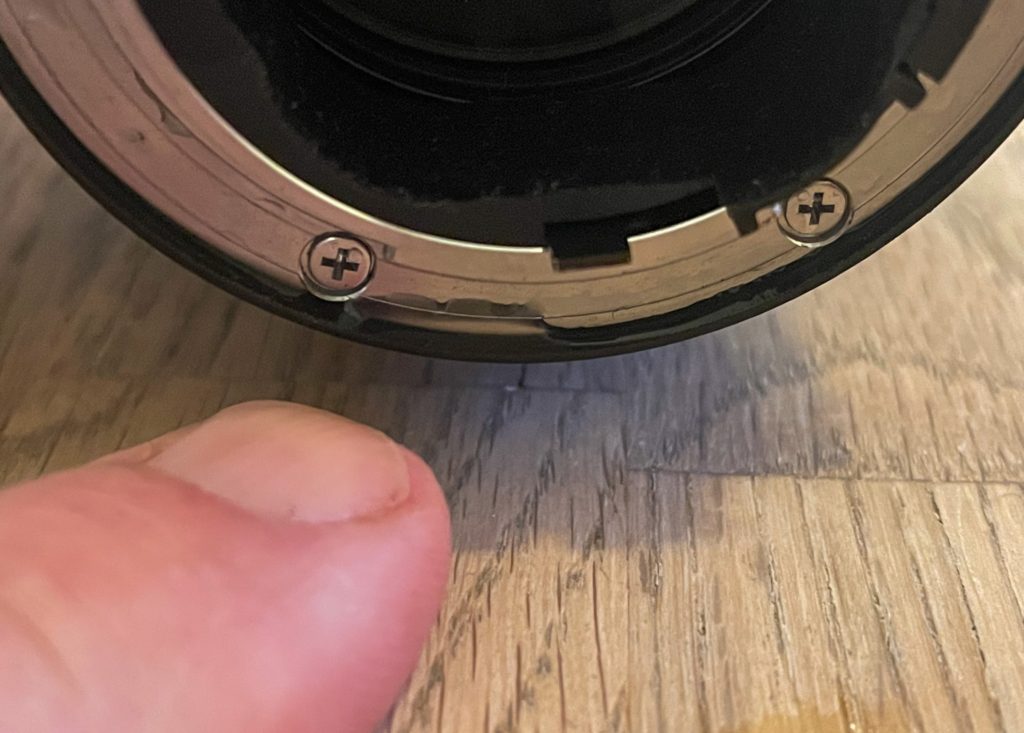
The water got in between the F-mount lens and the FTZ adapter. Here traces of water where it should not be – in the FTZ adapter. After drying the adapter for a few hours, the problem was solved.

Arriving at home I could get the Nikon Z6ii to work with a S-series lens, so the camera was fine. And I could get the Nikon AF-S 70-200mm VRii to work with my Nikon D4. So the problem was isolated to the FTZ adapter. And I found water inside the FTZ adapter, that should not be there, so no wonder the camera could not talk properly to the lens.

After drying the FTZ adapter for a few hours it all started to work again and I was very relieved. I would have been sorry to see my almost brand new Nikon Z6ii being damaged for obvious reasons, and also I would have hated my beloved Nikon AF-S 70-200mm VRii lens to stop working. I could have accepted the FTZ adapter to be damaged, but was so lucky that also this one got back in operation.

My solution to all this is to get a rain cover for the camera. They come in different sizes and price ranges, but I am sure they would have saved me for the watery experience. I know that both lens and camera are waterproof, but going forward I prefer to be better safe than sorry, and will bring a rain cover for eventualities.

Video link

Related reading

Nikon FTZ adapter – when is it relevant?

Nikon Z6ii vs Z6 – Which one for you?

Nikon FTZ adapter: When is it relevant?

The go-between solution

When Nikon launched their mirrorless camera series, they did so introducing a new lens mount called the Z-mount. It was a brand new design with a larger diameter than the classic F-mount and also it had a much shorter flange distance, both – according to Nikon – to improve image quality.

The new Nikon Z-mount is only compatible with a brand new line of lenses, known as the Z-mount lenses or S-lenses. These lenses fit directly to the Z-mount. As all the S-lenses have motors built into them, there is no need for a focus motor in the mirrorless camera bodies.

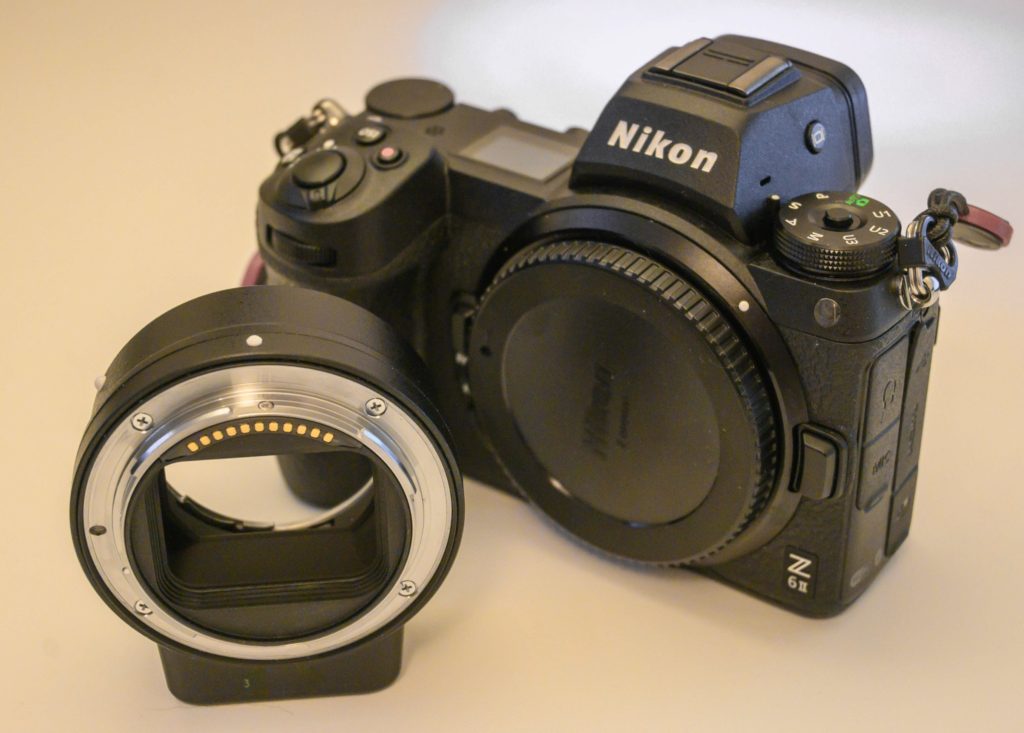
In order to give some backward compatibility with all the good glass made from the middle of the former century and still being made today, Nikon decided to market an adapter, the so called FTZ adapter, or the F-mount to Z-mount adapter. It was probably also because the amount of glass available to the Z-mount was very limited when the ML series was new, so many focal lengths were simply not available for the Z-mount previously.

Nikon FTZ adapter
The back of the FTZ adapter shown to the left. This side faces the Nikon mirrorless camera when mounted.

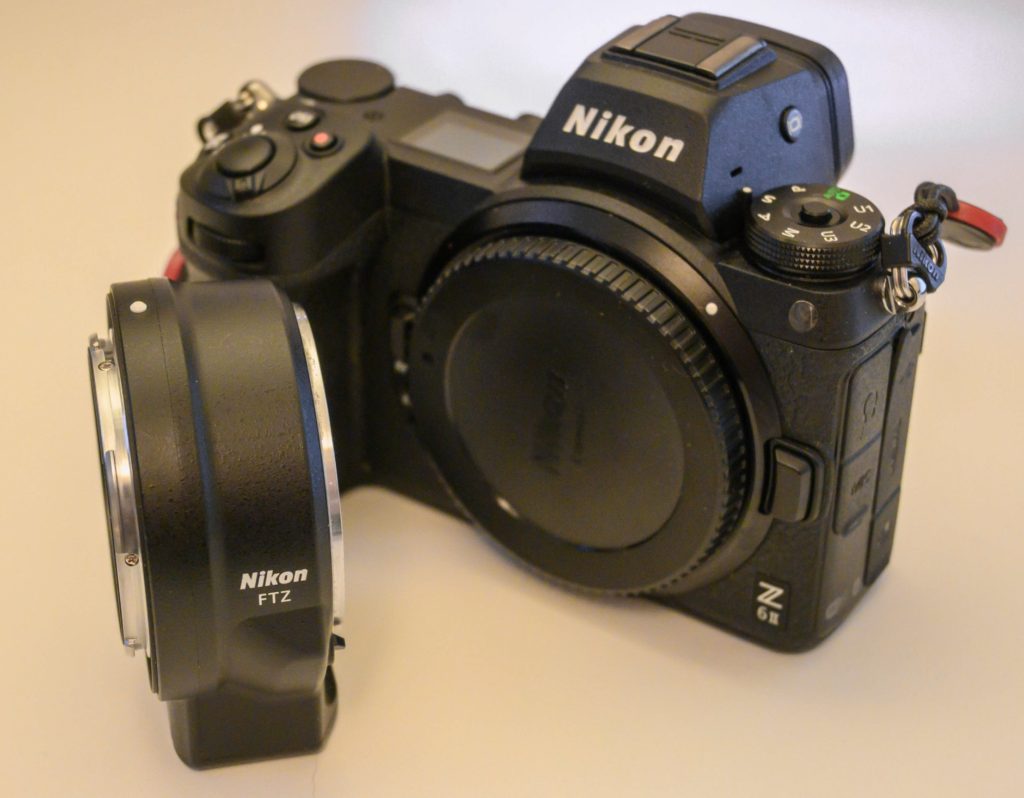
The FTZ-adapter allows you to shoot with all the glass that is made for the F-mount, as the adapter takes F-mount glass on the front and fits to the Z-mount on the back. The only downside of this adapter, other than the price of it and that is slows down AF speed a little bit, is that it has no focus motor built into it. All the glass with mechanical auto focus is dependent upon a motor in the camera body, and hence you are left with manual focus for these lenses. AF-S glass with the motor built into the lens of course auto focuses as it should, but many will probably hold on to their DSLRs to maintain auto focus for AF and AF-D glass.

Nikon FTZ adapter
The Nikon FTZ adapter sits between the F-mount lens and the camera body.

Many have speculated that Nikon would produce a FTZ-adapter with a motor built into it, but I doubt it will happen. Nikon did produce a FTZ adapter version 2, but this one is specifically designed for the Z9 camera body, and still has no motor built into it.

Nikon FTZ adapter
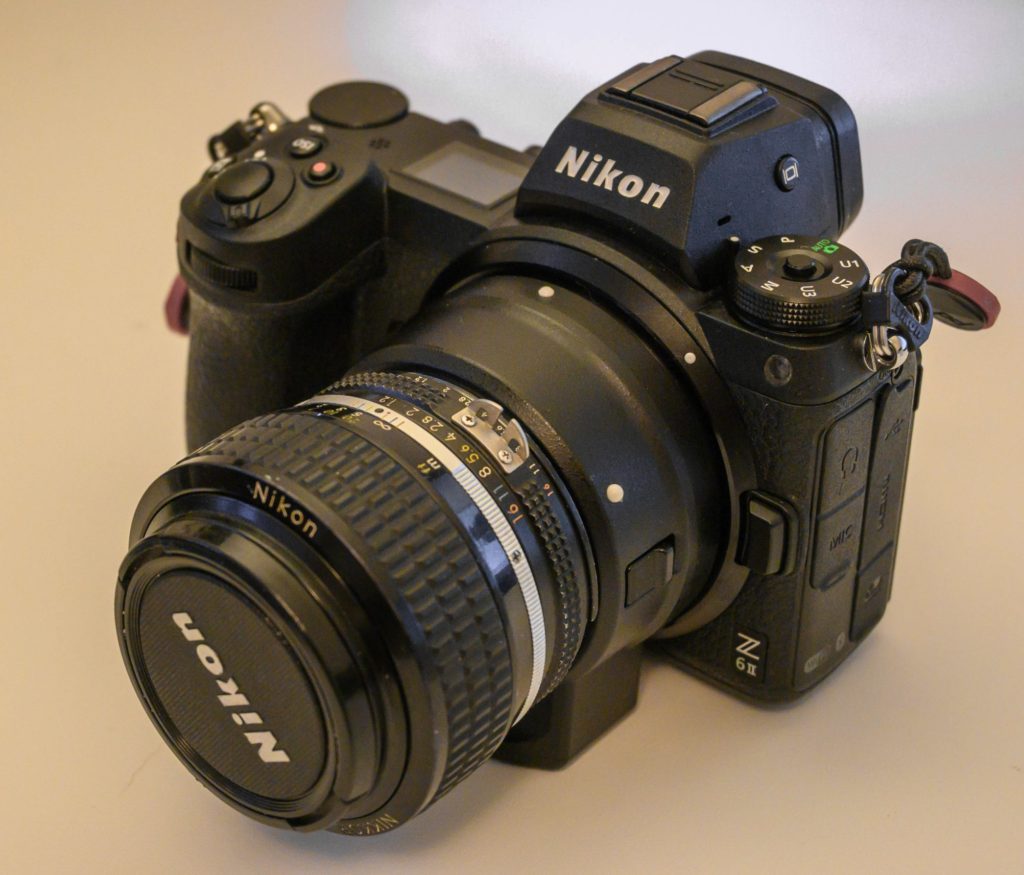
The classic 50 mm f/1.2 mounted on the FTZ adapter mounted on the Nikon Z6ii.

So my best guess – and it is a guess – is that we will not see mechanical auto focus motors in the FTZ-adapter. I think Nikon finds that you have lots of aid in focusing manually in the ML system, if you insist to use vintage glass with the mirrorless cameras.

So the FTZ-adapter is relevant if you have F-mount glass that you love and want to hold on to, and at the same time want to upgrade to a mirrorless camera body. Other than giving you the benefits of a mirrorless camera relative to a DSLR, it also opens up a new (and expensive) world of S-series glass that in most cases have got excellent reviews for stunning results.

Video link

Related reading

Which Nikon lens type should you buy?

Is mirrorless cameras better than DSLRs?

Nikon Z6ii: Manual exposure, how to

Manual exposure

Many find manual exposure a bit intimidating and stay with the automated mode or one of the semi automated modes like aperture priority or shutter priority. Good news is that manual exposure is not complicated at all and that you have a lot of room for making exposure mistakes and still be able to fix it in post, provided you shoot RAW, which I highly recommend. And you will understand your camera a lot better when you know how to operate in manual exposure mode.

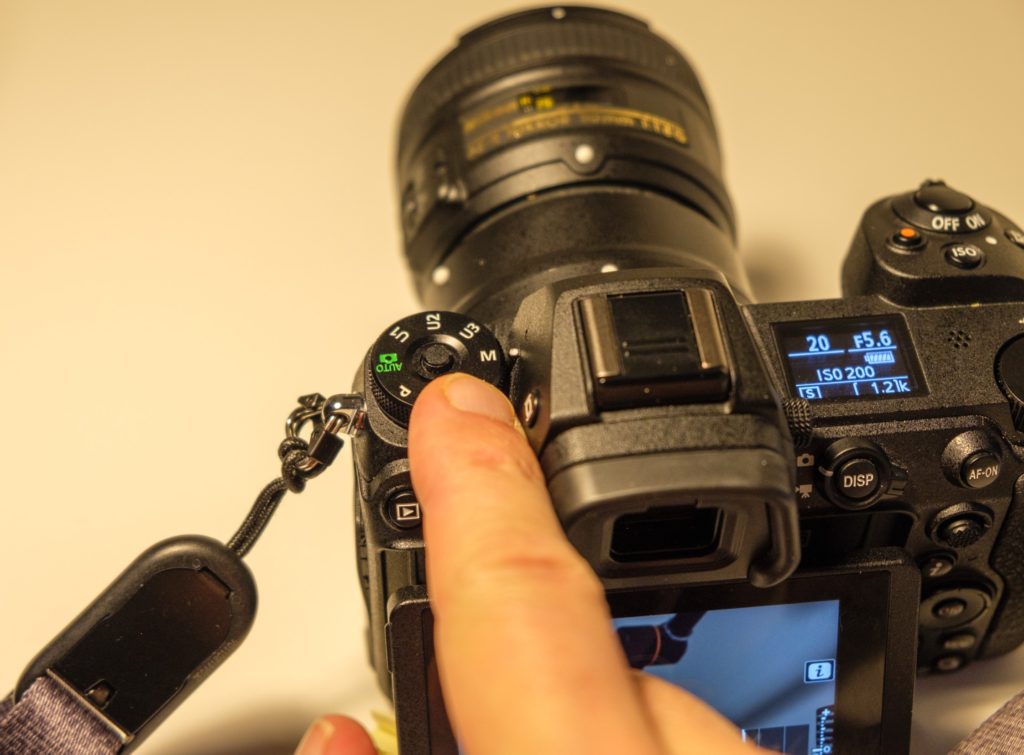
You camera has a built in metering system, that constantly measures the available light. This system continues to work also when you set the camera in manual mode. Select the manual mode on the PASM dial top left on the Nikon Z6ii.

Manual exposure mode
Mode dial top left – here the mode “M” for manual is selected.

Once in manual mode, you will notice a little exposure indicator appearing, both in the viewfinder and in the rear LCD. This indicator will tell if the camera finds that the aperture, shutter speed and ISO settings will give a correctly exposed picture when you hit the shutter.

Metering scale. Rear LCD.
Notice the scale bottom right on the rear LCD. Here the metering system says the image will be significantly underexposed. The histogram seems to agree!

It is a good thing to keep an eye on the exposure indicator to make sure you get the exposure you are after. Sometimes you want deliberately to over- or underexpose your picture, and the exposure indicator is a good tool to make sure you get what you want.

exposure indicator guide
The exposure indicator shows if the picture will be over- or underexposed or correct exposed. Notice the difference between the viewfinder orientation and the rear LCD ditto. Credit: Nikon Z6ii manual.

Another way to see the same information as the exposure indicator is to use the histogram – you can make it appear by hitting the “disp” button on the center top rear on the camera. Finally, as you have WYSIWYG, you can simply notice if the LCD or electronic viewfinder turns very dark or very bright – a good indication something is off relative to a technically correct exposed picture.

Aperture and shutter speed

You control the aperture and the shutter speed by turning the front and rear command dials respectively.

The thumb is on the rear command dial that sets the shutter speed. The index finger is on the front command dial that controls the aperture.

As you do so, you will notice that the exposure indicator changes in accordance with the selected settings for the two.

If the camera flashes “FEE” in the top LCD when you mount the lens, it is probably because you have not locked the aperture on the lens to the highest f-stop number possible – the camera needs this setting to be so, in order for it to control the position of the aperture blades when shooting with AF or AF-D lenses.

If your lens is an older model (say AI or AIS) where you have an aperture ring on the lens, it is not always possible to change the aperture with the front command dial – instead you will have to set the aperture on the lens. The top LCD will not show the aperture but just a “F–” to indicate it cannot “see” the chosen aperture. The metering indicator works fine still though.

ISO

On a digital camera, ISO is actually not part of the exposure. The sensor has the sensitivity it had when it left the factory and it cannot be changed.

By setting the ISO to other values than the base ISO 100, you apply a gain to the values read by the sensor. It is camera internal post processing that happens from the sensor has read the light and until the image sits on the memory card. Just like in the old days when you turned up the radio, you both amplified the signal and the noise – the original signal remains the same. ISO works the same way, so the price for turning up the ISO is more noise and grain.

When you push the ISO button on top of the camera, you change the function of the front and rear command dial.

The ISO button is located on the top of the Nikon Z6ii.

Pushing the ISO button and at the same time turning the front and rear command dial, changes the ISO values. The front command dial switches between ISO and auto-ISO and the rear command dial shifts between ISO values, say from 100 to 140, and from 140 to 200, and so on.

Choosing the ISO on the Nikon Z6ii
Here the ISO button is pushed. Notice that the top LCD now shows the chosen ISO value.

When you have auto-ISO switched on, the camera will be in a – if not semi automatic – then quarter automatic mode. In other words, the camera will try to make the picture correctly exposed ALONE changing the ISO. So if you have a dark scene where the aperture is closed down and the shutter speed is fast, the camera will have to go to very high ISO values to compensate.

You can use auto-ISO to make sure you come home with images that show at least something, but be aware that grain and noise may be the price you pay for switching auto-ISO on. For starters, I would recommend that you have auto-ISO off, and keep an eye on the exposure indicator or the histogram to make sure the exposure is roughly right. Later, when you have some experience, auto-ISO can make you work faster.

Metering modes

The Nikon Z6ii has 4 metering modes. You can access these by pushing the little “i” in the rear of the camera (middle) and this shows a 6×2 menu where the 9th option (counting top left to right) is “metering”. Selecting that one, brings a sub-menu with 4 options.

Choosing the metering options on the Nikon Z6ii
The 4 metering options.

The metering mode does NOT change the amount of available light, rather it changes how the camera meters the light that passes through the lens. I shoot almost entirely in the “matrix metering” mode as it is the most advanced one, that tries to take in the entire scene and find a good compromise.

Second option is center weighted metering. This one is good if you shoot portraits where you don’t really care of the corners are exposed correct – the important is that the person in the frame is exposed correct. The manual also mentions this as a good mode if you shoot with filters.

The third option is spot metering, where the focus point is where the metering is done entirely. This is a good option of you know that a particular point in the image needs to be correct exposed, but you do not care too much about the rest of the frame. In the settings menu B3 you can set the size of this point.

The final option is highlight-weighted metering. This one many street photographers use as they are not afraid of loosing details in the shadows. I use it for shooting silhouette photography, where the details in the shadows are also less important.

All of these modes may seem confusing, so my advice is to use matrix metering. If you shoot RAW, then there are plenty of options for adjusting the exposure in post and hence I find that these 4 options are more for backward compatibility with older DSLRs than anything else.

Video link

Related reading

Nikon Z6ii – Manual focus aid

Nikon Z6ii – any need for the Preview button?