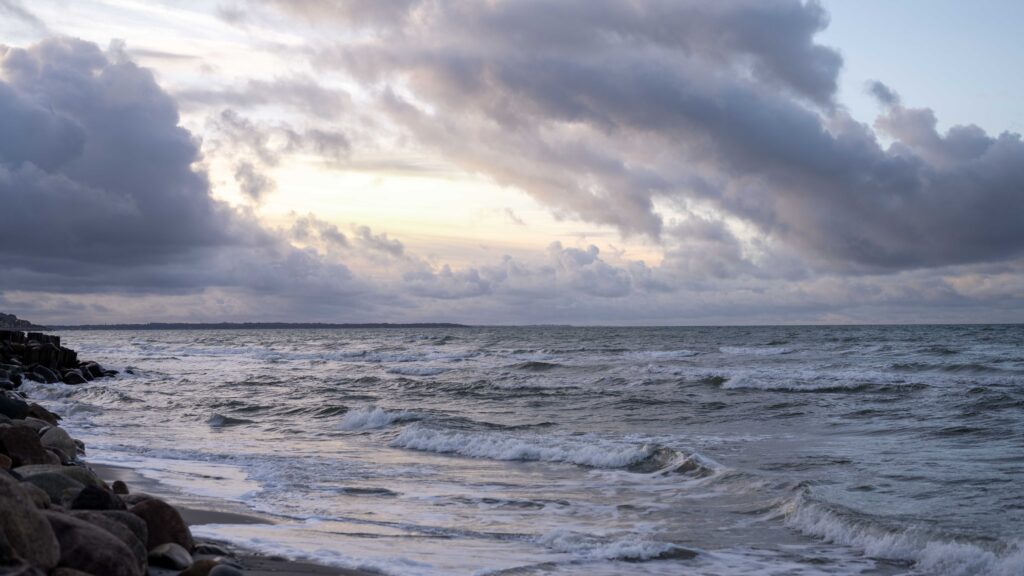
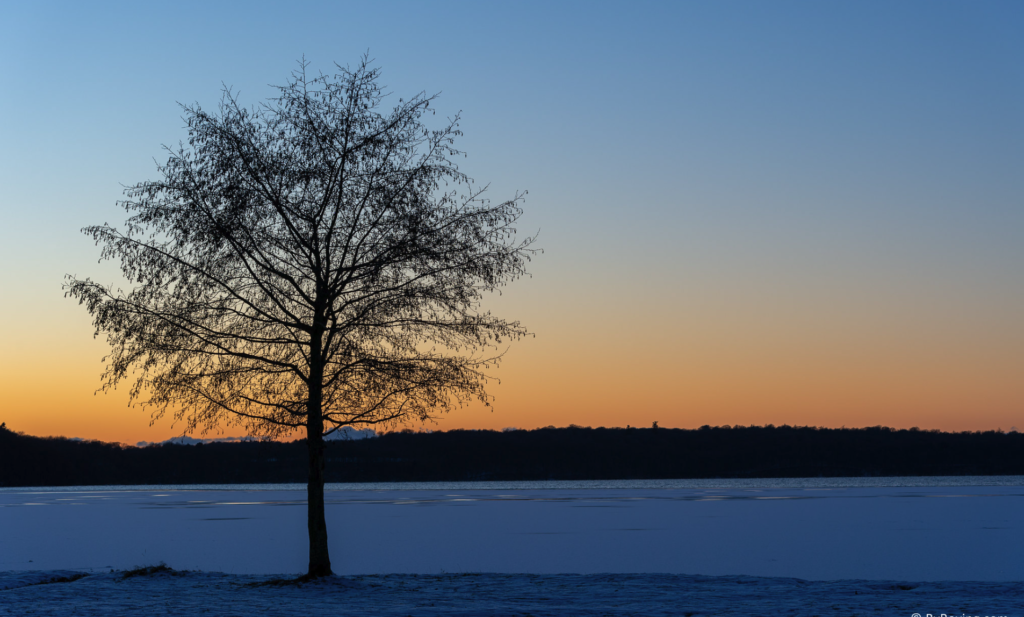
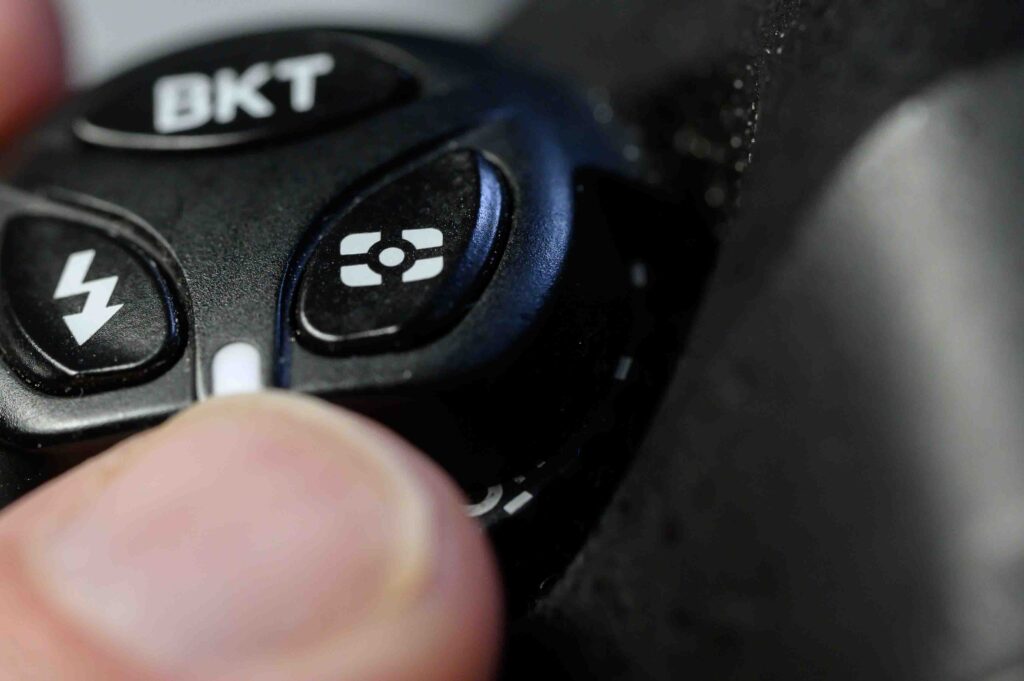
Your eyes are amazing! They can take in a scene and cover a dynamic range of approximately 20 stops of light. So looking at a sunset, you can distinguish the light both around the sun and some shades on the ground at the same time! Your Nikon D4 unfortunately cannot. It can “only” cover around 12-13 stops of light, so if you have a scene where there is both some very bright parts and some darker ones and you’d like to cover the details in both ends of the spectrum, exposure bracketing is the tool to use.
Preconditions
With exposure bracketing, you are taking several images of the same scene at different exposure values. Perhaps needles to say, but you can only do this for stable subjects such as architecture or landscape photography. And you also need to make sure the camera is in exactly the same spot for the series of shots, and a tripod is the classic tool to make this happen.
As you are shooting a series of images, the easy way to get it done is to make sure your Nikon D4 is in continuous mode (low or high), so that it fires a series of shots when you hold down the shutter release. Otherwise you will have to hit the shutter several times to complete the series.
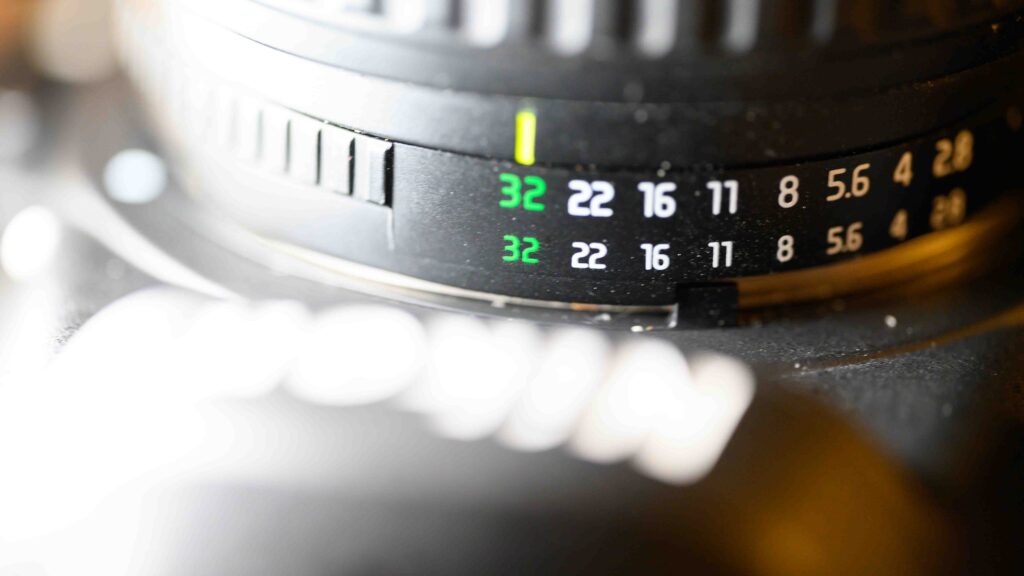
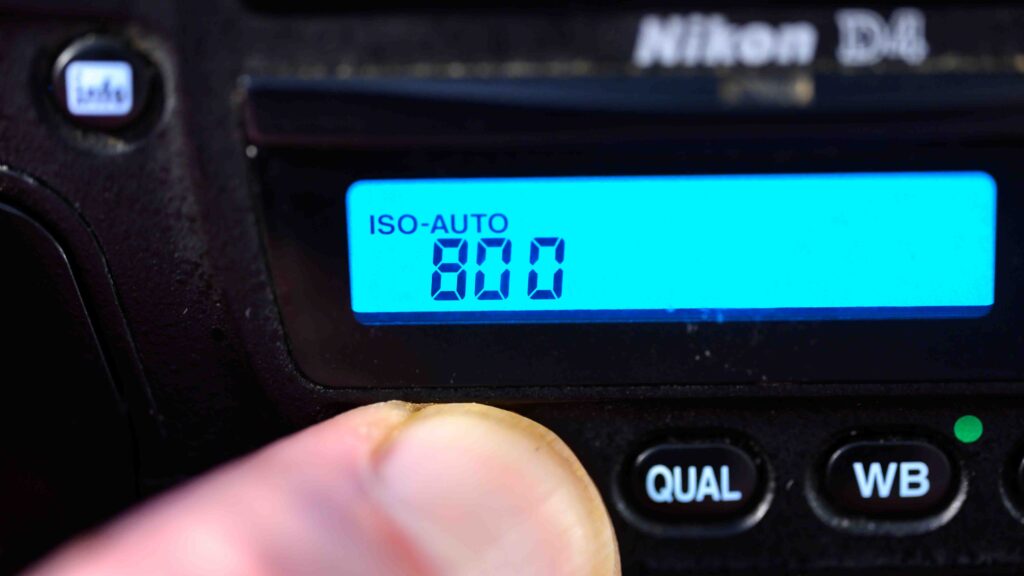
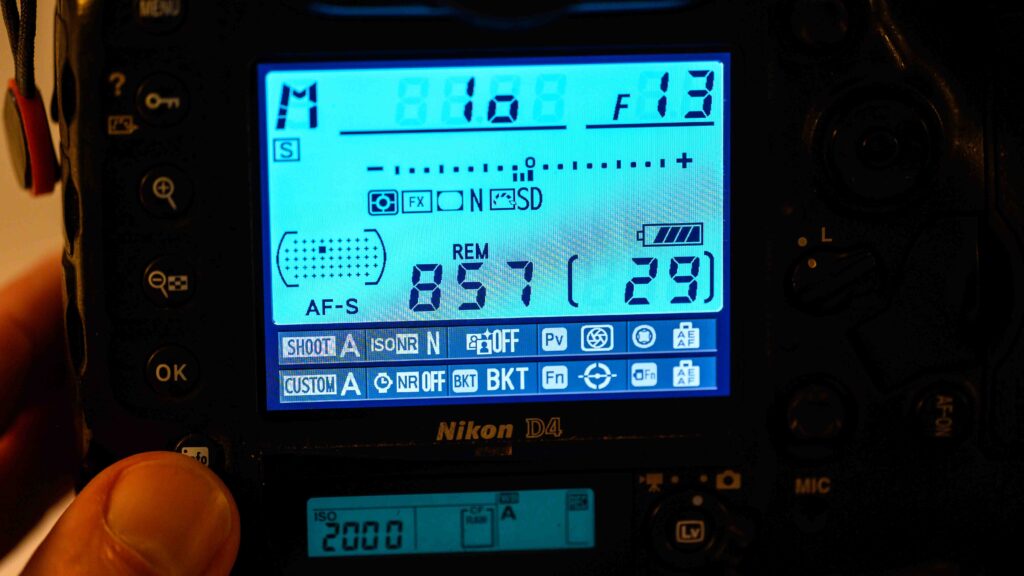
Finally, you need to give the camera some options for changing the exposure between shots and the semi automatic exposure modes like program, aperture priority and shutter priority are ways to secure this. You can also shoot in manual mode, but make sure the D4 has auto ISO set to on, otherwise there is very little for the camera to vary between the shots!
How to
You can bracket for many things such as white balance and also bracket using the flash light, but in this post I will just cover exposure bracketing using ambient light.
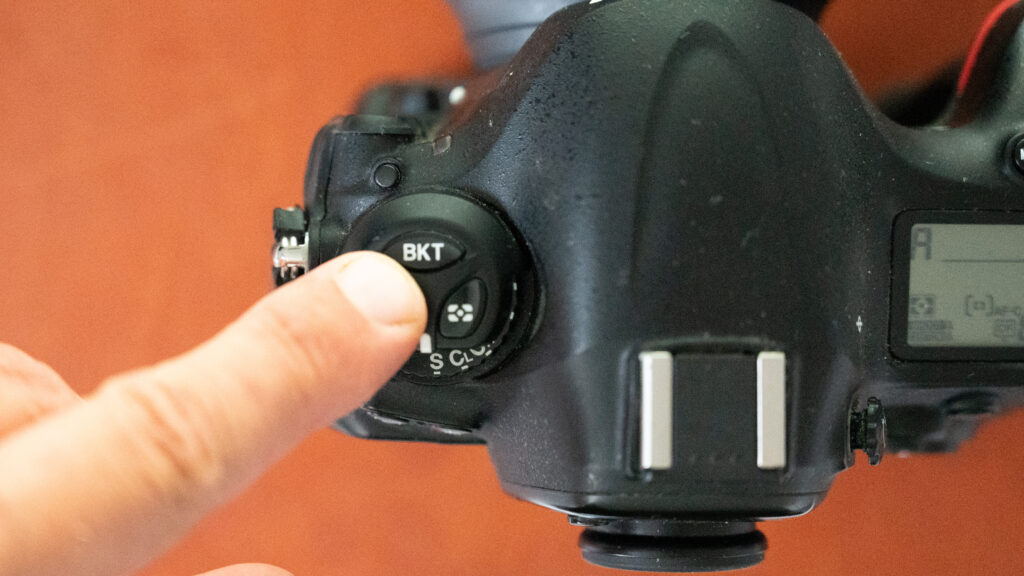
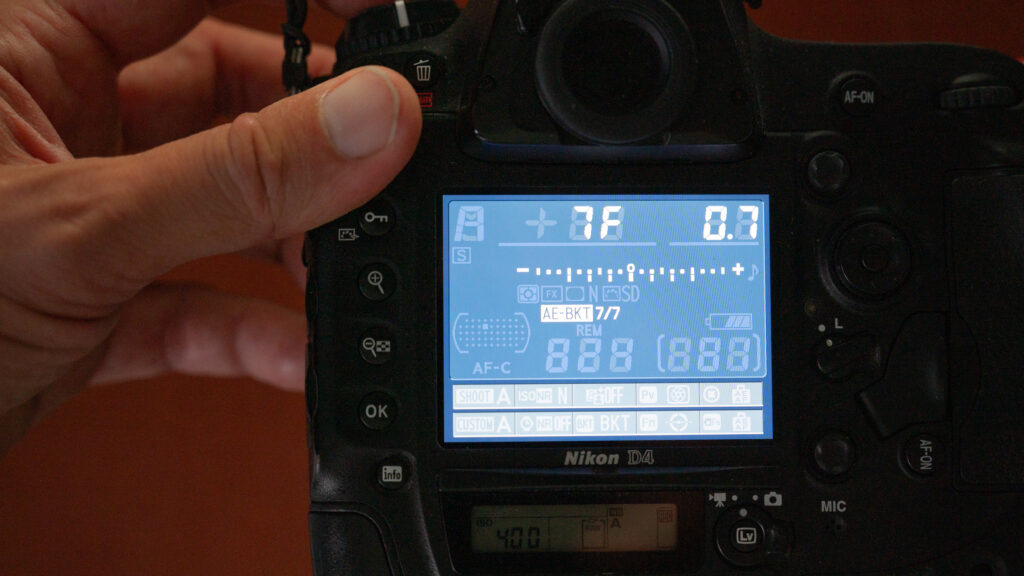
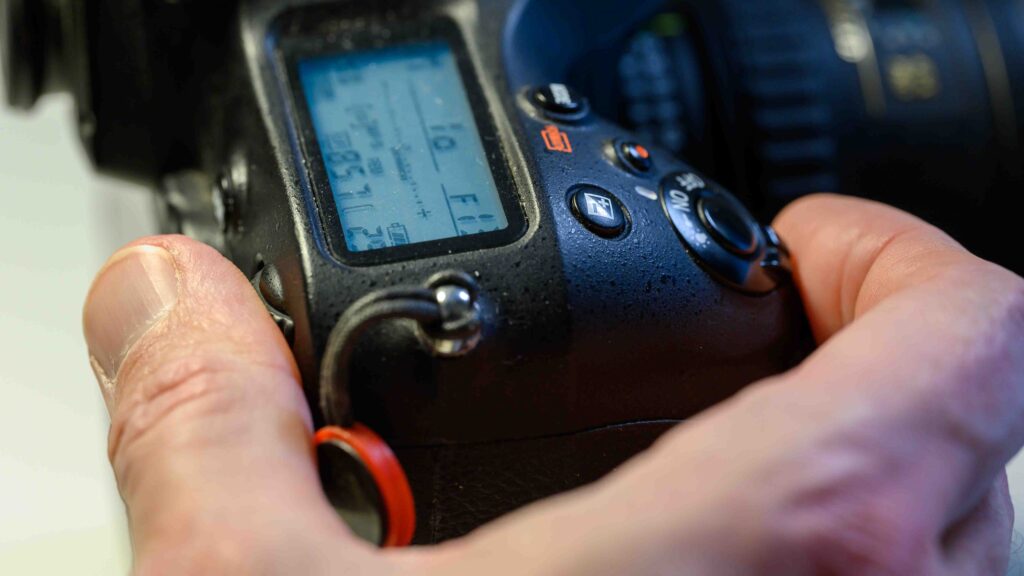
The wonderful Nikon D4 has a dedicated bracketing button sitting top left on the camera named “bkt”. If you hold down that button, you can set up how many shots you want in the bracketing series (3-5-7 etc) and also how many stops of light the exposure is to deviate from the normal exposure. Use the front and rear command dial to change the values. I usually set this to 1.0, but if you set it to say 0.3 or 0.7, you can select a larger number of images to be included in the series. If you set the number of images to 0, you are turning off the bracketing functionality.
Once you have captured a series of images, you will need to merge the images in post processing. I use Lightroom for this purpose, but there are probably other tools that can do exactly the samme. The software will pick the over exposed images to get access to the details in the shades and the under exposed images to get access to the details in the highlights, and by stitching the images together, a final image with improved dynamic range can be produced.
Shooting tethered is great if you want to see the result of your work in large format right after you have hit the shutter! Or if you want to present the client with the result instantly – the feedback can be valuable and you can change the scene or the setting on the fly rather than the client being disappointed seeing the result some days later. No much how much editing you do, it is difficult to change a headshot if the client suddenly sees that the shirt he is wearing is not fit for purpose, or the like.
What you need
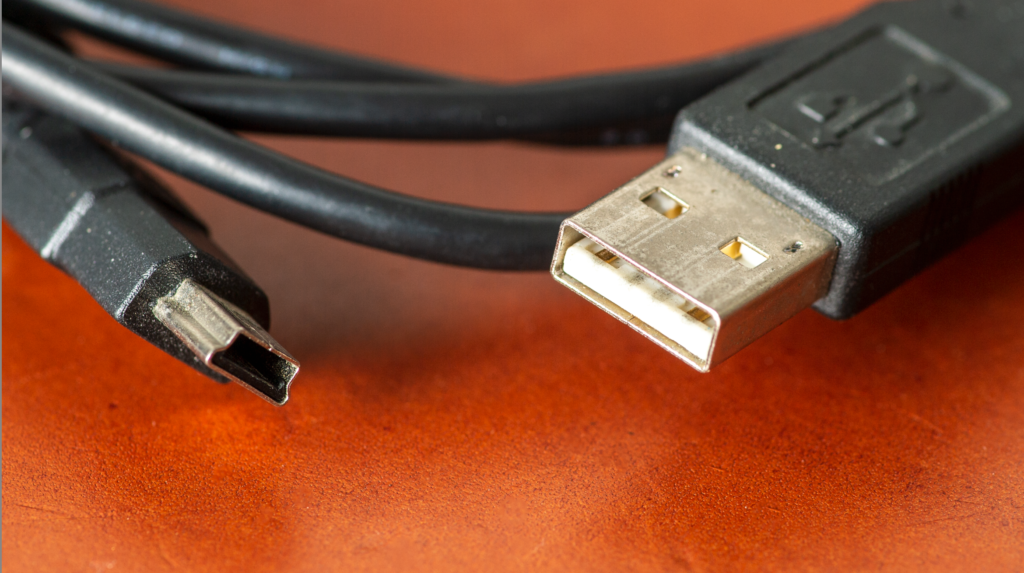
You obviously need your beloved Nikon D4 with a charged battery and a lens mounted, but in addition you will – as the name indicates – need a cable. They come in many shapes and forms and different lengths, but you can start looking for what you’ve got on stock to see if you can get going without buying a cable. It is a regular cable, a USB one, with a USB-A connector in one end and a mini-B in the other.
The second thing you will need is a piece of software to communicate with the Nikon D4. I am not sure of NX tether will work with the D4 or D4S as the spec sheet only promises it will work for the D6 and more modern cameras.
I use Lightroom and it works ok, although on my Mac it has a tendency to crash often – usually in the beginning of a session and then it stabilises. I don’t have that issue on my Windows laptop.
I know that many portrait photographers prefer to use Capture One and that is an alternative to Lightroom. I am not aware of any freeware that will support tethered capture.
The final thing you will need is a computer with a screen. If I am out and about I use my laptop and the screen it has – it is clearly not as big as my office monitor, but so much bigger than the rear LCD of the Nikon D4. If I am in the office I use my mac mini with a 32″ monitor attached.
How
If you hook up the Nikon D4 to the laptop / PC / mac with the USB cable and make sure the camera is turned on, the only thing to do is to activate tethered capture in (in my case) Lightroom. I do that by simply selecting: File > Tethered capture > start tethered capture, and confirm using the window that appears. You will start session where the images are transferred to a dedicated folder in Lightroom and they will emerge as you shoot – one by one. The transfer time is rather fast – I would estimate it to be 1 second or thereabout.
Backup
Be mindful that the images are NOT stored on the memory cards on the Nikon D4 when you are shooting in tethered mode. They are transferred directly to the laptop / PC / mac and only stored there. I recommend that you asap and preferably in real time take a backup of the images.
When you shoot with the Nikon D4 without tethering and with 2 card slots, you automatically have a backup as the images are written to both cards. This is not the case when shooting tethered, so make sure you have a process for making backups asap.
Other than that, there is not much to it! I wish you all the best with tethered shooting.
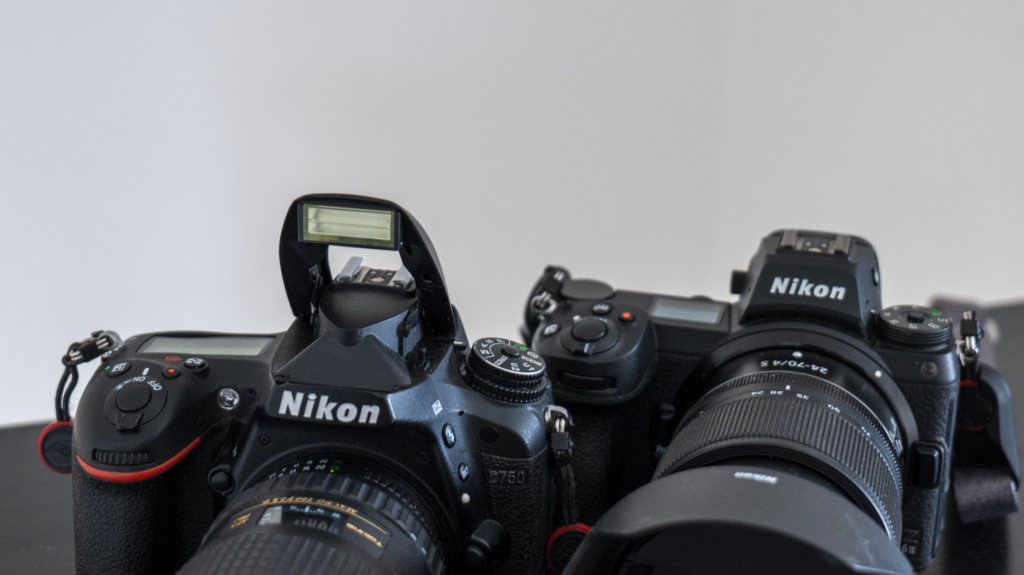
The Nikon D4 is a professional level camera announced by Nikon back in 2012, and measured in terms of technical development, this is really a long time ago! A lot has happened to the cameras in terms of video capability, computing power and the notorious move to mirrorless cameras.
Within the professional series of Nikon cameras, the D4 is now several generations old. So it is a bit up-hill for this trusty old DSLR. And to make it worse, the D4 was replaced by the D4S with even better specs, but of course the D4S comes with a somewhat higher price tag. You can find my reasons for choosing the D4 over the D4S right here (yes, I am cheap!).
Convincing build quality
When you hold the Nikon D4 for the first time, you will notice the size of the camera! It is huge and heavy! My Nikon D700 plus a battery grip is also big and heavy, but the D4 is just a little bit more bulky. When I add my 70-200mm f/2.8 G lens, the combo becomes crazy heavy. If you are an event shooter that needs to hand-hold the camera throughout the day, make sure you try the camera with your lens of preference before you invest.
You have a feeling that the D4 can roll down a mountainside and the only thing that will happen is that the mountain will be hurt! Jokes aside, it is a very convincing camera in terms of its build quality. But if you don’t like a heavy camera, stay clear of the Nikon D4. It is the biggest camera I have ever owned! The D4 body is 1.2 kilos!
The feeling of top level quality continues when you hit the shutter: it is a heavy sound that shutter makes! If you put the camera in continuous mode, the sound is like a machine gun! I am not a camera engineer, but just from using it, I am left with the impression that this camera will last for years and years. Specs say the shutter will last 400.000 actuations, but IRL the shutter will probably last much longer.
The D4 was built for speed with especially sports and wildlife photographers in mind. For it’s time, it can move a lot of data from the sensor to the buffer and stay at 10 FPS. The buffer can hold up to 100 RAW images. You may think that I am crazy getting the Nikon D4 when I have no need for the speed really, but I simply had to try one of the professional level cameras, and the D4 was the most affordable without being antique.
Ergonomics
I’ve got big hands, and the D4 is a wonderful camera to hold, despite it’s significant weight! Across the D700, D750, D7500, D5600 and Z6ii that I have tried, the D4 has the best ergonomics of them all.
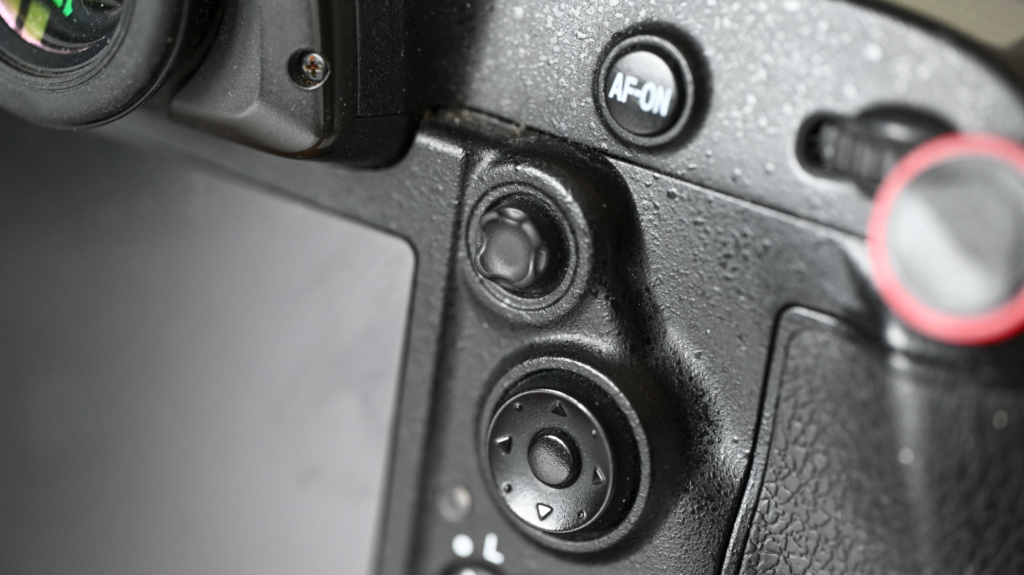
The button layout of the D4 reminds me of what you’ll find on a Nikon D700, but there are some twists. It seems that Nikon constantly try to improve the shooting experience, and hence makes little tweaks from one camera generation to the next. One of the things many love to hate is the joysticks to move the focus point around – they find them too small, to flimsy and report that they simply fall of the camera after a while. I am happy to report that mine are still around, and serve me well, but if you have small hands, you may find it a bit difficult to get your thumb to reach the joystick as you have to get passed the command wheel!
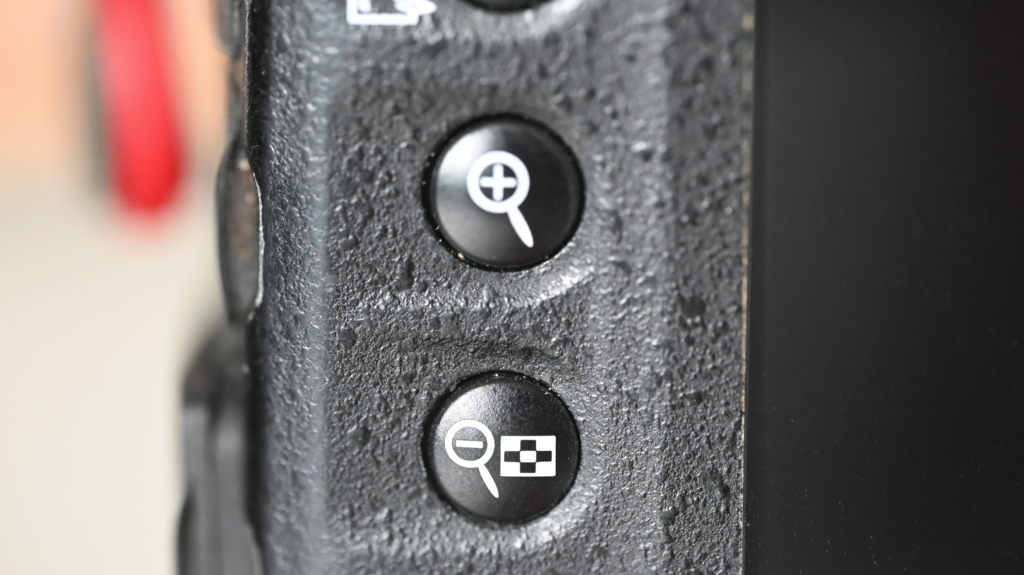
The rear LCD works really well, but forget about a a tilting or an articulating screen – this one sits in the camera body and stays there! Also, if you have gotten used to zooming in and out by pinching and zooming on the screen, you will need to re-learn to use the + and – buttons in the left side of the camera. The screen will ignore you otherwise! So here the cameras age starts to show. But then on the other hand you get a pro level camera where the buttons are backlit (!) which when shooting at night / low light is an absolute blessing that I wish Nikon would bring to their enthusiast level cameras.
The expected battery life of 2600 shots seems absolutely mind-blowing! This I got from the spec sheet, but in real life the battery life is impressive, actually so impressive that I often forget to charge the battery on a regular basis! There is no need! Be aware though that if you shoot in Live View a lot, then the rear LCD will drain the battery a lot faster.
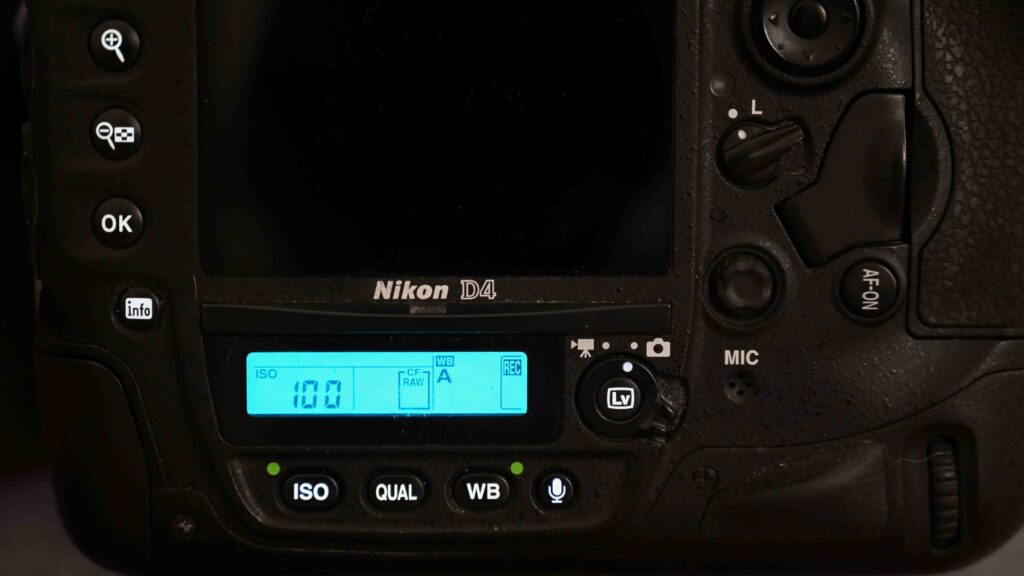
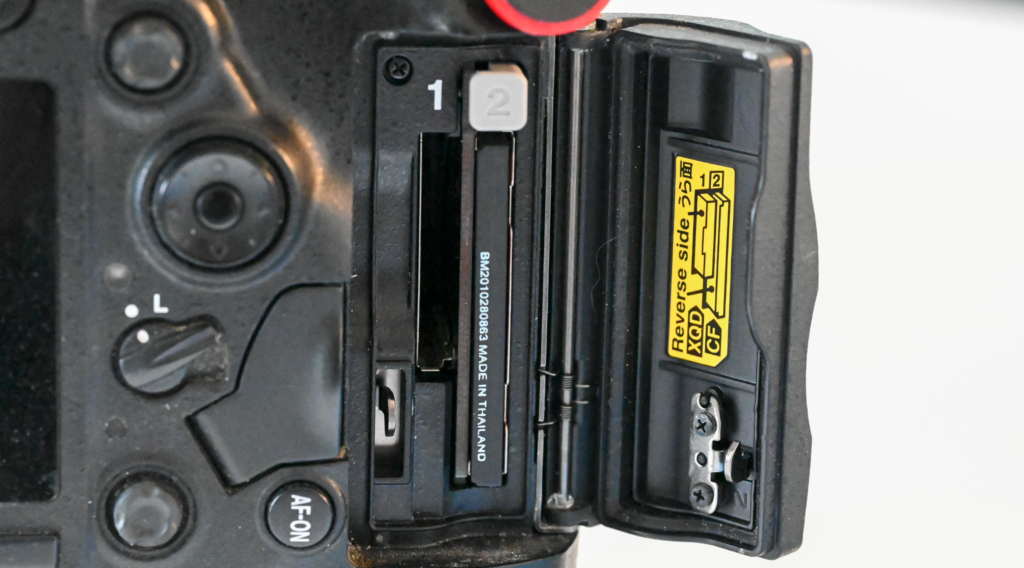
The D4 of course comes with 2 card slots, but be aware that one is an XQD slot, the other is a CF (Compact Flash) slot. The XQD card type never really caught on and for that reason only few vendors produce the card today, which drives the prices upwards, unfortunately. Add the price of a good XQD card to the price of the camera before making the purchase decision, in case the XQD card is not included.
Video
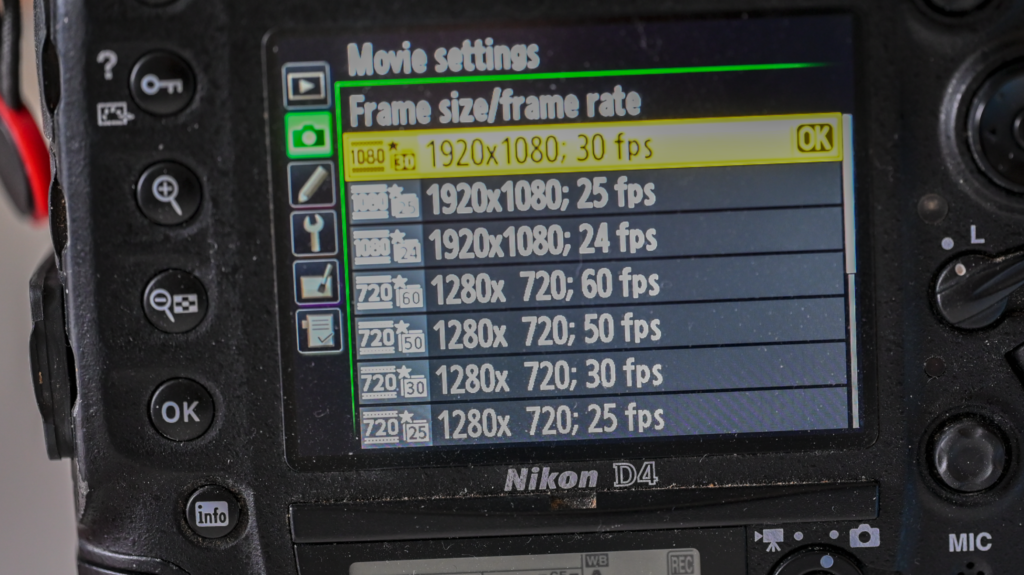
The Nikon D4 does decent video (1080p), but if you look at what a modern hybrid mirrorless camera can do in terms of resolution and FPS, then the D4 cannot keep up.
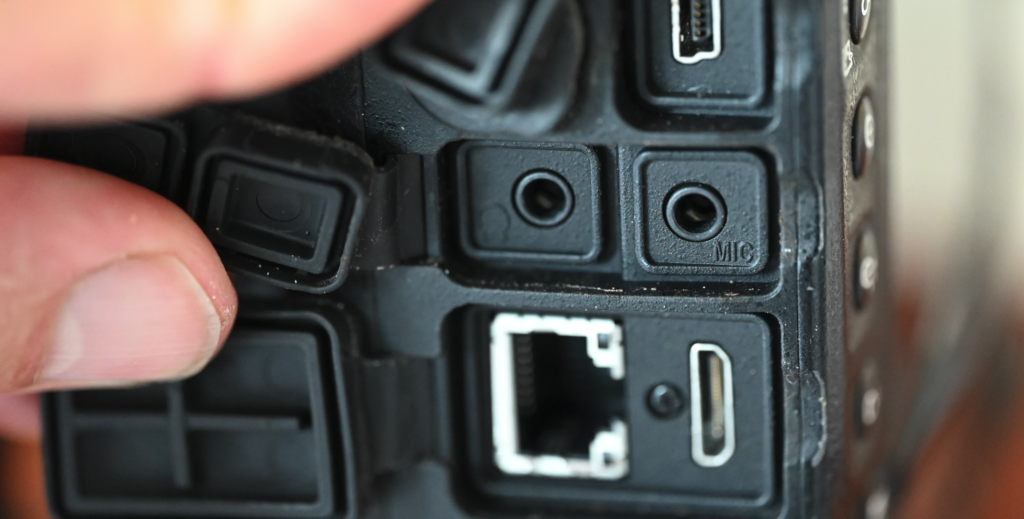
The D4 is well connected with ports for HDMI, network, USB, microphone and headset. WiFi or bluetooth or other similar wireless options are not built into the camera, and again the age starts to show.
I must admit that I have not used the D4 for video as my Nikon Z6ii is so much more capable with more resolution, more FPS, IBIS, etc, and I think most hybrid shooters today will find that the D4 is a tad too old to serve as their camera.
Image quality
The image quality of the D4 in one word? Outstanding!
I know that many will wrinkle their nose when they in the spec sheet read that the sensor has “only” 16mp resolution and wonder if that will ever suffice. Many entry level cameras today have 24mp and the number seems to go up and up. But be mindful that the camera producers are very aware that this is one of the parameters buyers can relate to and are looking for – so it is a competitive parameter more than it has to do with image quality. Just like an amplifier for your stereo equipment does not get better the more watts it can output, the same way your camera body’s quality is not directly correlated to the resolution of the sensor.
The images that the D4 produces are stellar, and I am particularly fond of the colour rendition. Many praise the D700 for being a special camera with a special sensor, but when it comes to colour rendition, the D4 IMHO is the best camera I have ever seen across all the different Nikon cameras I have tried. This can of course be related to my copy of the D4, what I shoot or what I look for, but I am still convinced that the D4 is some of the best I have ever seen.
If you want to see with your own eyes, go to flicker or the like and find images shot with the Nikon D4. I can provide a few examples via this link.
I think you will be positively surprised by the performance by this 10+ year old camera, despite it’s relatively low pixel count and the sensor having no IBIS or BSI or whatever is the latest fashion.
Auto focus system
Being frustrated with the focus system on the mirrorless cameras (like the Nikon Z6ii), I am happy to say that the focus system on the D4 works like a charm. It is professional grade stuff and for my “catch a bird in flight” once in a while shooting, I have never met the limits of the AF system. It appears to me that the AF system of the D4 is blazing fast and rock solid.
Be mindful that the performance of an AF system is always a co-operation between the lens and the camera. Slow lens and fast camera does not really cut it. I have primarily been shooting with my beloved 70-200mm f/2.8 G series lens, and it co-operates with the D4 beautifully.
Summary
When the D4 was new, the price was around 6.000 USD. We are now approaching 1.000 USD used. You get a very good used professional level camera if you go for the Nikon D4.
My main concerns on your behalf is the weight. It is a heavy camera. Also, the ergonomics are probably betters suited people with big hands. So try the camera before you buy.
You will have to live with a few dated features: the video capabilities is not up to par with a modern camera, there is not articulating screen, the camera is noisy, etc. So for me it is a photography only camera. But if you put some good glass in front of it, you will have a reliable workhorse at your disposal many years to come. Be aware though that servicing of the D4 has probably come to an end, so when the camera stops working, it is probably the end of it – unfortunately – unless some non-Nikon workshop can fix it.
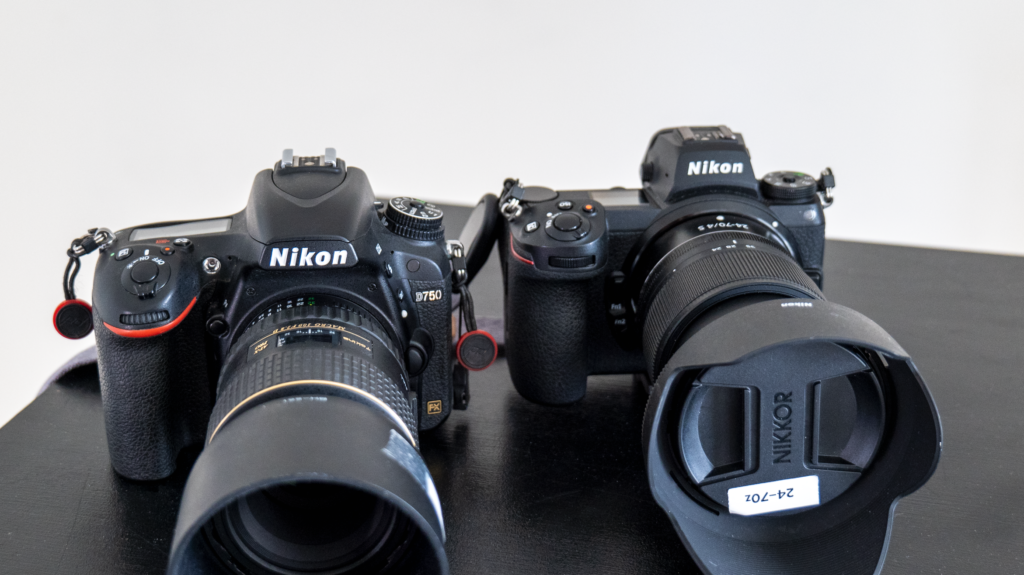
The Nikon D750 was my first full frame camera and I love it! It has served as my workhorse and spare time camera from 2018 when I bought it and up till today. Along with my Tokina 100mm Macro lens, I have used it to shoot a lot of the images that you’ll find on this blog.
The D750 may not be as super solid as you will find if you get hold of say a Nikon D4 or D4S. Far from. Many that have tried a camera from Nikons professional (one digit) series will say that the D750 is a bit too light and that the built quality is not up to par with the pro series. And it is true.
But if you are not a photojournalists putting your camera through hell and high water on a daily basis, you probably don’t need that level of build quality. The D750 has been with me on outdoor photography many times in brutal weather, and it has stood the test of time as far as I am concerned. Everything still works on the camera – no failures when it comes to buttons / dials or internal mechanics / electronics.
And then what I find the best part: the D750 is so easy to use. If you speak Nikon, you will find at home with the D750 right away. It is a camera that does exactly what you ask it to, and it does not talk back. You can read more about why I chose the D750 back in 2018 right here.
Into the mirrorless era
Much has been written and said about the transition from DSLRs to mirrorless cameras. And I think this debate will go on for a long time. I have no intention to add to this debate, but will try to give you some observations that I have made working with both the Nikon D750 and the Nikon Z6ii. You can find my general observations about the difference between DSLRs and mirrorless cameras right here.
Glass and mount
When Nikon entered the mirrorless scene, they took a big decision and abandoned the good old trusty F-mount! The F-mount has been with us since the earth cooled down, and it was probably not an easy decision for Nikon to make. But I guess the reckoned that going mirrorless was also a “once in a millennium” chance of improving the mount. They did develop an FTZ adapter, but be aware that for all the F-mount glass with mechanical focus, i.e. where it depends on a focus motor in the body, is now suddenly manual focus!
Nikon argues that the new Z-mount with reduced flange distance improves the image quality, especially for wide lenses. I don’t know if this is true, but what I do know is that Nikon also took a deep breath and redesigned their lenses for the new mount. And this has been the central criticism of Nikons mirrorless cameras: the lack of lenses. But that was an issue in the beginning more than it is now – other vendors like Sigma are joining the party and deliver lenses for the Z-mount.
If you read reviews of Nikon lenses for the Z-mount, you will find that the lenses for the Z-mount is a new level in quality. Is this because of new lens design, new mount or smaller flange distance? I really don’t know. But I can see that something has happened for the better.
The question however is: Do you need the higher lens quality? My answer is: probably not, unless you shoot astro photography or some other line of business where resolution and micro contrast is of the essence. You can get say an 85mm AF-S lens for the F-mount and it will produce images in professional quality and your clients will be happy as can be, provided that you as photographer know your line of business.
Prepare to pay for the glass. Z-mount glass is good, but it is also reflected in the price level.
Add to this the price for the Z-mount glass: it is expensive. We have gotten used to the vast amount of used glass for the F-mount, and the fact that you often on a flea market can find dirt cheap glass of good quality that you can put on your DSLR and it works like a charm. New good glass has always been expensive, so it is perhaps not fair to compare to the used market for F-mount, but it is very real when you compare the F-mount and the Z-mount. So of you plan to go mirrorless, prepare to pay for the glass.
Your AF-S lenses with built in focus motor will work directly on the FTZ adapter, and that is probably the good compromise in terms of price point. If you use older glass like AF and AF-D, be prepared to focus manually!
Video
Video capabilities is where cameras have developed the most the last 10 years. This is also where my trusty D750 starts to feel old: it has no 4K option. If you are not a hybrid shooter, then this may be less important to you. For me, shooting a lot of video on the Z6ii also, this is important, as 4K is important to me. We are in personal preference territory and some will be happy shooting video at 1080p, and in that case the D750 can get the job done. But I never use the D750 for video anymore.
Unfortunately neither the D750 nor the Z6ii has a fully articulating screen, which is important if you need to frame precisely, e.g. overhead shoots or walk and talk videos. I miss the fully articulating screen and had hoped to see this as an improvement on the Z6ii, but no. Strange actually, as my Nikon D5600 from way back when had a fully articulating screen!
Speaking of video, the viewfinder on the Z6ii is a small TV screen! What the sensor picks up is live transmitted to a small screen that sits where the optical viewfinder used to be. So you are in permanent live view mode! Some absolutely hate this and want to stay with the optical viewfinders – I am not one, and I think the electronic viewfinder in the Z6ii works very well, also in low light conditions. And then the ability to zoom in, in the viewfinder, especially for manual focus, is a thing I find hard to miss when I go back to the D750 after shooting with the Z6ii.
Shooting experience
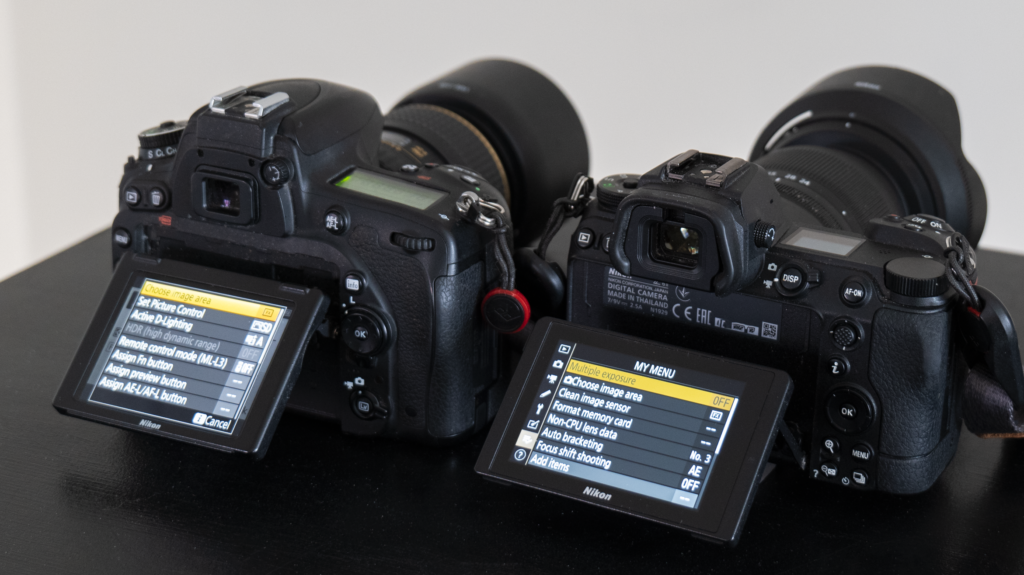
In the beginning I was not happy shooting with the Z6ii. Nikon has clearly re-designed the user interface and much more is now put into quick menu items at the expense of physical buttons. You can see this when you look at the front left of the Z6ii – the buttons have all gone and there are only buttons for the right hand to use.
The shortcut for formatting the memory card has also gone, along with the physical selection of drive mode. It is all selected via menus now.
I like the design, with dedicated buttons for things you select often, better. I really miss the ability to select focus mode via a button or format the memory card via a shortcut, but again, this is very much personal preference territory. I do notice however, that Nikon on some of the more expensive ML cameras seem to lean more towards their older designs.
Otherwise I find ergonomics great with both cameras. I have big hands and need a deep grip which both the D750 and the Z6ii features. And the buttons and dials are easy to use on both cameras, not much to notice there. The only thing that I miss when going from the D750 to the Z6ii is a flash! Call me crazy, but in a pinch I sometimes use the built in flash, and I find none on the Z6ii. Not a biggie, but a difference I notice.
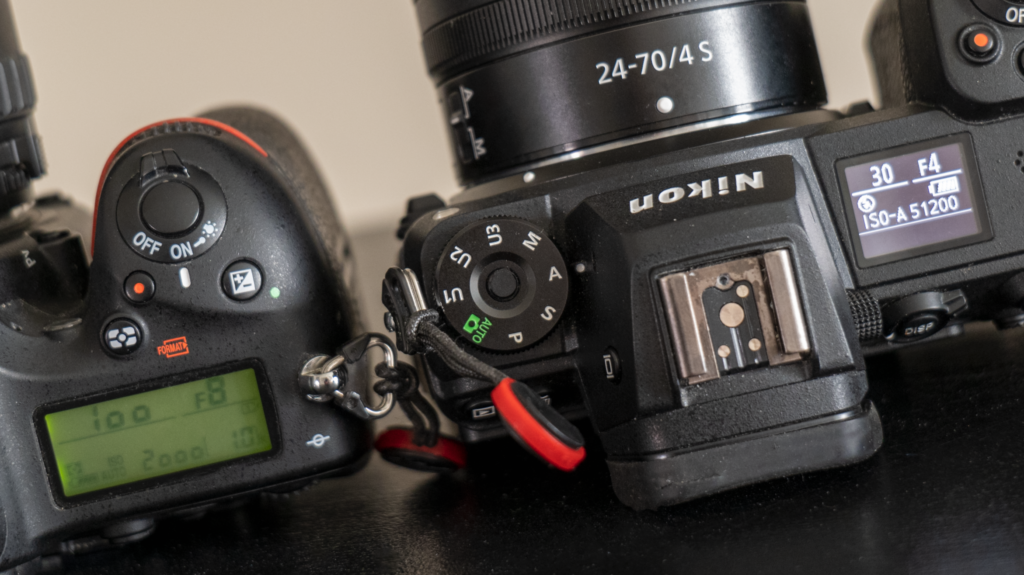
The top LCD has changed so that it now features a white on black (or black on white) text instead of the good old green light we’ve known for decades. I do find the Z6ii a bit easier to read, but it is an improvement that is not very vital if you ask me.
What I do love about the mirrorless Z6ii is the ability to zoom in both in the viewfinder and the rear LCD, in combination with focus peaking highlights. When you shoot with a manual focus lens, these tools are a great help if you ask me, but also when you shoot with AF! You can let the camera focus automatically for starters and then you can grab the manual focus ring to override auto focus and get help from peaking highlights. For me, this is one of the areas the Z6ii really changes the shooting experience and I miss these features every time I return to the D750.
Another thing I miss is the ability to zoom and pinch on the touch sensitive screen – when you come from an iPhone you expect this to be the standard. Not on the D750; the + and – buttons on the camera needs to be engaged to zoom in and out.
Focus
When it comes to the focus system, the DSLRs have matured this technology over many years and many iterations. My Nikon D750 can see in the dark! When I do low light photography with a fast lens, it is amazing how the camera is able to focus both fast and precisely.
I am not impressed by the focus system in the Z6ii. My favourite example of a focus system that does not work is when I put the 105mm macro z-lens on the Z6ii and try to shoot in less than optimal light conditions. This is where I get the sad whale song! The lens hunts and hunts and passes where it should obtain focus several times! Until I get fed up and override with manual focus. That NEVER happens with my D750 and the 100mm Tokina lens – it just locks on focus every time. I have noticed that updates to the software has made the Z6ii perform better and better for each update, and maybe it is a question of time before new firmware updates will make optimal use of the computing power in the dual Expeed processors. But for now, I am not impressed by the Z6ii focus system.
When that is said, the ability to move the focus point to ANY point on the screen is a blessing with mirrorless cameras, and every time I return to the D750 I feel limited by the “centre only” focus points. Yes, I can focus, lock and recompose, but when you get used to both framing and focusing in one go, you really don’t want to go back. I miss this freedom every time I shoot with the D750 (or the D700 or the D4 for that matter!).
I use eye detection and animal detection very little, but the few times I have used it, it has worked really well. If these things are important to you, this could be a strong argument for the Z6ii. I would imagine that if you shoot portraits from 9-5 and need to come home with tac sharp keepers every time, the eye detection capabilities of the Z6ii is a blessing.
Sensor and image quality
I guess that you would expect miracles in terms of the image quality jumping to a 6 years younger camera, right? Not so much. If I put my 16-35mm AF-S lens on the D750 and compare it to a shot with the same lens on my Nikon Z6ii with the FTZ adapter, I cannot really tell the difference! But maybe not a surprise, as the sensors have roughly the same resolution.
The Z6ii has a back side illuminated sensor (BSI) and technically that should give better images, as less light is blocked by wiring and hence the signal should be stronger. In terms of dynamic range and the like from the spec sheet, the Z6ii is superior to the D750. However, in my kind of shooting (mainly outdoor photography) I have never noticed the difference. I am sure that engineers in controlled environments can measure a difference, but the difference has not been big enough for me to notice. I think it is because we are comparing very good to very, very good.
The Z6ii comes with a IBIS sensor. I do notice the effect of the stabilisation and I have shot at 100mm handheld down to 1/20th of a second with decent results. But I must admit that I seldom use it and don’t really miss it in the D750. And I always forget to switch the IBIS off when doing ICM photography!
So in summary, when I use the same lenses on the two cameras, I can hardly see a difference. Only when I mount a Z lens on the Z6ii, I notice a difference. Please do not put more into this than needed – it is just one photographers opinion!
Summary
Before I conclude, let me underline that this is just one photographers opinion, and that your shooting requirements and personal preferences probably differs from mine. So see this as a small voice in the debate, and make sure to listen to many voices before you choose between the cameras.
If you plan to shoot with f-mount glass only, then you will not see much difference in terms of image quality between the D750 and the Z6ii. You will get some nice features in the Z6ii that I absolutely love, like:
focus peaking highlights
viewfinder zoom
focus points all over the place
touch sensitive rear LCD
And a few things I do not use that much:
14 fps (vs 6.5)
IBIS
Eye and animal tracking
1/8000th max shutter (vs 1/4000th)
Focus shift shooting
I doubt that these things are enough to warrant the move from D750 to Z6ii, but I let you be the boss here – only you know if these features are important to you.
The D750 is still a very capable camera. And it comes with a built in flash the Z6ii does not have, and if you use the flash lightly, the batteries of the D750 will last way longer than those of the Z6ii. If you are used to the classic Nikon DSLR design with many dedicated buttons for operating the camera, then the D750 will be right up your alley, whereas the Z6ii will feel more like a computer you operate via menu systems. And when shooting in low light, the focus system of the D750 will make mincemeat of the Z6ii.
I will say that if you are a hybrid shooter and need 4K, then the D750 is not able to deliver. In that case, I think there are good reasons to move to the Z6ii. And if you plan to buy some of the expensive Z-mount glass, then you will lift your technical image quality. If that is your ambition, then this could be another reason to select the Z6ii over the D750.
Many find manual exposure a bit intimidating and stay with the automated mode or one of the semi automated modes like aperture priority or shutter priority. Good news is that manual exposure is not complicated at all and that you have a lot of room for making exposure mistakes and still be able to fix it in post, provided you shoot RAW, which I highly recommend. And you will understand your camera a lot better when you know how to operate in manual exposure mode.
You camera has a built in metering system, that constantly measures the available light. This system continues to work also when you set the camera in manual mode. Select the manual mode on by pushing the “mode” button top right on the Nikon D4 while turning the rear command dial to scroll through the PASM options.
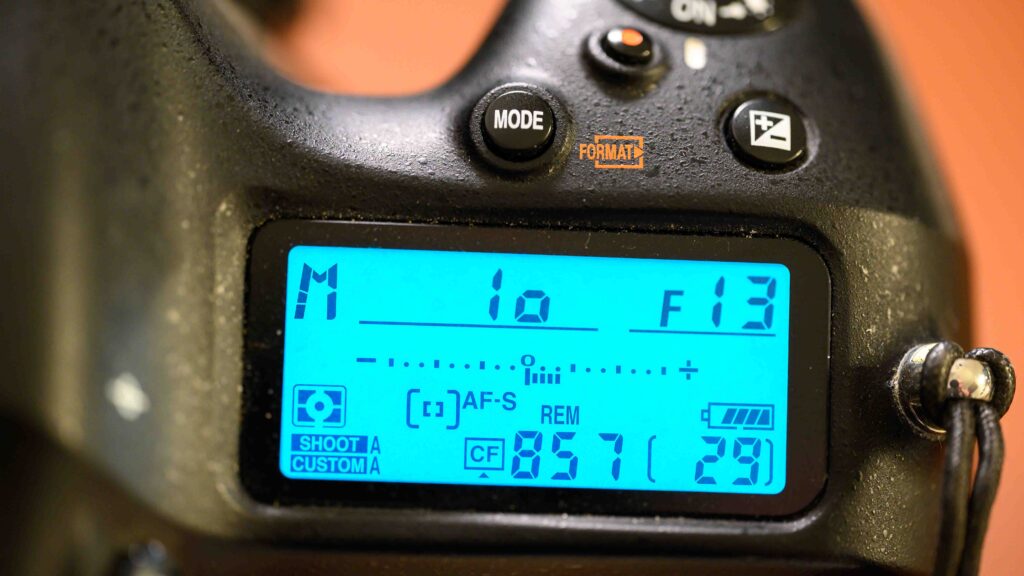
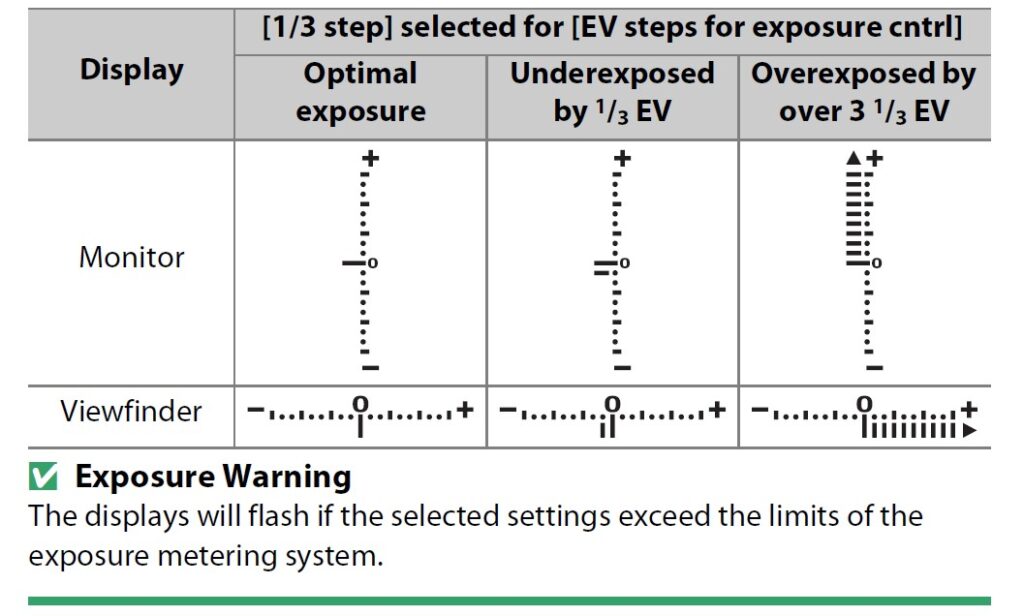
Once in manual mode, you will notice a little exposure indicator appearing, both in the viewfinder and in the top/rear LCD. This indicator will tell if the camera finds that the aperture, shutter speed and ISO settings will give a correctly exposed picture when you hit the shutter.
It is a good thing to keep an eye on the exposure indicator to make sure you get the exposure you are after. Sometimes you want deliberately to over- or underexpose your picture, and the exposure indicator is a good tool to make sure you get what you want.
Aperture and shutter speed
You control the aperture and the shutter speed by turning the front and rear command dials respectively.
As you do so, you will notice that the exposure indicator changes in accordance with the selected settings for the two.
If the camera flashes “FEE” in the top LCD when you mount the lens, it is probably because you have not locked the aperture on the lens to the highest f-stop number possible – the camera needs this setting to be so, in order for it to control the position of the aperture blades when shooting with AF, AF-D or AF-S lenses.
If your lens is an older model (say AI or AIS) where you have an aperture ring on the lens, it is not always possible to change the aperture with the front command dial – instead you will have to set the aperture on the lens. The top LCD will not show the aperture but just a “F–” to indicate it cannot “see” the chosen aperture. The metering indicator works fine still though.
ISO
On a digital camera, ISO is actually not part of the exposure. The sensor has the sensitivity it had when it left the factory and it cannot be changed.
By setting the ISO to other values than the base ISO 100, you apply a gain to the values read by the sensor. It is camera internal post processing that happens from the sensor has read the light and until the image sits on the memory card. Just like in the old days when you turned up the radio, you both amplified the signal and the noise – the original signal remains the same. ISO works the same way, so the price for turning up the ISO is more noise and grain.
The NikonD4 has a dedicated ISO button at the bottom left on the camera body. Press this one to change the ISO value selected.
Pushing the ISO button and at the same time turning the front and rear command dial, changes the ISO values. The front command dial switches between ISO and auto-ISO and the rear command dial shifts between ISO values, say from 200 to 400, and from 400 to 800, and so on.
When you have auto-ISO switched on, the camera will be in a – if not semi automatic – then quarter automatic mode. In other words, the camera will try to make the picture correctly exposed ALONE changing the ISO. So if you have a dark scene where the aperture is closed down and the shutter speed is fast, the camera will have to go to very high ISO values to compensate.
You can use auto-ISO to make sure you come home with images that show at least something, but be aware that grain and noise may be the price you pay for switching auto-ISO on. For starters, I would recommend that you have auto-ISO off, and keep an eye on the exposure indicator or the histogram to make sure the exposure is roughly right. Later, when you have some experience, auto-ISO can make you work faster.
Metering modes
The Nikon D4 has 3 metering modes. You can access these by pushing the metering mode button top left on the camera – the button the closest to the viewfinder – and at the same time turning the rear command dial.
The metering mode does NOT change the amount of available light, rather it changes how the camera meters the light that passes through the lens. I shoot almost entirely in the “matrix metering” mode as it is the most advanced one, that tries to take in the entire scene and find a good compromise.
Second option is centre weighted metering. This one is good if you shoot portraits where you don’t really care of the corners are exposed correct – the important is that the person in the frame is exposed correct. The manual also mentions this as a good mode if you shoot with filters.
The third option is spot metering (the logo is a small dot), where the focus point is where the metering is done entirely. This is a good option of you know that a particular point in the image needs to be correct exposed, but you do not care too much about the rest of the frame.
All of these modes may seem confusing, so my advice is to use matrix metering. If you shoot RAW, then there are plenty of options for adjusting the exposure in post and hence I find that these other options are more for backward compatibility with older DSLRs than anything else.
Your smartphone probably pushes software updates to you on a regular basis and prompts you to make sure you have the latest software installed. Your Nikon Z6ii is not that pushy, and you need to be more active to find out if a new version of the software for both your camera and lens is available. I recommend that you at all times have the latest software installed as it often involves improvements and bug fixes that are nice to have installed.
My approach to the upgrade is simply to install the new firmware version on the memory card and install the software from the memory card onto the camera and lens. I’ll show you the steps in the following.
Before you start
It is a good thing to make sure the battery is fully charged (or close to). Nikon will not accept to start the software installation with a half charged battery, not even if you have power supply via USB-C while running the upgrade. So before you do anything, make sure you have a fully charged battery.
Another thing to check is if you have the need for an upgrade – you may already be running on the latest version and then of course no action is needed.
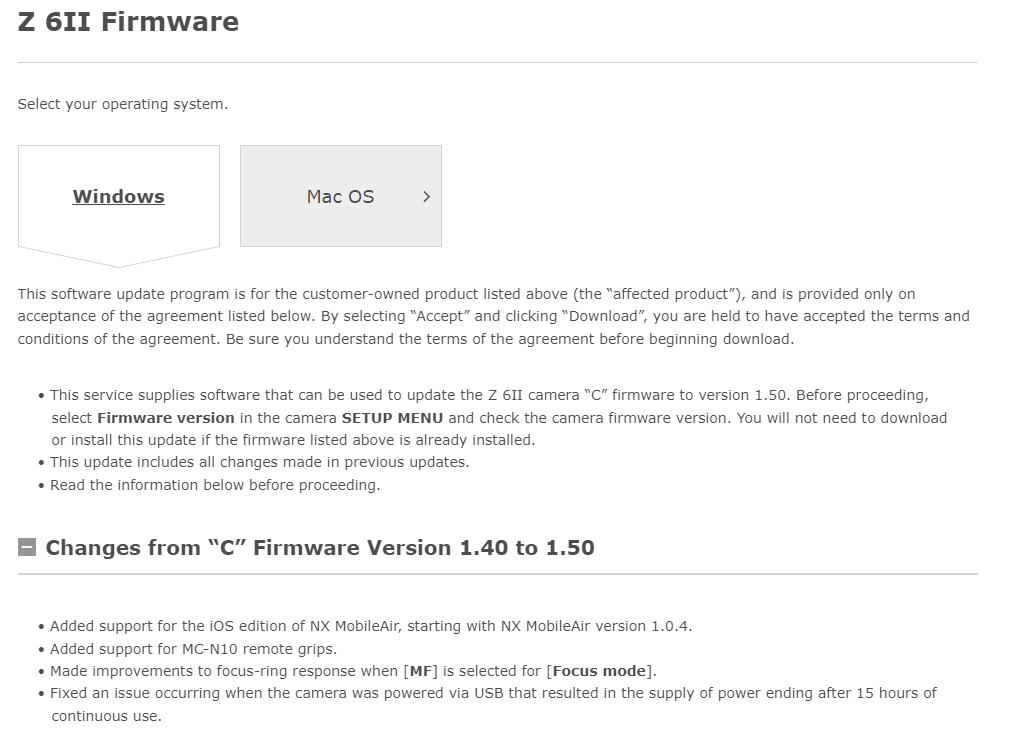
You can go into the setup menu (the wrench symbol) and scroll to the bottom and find the “Firmware version” menu item. In here the “C” gives the Firmware version of the camera and “LF” is the lens firmware. Make a note of the two and compare it to the latest version of the firmware on the Nikon homepage (see image above where version 1.50 is the latest version).
You can simply put “Nikon Z6ii firmware upgrade” as search text in google, and the first item that pops up is the link to the Nikon homepage. Or you can just press here to get to the same place. You can also here see what upgrades have been made from version to version. In my case I jumped from version 1.30 to 1.50 and hence skipped version 1.40. Notice that you need to select if your operating system is Mac or Windows before downloading.
Download
In order to download the file with the new firmware, simply scroll to the bottom of the page where you accept the terms and conditions, and hit the button to start the download. It is a relatively small file and in my case the download was quick and took less than 10 seconds. The file on my Windows based PC was put in the dedicated folder for downloads.
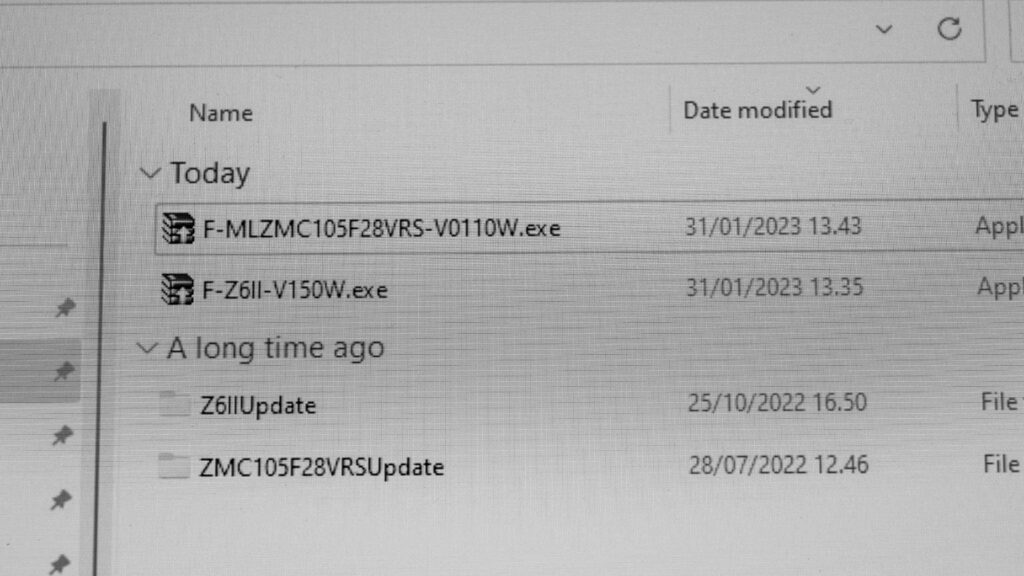
The file itself is an executable file that is packed. It is important that you run the unpack before you move on. In my case the file “F-Z6II-V150W.exe” is the executable packaged file with the version 1.50 firmware for the camera body. When you run the file, a folder named “Z6IIUpdate” is created in the same folder as the downloaded file. You need to double click on that folder to see the actual file with the firmware – it has the ending “.bin”. There is only one file in the folder, so you cannot miss it.
Installation – body
You then need to get the “.bin” file onto the memory card of the camera. I prefer to move the file by inserting the memory card in my PC and copy it here. You can do the file transfer in many ways (USB-C etc) but I prefer the low tech and safe way to simply copy it to the memory card on the PC.
There are 2 things now that are important: (1) You need to make sure the file is copied to the root drive of the memory card and (2) if you have 2 cards in the camera at the same time, take out the one without the firmware upgrade – that way you force the camera to read the memory card with the “.bin” file installed. The manual says the memory card has to be formatted, but in my experience this is not necessary, as long as the file is in the root of the memory card and there is only one card in the camera.
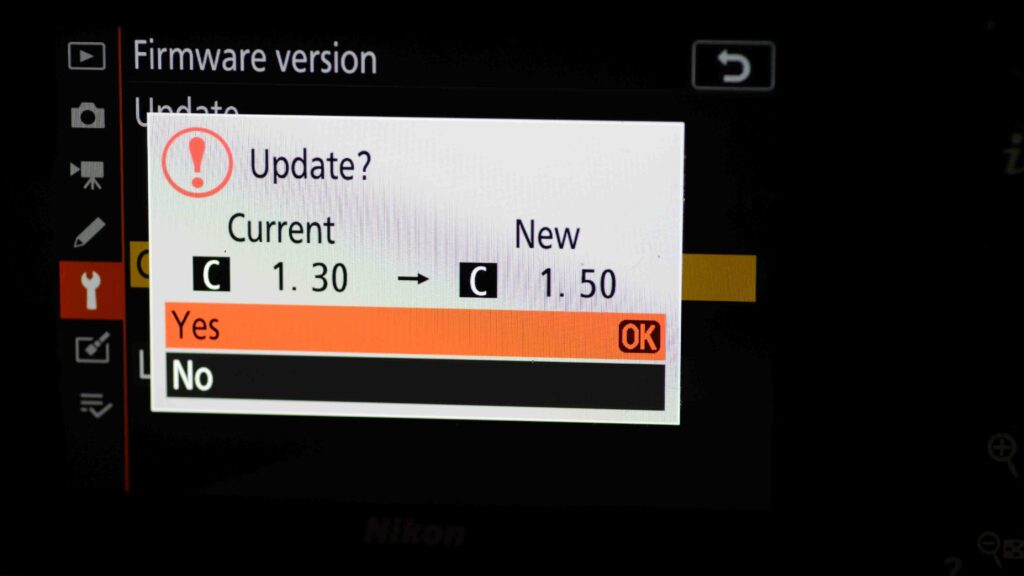
So after you have inserted the memory card in the camera, turn it off and on again, go to the same menu items as where you checked the firmware version (SETUP -> firmware version) and now you should be offered to upgrade.
The orange bar starts being positioned at “no” so you need to move this one up to highlight “yes” and the confirm with the centre of the command wheel (“ok”). After confirming the upgrade, a progress bar will be shown to far the upgrade has progressed. A camera upgrade can take several minutes, so be patient. A lens upgrade is typically much faster (the process is the same).
It is important that you do not disturb the camera while the upgrade is running. Do not turn it off. Do not touch any buttons. Leave it be. Let it do it’s work with no interruptions. This is important, as an interruption can leave the camera in an undefined state and then you may need a Nikon professional to unbrick your camera! So please take this point seriously!
After the upgrade is done, follow the instructions on screen and you are good to go with the new version of the firmware.
Installation – lens
The process of upgrading the lens is exactly the same as for the camera body. Find the appropriate file for your lens using google, check that you have a need for the upgrade, download the file, run the extract, get the “.bin” file onto the memory card, get the memory card in the camera and select SETUP -> firmware version and follow the instructions on screen.
I actually downloaded and installed both the lens and the camera firmware upgrade files in one go, and the camera then simply asked me which of the files I wanted to install.
Final thoughts
If reading the above does not make you feel comfortable with the process, then get a professional to do it. It is a relatively simple process, but better safe than sorry. Hope this guide has been to some help and all the best with your Nikon Z6ii camera.
So over at my YouTube channel I got the following question from Arpski 2K, and I want to add it to my list of blog posts, as I find that many ask – if not the same question – then questions that circle around the same subject:
“Right now I have a dilemma what to get after my D5600, but I am still not sure. I think that right now my DSLR is limiting me, I like to photograph landscapes and wildlife, mainly birds but for landscape looks like crop sensor is the limit like i can’t zoom out the scene how I would like to do. And the AF for fast birds is sometimes slow and wrong as it pick up often wrong thing to focus on, idk, my lens is stock 18-140mm, also I love to travel with my camera so weight is a factor too. Maybe 7500 would be better option?”
Arpski gives us a number of hints regarding what is important: the weight of the gear, the ability to go wide in landscape photography and the ability to track fast moving birds fast with autofocus that locks on. And he has an idea that the APS-C sensor in the D5600 is limiting him.
Ok, let’s look at the individual parts:
Weight: If weight is important to you, my advice is to stay with APS-C or cropped sensor. Full frame glass is much heavier and also more expensive, and the bonus of the FF in terms of bokeh and low low light capabilities does not seem to be important here. I have seen landscape photographers working with APS-C cameras and getting beautiful results, so no need to go full frame if you ask me.
BIF: Auto focus to track fast moving birds, i.e. birds in flight (BIF) is a challenge for many AF systems. Mind you that the AF speed is a cooperation between the lens and the camera, so it can sometime be a bit difficult to say of the camera is slow, or the lens is slow or the combo is slow. But before you go and invest in new gear, try this: Manual focus! Or rather, no focus at all. I do not know what distance you shoot birds at, but if they are say 100 meters away, focusing at 100m distance and leaving the lens in that position may just give you the results you are after! The depth of field here is 60 meters at f/4 on an APS-C camera when shooting at 140mm! So if you can figure out the distance to your subject, manual focus may be the answer to your problems. The depth of field – all things equal – grows to very forgiving sizes when the distance to your subject is large!
Shooting wide: In my book a 18mm lens is pretty wide. Yes, you can go wider! If you want to invest in a small prime that is wider than 18mm, then there are a number of options. But before you do that, you can try an alternative: shoot several overlapping images and stitch them together in post processing. That way you can go wider than the lens itself and as a bonus you will get an image with a lot more resolution. If you can stomach it, then try to shoot in manual exposure mode, as the exposure and depth of field needs to be constant across the images, otherwise merging them may give strange results.
Ok, so none of the issues reported cannot be addressed using the existing lens and the D5600. But then Arpski mentions that he feels the D5600 is a limitation to his photography. This is a feeling I think most photographers have tried: we constantly ping pong between upgrading our gear and upgrading our skills. And sometimes we just feel like our gear is the limiting factor and it is time to move on. That is as it should be.
The D7500 was a camera I unfortunately only enjoyed for a short while. I bought it after my D5600, but the D7500 was bricked in a salt water accident shortly after I got it and it could not be restored unfortunately. But I loved that camera: great ergonomics, fast FPS, excellent low light performance, etc. I had it with me on a trip to Dublin and I came home with a wonderful set of images.
Mind you that many photographers love to hate the D7500. The reason being that Nikon gave the D7500 a wrong name. The D7100 and D7200 are legends and loved by many Nikon enthusiasts, so when the D7500 came out, they thought the D7500 would be the successor to the D7200. But it was not, and the D7500 took a lot of beating from frustrated photographers. If Nikon had flipped to digits and called the D7500 for D5700, I think all would have been good and the camera would have been seen as what it is: a really good all round APS-C camera. So bear this in mind when you read blogs where people discuss the D7500 – people don’t like it, because the name stages the camera the wrong place.
So what to do? I have one principle that I pursue wholeheartedly, and that is ergonomics and weight. The best camera is the one that is with you, and if weight is important to you, choose a light camera. In other words, don’t go full frame – you will hate the weight penalty. And many APS-C cameras are absolutely wonderful cameras that often are at par with full frame if you do not have crazy demands in terms of shallow depth of field or low light capabilities.
The D7100 and D7200 may be what you should be looking at. They have legendary status and if you can find a good copy without too many clicks on the clock then I am sure that could be a good next step. I shop used over at mpb.com (no affiliate) and find that they give a fair trade in price for used gear and that what they sell is in the condition advertised.
The D7500 is also an option and I think it will be easier to find a good copy used as it is a younger camera. They even sell new copies (affiliate link). My only issue with the D7500 is that it had little “ears” to hold on to the camera strap and those ears were not good friends with my big hands. But that is the only negative that springs to my mind.
If you specifically try to choose between the D7500 and the D5600, my advice is to go with the D7500 if your budget allows. The D5600 is a good camera, but the D7500 is in many respects just better (FPS, dynamic range, etc). I shot with the D7500 in low light conditions and especially this image convinced me that the D7500 is a great camera.
Again, it is difficult to give a final and decisive advice, as you hold the list of personal preferences and what is important to you. And it is your money. And you have to live with the consequences of whatever you decide. My best advice is: consult many sources, read many reviews and don’t trust anyone fully, but make your own opinion based on many different sources. That way you can make an informed decision. I wish you the best of luck with your photography!
Many find manual exposure a bit intimidating and stay with the automated mode or one of the semi automated modes like aperture priority or shutter priority. Good news is that manual exposure is not complicated at all and that you have a lot of room for making exposure mistakes and still be able to fix it in post, provided you shoot RAW, which I highly recommend. And you will understand your camera a lot better when you know how to operate in manual exposure mode.
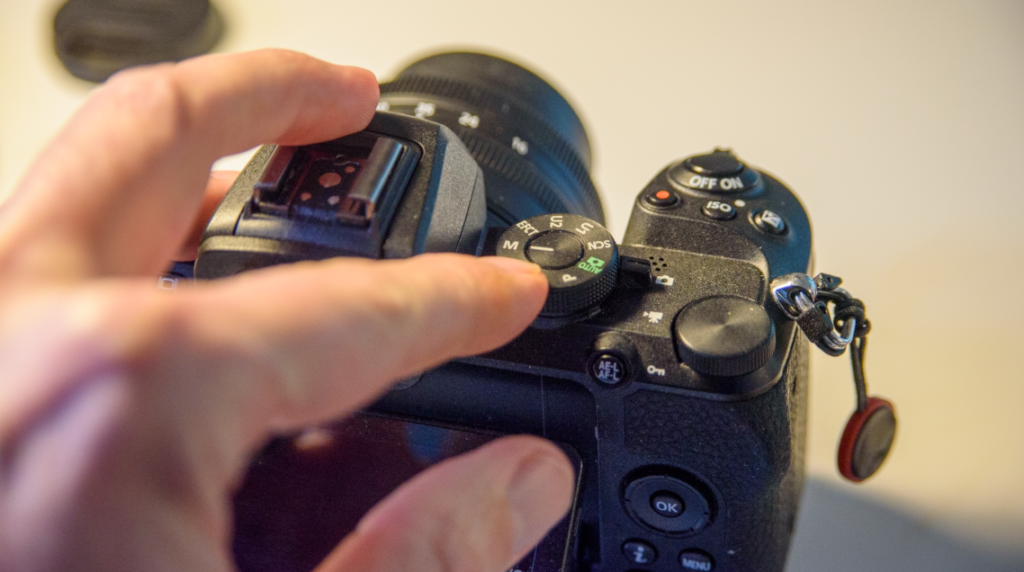
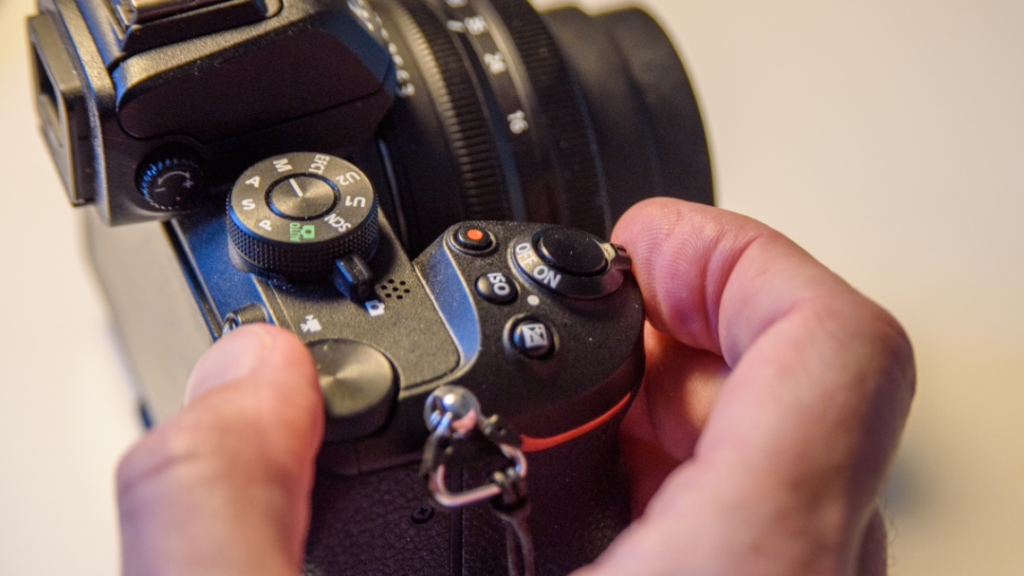
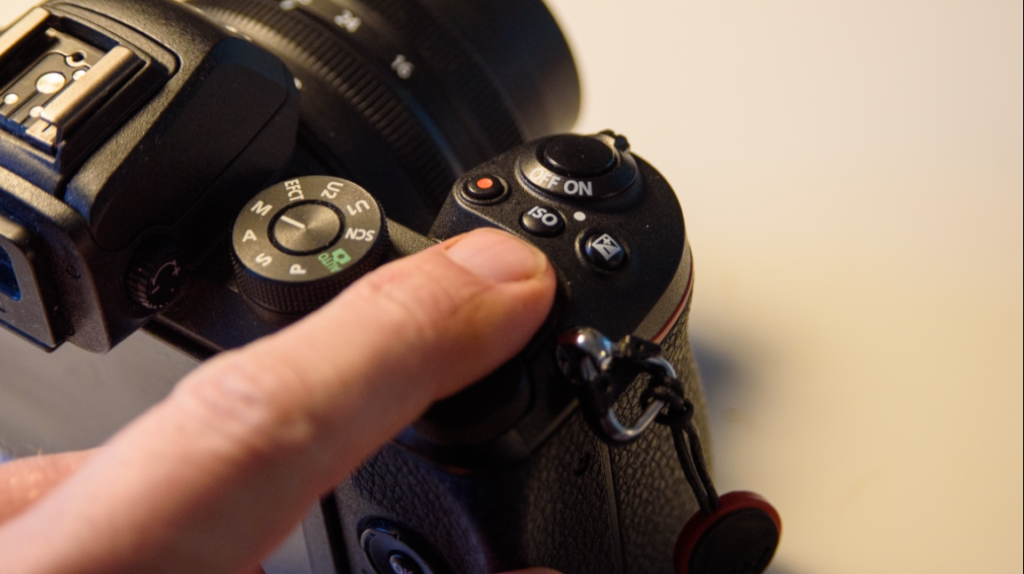
You camera has a built in metering system, that constantly measures the available light. This system continues to work also when you set the camera in manual mode. Select the manual mode on the PASM dial top right on the Nikon Z50.
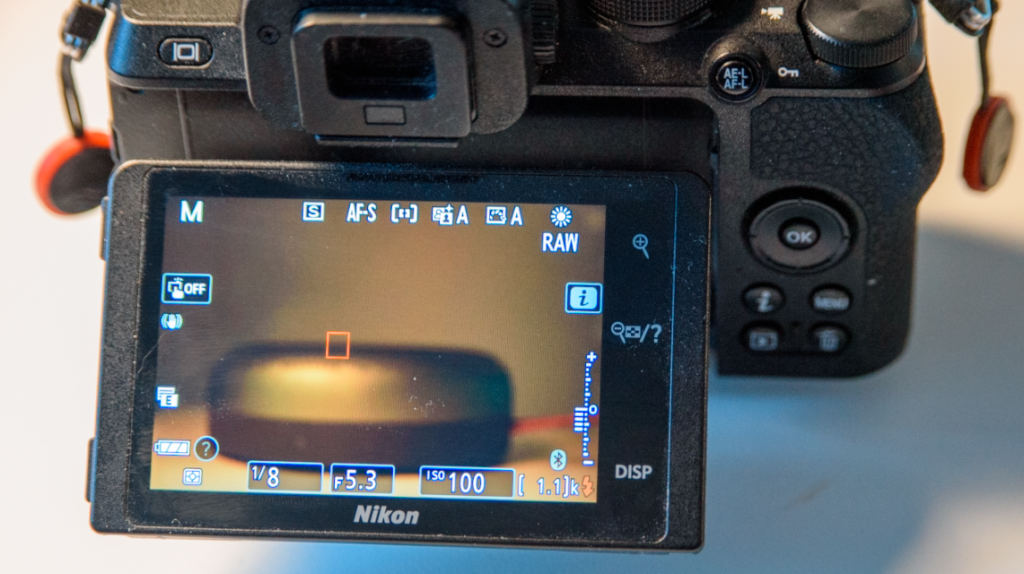
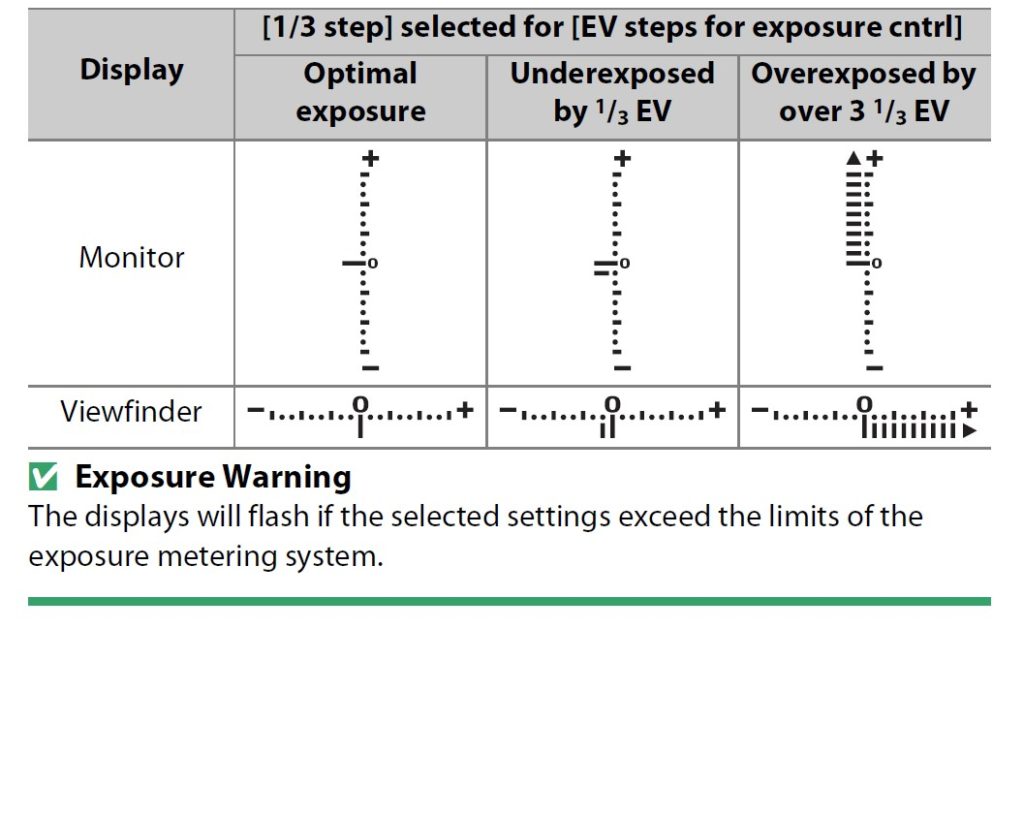
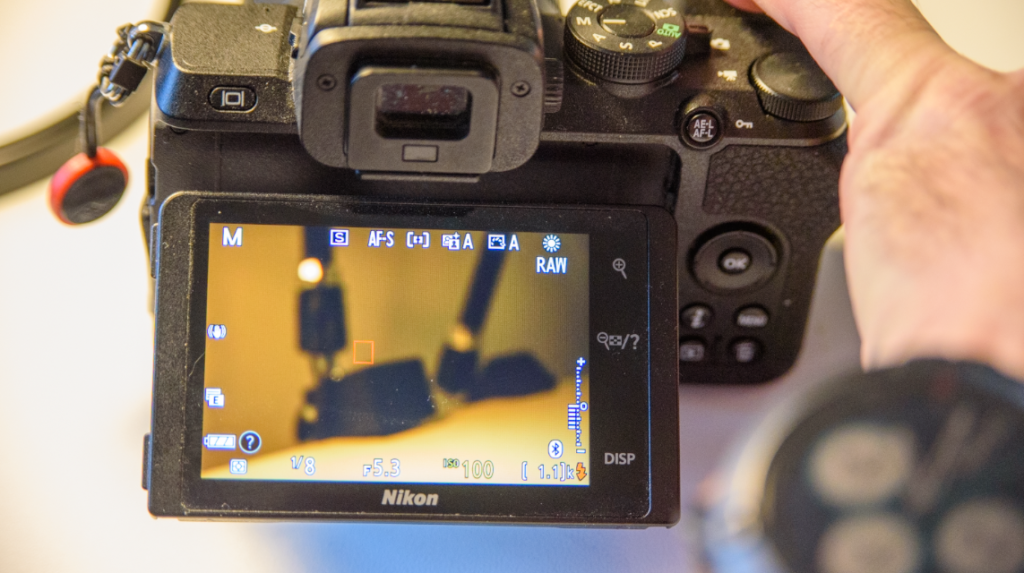
Once in manual mode, you will notice a little exposure indicator appearing, both in the viewfinder and in the rear LCD. This indicator will tell if the camera finds that the aperture, shutter speed and ISO settings will give a correctly exposed picture when you hit the shutter.
It is a good thing to keep an eye on the exposure indicator to make sure you get the exposure you are after. Sometimes you want deliberately to over- or underexpose your picture, and the exposure indicator is a good tool to make sure you get what you want.
Another way to see the same information as the exposure indicator is to use the histogram – you can make it appear by hitting the “disp” button on the center top rear on the camera. Finally, as you have WYSIWYG, you can simply notice if the LCD or electronic viewfinder turns very dark or very bright – a good indication something is off relative to a technically correct exposed picture.
Aperture and shutter speed
You control the aperture and the shutter speed by turning the front and rear command dials respectively.
If the camera flashes “FEE” in the top LCD when you mount the lens, it is probably because you have not locked the aperture on the lens to the highest f-stop number possible – the camera needs this setting to be so, in order for it to control the position of the aperture blades when shooting with AF or AF-D lenses.
If your lens is an older model (say AI or AIS) where you have an aperture ring on the lens, it is not always possible to change the aperture with the front command dial – instead you will have to set the aperture on the lens. The top LCD will not show the aperture but just a “F–” to indicate it cannot “see” the chosen aperture. The metering indicator works fine still though.
ISO
On a digital camera, ISO is actually not part of the exposure. The sensor has the sensitivity it had when it left the factory and it cannot be changed.
By setting the ISO to other values than the base ISO 100, you apply a gain to the values read by the sensor. It is camera internal post processing that happens from the sensor has read the light and until the image sits on the memory card. Just like in the old days when you turned up the radio, you both amplified the signal and the noise – the original signal remains the same. ISO works the same way, so the price for turning up the ISO is more noise and grain.
When you push the ISO button on top of the camera, you change the function of the front and rear command dial.
Pushing the ISO button and at the same time turning the front and rear command dial, changes the ISO values. The front command dial switches between ISO and auto-ISO and the rear command dial shifts between ISO values.
When you have auto-ISO switched on, the camera will be in a – if not semi automatic – then quarter automatic mode. In other words, the camera will try to make the picture correctly exposed ALONE changing the ISO. So if you have a dark scene where the aperture is closed down and the shutter speed is fast, the camera will have to go to very high ISO values to compensate.
You can use auto-ISO to make sure you come home with images that show at least something, but be aware that grain and noise may be the price you pay for switching auto-ISO on. For starters, I would recommend that you have auto-ISO off, and keep an eye on the exposure indicator or the histogram to make sure the exposure is roughly right. Later, when you have some experience, auto-ISO can make you work faster.
Metering modes
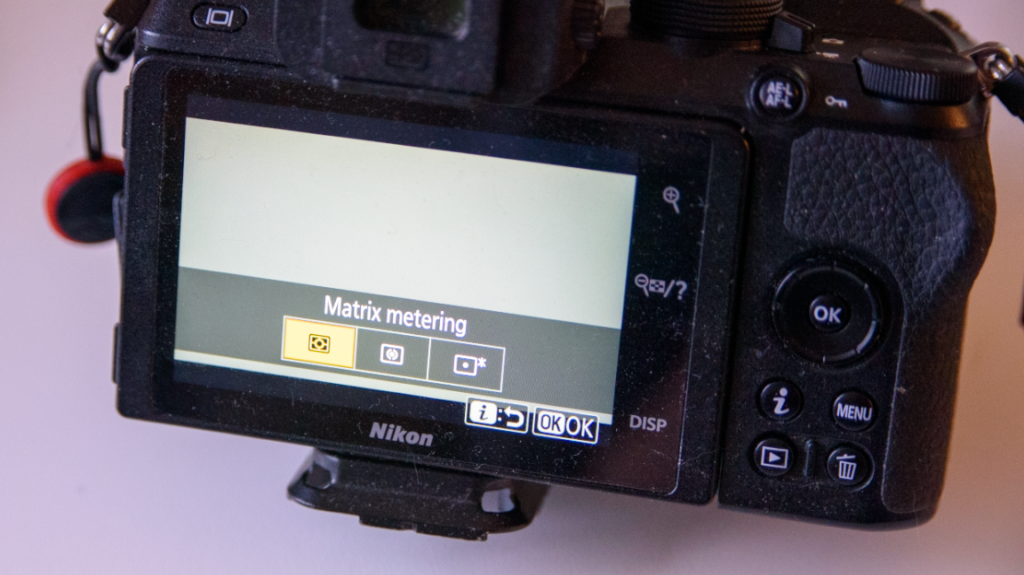
The Nikon Z50 has 3 metering modes. You can access these by pushing the little “i” in the rear of the camera (middle) and this shows a 6×2 menu where one option is “metering”. Selecting that one, brings a sub-menu with 3 options.
The metering mode does NOT change the amount of available light, rather it changes how the camera meters the light that passes through the lens. I shoot almost entirely in the “matrix metering” mode as it is the most advanced one, that tries to take in the entire scene and find a good compromise.
Second option is center weighted metering. This one is good if you shoot portraits where you don’t really care of the corners are exposed correct – the important is that the person in the frame is exposed correct. The manual also mentions this as a good mode if you shoot with filters.
The final option is highlight-weighted metering. This one many street photographers use as they are not afraid of losing details in the shadows. I use it for shooting silhouette photography, where the details in the shadows are also less important.
All of these modes may seem confusing, so my advice is to use matrix metering. If you shoot RAW, then there are plenty of options for adjusting the exposure in post and hence I find that these 3 options are maybe more for backward compatibility with older DSLRs.
Final thoughts
I hope the above has given you some inspiration for shooting in manual exposure mode. With a mirrorless camera like the Nikon Z50, it IMHO has become much easier to see if the exposure is right or not: both the EVF and the rear LCD will show you a too bright or a too dark image if you got it wrong, the histogram will be “lefty” or the opposite and the metering indicator will do the same. So there is plenty of help to get the exposure right if you ask me. And then, if you shoot RAW and didn’t nail the exposure just right, there is lots of headroom to tweak the image in post so the exposure is spot on. I hope you will practice your new set of skills! I think you will find it rewarding!
Some years back when I bought my copy of the Nikon D4, I did consider the Nikon D4s, but decided to go with the D4. I have since then made a few videos over at my channel about my experience with the D4 and over there I have several times got the question: Frederik, why did you go with the Nikon D4 and not the D4S? Clearly, the D4S is a better camera, seems to be the thinking behind the question.
Service
The D4S is a better camera than the Nikon D4, no doubt about it. It is also a younger camera, released in 2014 and produced all the way to 2016, when it was replaced by the D5. And this is probably one of the first differences between the cameras: because the D4S is younger, you can probably still get it serviced by Nikon. There is no official policy from Nikon on this matter, but word on the street is that Nikon will service and offer spare parts to cameras until they are 10 years old. And hence the D4S clearly has a better chance of being serviced today should something happen to it, rather than the D4.
The age is reflected in another difference: the price. At the introduction, the D4S was around 500 USD more expensive than the D4, but the relative difference now between the two is much bigger than that. The D4S price for a used copy is significantly more expensive, and I cannot imagine it is all related to the technical improvements. It has to be because photographers also factor in that if the camera breaks down or needs service, then the D4 is a dead end whereas the D4S still is “live”.
That said, with an expected shutter count around 400.000 and the knowledge that Nikon cameras often go way beyond the expected shutter count, I doubt that I will ever see the end of my D4. But it is of course a risk that I cannot get it serviced or repaired, if need be.
EXPEED
One of the major upgrades from the D4 to the D4S is the processor capacity, and the EXPEED 3 is replaced by the EXPEED 4 – about 1/3rd more computing capacity in the D4S.
I think this is one of the reasons why the D4S spec sheet wise is better when it comes to FPS and a more advanced auto focus system. The increased computing power simply gave the engineers at Nikon more headroom to develop the software in the AF system. And this could be important to you, but it is not important to me, as I am mainly an outdoor photographer. If portraiture or street photography is you line of business, then the improvements in the AF system could be vital for you.
There are other updates like a wider ISO range, a stronger battery and slightly redesigned joysticks for better comfort. But again, I think I’ll be fine without these improvements.
Conclusion
There are other differences between the D4 and the D4S and the intention was not to list them all. If you want to see a full spec compare, it is right here.
The D4 was one of the very best cameras the camera industry could offer approx. 10 years ago, and to me choosing between the D4 and the D4S is a bit like choosing between Bentley and Rolls Royce. Both are amazing!
The point is that the improvements made going from the D4 to the D4S simply was not important to me, and with the (in relative terms) significant price difference between the two cameras, my choice was easy.
But this shoe fits my foot. That does not mean it will fit yours. Your criteria are probably different and hence you will need to make your own assessment when choosing between the D4 and the D4S. But I hope my story here has helped you get a little closer to making the decision that is right for you.
The options available for storing files on the Nikon D700 can be a bit overwhelming, so I try here to give a short overview, so you quickly get a “drivers license” to the options available. It is not intended to be a full blown engineer explanation of all the ins and outs of file formats and compression, but a drivers license to help you make some clever decisions without getting too bugged down by technical details.
Resolution and compression
Your Nikon D700 has a 12MP sensor. No matter which format or compression you choose, the source of the data is still the same. And the resolution of the sensor remains the same. What your are changing is the format of the file, how much info is stored about each pixel and how the file is compressed. But not the number of pixels.
Note: You can change the cameras image area between FX and DX format, and within these choose between L, M and S. I will not cover this part here, but always recommend that you go for Large (L) FX format, to give you the most options in post processing. You can always crop the file, if that is to your liking.
RAW format
The D700 stores in RAW format named NEF – Nikon Electronic Format. It is just a format or a way to structure the file. Most software these days like Lightroom or Photoshop can read and work with these files. RAW is the “richest” format you can choose, i.e. all that is recorded by the sensor is also stored in the file. If you don’t like RAW format, then TIFF is an alternative, but if you don’t know what TIFF is or your printer doesn’t insist you send the files in TIFF format, then I would suggest you ignore this option.
You can compress the RAW file to varying degrees. The objective of compression is to save space. Lossless compression is the “lightest” way of compressing that enables your computer to “reverse engineer” the compression back to the amount of information available when the image was taken. In other words, despite the compression, no information is lost. Hence the name. My recommended setting. Uncompressed has the same advantage – no data is lost, but mind you that it takes up a bit more space and that processing time is a bit longer simply because the file is larger.
Compressed RAW saves you around 40-45% of disk space, and you loose very little data. However, you do loose some data, and the original file cannot be recreated. It is in other words a non-reversible algorithm that is applied when the compression is done. If you struggle with card and disk space, i.e. you have too little of it, then this could be a really good option to use for mitigating your space headache. But mind you that the price for memory and disk has only gone one way for many years – down.
Another dimension to the RAW format is the bit depth. Again, it is not related to resolution, but how much information is stored for each pixel. You can choose between 12-bit and 14-bit. It may sound like a small difference, but the number of options explodes exponentially as you add positions for storing information, and hence going from 12 tp 14 bit enables your camera to store MUCH more information. If you in any way shape or form can handle the bigger files that 14 bit generates, then the 14 bit is my recommendation.
JPEG format
JPEG is a very different format from RAW, and the objective is first and foremost to save space and make the file significantly smaller. Not in terms of resolution, but in terms of how much info is stored per pixel. JPEGS were designed to share images via low bandwidth channels and hence compression and small files is the main objective here.
The D700 gives you 3 JPEG options: Fine, Normal and Basic. Basic is where the compression is the biggest and the file is the smallest. Fine is where the compression is the least and the file is the biggest. Normal is the middle of the road alternative sitting somewhere between Fine and Basic. The compression takes data out of the equation. To illustrate: Where a RAW file may store say 100 shades of grey, a JPEG file reduces these to 30 shades of grey in Fine mode and only 10 shades of grey in Basic mode. So the granularity of the shades and the colors will be reduced due to the compression made. JPEG files are rather small also in Fine mode, so if you want to use the JPEG format, I always recommend that you use the format with the least compression: Fine.
Combined formats
You can choose to combine formats, so that the camera records both a RAW and a JPEG file at the same time. I have used this in my post processing so that I load the JPEGs and do a review of the images, mark the ones that I like and then afterwards only import the ones that I like as RAW files. As this is an additional step in the work, I have dropped this way of working and now only shoot and import RAW files. It takes more space both on my camera and my computer, but it saves me for a lot of time, and hence it is to my preference. As they say, time is money.