Lumix S5: Manual exposure guide

Manual exposure

I recommend that you try out manual exposure. You will learn a lot about exposure doing so, and you will be a better photographer when using some of the semi automatic modes like Aperture priority, because you will understand much better what the camera does and what you control.

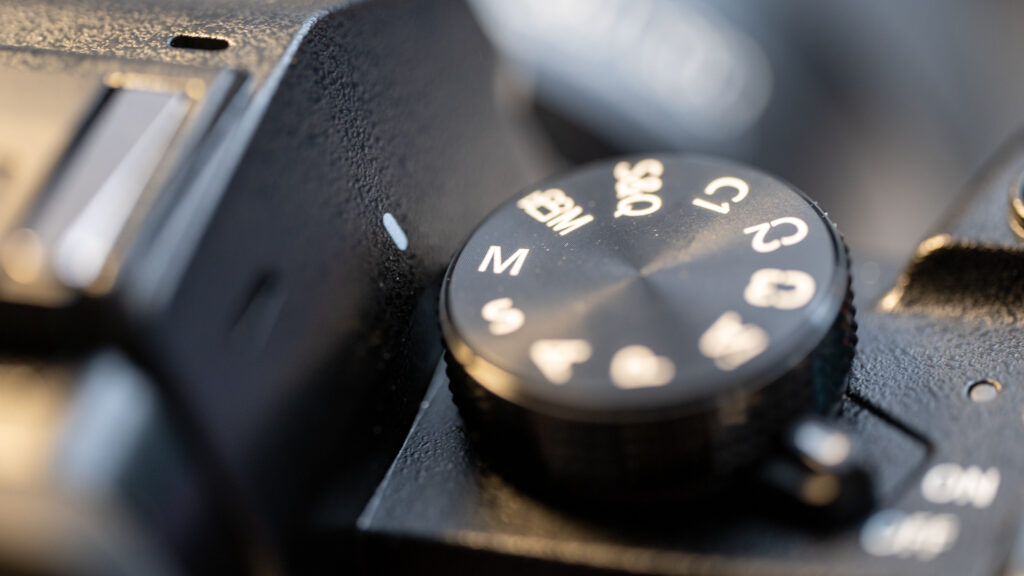
First things first: select manual mode using the mode dial on top of the camera. It sits to the right of the viewfinder. Manual mode disengages the automated metering, but the metering system is still at work, and the camera will tell you how you are doing in terms of exposing right, both via the preview in the viewfinder / rear LCD and via the exposure indicator. So you are not left entirely on your own, but you need to keep an eye out for the exposure when in manual mode. If you shoot RAW you can fix a lot of mis-exposure in post processing, but it is more fun and more rewarding to get it right in camera!

Lumix S5 exposure
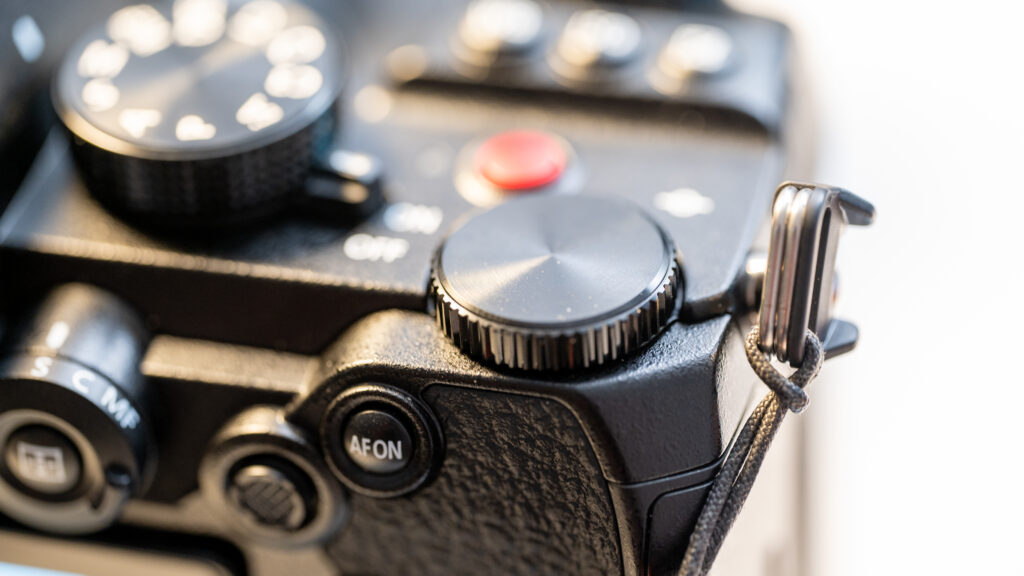
Choosing M for Manual on the mode selector top right on the camera.
Lumix S5 exposure
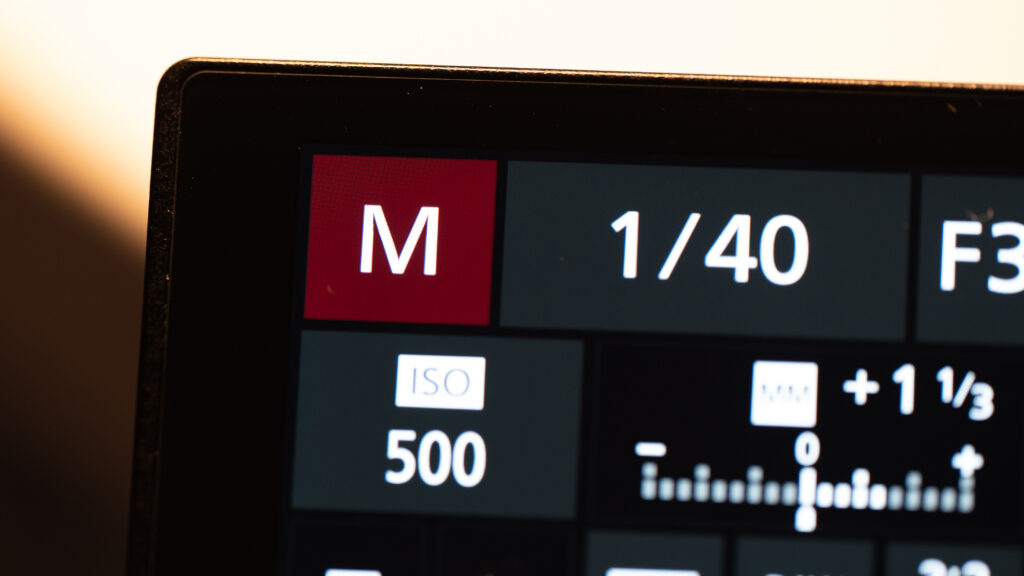
Look for the “M” top left in the viewfinder or the rear LCD to confirm that you have selected manual exposure mode.

Aperture

There are 3 values to work with when in manual mode: Aperture, shutter speed and ISO. You have probably heard of the exposure triangle, and it is exactly that triangle you need to be on top of.

Lumix S5 manual exposure
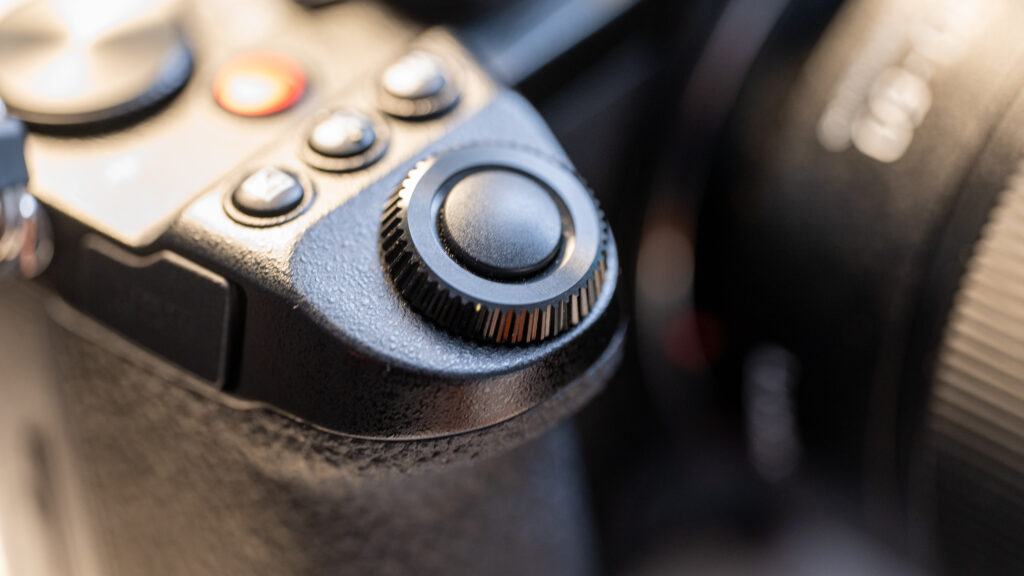
The front command dial controls the aperture.

The front command dial that sits under or around the shutter release controls the aperture. Turning the command dial updates the aperture setting. You can see the aperture value both in the electronic viewfinder and the rear LCD as you turn the dial. When you are changing the aperture value, the setting turns yellow to help you see what you are changing.

Shutter speed

The shutter speed is selected turning the rear command dial that sits top right on the camera, closest to you. You can read the value of the shutter speed both in the rear LCD and the bottom of the viewfinder.

Lumix S5 manual exposure
The rear command dial controls the shutter speed. The shutter speed is shown at the bottom of the LCD and at the bottom of the viewfinder.
Lumix S5 exposure
Here the value to the right of “M” for manual shows that the selected shutter speed is 1/40th of a second.

ISO

On a digital camera, ISO is actually not part of the exposure. The sensor has the sensitivity it had when it left the factory and it cannot be changed.

By setting the ISO to other values than the base ISO 100, you apply a gain to the values read by the sensor. It is camera internal post processing that happens from the sensor has read the light and until the image sits on the memory card. Just like in the old days when you turned up the radio, you both amplified the signal and the noise – the original signal remains the same. ISO works the same way, so the price for turning up the ISO is more noise and grain.

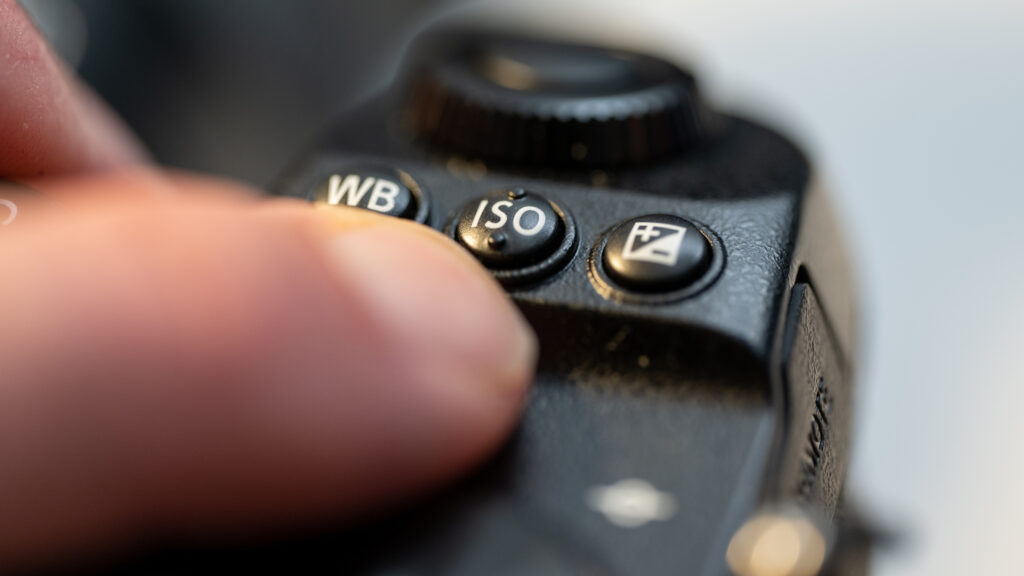
The S5 has an ISO button sitting right behind the shutter release. When pushed, you can change the ISO value turning either the front or the rear command dial.

Lumix S5 manual exposure
The ISO select button sits in the middle between the exposure compensation and the white balance.

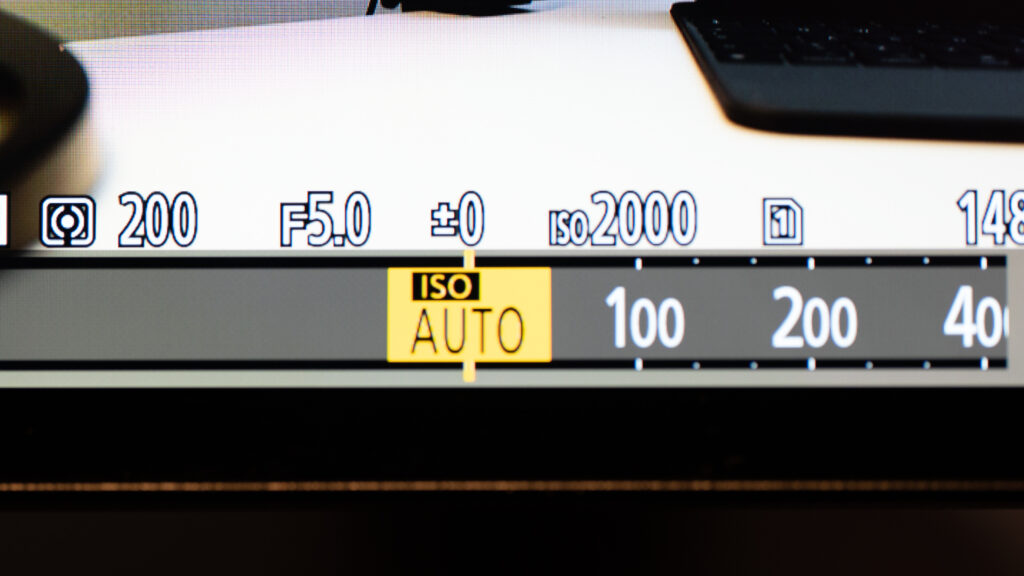
Contrary to what I am used to from my Nikon cameras, the selection between Auto ISO and manual ISO does not happen as a consequence of turning the front command dial, rather it is as the near end of the ISO scale, i.e. when you try to select a value smaller than ISO 100, then it selects auto ISO.

Lumix S5
The auto ISO option is at the beginning of the ISO scale, i.e. as if you were trying to select a value lower than 100.

When you have auto-ISO switched on, the camera will be in a – if not semi automatic – then quarter automatic mode. In other words, the camera will try to make the picture correctly exposed ALONE changing the ISO. So if you have a dark scene where the aperture is closed down and/or the shutter speed is fast, the camera will have to go to very high ISO values to compensate.

Exposure metering

When you switch to manual mode with manual ISO as well, then you disengage the metering system in the camera, i.e. you are in full control. However, the camera is looking over your shoulder and has an opinion about how you are doing. You can see this in the viewfinder and the rear LCD: if the image turns dark or very bright, it is a clear signal that your exposure is off to some degree.

Lumix S5 exposure
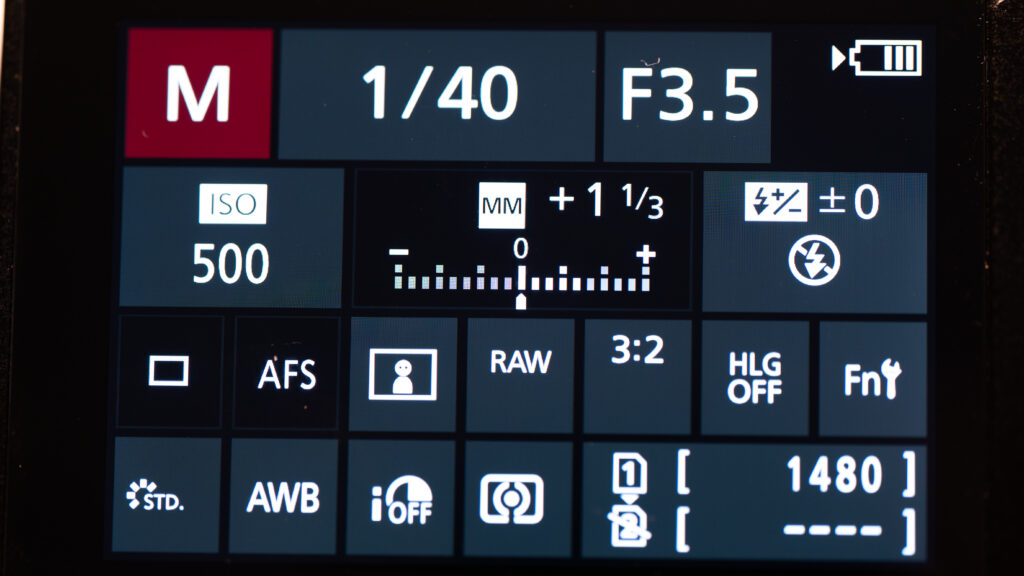
Just below the 1/40th value for the shutter speed you will find the metering scale. Here you can see I am over exposing the image with more than a stop.

You can keep an eye out for the metering scale both on the rear LCD and the viewfinder; this will give you an indication of how the camera thinks you are doing with regards to exposing (technically) correct. You can choose to ignore this of course – the artistic freedom – but in the beginning I would recommend that you see what the metering scale tells you.

Management information

The information that the Lumix S5 shows varies subject to the display settings.

Lumix S5
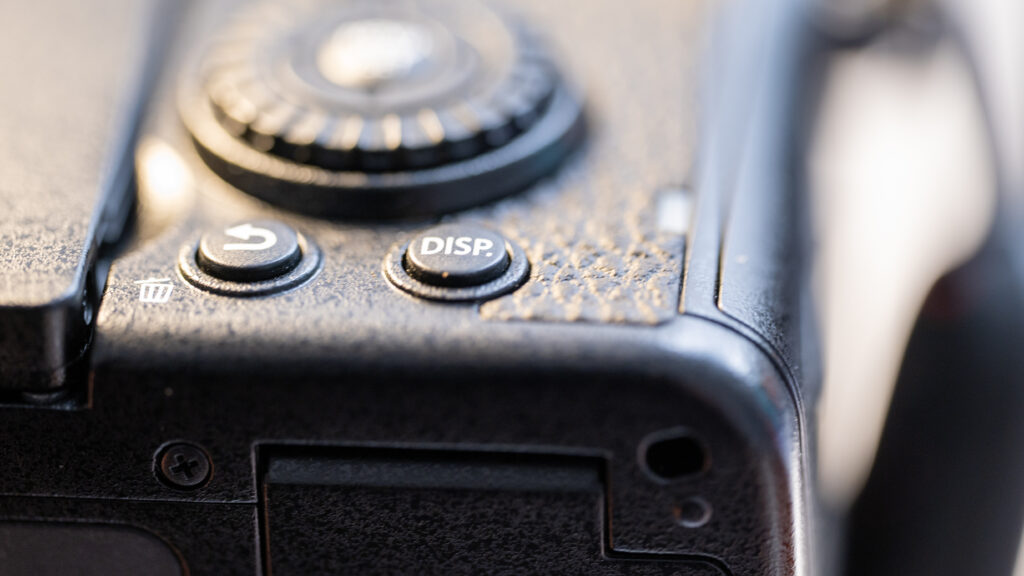
The display button is at the bottom right of the rear of the Lumix S5.

If you hit the “DISP” button shown above, you will toggle between different options for what is shown in the viewfinder and the rear LCD. You can make further and more detailed configuration of what is shown via the menu system, but for starters try the “DISP” button options and see which one you like.

Next step

I hope the above was useful and that you may start to feel a bit comfortable with shooting in manual mode. The worst thing that can happen is that you come home with some images that are exposed poorly. If you shoot RAW, chances are you can fix this in post if need be. So the worst case scenario is perhaps not so bad if you think about it. Best of luck with manual exposure!

Related reading

What is ISO?

What is aperture? And why important?


Review: The Unseen Saul Leiter by Margit Erb & Michael Parillo

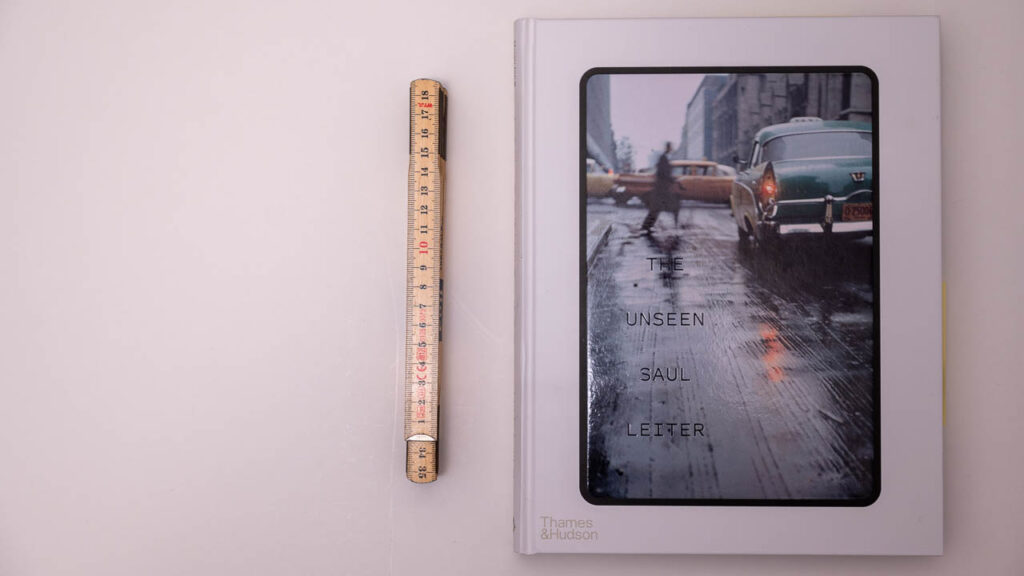
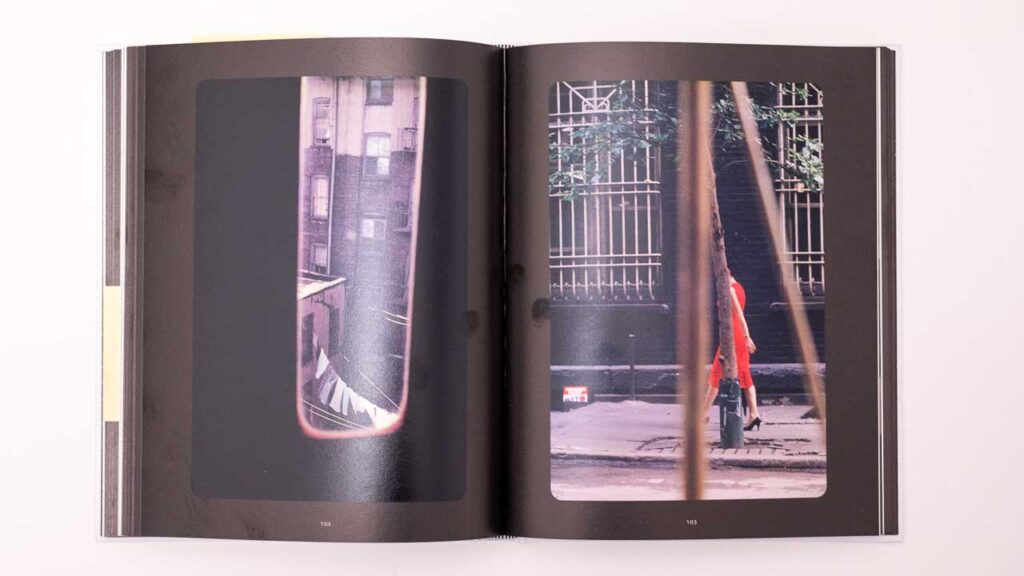
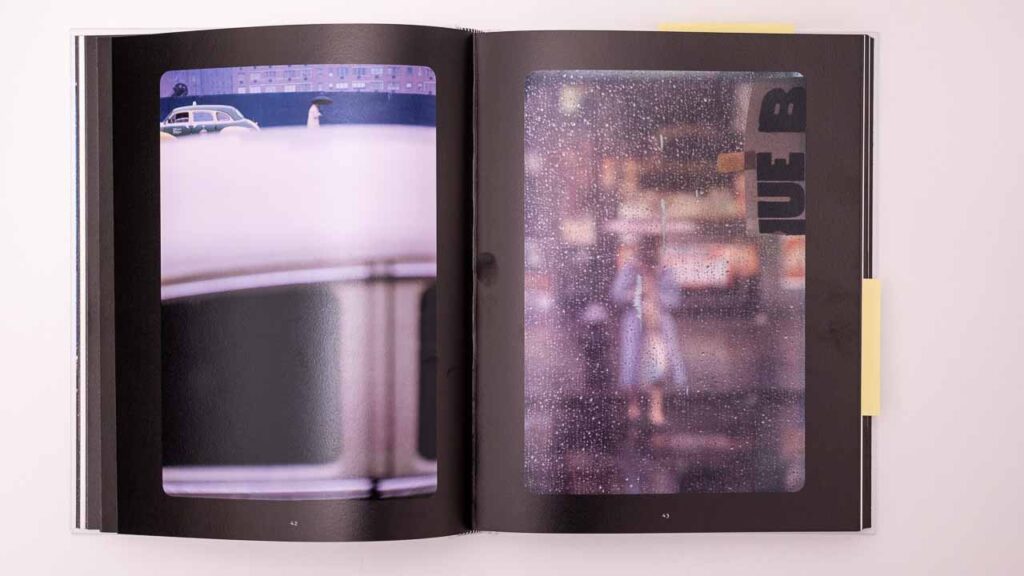
In this book the authors Margit Erb and Michael Parillo have hand picked 76 images from Saul Leiters earlier work where he used slide film as the medium. The book presents the images on completely black pages, simulating that you sit in front of the projector and see Leiters work being cast onto the wall. It works really well, and IMO they have managed to capture the “feel” of slide film being projected to large scale format really well. The 160 pages book is a hardback and measures 22 cm across and 28 cm down.

The Unseen Saul Letier
The Unseen Saul Letier. Hardback. 160 pages approx.

Extraordinary

When Michael Parello writes that “Leiter was a keen observer as life unfolded before him, somehow finding a way to reliably pluck a sublime split-second out of a mundane moment”, it really resonated with me and how I see Leiters images. Leiter was truly able to make something extraordinary out of the ordinary. A talent that many of us that dream of travelling to the other side of the globe to capture something extraordinary (like a mountain or an iceberg) could benefit from being reminded of on a regular basis.

Further into the book Michael quotes Robert Benton for describing Leiters images: “[They] were like paintings in which the subject matter did not dominate the photograph but was only one element among swaths of color, abstract shapes and daring composition”. Again, this very precisely pinpoints another dimension to Leiters images that makes them stand out: the subject is not dominating, but serves (almost) as a prop in a bigger composition as one of many elements.

The Unseen Saul Letier
Framing, framing and framing.

These quotes very well describe why I find Leiters work so extraordinary, and to this I will add that his use of out of focus elements sprinkles a bit of mystery to the scene. You may think that out of focus is harder than in focus, but actually getting the right amount of out of focus is the key here – so that the subject is still visible and recognisable, but hiding the finer details and only leave a shadow or an outline. His use of misted windows serves the same purpose.

The Unseen Saul Letier
To the right: Out of focus. But just the right amount of out of focus.

Finally, his use of framing is simply mind blowing. Especially if you have just read a book about composition and all the classic compositional rules. Leiter breaks them all, and did so long before the text books were written! In some images the subject is only revealed as a small beam of light between solid objects completely dominating the frame. Or he shows 6 people in a frame where the heads of 4 of them are hidden. It makes me want to study the images even more!

Conclusion

If you like the work of Saul Leiter, I think you will enjoy this book. The hard back is solid quality and the images present themselves really well on the black pages. And each image has got the space and room it needs to work the best.

The book gives a little text about how the images have been collected and indexed, but the main focus of the book is to present Saul Leiters work. If you are after getting to know Saul Leiter better, then this may not be the book for you, but if you enjoy his work and want to see it as first hand as a book can offer, then this book comes highly recommended. But be warned that I am a Saul Leiter fan and my objectivity relative to reviewing this book is highly questionable.

Further reading

Review: Saul Leiter In My Room, Edited by Margit Erb and Robert Benton

Review: All about Saul Leiter, collected by Margit Erb

Shopping link

Affiliate link to the book on Amazon.


Review: Vivian Maier by Christa Blümlinger, Ann Marks and Anne Morin

When photographer Vivian Maier passed away April 2009, she left behind more than 140.000 images, many of which had not been developed. As soon as Vivians work was shared on the internet, both her work and her story drew lots of attention.

Front page of the book Vivian Maier by Christa Blümlinger, Ann Marks and Anne Morin

This books gives both her story and presents a lot of her work. As interesting as her story is, I enjoy her work the most. For that reason I was happy to find that 200 of the 250 pages in this book is dedicated to presenting her work.

Vivian Maier
This images shows an example from the approx 30 pages in the beginning of the book – another section like this at the end of the book.

Of course I was aware that Vivians work would centre around street photography, but I has impressed with other sides of her work showing architecture, landscapes, self portraits, still life and even some surrealistic work reminding me of work done by Henrik Cartier-Bresson.

Vivian Maier
Two examples from the work of Vivian Maier.

I am not aware of how large a share of her total body of work has been developed and used for this book, but even so I find Vivian to be a very complete photographer that uses composition, reflections, framing, etc in an effortless way that you – if you are into photography – can only admire. And in addition the street images portrait people in a way where the portraits are almost loving in the tender way they capture people sleeping, reading newspapers or just passing by.
So as you can probably guess, I can wholeheartedly recommend this book if you are into photography and want to study and seek inspiration from the work of one of the best photographers of all time. It really is a pleasure to study Vivians work.
Related reading

Review: Henri Cartier-Bresson Here and Now, by Clément Chéroux

Shopping link

Affiliate link to the book on Amazon.

What is exposure delay mode? (using Nikon as an example)

Camera shake is typically something you want to avoid if you want sharp images, and many landscape photographers use different techniques to avoid camera shake.

One classic tool is to put the camera on a tripod to secure the camera is held absolutely still during the exposure, but even when using a tripod, there are a few more factors that can contribute to camera shake, such as

  • the photographer pushing the shutter and hence moving the camera slightly
  • the mirror flicking (in a DSLR)

These small movements may – if you are striving for minimum camera shake – yield ever so slightly movements to the camera body. Here  exposure delay comes to the rescue.

Exposure delay is pretty much what the name says: after you hit the shutter, there is a delay before the picture being taken. It is worth noticing however, that on a DSLR, the mirror is lifted as you hit the shutter, so the mirror movement does not yield any camera shake.

You can set up the duration of the exposure delay in the shooting/display menu that you find in the custom settings menu (also know as the pencil menu).

Exposure delay mode
You find the exposure delay mode setup under the shooting/display menu item in the Custom Settings Menu.

In the menu “d” for shooting/display, you will find the Exposure delay mode option.

What is exposure delay mode? (Nikon)
You find the exposure delay mode menu item in the shooting/display menu. Notice that the specific menu item ID may vary from camera to camera, so this is just an example.

Typically you can set the shooting delay mode from 0.2 seconds up until 3 seconds. I always use the longest option available.

What is exposure delay mode? (Nikon)
The options available for how long you want the exposure delay to be.

Alternatives

The big advantage of using exposure delay is that it is a solution that is available, provided you have brought your Nikon along. You can also use a remote trigger (wired, radio controlled) to make sure you pushing the shutter does not give any camera shake, but of course the pre-condition is that (1) you have a remote trigger and (2) that you remembered to bring it along!

Also, there is an option to set the release mode to self-timer, in which you can shoot one or more images with an interval you select. But again, on a DSLR, the mirror flicks for each image and hence the exposure delay is a better option.

Related reading

Nikon Z6ii: Firmware upgrade, how-to

Nikon D4: Manual exposure, how to

Nikon D4: Manual exposure, how to

Manual exposure

Many find manual exposure a bit intimidating and stay with the automated mode or one of the semi automated modes like aperture priority or shutter priority. Good news is that manual exposure is not complicated at all and that you have a lot of room for making exposure mistakes and still be able to fix it in post, provided you shoot RAW, which I highly recommend. And you will understand your camera a lot better when you know how to operate in manual exposure mode.

You camera has a built in metering system, that constantly measures the available light. This system continues to work also when you set the camera in manual mode. Select the manual mode on by pushing the “mode” button top right on the Nikon D4 while turning the rear command dial to scroll through the PASM options.

Nikon D4
The mode dial on the Nikon D4 sits right in front of the top LCD. Notice the “M” top left indicating manual mode and the bar below the “10” indicating that the image will be somewhat overexposed.

Once in manual mode, you will notice a little exposure indicator appearing, both in the viewfinder and in the top/rear LCD. This indicator will tell if the camera finds that the aperture, shutter speed and ISO settings will give a correctly exposed picture when you hit the shutter.

It is a good thing to keep an eye on the exposure indicator to make sure you get the exposure you are after. Sometimes you want deliberately to over- or underexpose your picture, and the exposure indicator is a good tool to make sure you get what you want.

exposure indicator guide
The exposure indicator shows if the picture will be over- or underexposed or correct exposed. Notice the difference between the viewfinder orientation and the rear LCD ditto. Credit: Nikon Z6ii manual.

Aperture and shutter speed

You control the aperture and the shutter speed by turning the front and rear command dials respectively.

Nikon D4
Index finger on the front command dial, thumb on the rear command dial. Aperture and shutter speed respectively.

As you do so, you will notice that the exposure indicator changes in accordance with the selected settings for the two.

If the camera flashes “FEE” in the top LCD when you mount the lens, it is probably because you have not locked the aperture on the lens to the highest f-stop number possible – the camera needs this setting to be so, in order for it to control the position of the aperture blades when shooting with AF, AF-D or AF-S lenses.

Nikon D4
When mounting a AF, AF-D or AF-S lens, make sure to lock it in the position of the smallest aperture the lens has to offer.

If your lens is an older model (say AI or AIS) where you have an aperture ring on the lens, it is not always possible to change the aperture with the front command dial – instead you will have to set the aperture on the lens. The top LCD will not show the aperture but just a “F–” to indicate it cannot “see” the chosen aperture. The metering indicator works fine still though.

ISO

On a digital camera, ISO is actually not part of the exposure. The sensor has the sensitivity it had when it left the factory and it cannot be changed.

By setting the ISO to other values than the base ISO 100, you apply a gain to the values read by the sensor. It is camera internal post processing that happens from the sensor has read the light and until the image sits on the memory card. Just like in the old days when you turned up the radio, you both amplified the signal and the noise – the original signal remains the same. ISO works the same way, so the price for turning up the ISO is more noise and grain.

The NikonD4 has a dedicated ISO button at the bottom left on the camera body. Press this one to change the ISO value selected.

Nikon D4
My thumb is here pushing the dedicated ISO button sitting right next to the image quality button.

Pushing the ISO button and at the same time turning the front and rear command dial, changes the ISO values. The front command dial switches between ISO and auto-ISO and the rear command dial shifts between ISO values, say from 200 to 400, and from 400 to 800, and so on.

When you have auto-ISO switched on, the camera will be in a – if not semi automatic – then quarter automatic mode. In other words, the camera will try to make the picture correctly exposed ALONE changing the ISO. So if you have a dark scene where the aperture is closed down and the shutter speed is fast, the camera will have to go to very high ISO values to compensate.

Nikon D4
The Nikon D4 has 2 backlit rear LCD screens – the top one here shows the camera is in manual model (“M” top left) and that the shutter speed is 1/10th and the aperture at f/13. The bottom LCD show the ISO is set manually to 2000.

You can use auto-ISO to make sure you come home with images that show at least something, but be aware that grain and noise may be the price you pay for switching auto-ISO on. For starters, I would recommend that you have auto-ISO off, and keep an eye on the exposure indicator or the histogram to make sure the exposure is roughly right. Later, when you have some experience, auto-ISO can make you work faster.

Metering modes

The Nikon D4 has 3 metering modes. You can access these by pushing the metering mode button top left on the camera – the button the closest to the viewfinder – and at the same time turning the rear command dial.

Nikon D4
The button for selecting the metering modes on the Nikon D4 sits top left on the camera. To me it looks like a roundabout with 4 roads joining!

The metering mode does NOT change the amount of available light, rather it changes how the camera meters the light that passes through the lens. I shoot almost entirely in the “matrix metering” mode as it is the most advanced one, that tries to take in the entire scene and find a good compromise.

Second option is centre weighted metering. This one is good if you shoot portraits where you don’t really care of the corners are exposed correct – the important is that the person in the frame is exposed correct. The manual also mentions this as a good mode if you shoot with filters.

The third option is spot metering (the logo is a small dot), where the focus point is where the metering is done entirely. This is a good option of you know that a particular point in the image needs to be correct exposed, but you do not care too much about the rest of the frame.

All of these modes may seem confusing, so my advice is to use matrix metering. If you shoot RAW, then there are plenty of options for adjusting the exposure in post and hence I find that these other options are more for backward compatibility with older DSLRs than anything else.

Related reading

Why the Nikon D4 and not the D4S?

Nikon D700 vs Nikon D4


Nikon Z6ii: Firmware upgrade, how-to

Your smartphone probably pushes software updates to you on a regular basis and prompts you to make sure you have the latest software installed. Your Nikon Z6ii is not that pushy, and you need to be more active to find out if a new version of the software for both your camera and lens is available. I recommend that you at all times have the latest software installed as it often involves improvements and bug fixes that are nice to have installed.

My approach to the upgrade is simply to install the new firmware version on the memory card and install the software from the memory card onto the camera and lens. I’ll show you the steps in the following.

Before you start

It is a good thing to make sure the battery is fully charged (or close to). Nikon will not accept to start the software installation with a half charged battery, not even if you have power supply via USB-C while running the upgrade. So before you do anything, make sure you have a fully charged battery.

Nikons homepage with the firmware update.
Nikons description of the upgrade to version 1.5 of the Firmware for the Nikon Z6ii.

Another thing to check is if you have the need for an upgrade – you may already be running on the latest version and then of course no action is needed.

You can go into the setup menu (the wrench symbol) and scroll to the bottom and find the “Firmware version” menu item. In here the “C” gives the Firmware version of the camera and “LF” is the lens firmware. Make a note of the two and compare it to the latest version of the firmware on the Nikon homepage (see image above where version 1.50 is the latest version).

You can simply put “Nikon Z6ii firmware upgrade” as search text in google, and the first item that pops up is the link to the Nikon homepage. Or you can just press here to get to the same place. You can also here see what upgrades have been made from version to version. In my case I jumped from version 1.30 to 1.50 and hence skipped version 1.40. Notice that you need to select if your operating system is Mac or Windows before downloading.

Download

In order to download the file with the new firmware, simply scroll to the bottom of the page where you accept the terms and conditions, and hit the button to start the download. It is a relatively small file and in my case the download was quick and took less than 10 seconds. The file on my Windows based PC was put in the dedicated folder for downloads.

The downloaded file is an executable zip file.
The downloaded file is an executable zip file. Here I have downloaded both the camera upgrade file and the lens upgrade (for my 105mm macro lens).

The file itself is an executable file that is packed. It is important that you run the unpack before you move on. In my case the file “F-Z6II-V150W.exe” is the executable packaged file with the version 1.50 firmware for the camera body. When you run the file, a folder named “Z6IIUpdate” is created in the same folder as the downloaded file. You need to double click on that folder to see the actual file with the firmware – it has the ending “.bin”. There is only one file in the folder, so you cannot miss it.

Installation – body

You then need to get the “.bin” file onto the memory card of the camera. I prefer to move the file by inserting the memory card in my PC and copy it here. You can do the file transfer in many ways (USB-C etc) but I prefer the low tech and safe way to simply copy it to the memory card on the PC.

There are 2 things now that are important: (1) You need to make sure the file is copied to the root drive of the memory card and (2) if you have 2 cards in the camera at the same time, take out the one without the firmware upgrade – that way you force the camera to read the memory card with the “.bin” file installed. The manual says the memory card has to be formatted, but in my experience this is not necessary, as long as the file is in the root of the memory card and there is only one card in the camera.

So after you have inserted the memory card in the camera, turn it off and on again, go to the same menu items as where you checked the firmware version (SETUP -> firmware version) and now you should be offered to upgrade.

Nikon Firmware upgrade.
Nikon Firmware upgrade: In this example I’m going from version 1.30 to version 1.50. Notice that the orange bar is showing the selection so make sure to move the orange bar to “yes” and confirm with hitting the “ok” button (centre of the command wheel).

The orange bar starts being positioned at “no” so you need to move this one up to highlight “yes” and the confirm with the centre of the command wheel (“ok”). After confirming the upgrade, a progress bar will be shown to far the upgrade has progressed. A camera upgrade can take several minutes, so be patient. A lens upgrade is typically much faster (the process is the same).

It is important that you do not disturb the camera while the upgrade is running. Do not turn it off. Do not touch any buttons. Leave it be. Let it do it’s work with no interruptions. This is important, as an interruption can leave the camera in an undefined state and then you may need a Nikon professional to unbrick your camera! So please take this point seriously!

After the upgrade is done, follow the instructions on screen and you are good to go with the new version of the firmware.

Installation – lens

The process of upgrading the lens is exactly the same as for the camera body. Find the appropriate file for your lens using google, check that you have a need for the upgrade, download the file, run the extract, get the “.bin” file onto the memory card, get the memory card in the camera and select SETUP -> firmware version and follow the instructions on screen.

I actually downloaded and installed both the lens and the camera firmware upgrade files in one go, and the camera then simply asked me which of the files I wanted to install.

Final thoughts

If reading the above does not make you feel comfortable with the process, then get a professional to do it. It is a relatively simple process, but better safe than sorry. Hope this guide has been to some help and all the best with your Nikon Z6ii camera.

Related reading

Nikon Z6ii: Focus shift shooting for landscapes

Nikon Z6ii: How to work with manual exposure

Review: Ansel Adams: 400 Photographs

When looking at the long list of hits that Beatles or Rolling Stones have produced and comparing that to what other successful bands have made, it dawns on you just how talented these bands were. It’s a different league, simply. This is exactly the feeling I get when browsing the 400 images of Ansel Adams – there are so many great images presented in one book. He was and is in a league of his own.

Ansel Adams - 400 photographs
The book is 25cm by 20cm. Maybe not as big as the images deserve, but on the other hand the book is easier to handle than some of the massive coffee table sized books.

Another thing that strikes me is the consistency of the work. Of course the images have been carefully selected amongst many more, but the sheer consistency and super high quality of each and every image is truly impressive. Adams is known for his motto that “nothing is worse than a sharp image of a fuzzy concept”, and he lived his own motto: every concept in the 400 images presented is razor sharp.

Ansel Adams - 400 photographs
The table of contents. Ansel Adams – 400 photographs.

The book gives a short introduction by Andrea G. Stillman, but other than that the book is simply presentation of 400 images, organised into different phases of Adam’s life. The book is relatively small (25cm by 20cm) and paperback quality, but the black and white images present themselves really well despite the format not being the largest.

Ansel Adams - 400 photographs
An example image from the book.

And as an outdoor photographer, I especially enjoy the section from the national park and monuments, probably the images that Adams is the most famous for. And of course you will find the moonrise image from New Mexico and the golden gate before the bridge. But there are many, many more great images.

Ansel Adams - 400 photographs
An example image from the book.

Can I recommend the book? Yes, if you are interested in landscape photography and want to study one of the greatest of all time, then this is a good place to start. When evaluating my own work, I often ask myself if I would hang my own work in my living room, and only a few images pass that test. But when it comes to Ansel Adams, I’d gladly put any of the images in this book on my wall.

Related reading

Review: Photo Icons, 50 landmark photographs and their stories, by Hans-Michael Koetzle

Review: Outdoor Photography monthly magazine

Review: Apple iPod Pro (1. generation)

Design darling

Well designed products is how we know Apple, and the Apple iPod Pro 1. generation is no exception. It is a beautifully made product – even the packaging is well designed and leaves you with a feeling that everything is designed and carefully considered down to the slightest detail.

I have the version 1 of the iPods and one of the big things I miss is the ability to regulate the sound level on the iPods themselves. That has been fixed in version 2 and is probably confirms that Apple themselves knew that this was one of the design flaws of the 1st generation. So you need to find your iPhone to turn the sound up and down.

As a former audiophile, I can say that the sound is far from perfect. Apple has clearly put emphasis on a pleasant and “round” sound rather than a precise and “dry” sound with high fidelity. So if the fidelity of sound is on top of your list, this product may not pass the first item on your list! No matter what, I recommend that you try the sound of the iPods before buying – it is very much up to personal preference and taste, so give them a try before buying if you want to be sure the sound it spot on relative to your taste. I think however that most will agree that relative to the standard iPods the sound and fit here is levels above!

Apple iPod Pro (1. generation)
The cradle that doubles as a battery pack works really well. And wireless charging is a plus.

Another detail that bugs me senseless is the lack of USB-C connectors. As a photographer with tons of gear (camera, flashes, etc) that needs a charger, I have come to appreciate the industry standard USB-C and the dramatic reduction in number of chargers I need to have on stock. I look forward to Apple moving to USB-C also on the iPhone and the iPods (my iPad has USB-C, so it is coming ever so slowly).

A mitigating factor however is the support for wireless charging of the battery in the cradle (aka the wireless charging case). And then I think the cradle that doubles as a battery pack is a little strike of genius – it was probably not Apple that got the idea, but their implementation works really well. The combined battery power with the combined battery in the iPods themselves and the cradle is really good and for my daily commute I have never run out of battery power.

Apple iPod Pro (1. generation)
The Pods in the cradle. Expect a less delicious view after actual use – they do actually sit in your ear!

I have had many in-ear earphones, and the iPods are the only ones that fit my ear right out of the box. This may be a coincidence that is specific to me and the way my ears are, but I can assure you that if you do not feel comfortable with the in-ear “hook”, then you will never be good friends with your earphones. Fit and comfort are number one. I do not run and cycle with my iPods, but I walk a lot and often take the train wearing the iPods, and I enjoy every minute. I think one of the reasons is that they are much lighter than my previous in-ear earphones.

The noise reduction is super effective and if you are not comfortable with closing out the world that way then the transparency mode that lets in ambient sound is for you. Especially at work where some noisy colleagues can be a pain, the noise reduction feature is a life saver!

Apple iPod Pro (1. generation)
There are buttons on the both the left and the right pod, although they are actually not buttons but just give you feedback so it feels that way.

In daily life the iPods just works. They connect to the iPhone via Bluetooth and it works really well. You can move to the next and the former song by pressing the iPods 2 or 3 times respectively, and if you take the iPods out temporarily and insert them again, the music picks up from where you left.

When you insert the iPods in the cradle and close it, the iPhone tells you the battery status for both the left iPod, the right iPod and the cradle. It is little details like that which makes the iPods such a pleasure to use. And then of course that it is wireless, probably needless to say.

Apple iPod Pro (1. generation)
The controls via the iPhone just works as it should.

The iPods are in many dimensions delicious to use, but expect the pods themselves to be less delicious after some time of usage. They do go into your ear after all! This is where the distance between what you see in the ads and what you experience in real life starts to kick in!

Conclusion

So as you have probably guessed I am really happy with this product. The sound is decent although not the best in the market, they fit my ears really well, the design and user interface is well made and works, etc. So my overall assessment is a very positive bias. They are really easy to use.

Other than being expensive as we know Apple products, my biggest reservation is the lack of volume control on the pods themselves. And for this reason I suggest you go for 2. generation, as it really is THE annoying thing about generation 1.

Related reading

Review: Apple AirTag

Review: RAVPower PD Pioneer Power Bank

Use a grid to shape the flash light

Forward

A grid is a pattern of black fabric that you mount typically on the front of the softbox instead of the usual white fabric. The grid will effectively stop or dampen all light that tries to travel sideways relative to the direction the flash is pointing, and hence make most of the light travel in the same direction.

Grid in flash photography.
The grid seen from the side when the flash fires. Most light that tries to “travel” sideways will be stopped or dampened.

Although the softbox itself is coated with a reflective fabric on the inside and and hence designed to send all the light forward, the forward direction is still much wider than the front of the softbox itself. The grid helps limit the sideways travel by only allowing the light moving straight forward to continue, the rest is blocked or dampened.

The flash grid.
The grid in action to the left, and the softbox without grid to the right. Notice how much wider the light is cast to the right.

I use the grid to give more specific direction to the light, if for example it is important that the light bouncing from the floor or the ceiling is minimized. Notice that the grid dampen the effect of the flash all things equal quite significantly, so especially if you shoot the flash in manual mode, you need to factor in the effect of the grid when setting the flash power.

Related reading

What is optical slave mode in flash photography?

Review: Godox V860 III Speedlite flash

Review: Sean Tucker: The meaning in the making

To make a long story short: this is a super interesting book, and it comes highly recommended.

If you expect to have a book that talks about photography in terms of which aperture to shoot at or how to frame your images just right, then you will be disappointed. The scope is much broader as the sub-title suggests: The why and the how behind our human need to create.

Sean Tucker: The meaning in the making.
My cat kept me company during the read. 320 pages in paperback format.

You may – like me – know Sean Tucker as a photographer and a YouTuber and follow him on both channels. But I did not know that he had been a musician and and waited tables to make ends meet financially. And it reminded me that he had also been a priest (and no, I did not run for the hills…).

On the homepage Sean writes that “This book contains personal stories interwoven with the psychological, philosophical and spiritual practices which help me stay a mentally healthy, inspired and motivated ‘maker of things.'” – that is in essence the content of this book. And it is relevant for anyone being creative of some sort.

Sean Tucker: The meaning in the making.
Using small QR codes after selected chapters, you can see some of the images mentioned in the book.

The book impressed me in several ways and to illustrate, let me give some examples:

Envy. Envy is not something we often talk about. It is a forbidden feeling almost and one that most try to supress. But Sean instead moves forward and analyses the feeling and how to deal with it constructively. This part of the book I found refreshing and brave, because he uses himself and his own story as the example and not some “holding it in arm’s length and talking about it academically”-way.

Feedback and critics. I find it hard to ask for feedback, or I simply forget to do it. And even more seldom do I actually work with the feedback. Sean early in his life thought about this and apparently decided to use the feedback as an integral part of his way living and working, and that calls for respect. And he also early identified mentors and was early in life very clear about why he wanted mentors and how to make the best of them. Sean also gives several examples of feedback that was harsh or brutal at the time, but he managed to turn it into something constructive and useful every time.

Success. I must admit that to some extent I believe in the american dream. Maybe not in the way a true American would, but that hard work and a bit of talent or luck can take you a long way and almost is a guarantee for success. Sean punctures this belief effectively using van Gogh as example, but also from his life as musician. I am still processing that part of the book and it bites me. I know from my NLP training that we do not see the world as it is, but rather a model of the world and that we take in information that fits our model of the world mainly, and leave the rest be. Seans words about success does not fit my model of the world, and as such it to me is a mental blow. And as unpleasant as mental punches to the kidneys are short term, as beneficial they can be longer term. Sean also talks about the world being broken and this is another part of the book that challenges my belief system, so I’ve been plenty challenged reading the book!

The small stories. Without going too much into details because I think you should enjoy the story yourself, I will give this quote: “This artistic train wreck would win no awards, but it was one of the most beautiful things I had ever seen”. That little story really moved me.

I could go on. But I won’t, because I think you should read the book if you have any interest in creativity, self development or philosophy. Or how you can grow as an artist.

I bought the book here in Denmark from a local online store. It can also be downloaded in an electronic version. And I believe you can even read a larger sample from the book. So there are no excuses – start here.

Shopping link

Sean Tucker: The meaning in the making

Video link

Related reading

Review: Outdoor Photography monthly magazine

Review: Photography and the Art of Seeing by Freeman Patterson