A sideways move
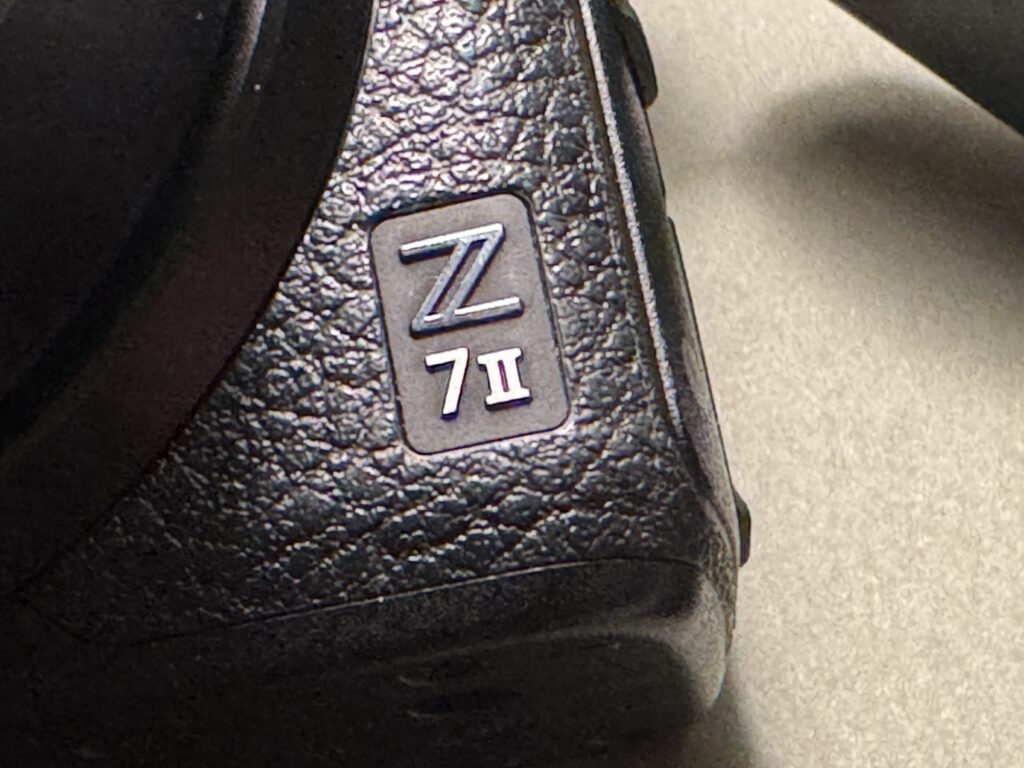
I recently swapped my Z6ii for a Z7ii, and in this blog post I want to share what the differences “feels” like and if I made the right choice. Both cameras are mirrorless and has the same user interface, so I consider this a sideways move as the main difference is found in the sensor resolution. More about this later. Also, I mainly use my Nikons for photography and not video production, so the following will be looking at the two as cameras only.
I swapped cameras using mpb.com, a company that I have used for selling and buying a lot of gear. They of course do make a margin for every item you buy or sell, but they are easy to do business with and the goods you sell them are never returned once they have passed the quality check. If you prioritize convenience over making a super sharp deal, you may want to follow the link (no, I am not sponsored). So in this case I bought the Z7ii used and in part payed for it with my used Z6ii.
I have had the Z6ii for some years now, and I moved from the D750 to the Z6ii back then. If you want to read more about that move, the post is right here. It may help you decide if moving from DSLR to mirrorless is for you.
The Nikon lineup
Before diving into the details, it may be good to take a look at the Nikon competition with Nikon itself: Where is the Nikon Z6ii positioned in the different mirrorless options that Nikon offers?
As I see it, the Z6ii is the middle-of-the-road camera that does everything well but nothing particularly good. It’s a general purpose camera that will please many photographers and it is reasonably priced as well. If we look upwards, the Z7ii is the high resolution big brother that offers approx 20 MP more resolution – a linear jump of around 87% relative to the 24 MP the Z6 has. So the Z7ii is for landscape, architecture, interior, astro, macro and maybe some product photography, but as the auto focus is not impressive, I would not use it for fast moving subjects at all (sports, wildlife).
If you are in the market for some of the best AF that Nikon offers, I would look towards the Z6iii or the Z8, subject to how much resolution you need and the size of your wallet. With the Z9 flagship camera, Nikon for the first time got the AF just right and able to match the competition from Sony and Canon. And the Z9 AF has now trickled down to first the Z8 and later the Z6iii. This could also be a reason for why you may want to wait and see how the Z7iii performs when it is announced – it should be right around the corner and may have the same top-of-the-shelf AF as the Z8. My non-scientific testing of the AF on the Z7ii reveals that the AF is not bad, it is just not the best available. And when you shoot macro, the Z7ii still seems to love to focus on the background and not the subject. So in conclusion, if fast AF is important to you, no need to upgrade from Z6ii to Z7ii – there is not much improvement here, despite a big jump in AF points. Look for the Z6iii or the Z8 instead (or wait for the Z7iii).
Same same, but different
There are so many similarities between the Z6ii and the Z7ii that I suspect Nikon to use the same production line for both cameras, right up to the point where the sensor is to be installed. If you pick up a Z6ii or a Z7ii with a piece of gaffa tape over the logo, you will not be able to tell the difference as all these things are the same:
- Weight (down to the gram!)
- Size
- Buttons and dials
- EVF resolution
- Rear LCD resolution and movement
- Top LCD
- Expeed Processors
- Weather sealing
- Card slots (number and specs)
So if you were hoping for a better shooting experience with the Z7ii, then you will be disappointed. Not that I have any complaints in this department, I have gotten used to the Z6ii and can work fairly fast with the layout. And the grip is sufficiently deep for my big hands. But the two cameras are super identical and I would say from a shooting experience point of view, it IS the same camera.
If you browse through the spec sheet, then the differences start to appear, ignoring resolution for now:
| Subject | Nikon Z6ii | Nikon Z7ii |
| ISO Range | 100–51,200 | 64–25,600 |
| Autofocus Points | 273 AF points | 493 AF points |
| Continuous Shooting | 14 fps | 10 fps |
| Buffer Capacity | Up to 124 RAW images | Up to 77 RAW images |
| Base ISO | ISO 100 | ISO 64 |
| Video Modes | 4K UHD up to 60p (with crop) |
4K UHD up to 60p (full sensor readout) |
| Anti-alias filter | Yes | No |
| Battery life | 340 shots | 360 shots |
The difference in FPS is maybe a bit surprising, but the Z7ii is slower as it has the same Expeed processors, but need to move larger files
But, with all respect and noting that your mileage may vary, there is nothing in the above list that really stands out as a game changer for my landscape photography. Maybe only that I was happy to see the Z7ii dropped the anti-alias filter, as this should give the best working conditions for the high resolution sensor.
Resolution monster?
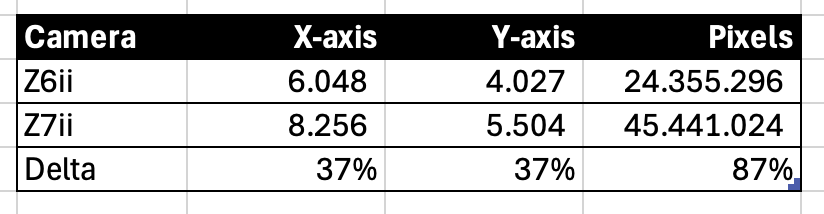
So, let’s finally get to the point with the Z7ii: the resolution. It offers around 20 MP more than the 24MP Z6ii senor and that is a linear jump of 87%. Truly impressive!
Sorry to be the party spoiler, but if you look at the effect on the image resolution covering 2 dimensions, then the addition 20 MP may not impress you so much. The thing is that the addition resolution obviously has to cover 2 dimensions, so you “only” get a 37% jump when you look at the two axes isolated. I know this may be more psychology than mathematics, but for me I get this sinking feeling: huh, is that it?
Add to this that you can get post processing software that intelligently can bump up the resolution of any image. What is the point then?
A sensor resolution around 24MP is probably the sweet spot when choosing the size of the resolution: you have sufficient to work with and the files are not annoying big to work with in post processing and file copying. So IMHO you really need to be sure you need the resolution.
If you think that lots of resolution is the precondition for large print, then I beg to differ. My argument is this: A billboard poster has a resolution around 1-2 MP! How come? It is probably some of the largest print you can think of and the resolution is so low? The answer is viewing distance. The bigger the print, the larger you will naturally make the viewing distance. Otherwise you will be too close to the print and will be studying with head movements like watching a tennis game! I have printed 70×100 cm images from a Nikon D700 with 12MP and never missed a pixel.
So why did I go with the Z7ii with the above line of thinking? The answer is: cropping! I have recently needed to crop dramatically in some of my work to make it fit an exhibition format in portrait orientation. And when cropping, the resolution all of a sudden is super relevant as it enables you to get decent resolution even though a large chunk of the image is removed.
I admit that more careful planning of the shots and/or better choice of focal length could have mitigated the issue without the need for cropping. But it nice to know that I can crop down a landscape image shot with a 50mm and get a – for me – useful result. Your mileage may vary of course, but for me this is a very welcome luxury.
Conclusion?
As the Nikon Z6ii and Z7ii in so many ways is exactly the same camera, I think you need to be absolutely sure you need the additional resolution. The approx 1000 EUR price difference further adds to the need to consider this carefully.
That said, the Z7ii produces some absolutely stunning images. As I traded in my Z6ii to partly finance the Z7ii I have not been able to make a head-t0-head compare of the two cameras, but I think the Z7ii is some of the best I have ever seen from any Nikon camera (disclaimer: I have never tried the D850). Maybe the sensor is different? Maybe the anti-alias filter gives the last umph? Maybe the additional resolution puts on display just how good the Nikon Z lenses (S series) are? I don’t know and I probably never will. But I do know that with this investment I have put myself in the difficult position where the only explanation for bad images is found a few centimeters behind the EVF.