Canon EOS 5D: How to do exposure bracketing

Dynamic range

Your eyes are amazing! They can take in a scene and cover a dynamic range of approximately 20 stops of light. So looking at a sunset, you can distinguish the light both around the sun and some shades on the ground at the same time! Your Canon EOD 5D unfortunately cannot. It can “only” cover around 11-13 stops of light, so if you have a scene where there is both some very bright parts and some darker ones and you’d like to cover the details in both ends of the spectrum, exposure bracketing is the tool to use.

Preconditions

With exposure bracketing, you are taking several images of the same scene at different exposure values. Perhaps needles to say, but you can only do this for stable subjects such as architecture or landscape photography. And you also need to make sure the camera is in exactly the same spot for the series of shots, and a tripod is the classic tool to make this happen.
Canon EOS 5D exposure bracketing
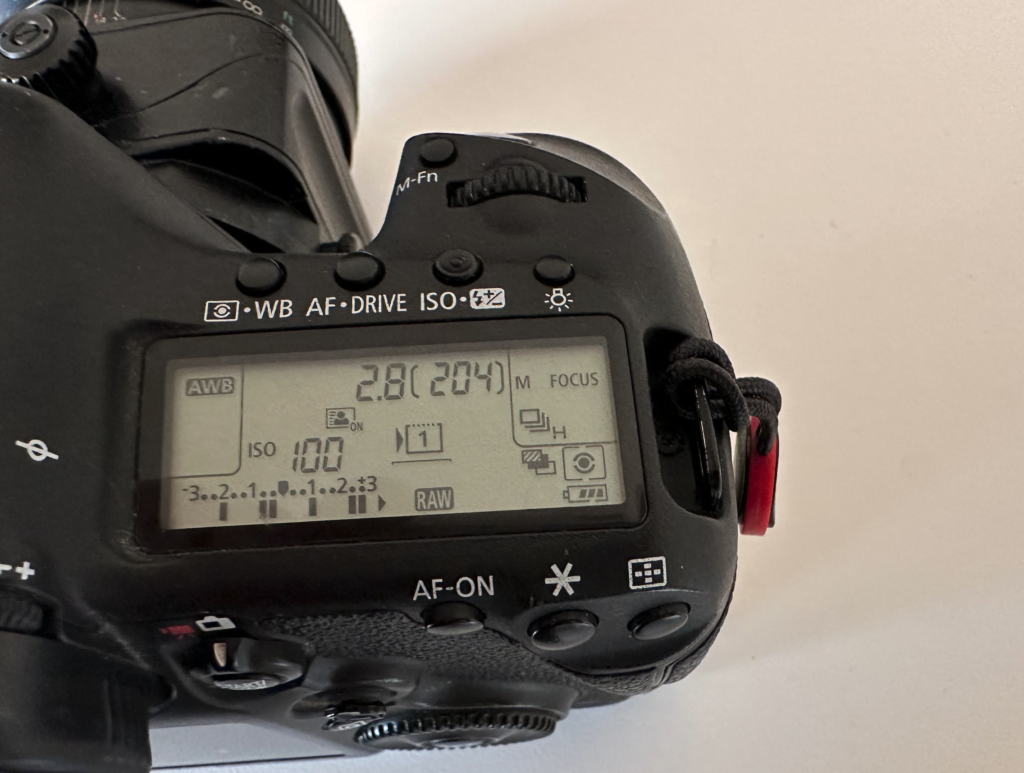
Avoid hitting the shutter several times: put the camera in one of the continuous release modes. Here high is selected.

As you are shooting a series of images, the easy way to get it done is to make sure your Canon EOS 5D is in continuous mode (low or high), so that it fires a series of shots when you hold down the shutter release. Otherwise you will have to hit the shutter several times to complete the series.

Finally, you need to give the camera some options for changing the exposure between shots and the semi automatic exposure modes like program, aperture priority and shutter priority are ways to secure this. You can also shoot in manual mode, but make sure the Canon 5D has auto ISO set to on, otherwise there is very little for the camera to vary between the shots!

How to

The Canon 5D  has two menus of relevance: one is where you configure the bracketing steps and the number of shots, the other where you configure the distance in stops between the shots and also if exposure compensation it to be applied also.
Canon EOS 5D exposure bracketing
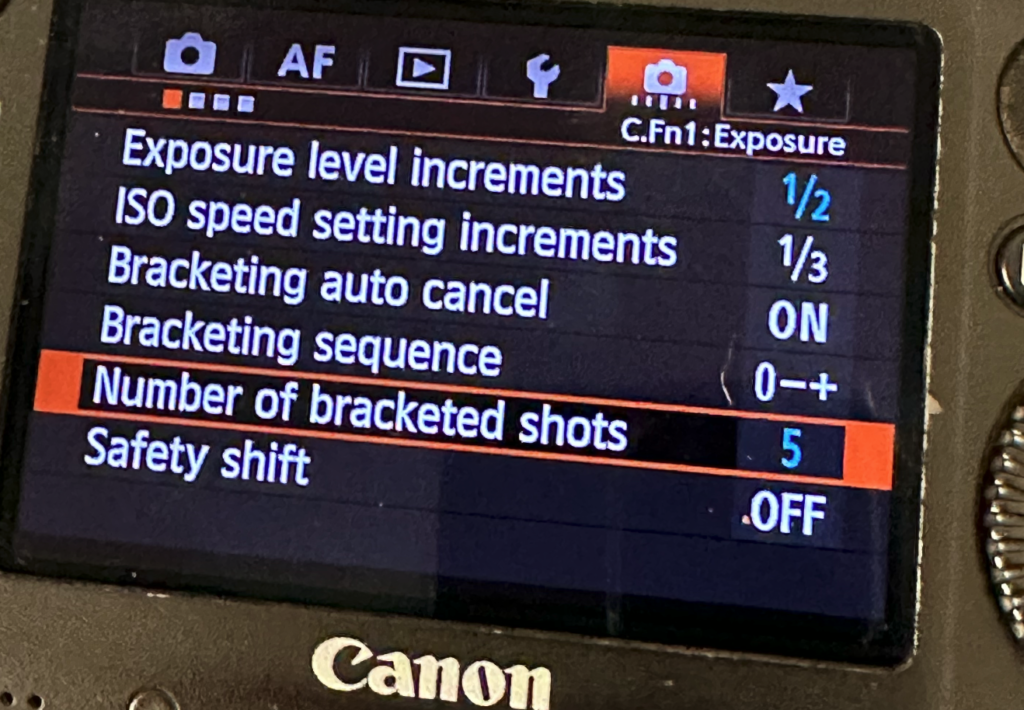
Use the C.FN1:Exposure menu (second last menu item on the top level, first sub menu) to select the increments (first menu item) and the number of bracketed shots (second last item). I never use the bracketing sequence as Lightroom does not care about the order of the images.

Canon EOS 5D exposure bracketing

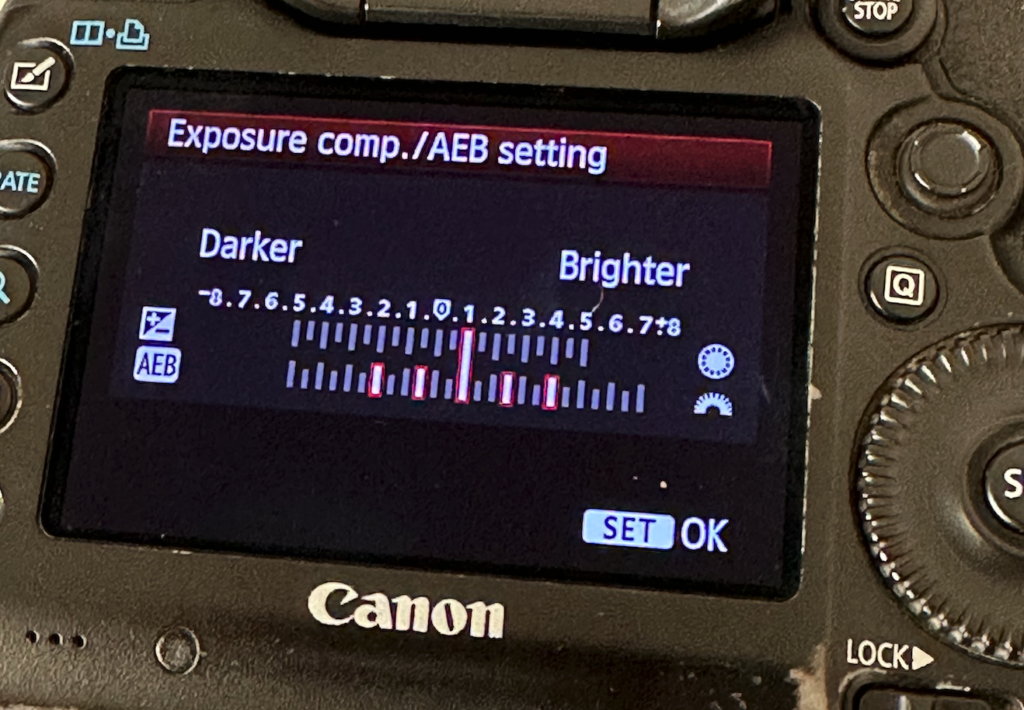
In the second sub-menu in the shooting menu (SHOOT2) you can configure the distance between the shots and exposure compensation. You can see in the example above that I have asked the camera to over expose all images with one stop and hence the middle of the 5 bars points to +1.Once you have captured a series of images, you will need to merge the images in post processing. I use Lightroom for this purpose, but there are probably other tools that can do exactly the samme. The software will pick the over exposed images to get access to the details in the shades and the under exposed images to get access to the details in the highlights, and by stitching the images together, a final image with improved dynamic range can be produced.

Video link

Nikon D4: How to do exposure bracketing

Dynamic range

Your eyes are amazing! They can take in a scene and cover a dynamic range of approximately 20 stops of light. So looking at a sunset, you can distinguish the light both around the sun and some shades on the ground at the same time! Your Nikon D4 unfortunately cannot. It can “only” cover around 12-13 stops of light, so if you have a scene where there is both some very bright parts and some darker ones and you’d like to cover the details in both ends of the spectrum, exposure bracketing is the tool to use.

Preconditions

With exposure bracketing, you are taking several images of the same scene at different exposure values. Perhaps needles to say, but you can only do this for stable subjects such as architecture or landscape photography. And you also need to make sure the camera is in exactly the same spot for the series of shots, and a tripod is the classic tool to make this happen.

As you are shooting a series of images, the easy way to get it done is to make sure your Nikon D4 is in continuous mode (low or high), so that it fires a series of shots when you hold down the shutter release. Otherwise you will have to hit the shutter several times to complete the series.

Finally, you need to give the camera some options for changing the exposure between shots and the semi automatic exposure modes like program, aperture priority and shutter priority are ways to secure this. You can also shoot in manual mode, but make sure the D4 has auto ISO set to on, otherwise there is very little for the camera to vary between the shots!

How to

You can bracket for many things such as white balance and also bracket using the flash light, but in this post I will just cover exposure bracketing using ambient light.

Nikon D4 exposure bracketing
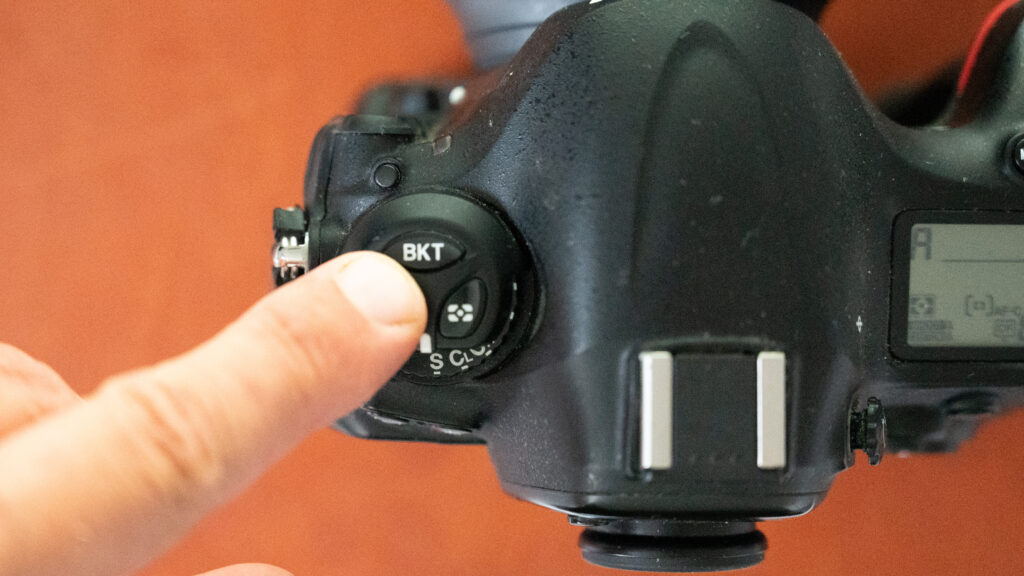
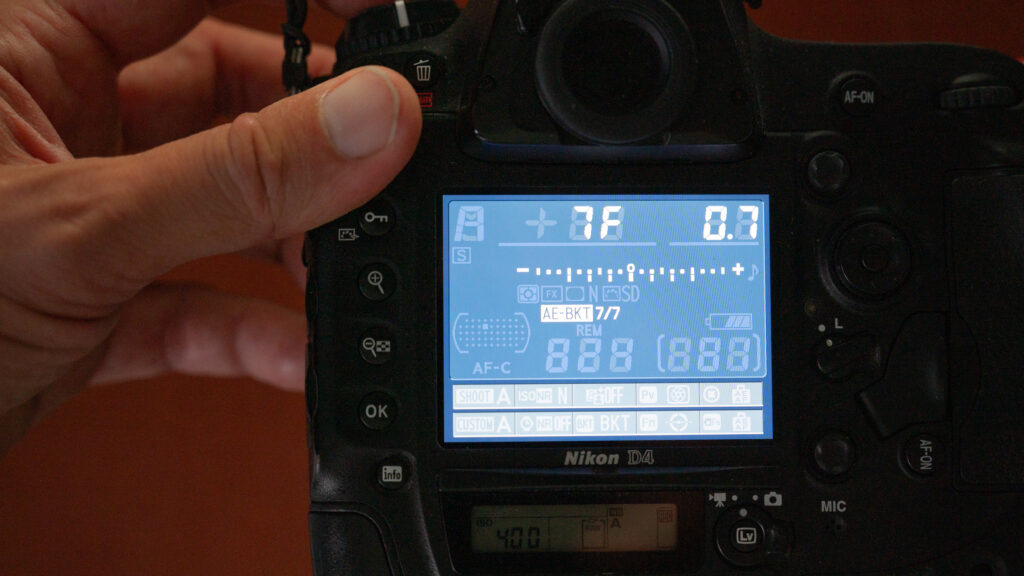
The Nikon D4 exposure bracketing button sits top left on your camera. It is marked “bkt” as an abbreviation for bracketing. You can change the parameters using the front and rear command dial. The configuration is displayed in the top LCD directly and on the large rear LCD if you hit the “info” button bottom left on the rear of the camera.

The wonderful Nikon D4 has a dedicated bracketing button sitting top left on the camera named “bkt”. If you hold down that button, you can set up how many shots you want in the bracketing series (3-5-7 etc) and also how many stops of light the exposure is to deviate from the normal exposure. Use the front and rear command dial to change the values. I usually set this to 1.0, but if you set it to say 0.3 or 0.7, you can select a larger number of images to be included in the series. If you set the number of images to 0, you are turning off the bracketing functionality.

Nikon D4 exposure bracketing
Nikon D4 exposure bracketing set up to take 7 images (frames) with 0.7 stops between each image. You can see how the graphics illustrate that there will be 3 images underexposed, 3 images overexposed and in the middle a normally exposed image. If you set the number of images to zero, it is the same as turning bracketing off.

Once you have captured a series of images, you will need to merge the images in post processing. I use Lightroom for this purpose, but there are probably other tools that can do exactly the samme. The software will pick the over exposed images to get access to the details in the shades and the under exposed images to get access to the details in the highlights, and by stitching the images together, a final image with improved dynamic range can be produced.
Video link

Is the camera shutter count important?

The odometer of a used car is an important indicator of just how used the car is! It may not tell exactly how well the previous owner(s) took care of the car, nor if they drove like rotten tomatoes or carefully like some senior citizens are able to. The shutter count on your camera is a little bit the same: it tells something about how used the camera is, but it is not the entire story.

You can tell a lot from the scratches and wear and tear on the outside of the camera body – many professionals (sports, photo journalism) do not baby their gear and you can certainly tell from the look of the camera. However, the cameras they choose for their line of business is built for the purpose, so factor this in when looking at a seemingly beaten up pro grade used camera.

In the spec sheet, camera manufacturers list the shutter count life expectancy for a given camera. The Nikon D4 is set to 400.000, but Nikon is notorious for being conservative when it comes to the life expectancy, and many report that they have passed the  expected shutter count by several factors!

The shutter in a DSLR is one of the parts that endure the most wear and tear, and hence the focus is very much on the mechanical shutter itself. If your cameras shutter stops working, it is often possible to have the shutter itself replaced and the camera re-calibrated, giving you – if not a new then – a refurbished camera that most likely will have several good years ahead. However, the precondition is that the camera is within the service window still and that spare parts are available. I have a Nikon D4 that is 10+ years old, and I doubt that I can get that serviced anymore as spare parts simply are no longer produced or in stock.

Other parts like buttons and dials are subject to wear and tear as well as the lens mount and doors in the camera. Print cards and electronics can also see the end of their life, but the mechanical parts is usually where the issues surface first.

Some think that the camera shutter counter is reflected in the file numbering of the pictures. And to some extend it is, but you can typically re-set or change the file naming counter, so it is not evidence of the shutter count. Unfortunately, most camera manufacturers do not provide the shutter counter to be seen via say the menu system or some other easily available option. It is hidden inside the camera!

Good news is that the EXIF information of the images contains the shutter count. So if you take an image and send it to this website, you can get the information “pulled out” of the image, provided your camera is supported. Although they say that the image is not stored, I would recommend that you use a test shot or something that is not dear to you as the image you upload. I have only been able to make it work for RAW files, not JPGs.

Sample shutter count for a Nikon D4

With the move from DSLRs to mirrorless cameras, the significance of the shutter count has dropped somewhat. However, there may still be a mechanical shutter in your mirrorless camera that is needed for flash photography or the like. However, when shooting with the electronic shutter, there is very little wear and tear of the mechanics of the camera (other than the shutter release button of course).

For a mirrorless camera you will typically find a counter for both the electronic and the mechanical shutter. For a DSLR, the distinction is between the counter including live-view shots and the more classic shutter release. It is a fair distinction, as the mirror is not flicking every time you shoot an image in live view.

Video link