Review: Hengwin Leather Belt Pouch

Every spring when the weather get warmer I face the same recurring issue: My winter coat has a lot of nice pockets for me to store my wallet, keys and phone, but when summer comes and it is all t-shirts and shorts, what then? When I stuff my pockets with all my gear, I often find that my shorts get more and more interested in saying hello to my angles!

I have sometimes made it with a small backpack, but on a hot summers day, a backpack may not exactly be what you want to keep your back even warmer!

Hengwin
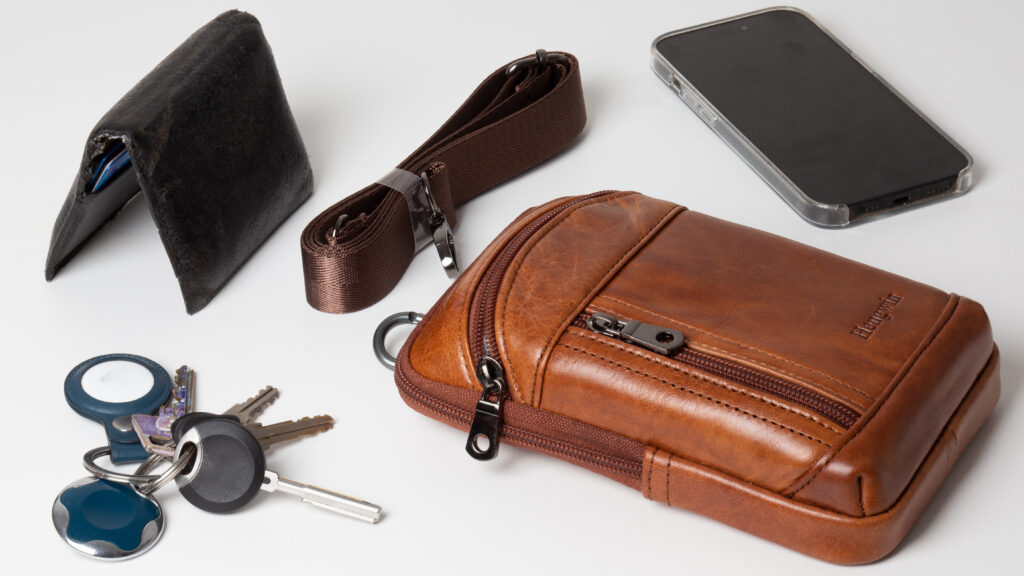
Hengwin Leather belt pouch
The pouch comes with a strap sitting just above the leather pouch itself, and holds my wallet (top left, black leather), keys and iPhone 13 Pro comfortably.

To the rescue comes Hengwin, a Chinese brand laser focused on small bags and pouches, practical solutions for carrying essentials without breaking the bank. You can find their homepage with all their products right here. The bag shown here will set you back around 30 USD. If you used the code “frederikboving” you’ll get a discount and if you order more than one, you may be eligible for free shipping! Make sure to check that you are not subject to import taxes.
Hengwin Leather belt pouch
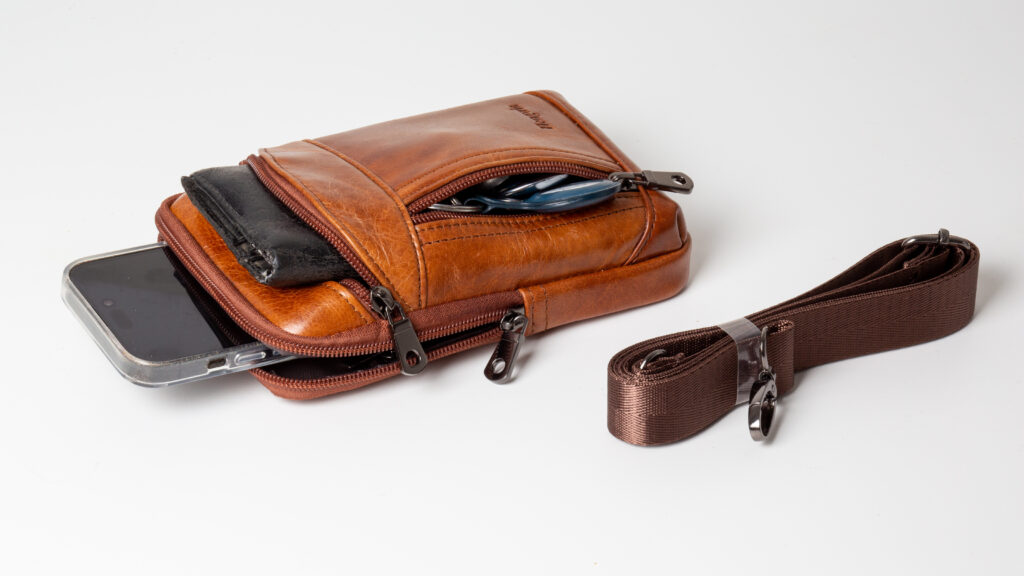
The Hengwin Leather belt pouch easily takes my iPhone, wallet and keys. I could also have used the vertical pocket for credit cards.

The leather belt pouch that I have in review here easily takes an iPhone 13 pro, my little wallet and my keys. I could also easily have fitted my sunglasses in there along with the iPhone.
Hengwin Leather belt pouch
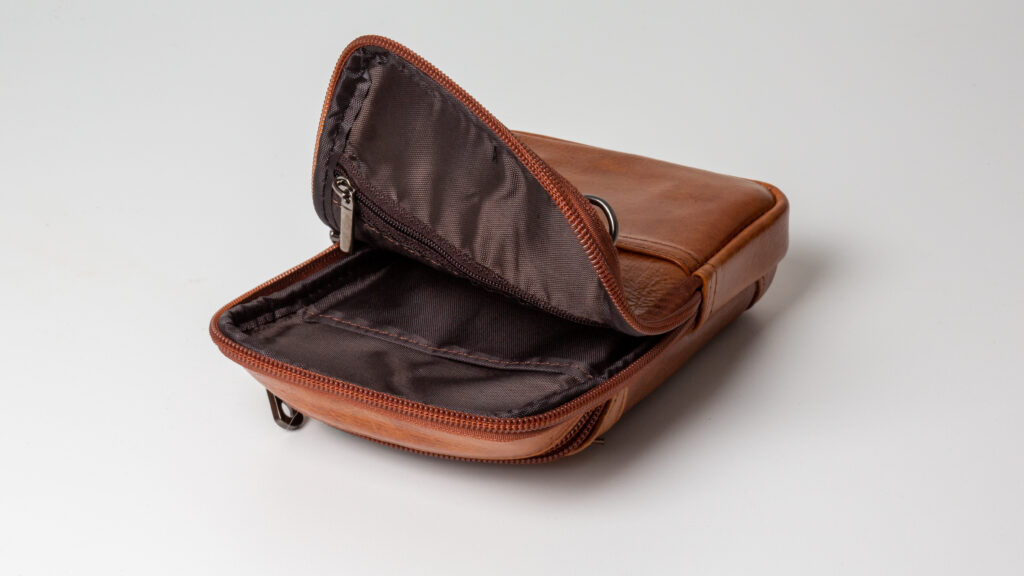
Inside the large room in the pouch you will find two more pockets – one with a zipper and another without.

Carrying

The pouch gives you 3 options for carrying:

  • Attached to your belt via a belt loop attachment
  • Attached to your clothing via clip-ons and
  • Carried in a cross-body adjustable strap

I must admit that I prefer the 3rd option, as it for me has a little more street credit, but also because I find it a more safe option – I am not sure I would notice right away of someone stole the bag when hanging on my hip! But that is all personal preference! It is nice that Hengwin gives options to choose from!
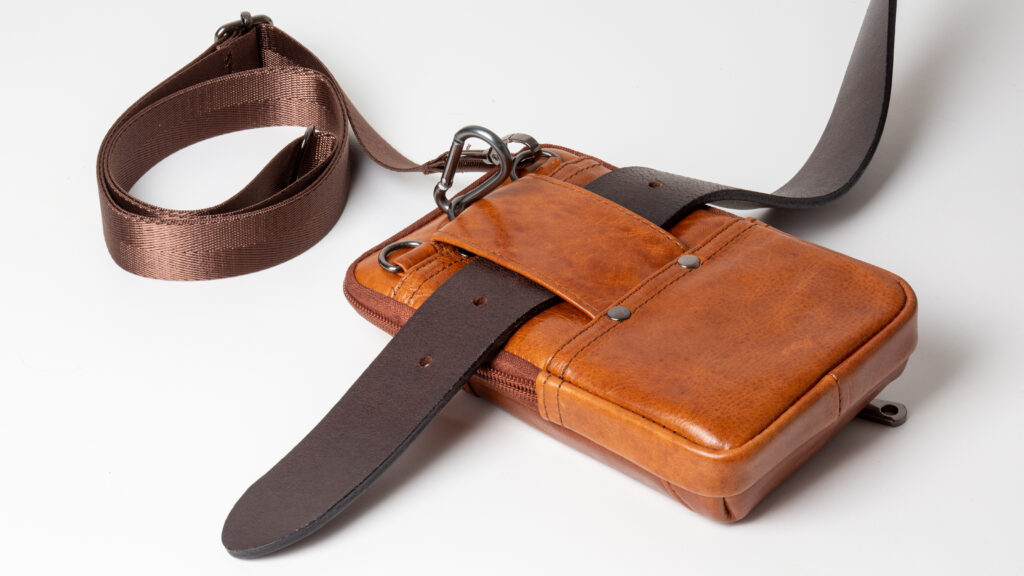
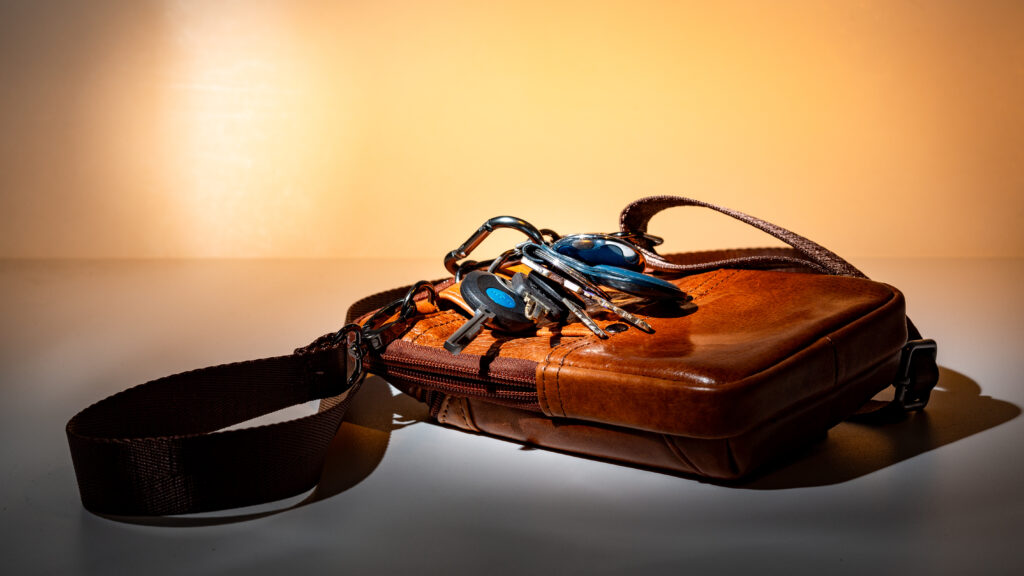
Hengwin Leather belt pouch
There are 3 options for carrying the pouch: belt, strap and carabiner clip.
Hengwen
Although designed to attach the pouch to your belt, I find that attaching my keys to the snap hook works really well in combination with the cross body strap.

Build quality

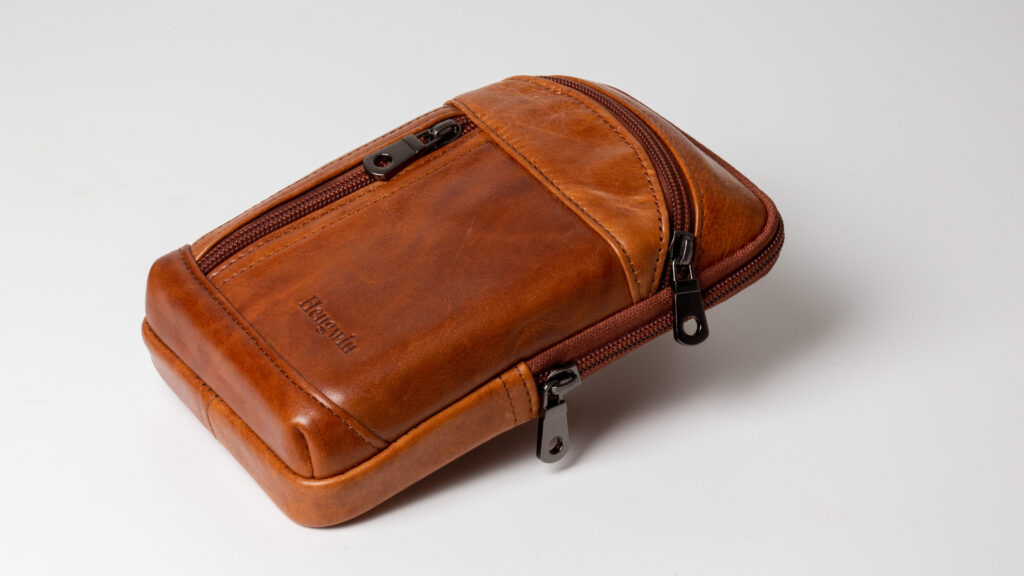
I have not yet long-term tested the pouch, but judging from the initial look and feel, the build quality seems to be very good, especially when you factor in the price point. Both the leather, sewings the zippers seem to be of good quality.

I would have loved if the adjustable strap had been made of leather like the pouch itself, but I also appreciate that a long strap of leather also has some disadvantages when age sets in!
Hengwin Leather belt pouch

Summary

I think this is just the solution I have been looking for to keep my bits and bobs in one place. And  even though I may carry a backpack when going to work, the Hengwin is probably with me as a bag in the bag, so I can always find my keys and phone. The build quality seems fine and if the pouch stands the test of time, I think you will find this to be a handy product without breaking the bank.
Hengwin Leather belt pouch
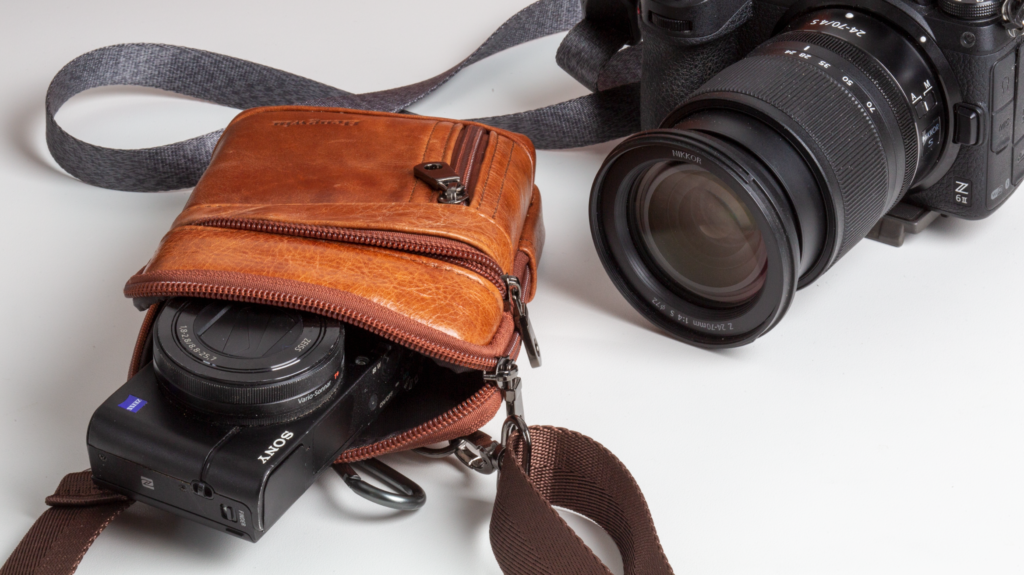
Although the Hengwin bag will take a small camera like the Sony RX100, I usually carry my camera over one shoulder and the Hengwin over the other.

Video link

Related reading

Review: HORL 2 knife sharpener

Review: Timbuk2 Heritage Classic S Messenger bag multi-colored

Atomos Ninja V: Great recorder, but prepare to pay for accessories!

I just ordered my copy of the Atomos Ninja V. It is a great tool if you want to get serious about video recording, but prepare to pay! The Atomos has a few surprises up its sleeve that you might want to know about before buying!

You can find lots of reviews praising the Atomos Ninja V and rightly so – it will unleash a lot of potential from your camera doing internal recording. But buying the Atomos is like buying a german car: the price for the base model looks reasonable, but when you add needed extras, the price suddenly changes in upward direction.

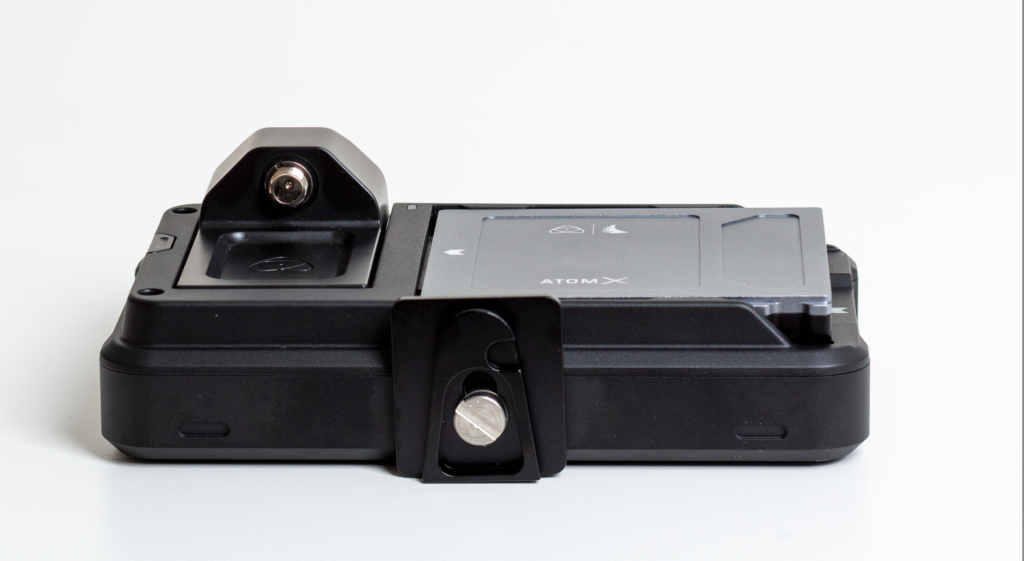
The backside of the Ninja with the SSD drive sitting to the right.
The backside of the Ninja with the SSD drive sitting to the right (light grey).

The Atomos Ninja V comes with no memory. You have to install a SSD drive for it to store information, and if you don’t want the SSD drive to stick out from the side of the Atomos Ninja, you have to buy a dedicated drive. I went for the Angelbird AtomX SSDmini with 500 GB.

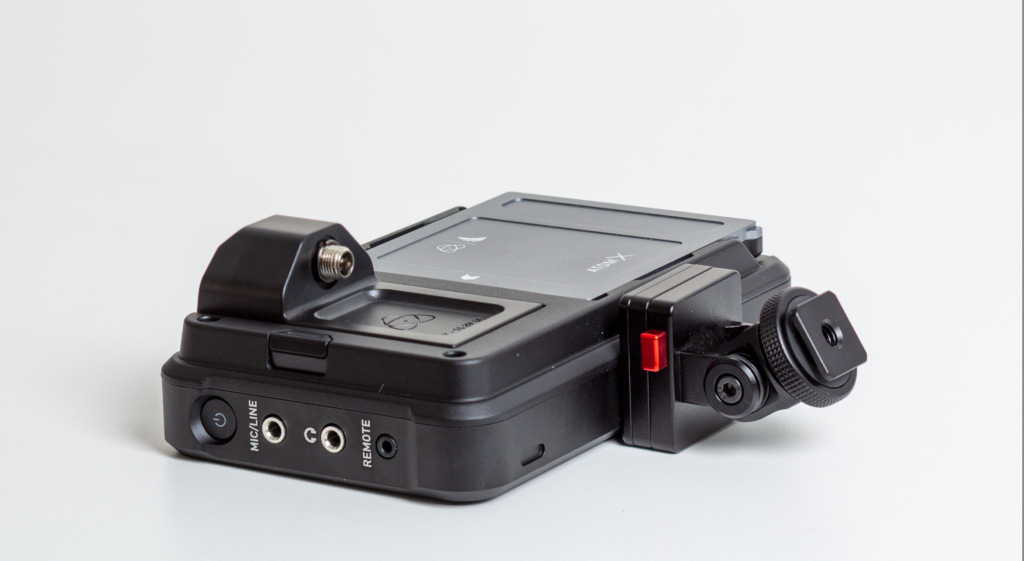
To the right the mount for the ninja on the camera hotshoe.
To the right the mount for the ninja on the camera hot shoe. The red button is for releasing the Ninja from the mount.

Further, there is not mount to make the Atomos sit comfortably on the camera – you can make a DYI version, but I decided to go for the Atomos monitor mount. The total of the mount and the SSD drive was around 66% of the price for the Atomos Ninja itself!

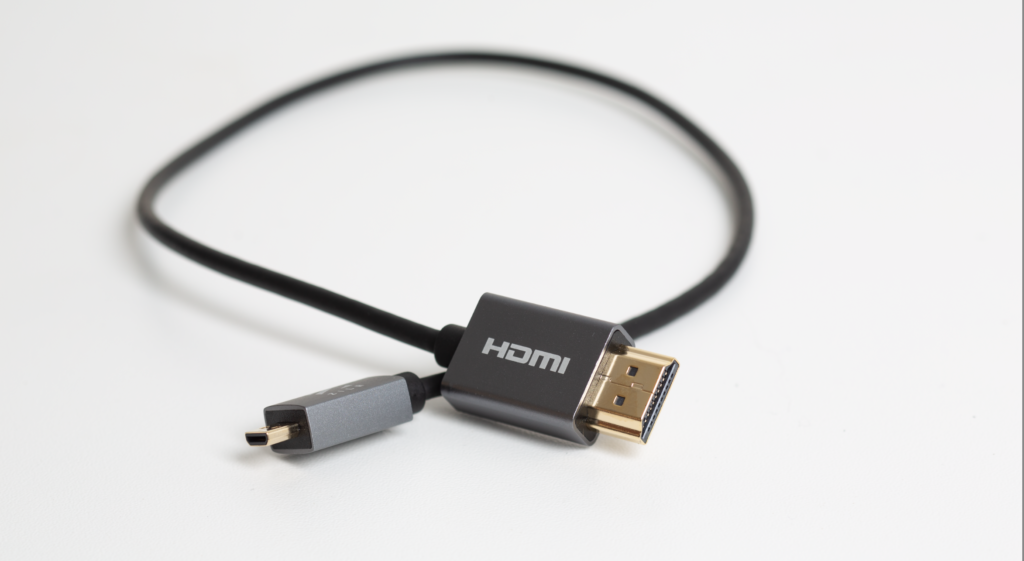
Then I learned that I did not have a cable to go between the Ninja and my camera -I needed a HDMI-A to HDMI-D cable for my Lumix camera (your camera may need a different cable). Maybe you are so lucky that you have one on stock, but I did not, so I had to invest once more. Notice that it is useful with a relative short cable if you intend to have the Ninja mounted right on top of your cable.

HDMI cable to go between camera and Ninja
HDMI cable to go between camera and Ninja.

Add to this that the Atomos Ninja V comes with not batteries at all! You can get a Atomos Accessory Kit with batteries and a sun visor and a battery charger, but that kit will set you back another 40% of what the Atomos itself costs, so if you want both batteries, sun visor, memory and a monitor mount, you have to pay a bit more than double the price of what the Atomos Ninja V itself will cost you.

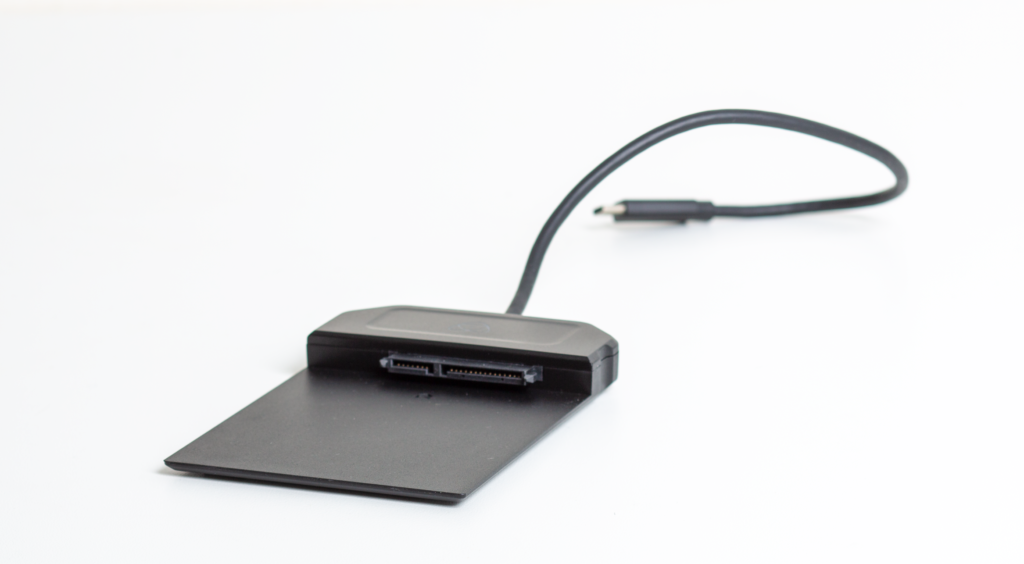
Then there is the question of getting data out of your Ninja! Here there is no USB-C or USB-A connector to “talk” to your Ninja, so I had to get a docking station for the SSD drive.

SSD drive docking station.

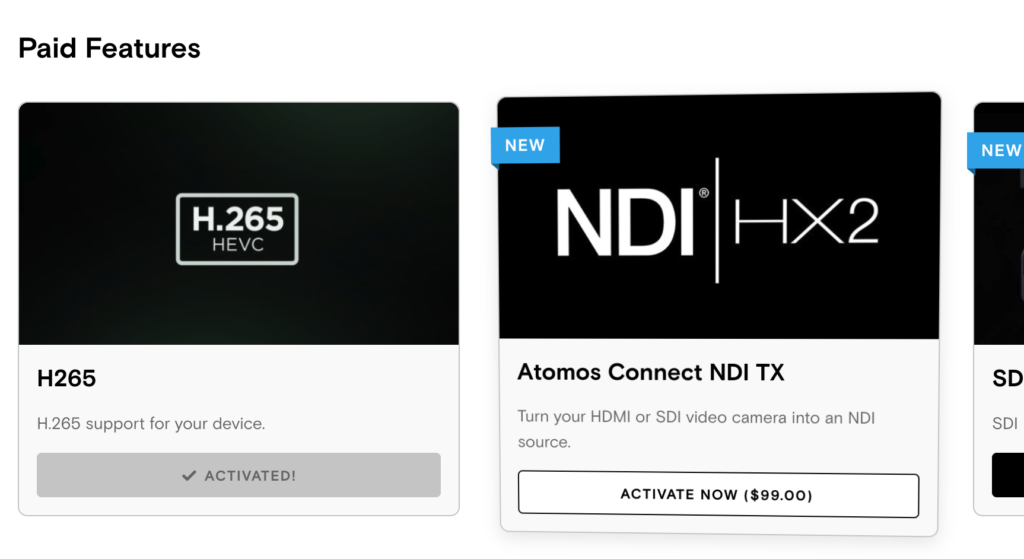
The final stab that Ninja Atomos V made at me was when I created a profile on the Atamos homepage and downloaded the latest software. There I learned that a one-time fee of 99 USD for the giving me access to the H.265 codex was required.

H.265 codex access paid!

So, as I said in the beginning of this blog, the Atomos Ninja V is a great tool, but just like cars from Germany: be prepared to cough up some extra of you hard earned cash to make the package complete.

Related reading

Review: SmallRig RM75 Video Light

Review: COLBOR CL100 Video light

Should you get a teleconverter?

What if I told you that there is a magic little gadget you can buy and install between your lens and camera, and all of a sudden the lens is significantly longer and has more reach? Does that sound too good to be true? Well, it is not. The name is teleconverter, and it comes in different variations but they all do the same: make your lens longer.

Teleconverters for Nikon comes in 1.4x, 1.7x and 2.0x meaning that the length of your lens is extended with 40%, 70% and whopping 100%! And good news is that the teleconverter is a relatively small device that does not add much weight to your setup. But it is not a free ride.

First, extenders are expensive. In order for the converter to work well and not deteriorate image quality, the glass in the converter has to be of super high quality. In addition the converter has to be 100% transparent in facilitating the communication between the lens and the camera in order for the auto focus system to work as efficient and fast as without the converter. That is a demanding challenge for the engineers. So good converters are expensive for good reasons.

Second, getting a teleconverter that works with your lens and camera may be a bit of a pain, especially if you say shoot with a Nikon body and a Tamron lens – should you then go with a Nikon teleconverter or a Tamron teleconverter? Difficult to say if you ask me. You can get third party converters that are more reasonably priced than the main brands, but make sure you study the spec sheet to see if your combo of lens and body is supported.

Third, the speed of your lens is affected negatively. How much depends on the specific model, but you can rest assured that if you have f/2.8 as your current widest aperture, then that max aperture will drop as a consequence of adding a teleconverter. So if you are shooting fast moving subjects, this could be a negative impact you seriously need to take into consideration before making the buy decision. And in addition most teleconverters will also give rise to a slight decline in image quality although the very best teleconverters will keep this decline at an absolute minimum.

And finally, if we are talking Nikon, the teleconverters only work on full frame lenses with built in auto focus motors. So AF glass will not do. Nor will APS-C glass.

So, as you have maybe guessed, I am a bit sceptical when it comes to teleconverters. I know many professional wildlife photographers use teleconverters with great success, but I just want you to understand all the down sides of the teleconverters before you go for it. Alternatively, of you have an APS-C camera lying around, try mounting that to your full frame lens – that will give you 40-50% more reach for free. Of course you then run around with a lot of glass you don’t use, but at least you are using the best part of the glass in the lens – the centre part. I have had my Nikon Z50 mounted with my 200-500 Nikkor lens and that gave a wonderful boost to the reach.

Related reading

What is a lens reproduction ratio?

Should you buy a fast lens or not?

Review: Looking East, portraits by Steve McCurry.

No introduction needed? In photography I guess Steve McCurry is as famous as Rolling Stones is amongst rock fans. An institution. Member of Magnum Photos of course. Long standing contributor to National Geographics. Ropert Capa gold medal. The list goes on.

Looking East, portraits by steve McCurry.
Looking East, portraits by Steve McCurry.

His image of the Afghan girl spiralled him into fame a long time ago, and the circumstances in which the image was taken has recently just added to the myth and the fame.

But back to planet earth and this book. It is quite large measuring approx 28 by 38 centimeter and contrary to what I had expected, it is not a hardback. Despite this, there is still a premium feel to the book, as each image is given a full page with the opposite page simply listing the location of the shoot.

You’ll find 120 images all shot in South and Southeast Asia. All portraits: Men, women and children. There is very little text in the book – normally you’ll find some curator introducing a photo book with 3-4 pages of intellectual perspectives to the photographers work and how the specific collection in the book came about. Not here. Apart from some few notes on the cover the the book, you will only find 120 wonderful images. The Independent is quoted for writing that “his images often dance on a knife-edge between sensuality and tragedy, sentiment and anguish”.

The picture that made Steve McCurry famous.

My label on McCurry’s work is “intense”. It is a part of the world where the colours are intense as well as the people. McCurry’s photography work is of course technically impeccable, but add to that the ability to capture people in exactly that split second where they reveal something more than just a headshot. And then of course travelling a part of the world that has fascinated him ever since he crossed the Pakistan border for the first time, many, many years ago.

If you like portraits, if you like a good coffee table book and if you like South and Southeast Asia, then this book is an absolute must. It is priced around 25 pounds here in 2023 and if you ask me, it is worth every penny.

Related reading

Review: Vivian Maier by Christa Blümlinger, Ann Marks and Anne Morin

Review: The Unseen Saul Leiter by Margit Erb & Michael Parillo

What is colour depth in photography?

Colour is reproduced mixing 3 channels of primary colour (Red, Green, Blue) and the colour depth tells how much information can be stored per colour channel. As each bit can hold a value of either 1 or 0, and combining say 8 bits for one channel allows to store up to 2^8=256 different values.

If there is room for 8 bits per channel, the total number of colours will then be a combination of the 3 channel meaning 256*256*256 = more than 16 million combinations. So a 8 bit colour depth yields more than 16 million combinations.

Notice that if the image is monochromatic and e.g. only uses the red channel, then the number of combinations are dramatically reduced as the other channels are not used for storing information.

Related reading

What is the difference between resolution and bit-depth in photography?