Nikkor 50mm 1.4D versus Nikkor 50mm 1.8G AF-S – which one to go for?

The need for speed, or?

There are many 50mm lenses. It is probably one of the most versatile focal lengths of all, and loved by most photographers. So every vendor has at least one 50mm lens, and Nikon – being a big player – has many 50mm, both in current production and as vintage lenses.
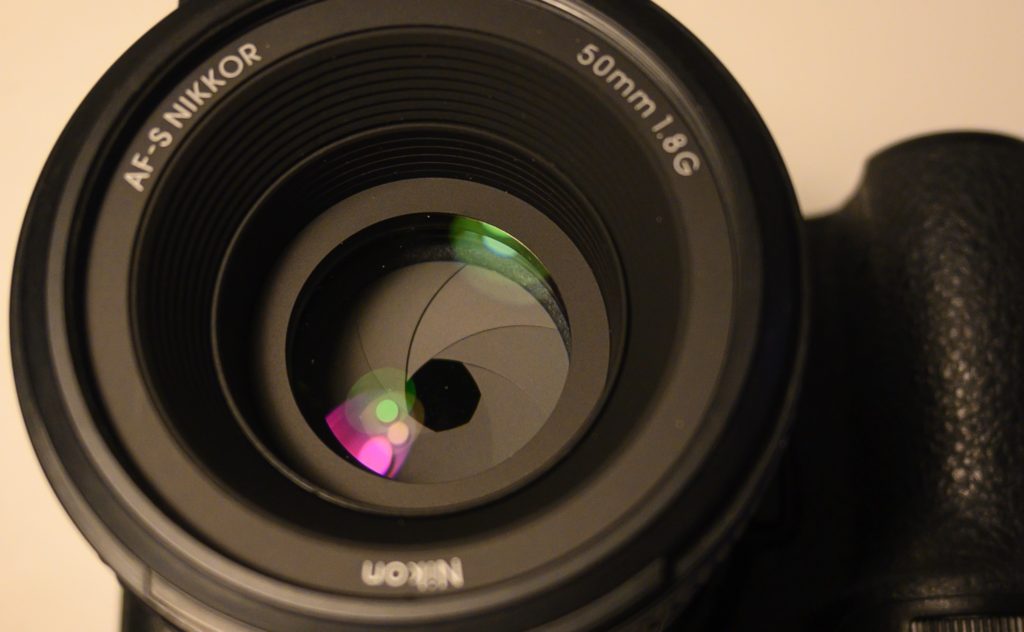
Aperture blades on the 1.8G lens – and the coating is also clearly at work here.

In this blog post I want to dive into two current Nikkor 50mm lenses and point to some differences to help you decide between the two.  I will not make the decision for you as it comes down to your personal preference and decision criteria, but I will give you some information that can help you make an informed decision.

Looking at the names of the lenses, one could be tempted to go with the Nikkor 50mm 1.4D lens, as it is faster. And faster is better in many cases.

Relative to the 50mm 1.8G lens, the 1.4 wide open lets in 2/3rd stops of light more than the 1.8G lens, and if you need the light intake because you shoot in low light settings where flash is not an option (say restaurants at night), then the fast lens may be the right option for that reason alone. The faster lens also gives a more shallow depth of field (DOF) when wide open – shooting at a distance of 2 meters on a FF camera, the 1.8 lens has a DOF of 17 cm and the 1.4 lens has a DOF of 13 cm. And for making the subject stand out against a soft background, this extra shallow DOF may be exactly what you need.

Technical performance

One of the challenges for lens designers is that the wider the lens needs to go, the more difficult it is to have the lens yield good sharpness and contrast.
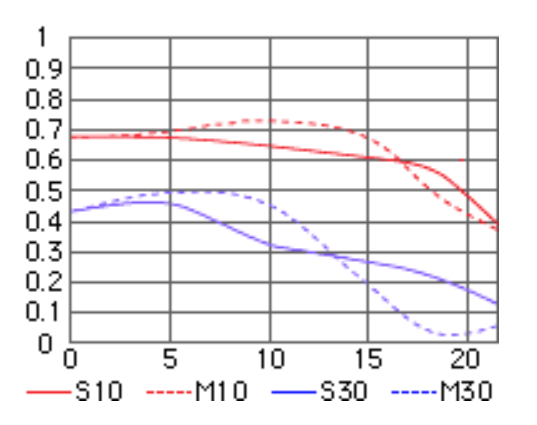
Wide open performance of the 50mm 1.4D – Credit to Nikons homepage.

The above is the MTF chart for the 50mm 1.4D lens wide open. If you are not too familiar with an MTF chart, then the gist of it is that lines that are flat and high is better, and that the red is sharpness and blue is contrast. And all above 0.7 in my book is good performance. As you can see, the 1.4D is not a top performer in the MTF chart above.

If you compare it to the MTF chart in for the 50mm 1.8G that you’ll find in the review of that lens, the performance is much better. But be mindful that the charts are wide open, and as the 1.8G cannot go as wide as the 1.4D, we are not comparing apples and apples. But you will find that the 1.4D is a bit soft wide open – stopped down, it will perform better. But then again, the point with wide lens is to be able to use it wide, right? That is what you pay for and what carrying the extra glass around is all about.

The lack of sharpness and contrast in the corners may be less of an issue for you if you are a portrait photographer, where the centre sharpness is vital. And some softness (and hence forgiveness) may be the preference for some photographers, that may not need the super clinical and technically perfect image that will survive a pixel peeping scrutiny and MTF chart mapping. In other words, sharpness and contrast may not be the deciding factor for all photographers.

Comfort and silence

The AF-S or G lens comes with a built in autofocus motor. The AF-D is dependent on the AF motor to be built into the camera body and driven mechanically via the “screwdriver” link between the lens and the camera.

In my experience, the AF-D works well and fast in general, but it is a bit noisy relative to the built in motor in the AF-S lens. And the dependence on the motor in the camera body means that you cannot use the AF if you later want to move to the mirrorless (ML) cameras from Nikon, as the ML cameras have no AF motor built into them. And if you plan to use the lens on some of the entry level APS-C cameras like the Nikon D5600, the situation is the same: no motor in the camera body, and you are left with manual focus.
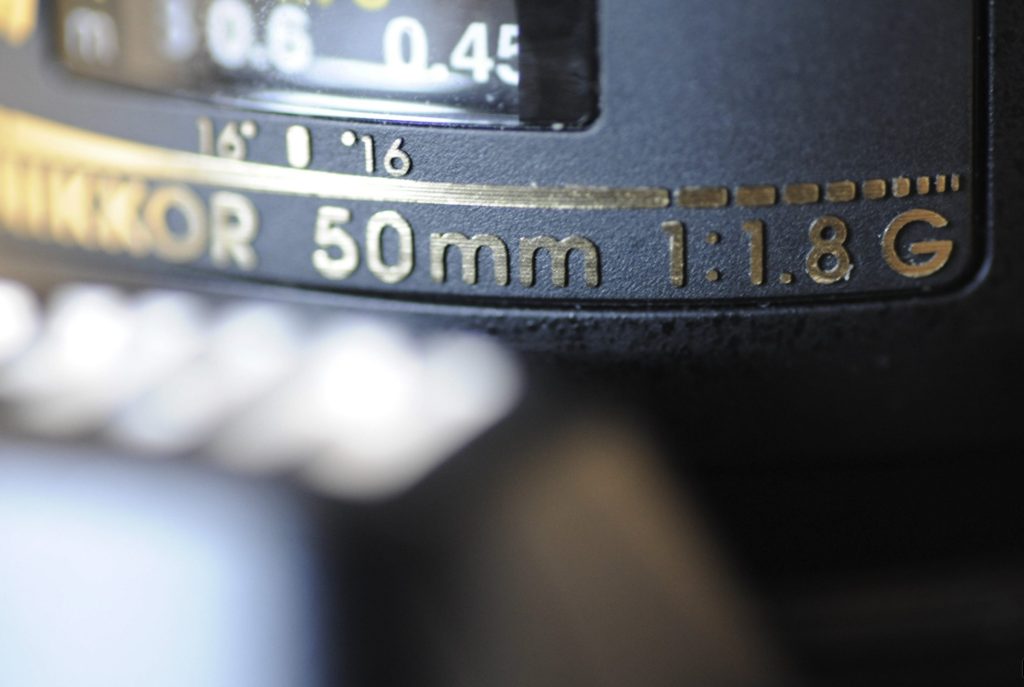
The Nikon 50mm prime lens 1.8G – a general purpose focal length.

Size and weight

Usually you get a big weight penalty for faster glass, but in this case it is not too bad, as the 50mm focal length does not require that much glass after all. The weight of the 1.4D is 230 grams whereas the 1.8G is 185 grams.  In absolute terms this is a small increase, but if you are a hiker running up and down mountains all day with your camera, this could be a factor in your decision.

In terms of the size, the diameter of the 1.8G is larger at 52mm versus 42mm for the AF-D lens; my guess is that the focus motor in the 1.8G lens takes up some space outside the glass itself and yields the larger diameter. The 1.8G lens is also a bit taller at 72mm versys 64mm, but I would say that both lenses are rather compact despite these differences.

Prices

The 50mm 1.4D over at mpb.com is available here in December 2022 for around 150 EUR used, whereas the 1.8G is available for a little less, around 120 EUR used. It is quite common to see that faster lens is more expensive, even factoring in the auto focus motor on the G lens. But both lenses, if you ask me, are a bargain and yields an outstanding price/performance ratio.

Conclusion

I have only zoomed in on a subset of differences between these lenses, in the hope that these differences are the vital ones for making your decision.

There are other factors of course like bokeh, aberrations, vignetting, distortion, color rendition, etc. But I think you will find that these two lenses are close in comparison on these other relevant parameters.

Best of luck with your search and decision making!

Shopping link

Nikon AF 50mm f/1.4D Lens

Nikon AF-S Nikkor 50mm f/1.8G Lens

Video link


What is rear curtain synchronization in flash photography?

A barn door of time

One of the fascinating things about flash photography is that your flash, besides being able to put out an impressive amount of light, is also able to do so in a very short interval of time. In fact, it is so fast that relative to a shutter speed of 1/20th second, the flash sees this as a barn door of time!

Decisions, decisions

Provided that the flash is fast and the shutter is slow (even when fast!), this gives an interval – a string of options for when to fire the flash when the shutter is open. Most cameras will default to firing the flash at the beginning of the shutter being open, but there typically is also an option available in your camera settings to fire the flash towards the end of the shutter being open. So the “string” of options is on most cameras reduced to two options: early or late. The late one is often called something like rear curtain sync.

Subject move

If you take a picture in a low light situation where you need to keep the shutter open for say 1/10th of a second, you will see that anything bright and moving will leave a trail of light. So the headlights on a car on a highway at night will leave a trail of lights as the car moves through the frame.

Now on top of this ambient exposure comes the flash. And it can be added early or late in the exposure. Again, remember that the flash is blazing fast and only uses a tiny, tiny fraction of the 1/10th in the example. Provided the flash is strong enough, it will add an additional exposure of the car, where the car stands out much stronger relative to the exposure done by the ambient light. In fact, the car may not be visible at all in the ambient light exposure – only the headlights.

So here is the thing: do you want the car to be exposed as the headlights start to be captured or towards the end of the headlights being captured (= rear curtain synchronization). That is basically what the rear curtain sync option governs. Most cameras will default to early sync, and have rear sync as an option you need to actively select.

If this sounds all mysterious and convoluted, my best advice is to give it a try. Shoot something bright moving at night and see the effect of turning rear sync on and off. It is the best teacher. Far better than any blogger! Enjoy!


Why color temperature is vital in color photography

Light sources

If you are new to photography, then color temperature may not be the first thing you worry about. There are many other dimensions of photography that demands you attention, ranging from selecting the right camera and lens, to composition and exposure. However, when you have found your feet and start getting the results you want, then white balance and the color temperature of light may start to be one of the more advanced subjects that you want to dive into.

Every light source has a certain color temperature. It is measured in Kelvin, and for reasons beyond me, it is typically on a scale between 2000 and 10000, and to signal it is a value on the Kelvin scale, a “K” is added after the number. So for example candlelight is 2000K whereas an overcast sky is around 6000K. So low values equals more red, high values more blue and in between is white.

You are fast!

No, I don’t write that headline to charm you, but it is a fact that your brain adapts to new light sources with astonishing speed and probably without you noticing. So if you walk from noon daylight (5200K) into a tungsten lit living room (2500K), then you’ll adapt to the new temperature of the light super fast and probably without noticing. And colors will look like they always do, and white will look white, simply because you adapt fast to a new light source. It is really smart design!

Your camera is not so smart

You camera is not so smart. In order for it to record the light in a way where the images that comes out of it look natural (e.g. white looks white), then the camera needs to know the temperature of the light. If it doesn’t, then I can assure you the colors will be strange – white will be yellow and blue will be purple, etc. So you need to tell the camera what color temperature you are shooting at.

Auto white balance

Luckily, most modern cameras has an option named auto white balance where the camera itself reads the light and figures out the color temperature of the ambient light. It works really well in most cases. You can try to play with a manual setting of the white balance, just to get a feel for what happens if the white balance is off and what options this gives you for giving your images a distinct look. If you have ever seen images by Bryan F. Petersson, you can find some amazing images where he gives the night sky a distinct purple look using manual setting of the white balance.


What is white balance in photography?

True colors

As strange as it may sound, white is not just white. Subject to the temperature of the light, measured in Kelvin, white is many different shades of yellow! Why is this hard to believe? Because your brain does an amazing job compensating for the color temperature, so that different version of white always appears to be the same white to you.

Unfortunately your camera is not as smart as your brain! Your camera needs to know what the color temperature of the light is in order to reproduce white (and colors) so that it looks credible when you see it in the screen or the print. If the white balance setting is off relative to the temperature of the ambient light, the colors (and the white) in the image will look unnatural. This can be used as a tool for making your images stand out, but for now I just assume that you want your images to look natural.

Auto white balance

Most modern cameras has an auto white balance function that in far most cases will give the technically correct white balance settings. Also, if you shoot in RAW format, the options for adjusting the white balance as part of the post processing work makes the wrong white balance settings less of a catastrophe – of course it is always nicer (and less work!) to get the white balance settings right in camera, but when shooting in RAW, hard work in post can make your images look right.

Manual white balance

You can set the white balance manually also. Typically your camera has two options, either you can go hard core manual and enter the Kelvin value directly (typically between 2500K and 8000K), or you can select between some predefined values such as sunlight, overcast, tungsten, incandescent, and so on. These names are just name for a specific Kelvin value – if you for example have a value on your camera called “overcast”, it is the same as entering a Kelvin value of about 6000K to 6500K.

Several light sources

Recently I was shooting images at a lunch party, where the party was held inside with tungsten light, but the light from an overcast sky seeped through large windows that (unfortunately!) served as a backdrop for many of the images. Although the auto white balance in my camera did it’s best, the mix of two different light sources with two different Kelvin values did not work out well for my images. The people at the party either had a very red color in their faces, or if I adjusted so that they looked more natural, the light from the windows started to look weird. That taught me to be careful mixing different light sources – had I chosen to frame the images differently (without the windows), this would not have happened.

Bottom line

If you are new to photography, I would not worry to much about white balance for starters. Set your camera to auto white balance, and focus on other matters like composition and storytelling. However, if you want to dive more into playing with color temperature and see what it can do for your images, try to study the Kelvin scale and start to set the white balance manually. Once you are comfortable with manual white balance, next step is to play with white balance settings on your camera that do not match the available light! Have fun!

Review: Hövding 3.0 – airbag protection for cyclists!

Warning!

The Swedish authorities (“Konsumverket”) have late 2023 stopped all sales of the Hövding 3 in Sweden until the safety issues have been investigated. It appears that the Hövding 3 in not all cases has provided the protection expected according to EU legislation and hence the sale of the product is on hold until further notice. Also, according to Swedish authorities, the helmet has not been tested at speeds above 20 km/h. The stop of sales has unfortunately challenged the company financially so much that they in December 2023 decided to file for bankruptcy. 

The review below does not look into the efficiency or completeness of the safety provided by the Hövding 3. I simply review the product from my experience with daily usage, and luckily I have not yet been in need of the Hövding 3 actively providing protection for my head during an accident.

I suggest you consult with the latest status from the Swedish authorities and the bankruptcy case so you can factor this in when deciding if the Hövding 3 is the right product for you.

Cycle helmet alternative

In this review I will give you my thought on the Hövding 3.0 airbag for cyclist from a user perspective, assuming it works as promised should an accident occur. I have fortunately never needed the Hövding to do its job, and hence it is not a test or testimony related the ability of the Hövding to protect you when needed, rather it is my view on the Hövding as part of my daily commuting routine.

Notice that there are several generations of the Hövding, and the one in review here is version 3.0 – so if you are considering another version, the content of the review may not apply.

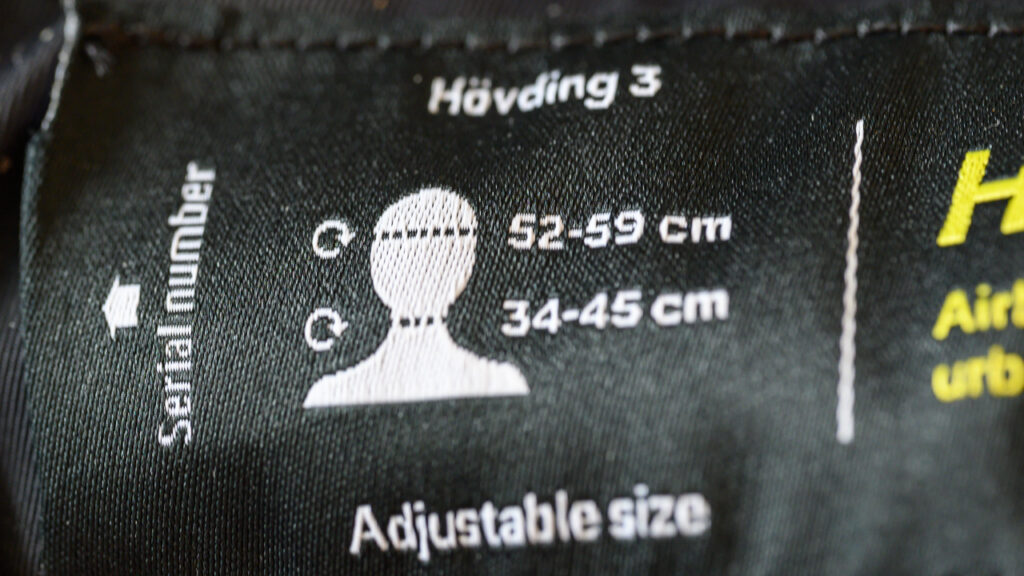
Hövding Size specifications.
Size specifications.

Also notice the size specifications. It does come with adjustable size around the neck, but you may want to consider if the ranges provided are acceptable to you.

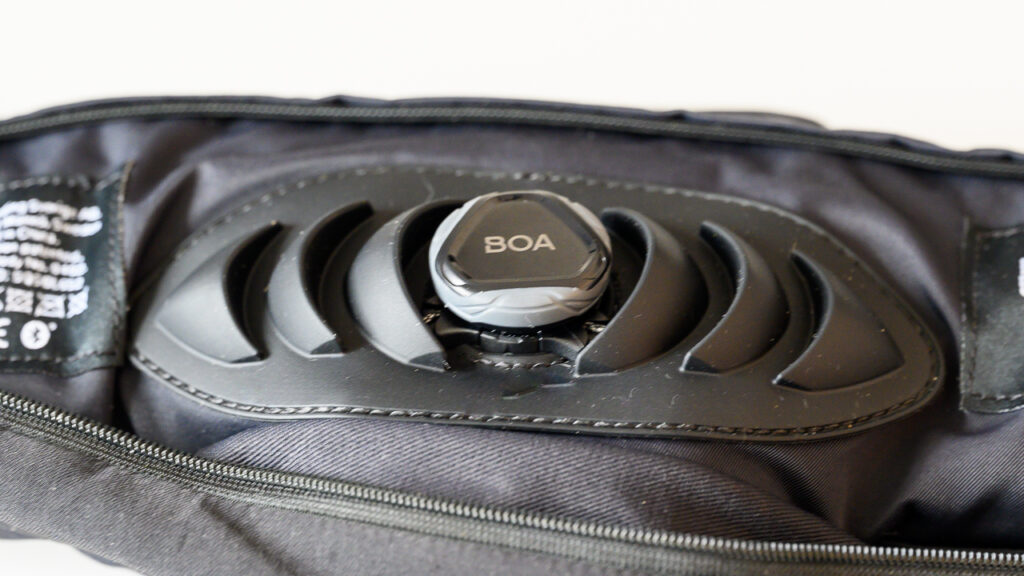
Size adjustment
The size around the neck can be adjusted with a system similar to what many race cyclists know from their shoes or skiiers know from their boots.

In my case, with the Hövding at its widest position, it is a bit tight around the neck. I survive, but could have used just a few more centimeters of space. But I guess that safety is first, and that the design is made this way for safety reasons.

Angles matter

Be aware that the Höwding is not made for racing cycling or cycles where you do not sit up right when you bike. If you sit in a position where you lean too much forward, the Hövding will not be comfortable to wear. The lump at the rear of the Hövding will become more noticeable as you lean forward. So only for upright cycling!

Heavy Duty

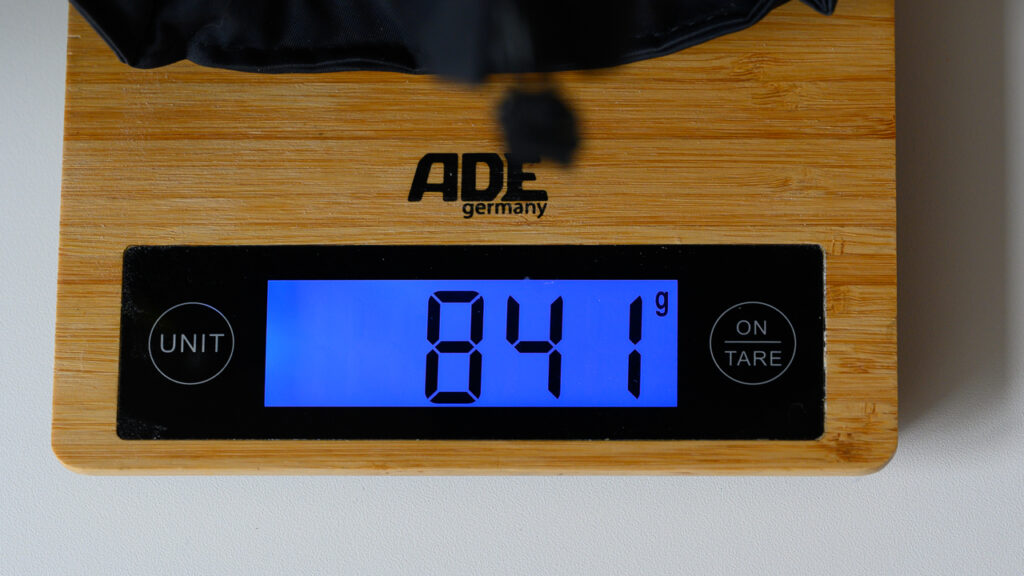
Before you try on a Hövding you may think that it is super light, but that is not the case. You get rid of the helmet and can choose to wear a hat or whatever is to your liking, but it is at the expense of adding weight. My cycling helmet weighs only a fraction of the 800+ grams the Hövding is.

Hövding weight.
Be prepared to carry some weight.

That said, the weight is well distributed and a big part of it sits in the centre around your neck, so it feels less of a pain.

Hövding weight.
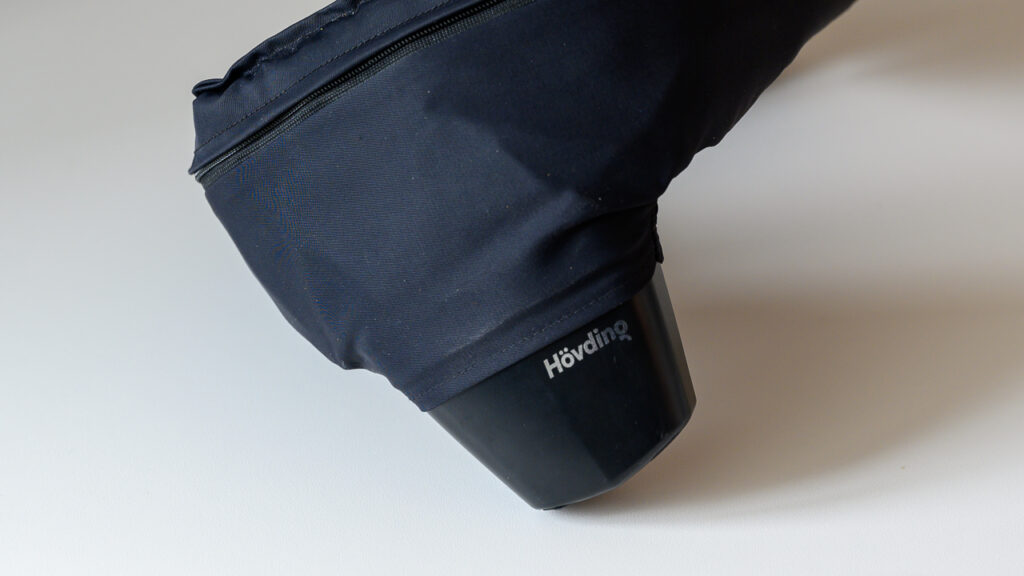
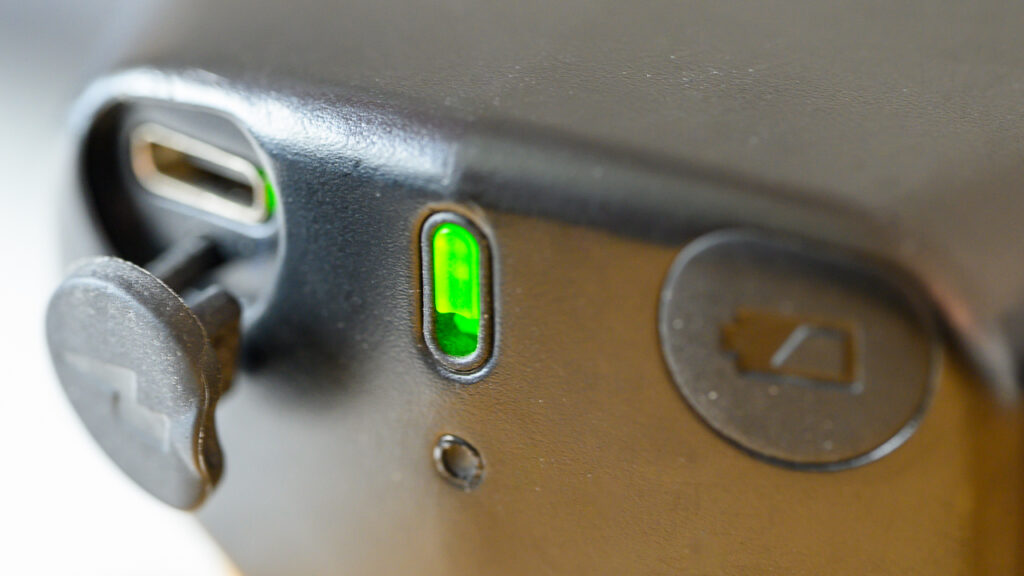
A good deal of the weight is sitting in the black lump in the centre of the Hövding. It also holds the charging USB-C port and led status.

But I was surprised the first time I put on the Hövding how heavy it was. In all fairness, after some time, you get used to it!

However, what I still struggle with is the fact that the Hövding is like wearing a scarf constantly! It is fine in the winter time, as you would do that anyway, but during summer I find that it is an absolute pain and prefer a traditional helmet for that reason.

Electronics

The Hövding charges via USB-C and thank you for that! Great that an industry standard for charging is catching on! There is a small charging light and a button to push to get the battery status, and that is actually the vitals in terms of the electronics.

Hövding USB-C.
USB-C – Yay!

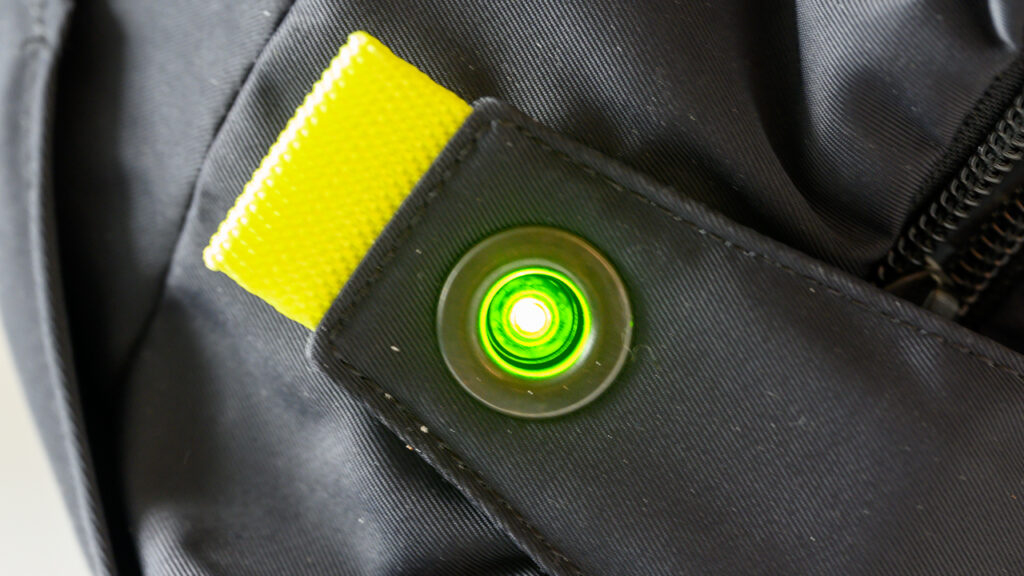
When you close the Hövding, a clear sound signal tells you that the helmet is now  operational and will protect you if you fall. The instructions underlines the importance of only doing this while on the bicycle! Similarly, when you open the helmet, a different – but equally clear – sound signal tells you the helmet is no longer operational (and the light turns from green to red).

Hövding light.
Green light indicates the Hövding is closed and operational.

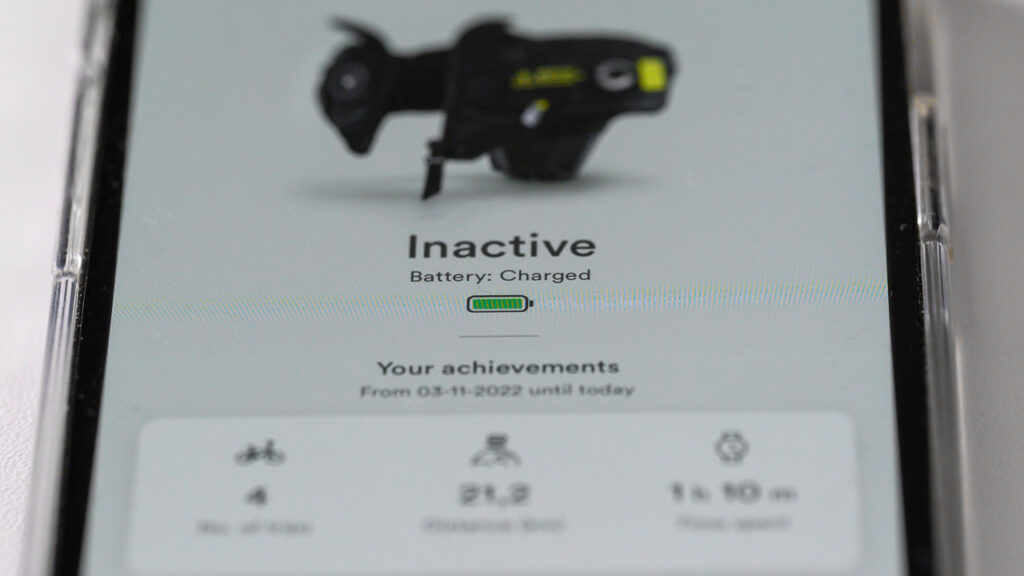
Of course the Hövding has an app, and it talks with the Hövding via bluetooth. The app works well and also keeps track of how far you have cycled and how many times you have been on the bicycle. And of course gives you a good conscience keeping track of how much CO2 you have saved the planet for, relative to travelling the same distance in a car.

Hövding app.
An app, of course!

Storage

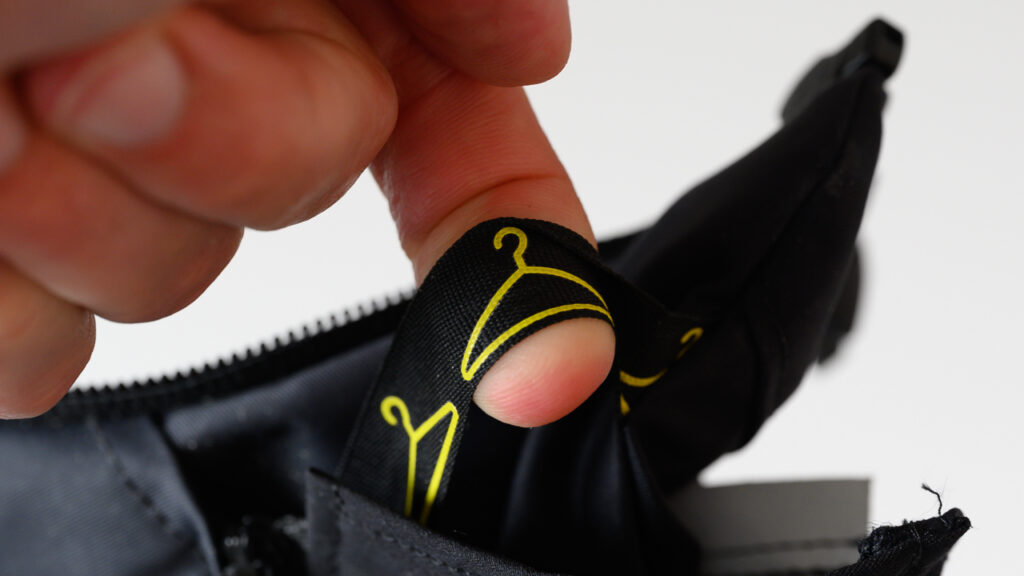
The Hövding is fairly small folded and can be fitted into most backpacks or the like for storage. It also has a small strap that allows you hang it on a hook easily when not in use.

Hövding hook.
The design includes a strap for hanging the Hövding on a hook.

Price and conclusion

The Hövding is a little less than 300 EUR here November 2022, but with the inflation numbers we are seeing this day and age, it is probably wise if you check the current prices. The Hövding is a use-once-only product, but I find that 300 EUR for avoiding a serious head injury is what I am more than willing to pay. My main complaint when it comes to the daily use is that it is warm to wear the Hövding, and as such I only use it during winter time. The rest of the year I prefer a traditional cycling helmet. But it is great to be able to use it during winter time and wear a warm hat at the same time – the latter does not fit well under the “hood” of my cycling helmet.

Related reading

Review: Garmin Varia RTL516 Rearview Radar and Taillight

Review: Timbuk2 Heritage Classic S Messenger bag multi-colored


How to shoot pinhole photography

No lens!

Pinhole photography is simply that you take the lens off your DSLR or mirrorless camera, and instead block the light from entering where the lens would be mounted, except for a tiny, tiny hole where the light can seep through is very limited amounts.

But why?

Pinhole photography is a nerdy discipline in photography, and certainly not for everyone. It requires long exposures and the images are -due to diffraction – not particularly sharp. But it is a more engaging type of photography, where you will need to spend more time with your camera and you will feel more engaged in the process of shooting, relative to the point-and-shoot like style that most of know from our smartphones..

How?

You need a camera where it is possible to take the lens off. This can be a DSLR or a ML camera, but if you can choose, I would recommend a DSLR, as the sensor is bit better protected behind the mirror than what is the case for a ML camera. You are walking around with a camera with a hole in it after all!

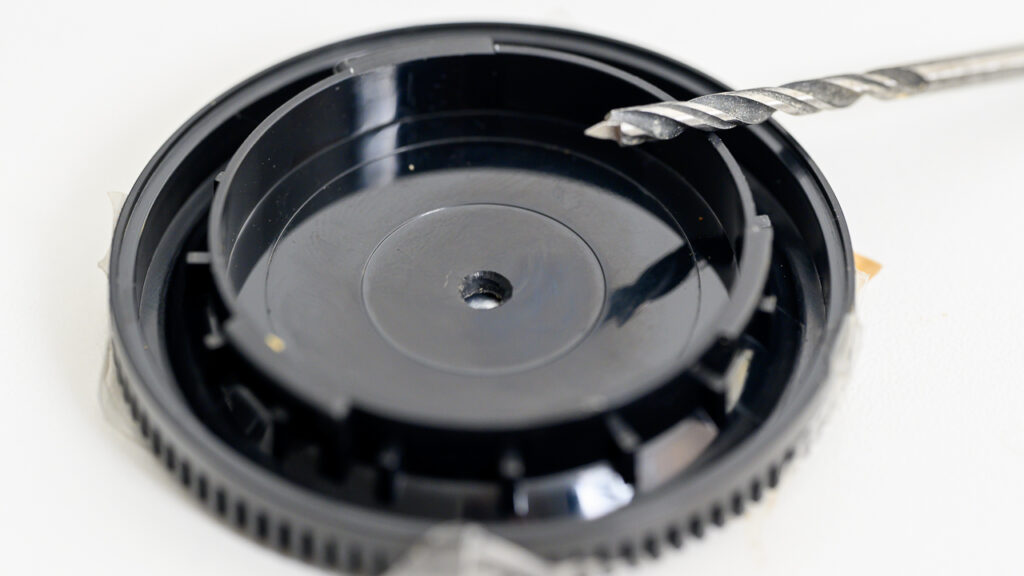
A small hole drilled in the lid used to seal the camera when no lens is mounted.

There are a few different ways you can do this, but I prefer to take the lid you use to seal off the camera when no lens is mounted, and drill a small hole in the centre of the lid. This gives a relatively robust solution, should something hit the area where the lens is usually mounted.

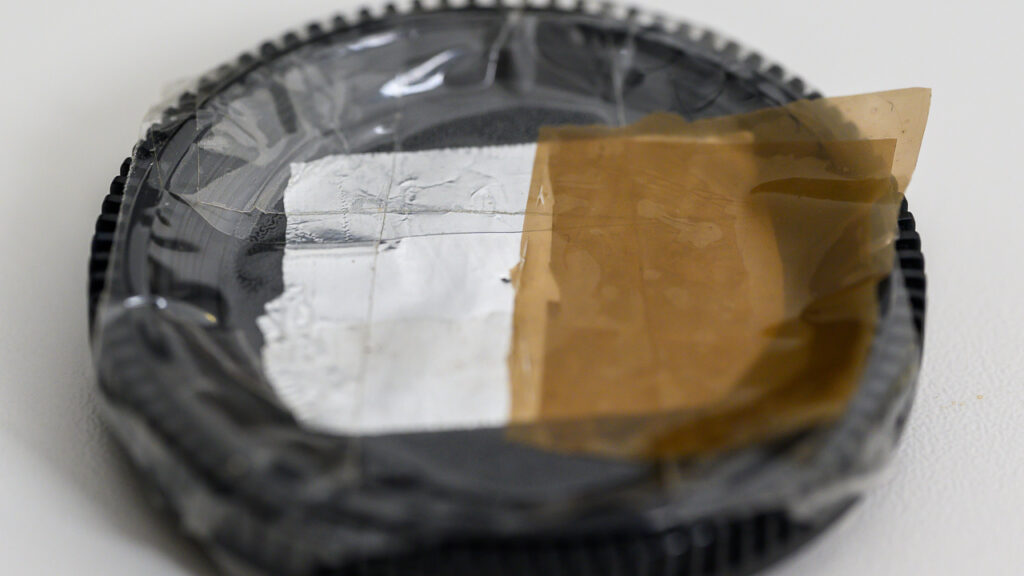
A piece of tinfoil taped to the lid. and a small hole punched in the tinfoil.

Make sure the hole is free from any fragments from the drilling process, so the hole is clean and round. Next, mount a piece of tinfoil on the lid, using a bit of tape. Smart people use tape that is not transparent – from the image above you can see that I am not in that group! And finally, you simply need to take a needle and punch a hole in the tinfoil.

If you want to be very serious about it, you can take a black permanent marker and color the tinfoil black on the side that faces the camera. This way, you minimize reflections on the “inside” of the tinfoil. Needless to say, you need to do this before taping the tinfoil to the lid.

After that, it is simply a question of mounting the lid on the camera, and you are all set! One small thing missing: blocking the viewfinder!

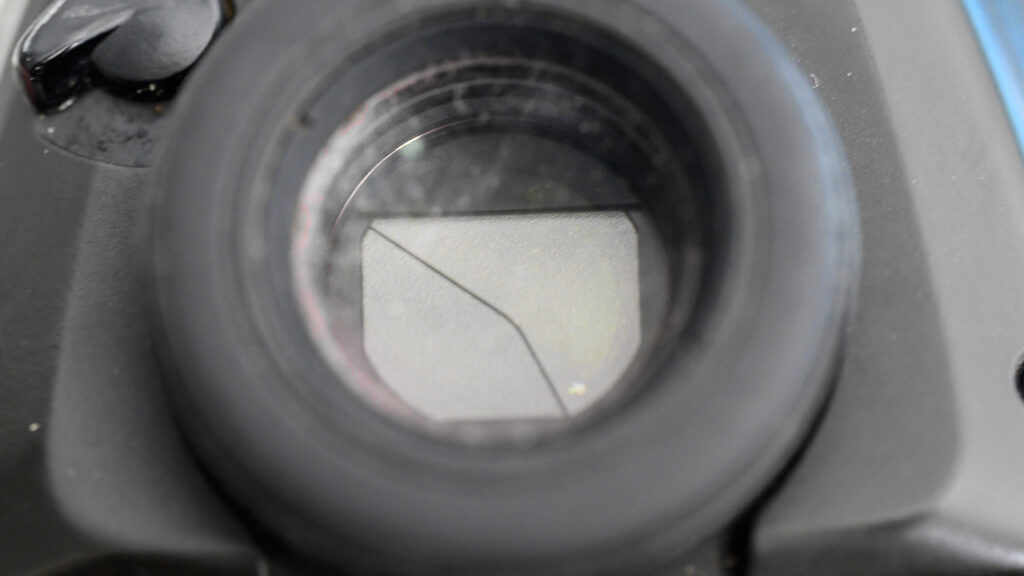
The viewfinder on the Nikon D4 can be blocked by moving a switch to the left of the viewfinder. Here it is closed – no light will enter!

When you are shooting with long exposures, so called false light can enter the camera via the viewfinder, so you need to block it. On some cameras it can be done by flipping a switch next to the viewfinder, if that is not the case for your camera, then you need to block it manually – but please don’t use chewing gum! Yes, seriously, I have seen some photographers do that!

A tripod is (almost) mandatory

Not everyone likes a tripod, but it is necessary to hold the camera still during long exposures. If you don’t have a tripod, try putting the camera on a big stone or a solid fence or whatever is available to you, to secure the camera is still during the exposure.

In my experience, the exposure times for a small pinhole is something along these lines:

  • Shooting into the sun: 10 seconds
  • Shooting on an overcast day: 20-30 seconds
  • Shooting at dusk: around 2 minutes
  • Shooting at night: 4+ minutes

I always try to shoot at base ISO, typically 100, but it may vary subject to your camera. If you shoot at higher ISO, the result may be noisy. I will say though that shooting at night will require so long exposures that in those cases I shoot at ISO 400 or 800 simply because my patience does not suffice. But as a general rule, stay at base ISO.

The auto white balance (WB) will struggle to read the light as there is so little of it, and it may be a good idea to set the WB manually. If you shoot RAW, then you can fix this in post, but I try to get my images right in camera as much as possible, and if you like that as well, the manual WB is the way to go.

As there is no lens mounted, you don’t have to worry about the aperture! My guess is that you are shooting at around f/200 – you can do a lot of math to figure this out; I don’t really care. I don’t need to know the exact aperture, and I simply take a few test shots to figure out what a reasonably right exposure time is.

Bulb may be required

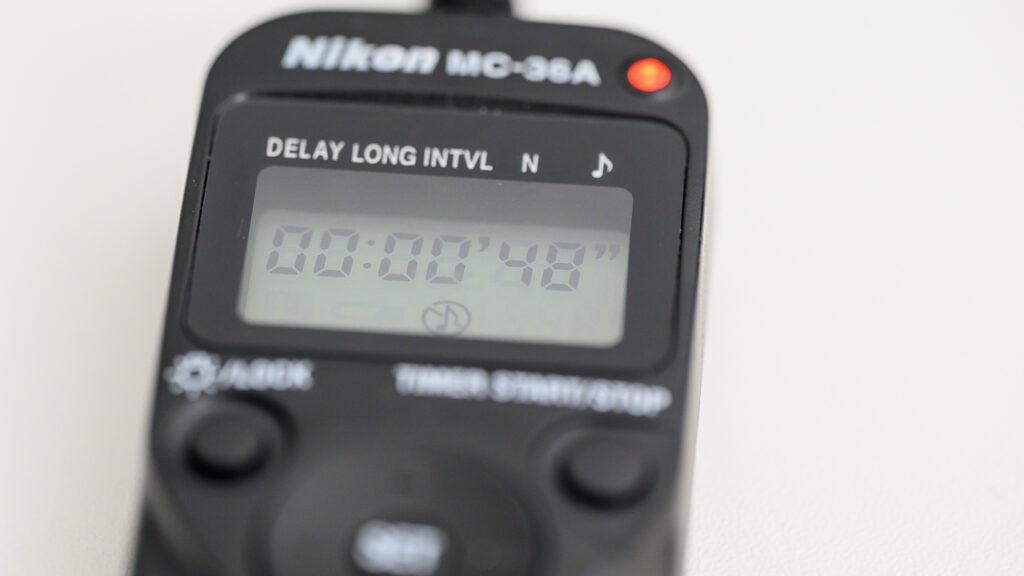
It differs from camera to camera, but when you need your shutter to be open for a long time, the camera may not have a pre-defined option for say keeping the shutter open for 1 or 2 minutes. My Nikon D4 stops at 30 seconds, after that, I need to use bulb mode. That means holding down the shutter while the exposure is going on, which I find to be a pain.

A cabled remote release for the Nikon D4.

So I have bought a remote release, that gives me more options for long exposures than what the camera does.

If you don’t have a remote release or don’t want one, a workaround is to use multiple exposures. Say you ask your camera to expose the same image 5 times. And you set it up to expose each image for 20 seconds. Then the totality of that is a 100 seconds exposure. Only downside is that you will need to hit the shutter 5 times, but it is better than holding it down for 100 seconds, if you ask me.

Is it for you?

In pinhole photography, you are running around with a camera with a hole in it, and that is an invite for dust and dirt to enter. So if you don’t like to clean your sensor, then you probably wanna stay clear of pinhole photography.

Pinhole photography is for long exposures. You cannot shoot anything that moves fast like a cat or a bird in flight. It is mainly for landscapes and stilleben and that kind of images.

Woodland. Notice the almost infinite DOF and that nothing is particularly sharp.

But it is a very engaging style of shooting, you cannot see in the viewfinder what the camera will capture prior to hitting the shutter, so there is a bit of guessing and trial-and-error when it comes to pinhole photography. And that has a charm. But it may not charm everyone!


Which photography Youtube channels to follow?

Learning from YouTube

You can learn a lot about photography watching YouTube videos. But granted, the number of channels and number of videos is overwhelming and being new to photography it can be difficult to know where to start and what to prioritise. That is the aim of this post: to give you some anchor points regarding photography and YouTube. It is just my list, and I don’t claim it is fair or comprehensive – my hope is that you can use it as a starting point and grow your own list from there.

Daniel Norton – portraits and light

If there is one photographer that really knows about portrait photography and especially all aspects of lightning (flash, fill, etc), then it is Daniel Norton. When it comes to lighting, he is my guru. Period.

Daniel is a NY based photographer who has been a very successful photographer in the fashion industry, but now is more focused on teaching, both via his YouTube channel and his podcast over at Avoice. He also co-operates with Adorama, so often his videos are published under the Adorama brand, but you can also find videos that he publishes on his own channel. And of course he has both his own homepage and is on Instagram. His podcast is different from the videos in the sense that it “discuss what it means to be a creator in today’s content rich world” (quote from the podcast).

Marten Heilbron – reviews

Marten Heilbron is a YouTuber proving that to be successful you don’t need to be young and make fast paced videos, as long as your content is competent and relevant. And his channel certainly is. He describes his own channel as “detailed hands-on reviews, explanations and demonstrations of cameras. Here you will find honest and detailed camera reviews, along with some how-to videos and the occasional travel review.” – and it is a very precise description of his channel and its contribution. And then Marten always has that bit of humor and twinkle in the eye that adds an extra dimension to watching his videos. So look no further if you want a camera review and a camera demonstration in one go.

Tech Gear Talk

If you want to watch some of the best produced and most “delicious” reviews on Youtube, the channel Tech Gear Talk is worth a visit. He reviews a lot of non-photography items as well, such as smartphones and the like, so the channel is wider than “just” photography gear. His motto is “Buy it Nice or Buy it Twice” and it may not always be good for your wallet, but he certainly has a point!

Kai W – reviews

The reviews from Kai W almost could not be further away from the ones Marten Heilbron gives. Kais’s videos are made by the same small team and have a crazy or desperate angle, as if he really really does not want to do the reviews at all. I get the impression that he finds it a bit boring and therefore he tries to escape out of the traditional frames for review videos using crazy ideas or storylines in the videos. I often find that his conclusions (the last 20-30 seconds of the video) is where he gets serious. So pay attention to the very last words in his videos – this is where the good and serious assess-ment of the gear under review is to be found.

Steve Perry – wildlife

If you want to know a thing or two about both wildlife photography and how to make the most of your Nikon camera, look no further than to Steve Perry’ channel. He talks fast and his videos are packed with information, but always relevant and based on facts and experience. And what I really like: he often presents evidence rather than just making a claim.

Sean Tucker – creative process

If you are looking for lens and camera reviews, then the channel from Sean Tucker is NOT for you. He has a very different focus, more aimed at the process of being creative and why we do it. He does have some videos that address the “how-to”  side of photography, but he is never into the details of a certain camera or a certain lens; he’s channel is gear agnostic. His videos often start and ends with some very beautiful footage in slow motion with accompanying music, and in between he talks and debates on a certain subject. It is one of those channels that I return to again and again, maybe because I like the philosophical aura that seeps through each well made video.

Jamie Windsor – history

Jamie’s channel may to some be a bit in the same league as Sean Tucker, but I find him slightly less philosophical and a bit more towards the “how-to” side of photography. What I really like about his channel is that you can tell he has years and years of experience and he happily shares this with his viewers. Also, he often tells the story or the history behind a certain concept or hot topic.

Christopher Frost – Lenses

If you want a short focused lens review, this is the channel to go to. Christopher has specialized in lens reviews and often uses the same “template” for the videos so you know what to expect and secures that all the vitals are covered. And he has a calm voice and well paced way of presenting the lenses and their performance, which makes the videos a pleasure to watch relative to some of the more “noisy” channels.

Mike Browne – Learning photography

If you want to learn photography from a guy who you can tell loves to teach and share knowledge, then look no further than Mike Browne. This is probably one of the channels where I have learned the most about photography and basic concepts such as aperture and dept-of-field and how that impacts your images. If you listen carefully, you will find that he not only addresses the “how-to” part but also often talks about how to get “in the zone” of seeing great images long before you lift the camera.

Omar Gonzales – Fuji and entertainment

If you want to have a laugh and be entertained while still learning a lot about especially Fuji, look no further than the brilliant channel from Omar Gonzales. If you want to know him a bit better, paying a visit to his homepage is a way to do it. He claims to be camera agnostic, but I learned a lot about especially Fuji cameras and lenses from watching his videos. He is not a full time youtuber but has a portrait and event business.

James Popsys – Entertaining learning

James Popsys has a special relationship with sheep and that is one major reason to watch his channel! Another is that you learn a lot about photography and he has a great sense of humor and irony that makes watching his videos a true pleasure. And he puts a lot of thinking and perspective into his videos that you do not find with many other channels.